
I am a maker of many things - dresses, skirts, and shirts - sweaters and hats - baked goods, and more fussy little craft projects than I care to count. It is perhaps because I am a maker of these things that I am also a maker of lists and plans.
(scroll down if you want some cool, downloadable Sewing Planner pages - or read on for the ramblings on why they exist!)
This project has been a long time coming, really, and has been influenced recently by a few things. First is the lack of immediate, repeatable info that ends up in my blog posts (often influenced by the length of time before finished projects get posted). Lately I've been making things that I intend to repeat (ahem, Wardrobe Architect), so I needed somewhere to record little things that don't necessarily make it to the blog - like stitch settings, type of needle used, fabric care instructions from the tags, etc. Second was the release of Colette's new Sewing Planner. It looks amazing, and exactly like something I'd love to have, but the price ($28) was only reasonable until I calculated international shipping ($30)... Sigh.

Originally, I was set on designing a printable page that I could simply fill out, but it quickly became clear that there were too many potential variations to account for. No, a printed page alone was a start (and I did make one!), but not enough. I ended up taking inspiration from the terrifying rabbit hole that is 'Bullet Journals' on Pinterest - and sketched layout after layout until I found a structure that would work but which could still be altered to accommodate different types of projects.
At this point I'd spent several weeks planning and a few afternoons sketching when I could have been sewing, and was starting to seriously question whether it was worth all the effort. To be completely honest, the only thing that kept me going was that we got a new desk this past weekend. It's amazing the impact a slightly larger workspace has made on my productivity. Needless to say, I managed to get it done in the end.

So - my rabbiting on aside- here's what we've got:
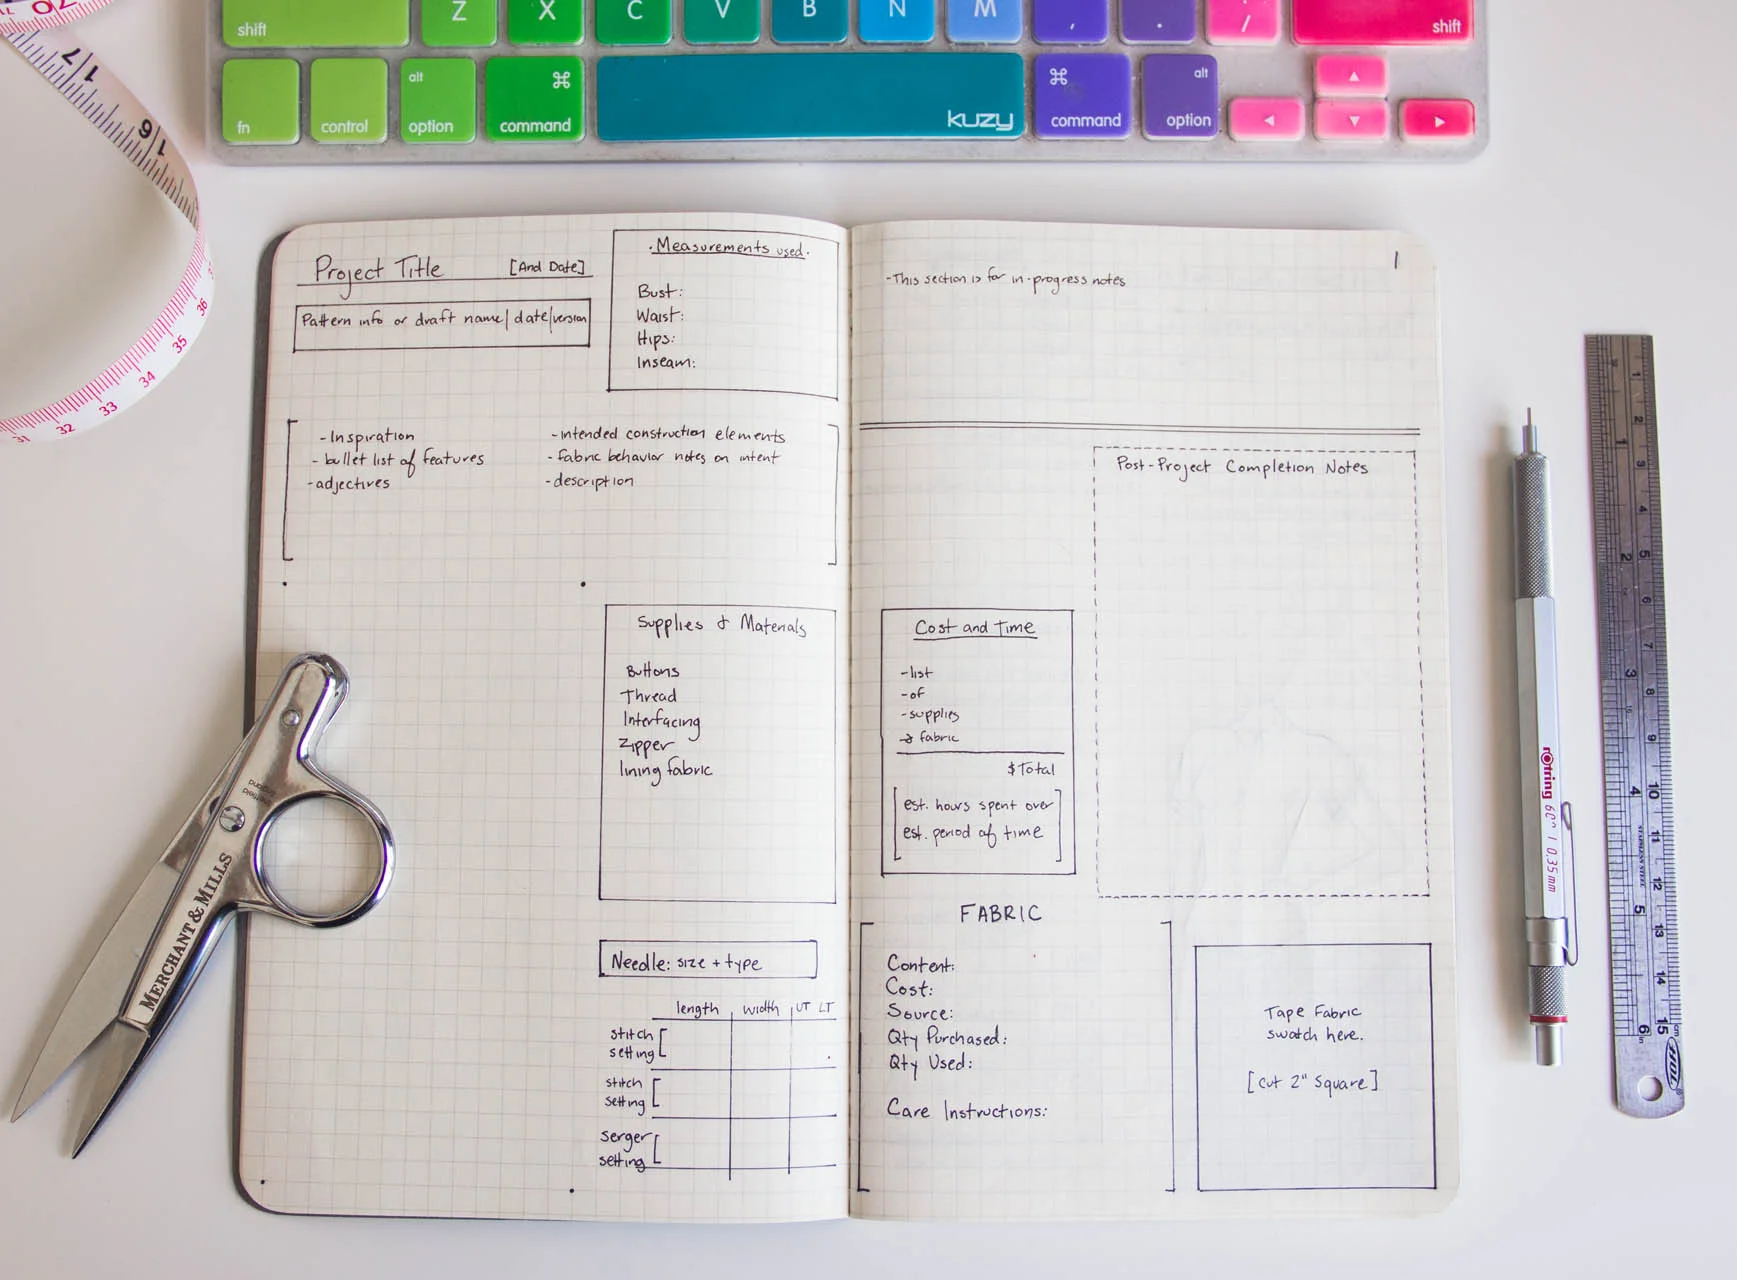
My sewing planner is drawn in a Moleskine squared Cahier Journal. I chose it because I had a spare one lying around, and because it's (fairly) inexpensive, and with only 80 pages I felt it would be a good way to decide if I wanted to continue with this style of project log ongoing. In the future, I'd go for a spiral bound notebook (to allow room for fabric swatches), preferably with a dot grid, and with at least a 100gsm stock (so that the pen marks didn't bleed through, although this notebook behaves surprisingly well in this regard).
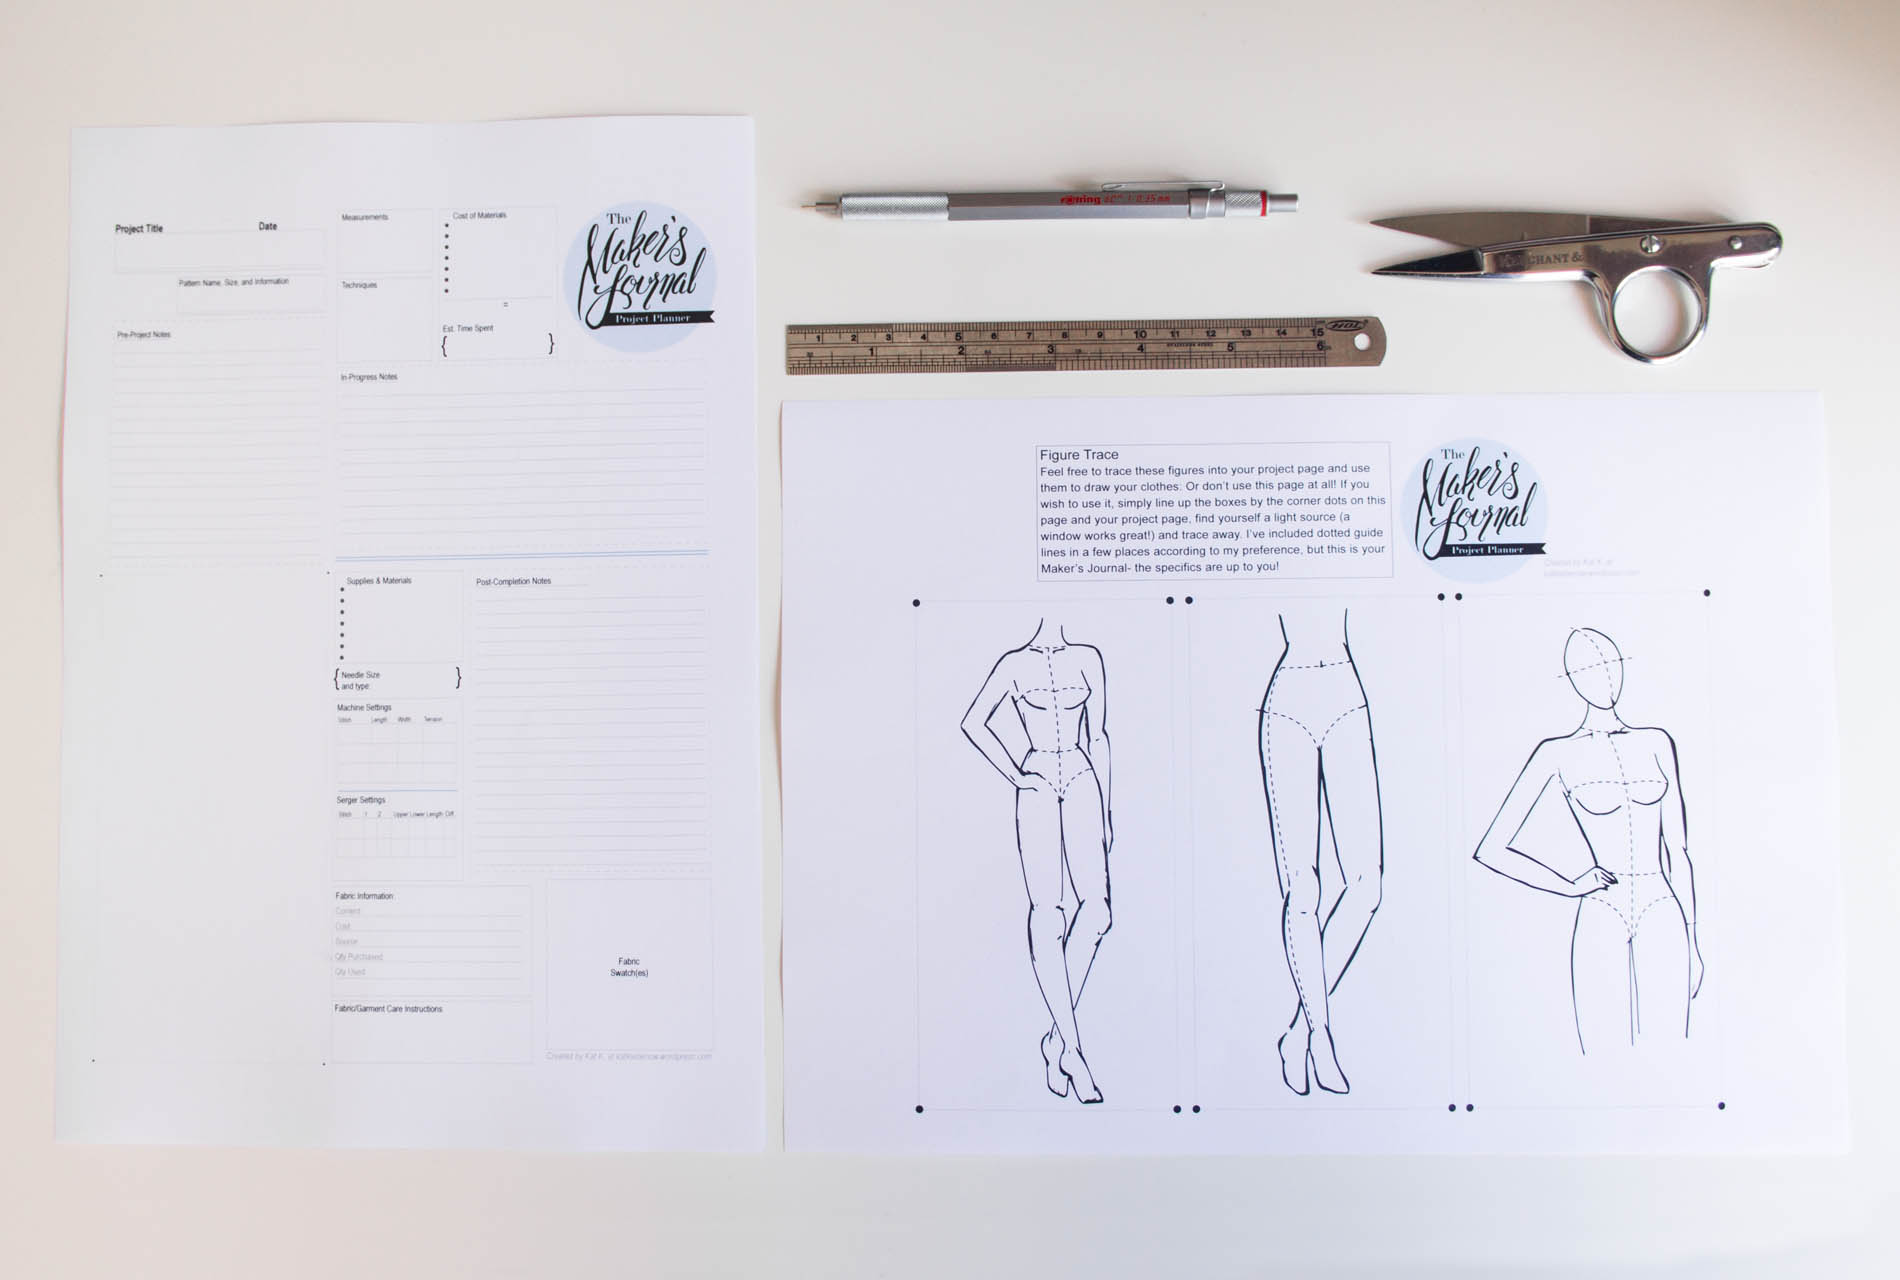
First, I've made a title page, followed by a Contents page which I intend to fill in as I go, and then a blank template page which I've filled in with the general information I wish to have in each space. I've made allowances for the layout to change for things like multiple fabrics, knitting or needlework projects, or exceptions for times I will or won't need certain information ( If I'm recreating an old favorite, the inspiration section won't be very big, and if I'm using leftover fabric I'll omit the swatch section and add a page reference instead).

Then, using the size of the designated sketch area, I drew a series of little fashion figures on bits of loose paper: A full body, along with an upper body (for tops) and a lower body (for pants and skirts) - to help maximize my drawing space. My notebook paper is thin enough that I can trace my figures through it, although eventually I'd prefer to do a rub-off transfer instead. I could just draw the sketch from scratch each time, but I'm trying to save time (for actual sewing!) and add consistency so this seemed like an easy way to make that happen. Conveniently, there's a pocket in the back cover of the notebook that I can store these sketches in.

I figured a good way to test the layout would be to start adding projects, so I retroactively added my first two projects from this year to see if I'd run into any issues: The B5527 shirt muslin, and my dropped shoulder tee. They're especially good contenders to go through the new system, because in both cases I intend to make second and third versions, and in both cases they had minor issues that need working out in said future versions.

Keeping in mind that both projects were pretty basic (one type of fabric, no major changes halfway through, etc.), I think they turned out well. Now that I have most of it worked out, I'll be adding new layouts for future projects like a bra (allll the different fabrics, elastics, and probably a different sketch) and non-sewing projects as well (Knitting? dyeing? jewelry?)

As I continue to use this thing, I'll include a photo of the project page with the project's blog post so you'll be able to see it in action. In addition to that - and I hope at least someone finds this useful (please tell me in the comments so I don't feel like I'm shouting into the void here?) - I've created PDF versions of my planner pages! There's a one page page version for those of you (like me) with small handwriting, and a two page version if you prefer to spread out. I've also included my little figure drawings which you can trace, although you may prefer to draw your own. Here they are:
If you'd prefer to draw your own bullet journal style sewing planner, here's a list of the information I recorded in mine:
- Title and date of project
- Draft used, or pattern and size/mods used
- My measurements, as used for project (useful for tracking change over time!)
- Inspiration, intended features, adjectives, planned construction, etc.
- Sketch of project
- Supplies and materials used (buttons, threads, interfacing, etc.)
- Needle size and type
- Sewing machine and serger settings and tension numbers
- In Progress Notes
- Post-Project completion notes
- Itemized cost breakdown and total
- Estimated total hours spent, over what period of time
- Fabric information: Content, cost, source, quantity purchased vs. used, and care instructions if available.
- Fabric Swatch
With allowances for:
- Multiple fabric swatches
- Dye charts or recipes
- Potential future knitting projects, and the way this would affect the 'in progress notes' section
- Sections which may reference other pages of the planner instead of repeating information.

If you're like me and your brain doesn't hold on to the useful things you sometimes want it to, I hope this has been a helpful exercise for you, or at least given you some ideas on how to organize your sewing in an inexpensive sort of way. As a side note, if you want to share your sewing organization habits or have any tips, tricks, or favorite sketchbooks to recommend, I'd love to hear about them! I, meanwhile, have been itching to get back to some actual sewing, so I'll see you next week!