

This was supposed to be the year I finally made it to the Art Deco Festival in Napier, New Zealand - but Cyclone Gabrielle had other plans and the event was cancelled the day before it began… But that’s not really where the story starts.
I always end up with mixed feelings after I finish a project, and I’d just finished Frocktails 2023 which was a huge undertaking. I’m happy to see them finished, but also quite sad that all the fun is over - which turns, perhaps predictably, into eagerness to start a new huge project! That’s how it started - five months ago, when Frocktails was finished, my friend Jay and I decided to go to Deco together and to make a whole set of outfits for the occasion. It’s a several-day event, so there’d be a day look and an evening look for each day, and there’s a fashion competition as well so we’d each need an extra outfit for that. I’ve been planning mine for five months, and working exclusively on Deco projects for about three - so when it was cancelled two days before we were supposed to head down, on the very day I put the finishing touches on the last thing on my list - I had, perhaps predictably, mixed feelings.
The hurricane was absolutely awful - it destroyed lives and homes and cancelling was the only option. It should go without saying that recovery is so much more important than the festival, but it doesn’t change the fact that I spent five months working on projects I haven’t shown you yet, so that’s what we’re doing today. I’d like for each of these items to get a post of its own, but I want to see them all in one place as well - the way they were supposed to be - so this post will serve as a bit of a table of contents. I’ll link the individual posts up to this one once they’re all written so you can see more of the process and look at some detailed photos if you like!
We’re going in order of when I had planned to wear each outfit throughout the weekend, so hang on to your hats!
McCalls Coatee 6517 copy
I LOVE how this turned out. It was originally a backup idea that I pulled out when I couldn’t make my first idea work in my head, and I used leftover fabric from another from the collection (the bias slip dress) because I had it already and the level at which I had convinced myself that I’d never wear this again meant I didn’t want to spend any money on supplies.

Reader, I was mistaken. I want this in twelve more colours. I’ll wear it ALL the time, it’s a perfect layer whose warmth factor could easily be adjusted with fabric selection - from coating fabric to a light sheer. How cool! The outfit I intended for deco paired it with my navy blue wide-legged jumpsuit, but I’ll definitely be pairing it with other items in my wardrobe.
This is self drafted based on photos I found of the front and back of the McCalls 6517 pattern envelope. The fabric is a crepe-back viscose satin.
Pink Silk Coverup
I had one flapper-adjacent dress in my wardrobe already - my senior Homecoming dress from high school, of all things! The dress is 13 years old - I’ve worn it a few times as a wedding guest dress, and it’s hardly a period-accurate flapper dress but it’s cute and I’d like to get more wear out of it! I knew I’d want something to cover my shoulders in the evening, though, so I had a hunt around for 1920s silhouettes and landed on this cocoon shaped coverlet.

It’s a simple rectangle of fabric with parts of the long edges sewn together to create the cocoon shape. I used a light, floaty silk (the fabric store I bought it from labelled it a chiffon but it’s much more a light silk habotai). It’s bound with a heavier silk satin I pulled out of my deep, deep stash.
It’s a super simple project with a striking finish!
Deco Tote Bag
Bags in the 1920s were teeny tiny - big enough to hold a lipstick and a couple of coins for the most part - which isn’t practical when you’re walking around all day at a festival and need a place to stash your sunscreen, granola bars, potential shopping, etc. I have another tote bag I’ve found perfect for carrying around at similar events, so I decided to make that bag again in a different colour.

I used a plain black canvas and used my Cricut to cut some heat-transfer vinyl in a very architectural, deco design. The vinyl is Siser’s “Metal” HTV which really does live up to its name - it looks like foil, so beautifully shiny! The tote has a double pocket inside for my phone and keys, and I’m very much looking forward to using it just in general, since I already know it’s a shape I like.
Silver Hotfix Flapper Dress
Saturday’s day look leaned into full flapper mode, but given I was already working on two tambour beaded outfits (in only five months, remember!) I didn’t think I’d have time for a third. At the same time, I’d been actively searching for a project I could make using hotfix rhinestones since I’d never used them before, and it seemed like the perfect opportunity!
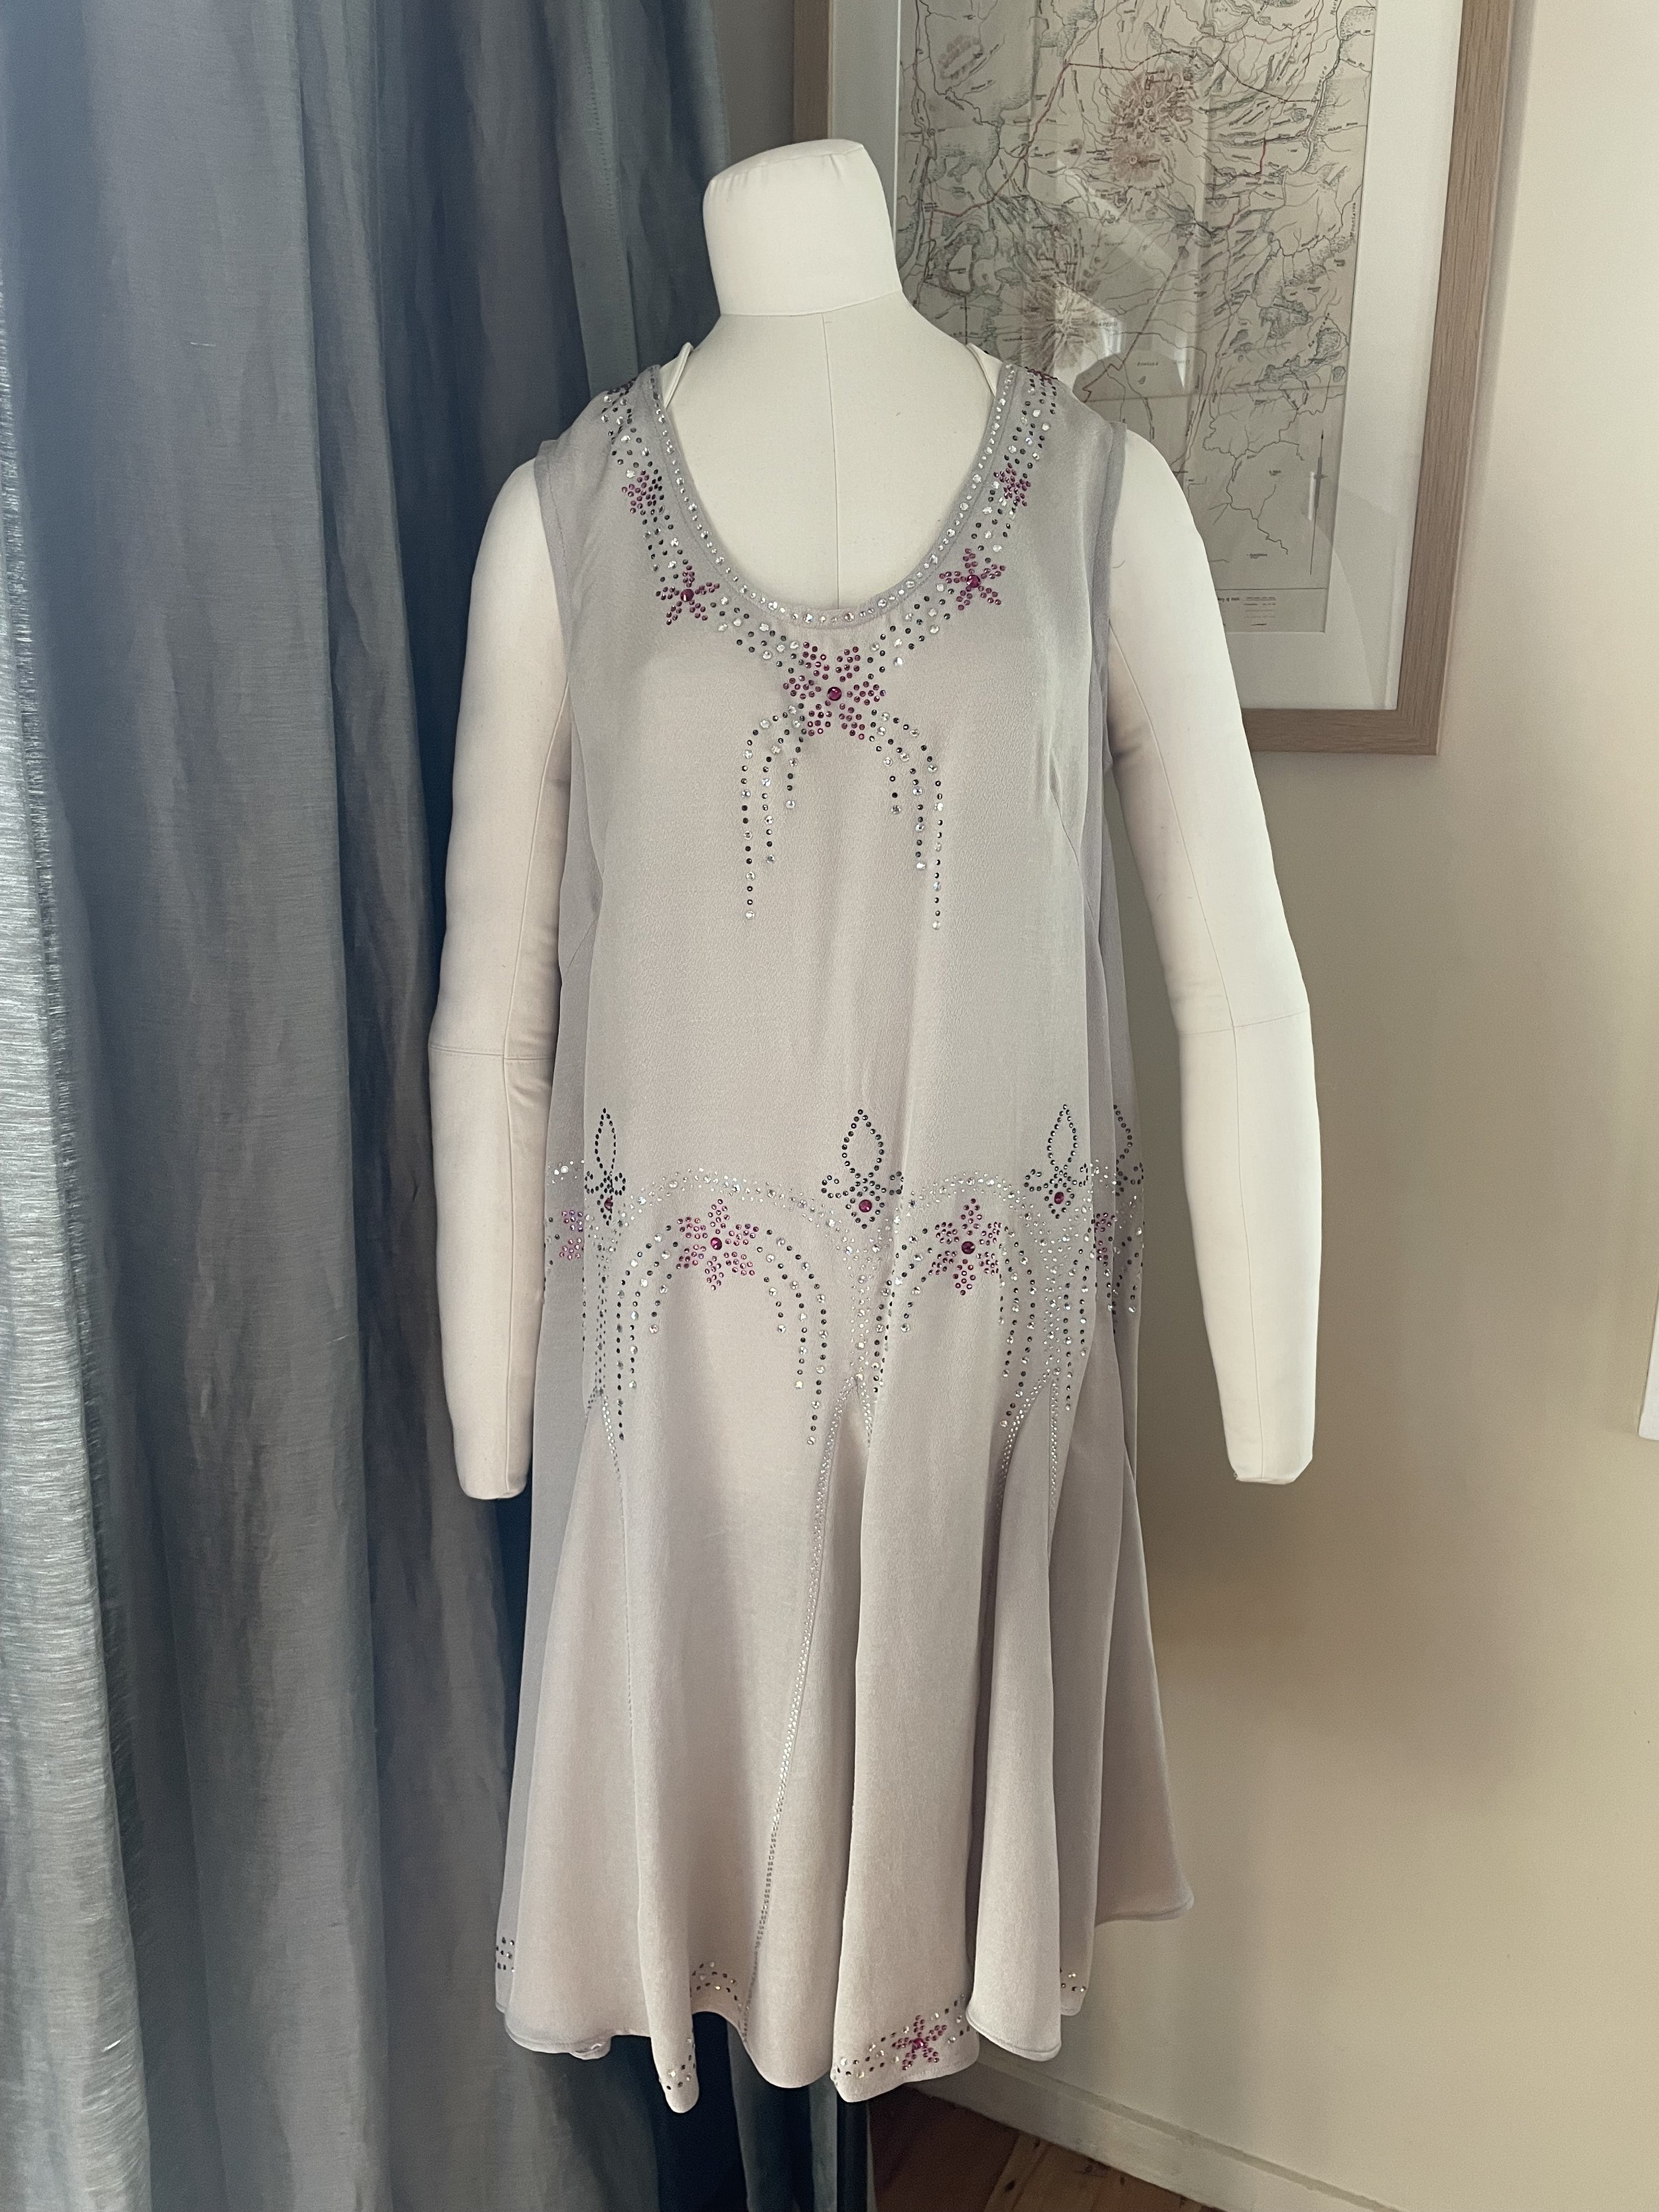
Rhinestones, like beads, are a huge part of the 1920s, although the hotfix method of attachment wasn’t invented until a few decades later. I took this as close enough anyways, and used the stones to apply a flapper-esque design to a base dress I’d made from viscose gauze. The process of designing this one and applying rhinestones was incredibly cool and unlike anything I’d done before, I’m very much looking forward to telling you about it!
Bike Shorts

A quick and easy project I made out of necessity - this one probably won’t get its own blog post, but here we are! I made a handful of things with sheer fabrics and didn’t want to risk my underwear colour or lines showing through - and also wasn’t interested in risking a Marilyn moment with any of my skirts - so I used the Avery pattern from Helen’s Closet to make a pair of shorts in a colour that’s close-ish to my skin tone. These are useful outside of the deco wardrobe, and I’m definitely happy to have them!
Art Deco Tank Top

One of my stars of the show! This was what inspired us to go to Deco in the first place. I started this a long time ago - before we decided to go to deco - and once we decided to go I ended up with a deadline to finish it, and also the reason I needed to think about outfits to pair with it. This one’s definitely going to get a post - if not several - all its own, so stay tuned for that! I was going to wear it to the competition on Saturday afternoon.
Bias Cut Slip Dress with beaded hem
The outfit! This was another surprising success, much like the Coatee I shared using the same fabric. It’s a vintage vogue pattern which I’ve made before, and I bought entirely too much fabric because I forgot that vintage patterns use narrow widths. This worked beautifully because it was the reason I had enough left to make my coatee. That’s not the only reason it was a success though! I had initially planned to make a pair of high waisted wide-legged pair of white pants, but when I tried them on with the top they were really underwhelming. I sort of started just trying random items on, and it turned out that the neckline of the slip I made to wear under the silver hotfix dress perfectly matched the neckline of the tank!

The light colour of the fabric helped the beadwork to stand out (which is what I’d wanted from the white pants, as opposed to the blue ones I’m wearing in that photo) and the shape of the skirt was also a perfect complement - so I decided to forego the pants and cut the hemline of the slip into points to match the tank and add a beaded border.
Blue accessories: Frame bag and Headpiece
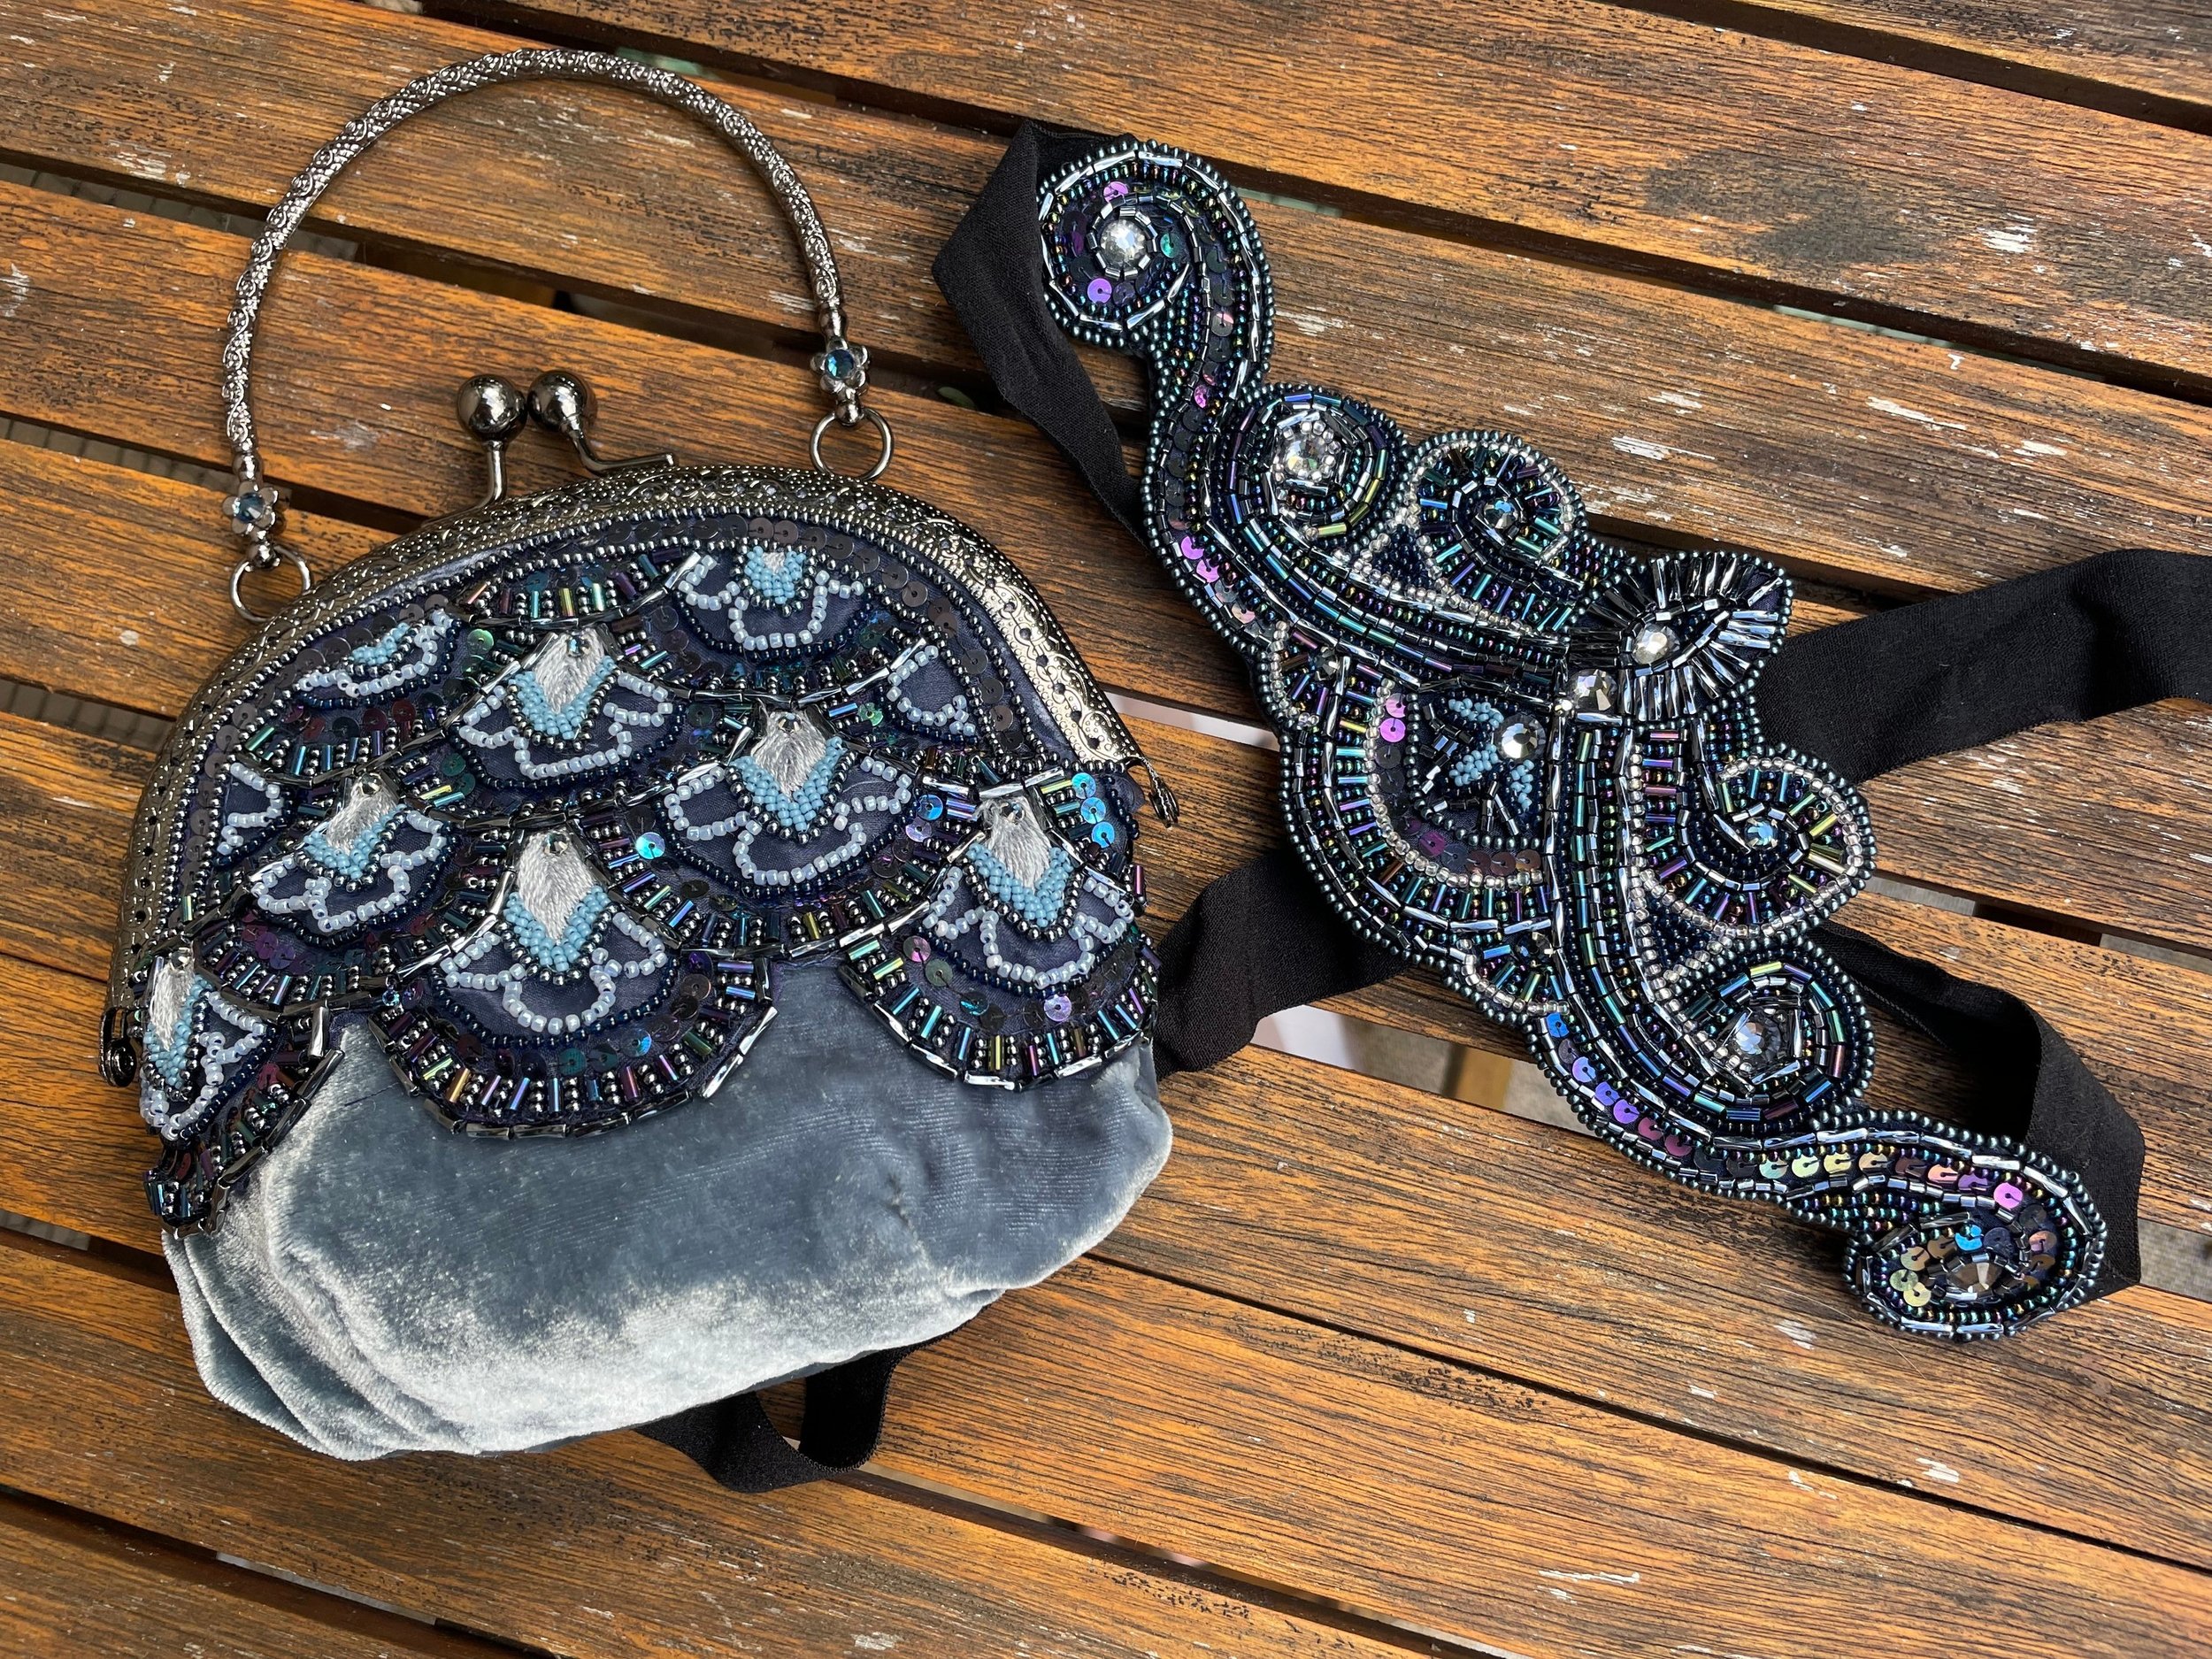
My very first ever frame bag! I needed accessories to complete the look, so I made a matching frame bag and headpiece using the same beads and some similar styles to the design I’d used for the tank. The frame bag is lined with some cupro satin I had in my stash, and the headpiece is backed with leather I use for shoemaking. These seemed to go wildly quick compared to the larger beadwork projects I’ve been so focused on lately!
Gatsby Flapper
After the competition, we were going to go to an extremely fancy “Gatsby Party” at a local winery. Three course dinner, custom cocktails, live band and dance floor - everything you’d expect. This became my next big tambour project, after the tank top was finished. I pulled together elements I liked from a bunch of museum photos of flapper dresses, plus I perused embroidery design plates and architecture drawings to get embroidery ideas.

The finished dress is silk georgette and yoryu, with tambour embroidery on the asymmetrical sash as well as the front and back neck. It uses the same base draft as the silver hotfix dress, I just modified the skirt design.
Gatsby accessories: Frame bag and Headpiece
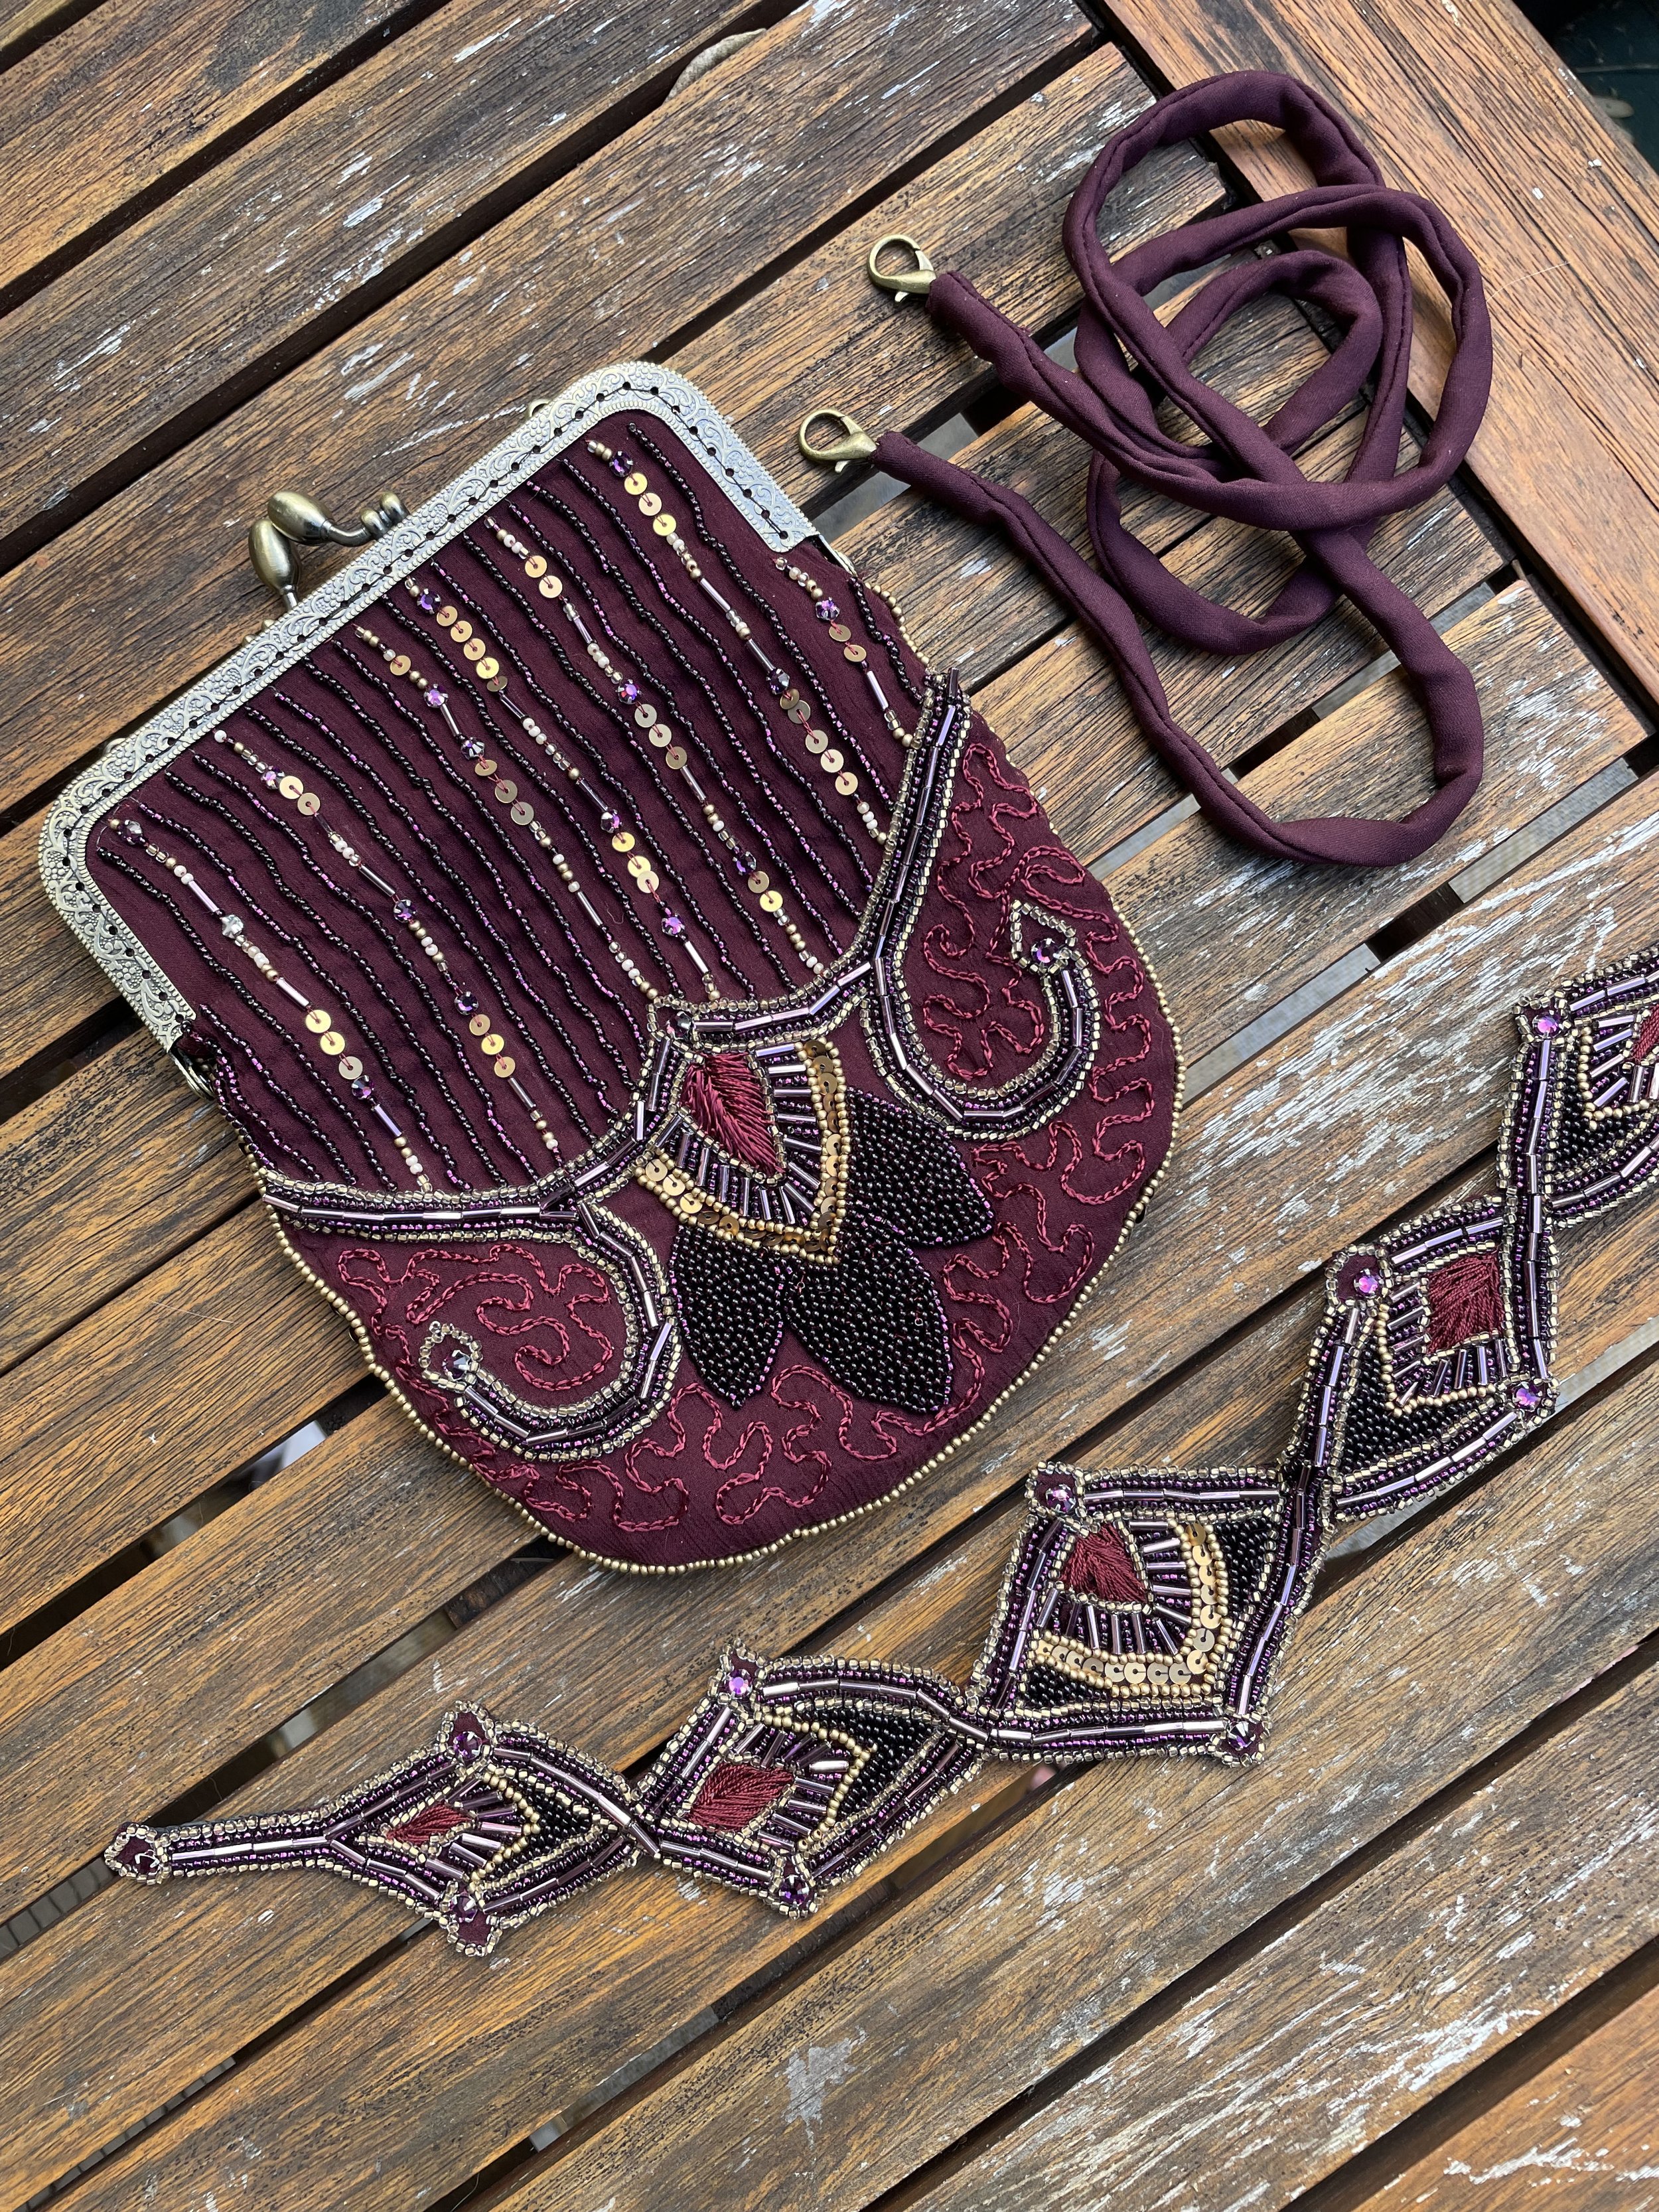
Of course, no fancy party outfit would be complete without matching accessories - so I made a matching headpiece and frame bag. I learned from the blue frame bag and made it a bit bigger (my phone doesn’t fit in the blue one) and I also made a matching shoulder strap for it. This is, again, not historically accurate, but it is handy! The headpiece is similar to the blue as well - the construction is the same with the leather backing, it’s just a different, longer shape.
Dapper Day outfit: Self drafted shirt and shorts, Suspenders

Lastly - the following day I wanted something less fussy after all Saturday’s dresses. I used my favourite “vacation dad” shirt draft to make the shirt using a luxurious Liberty silk satin (This is the sixth one of these shirts I’ve made - I wear them constantly!). The white shorts are the pants I made originally to go with the blue tank top. Due to some very complicated miscalculations I ended up shortening them to shorts to ‘save’ them - I’ll tell you about it in their post - but the short version (hah!) is that I love them at this length! I made a delightful little back waistband detail since I knew I wanted to add the suspenders. speaking of which, the suspenders are attached with buttons I stitched to the waistband facing. Suspenders historically did button on like this, but the buttons were usually on the outside. I thought the shorts would be more wearable without a bunch of random buttons on the waistband, so I chose to add them to the inside instead. The outfit was meant to be completed with my favourite green sunhat (a whole weekend of sun, I figured I’d want a hat!) and one of my older pairs of handmade shoes.
I made one other item - a pair of shoes inspired by an ad from the 1920s - but I’ve not shared them here as technically they’re not done. I was going to attach the heels the day we found out the festival was cancelled, and I haven’t quite gotten up the desire to do it yet. I will, though, and I’ll share them with you then! In the meantime, I’ll work on sharing more about each item in posts of their own, and I’ll link them back here when they’re done! I want to do full photoshoots with hair and makeup for each one, so it might take a little extra time!