An irresistible force comes over makers as soon as they start travel planning. You've probably experienced it yourself. We book our tickets, our accommodation, start planning what we'll do and see when we arrive.... and then we start thinking wardrobe. I wanted to make so many things! I ordered fabric for two new swimsuits almost immediately (having never made a swimsuit before), and started plotting summery dresses, tops, and linen outfits to the moon!
If you remember this post from when I first started planning, I said I wanted to have an 80% handmade wardrobe. Life and the Visa Approval Process got in the way of that pretty quickly, and by the time my swimsuit fabric arrived I was in a state of distress over whether the vacation was even going to happen, and whether I'd get to see my family.
After weeks of having mild panics every time I even looked at the fabric in its neat folded pile, I finally worked up the courage to just go for it: If the trip didn't happen, it's still the beginning of summer in New Zealand, and I was still going to make that suit, even if it didn't get to Hawaii and I didn't see my parents.

Charlie over at This Blog is Not For You recently published a really cool article on the importance of sewing to mental health, in which she discusses how calming and de-stressing it can be to just focus on each individual aspect of the making process. I've experienced it before (in sewing as well as knitting), but this suit, specifically the top, managed to bring me back down to a tolerable level of sanity surprisingly quickly at a time when everything else about my life was so up in the air.

I used the same pattern I drafted for my floral bustier bra. Working from a pattern I'd already sewn up took all of the construction guesswork out of the process, leaving me to focus on sewing with this new-to-me four way stretch lycra swimwear fabric.
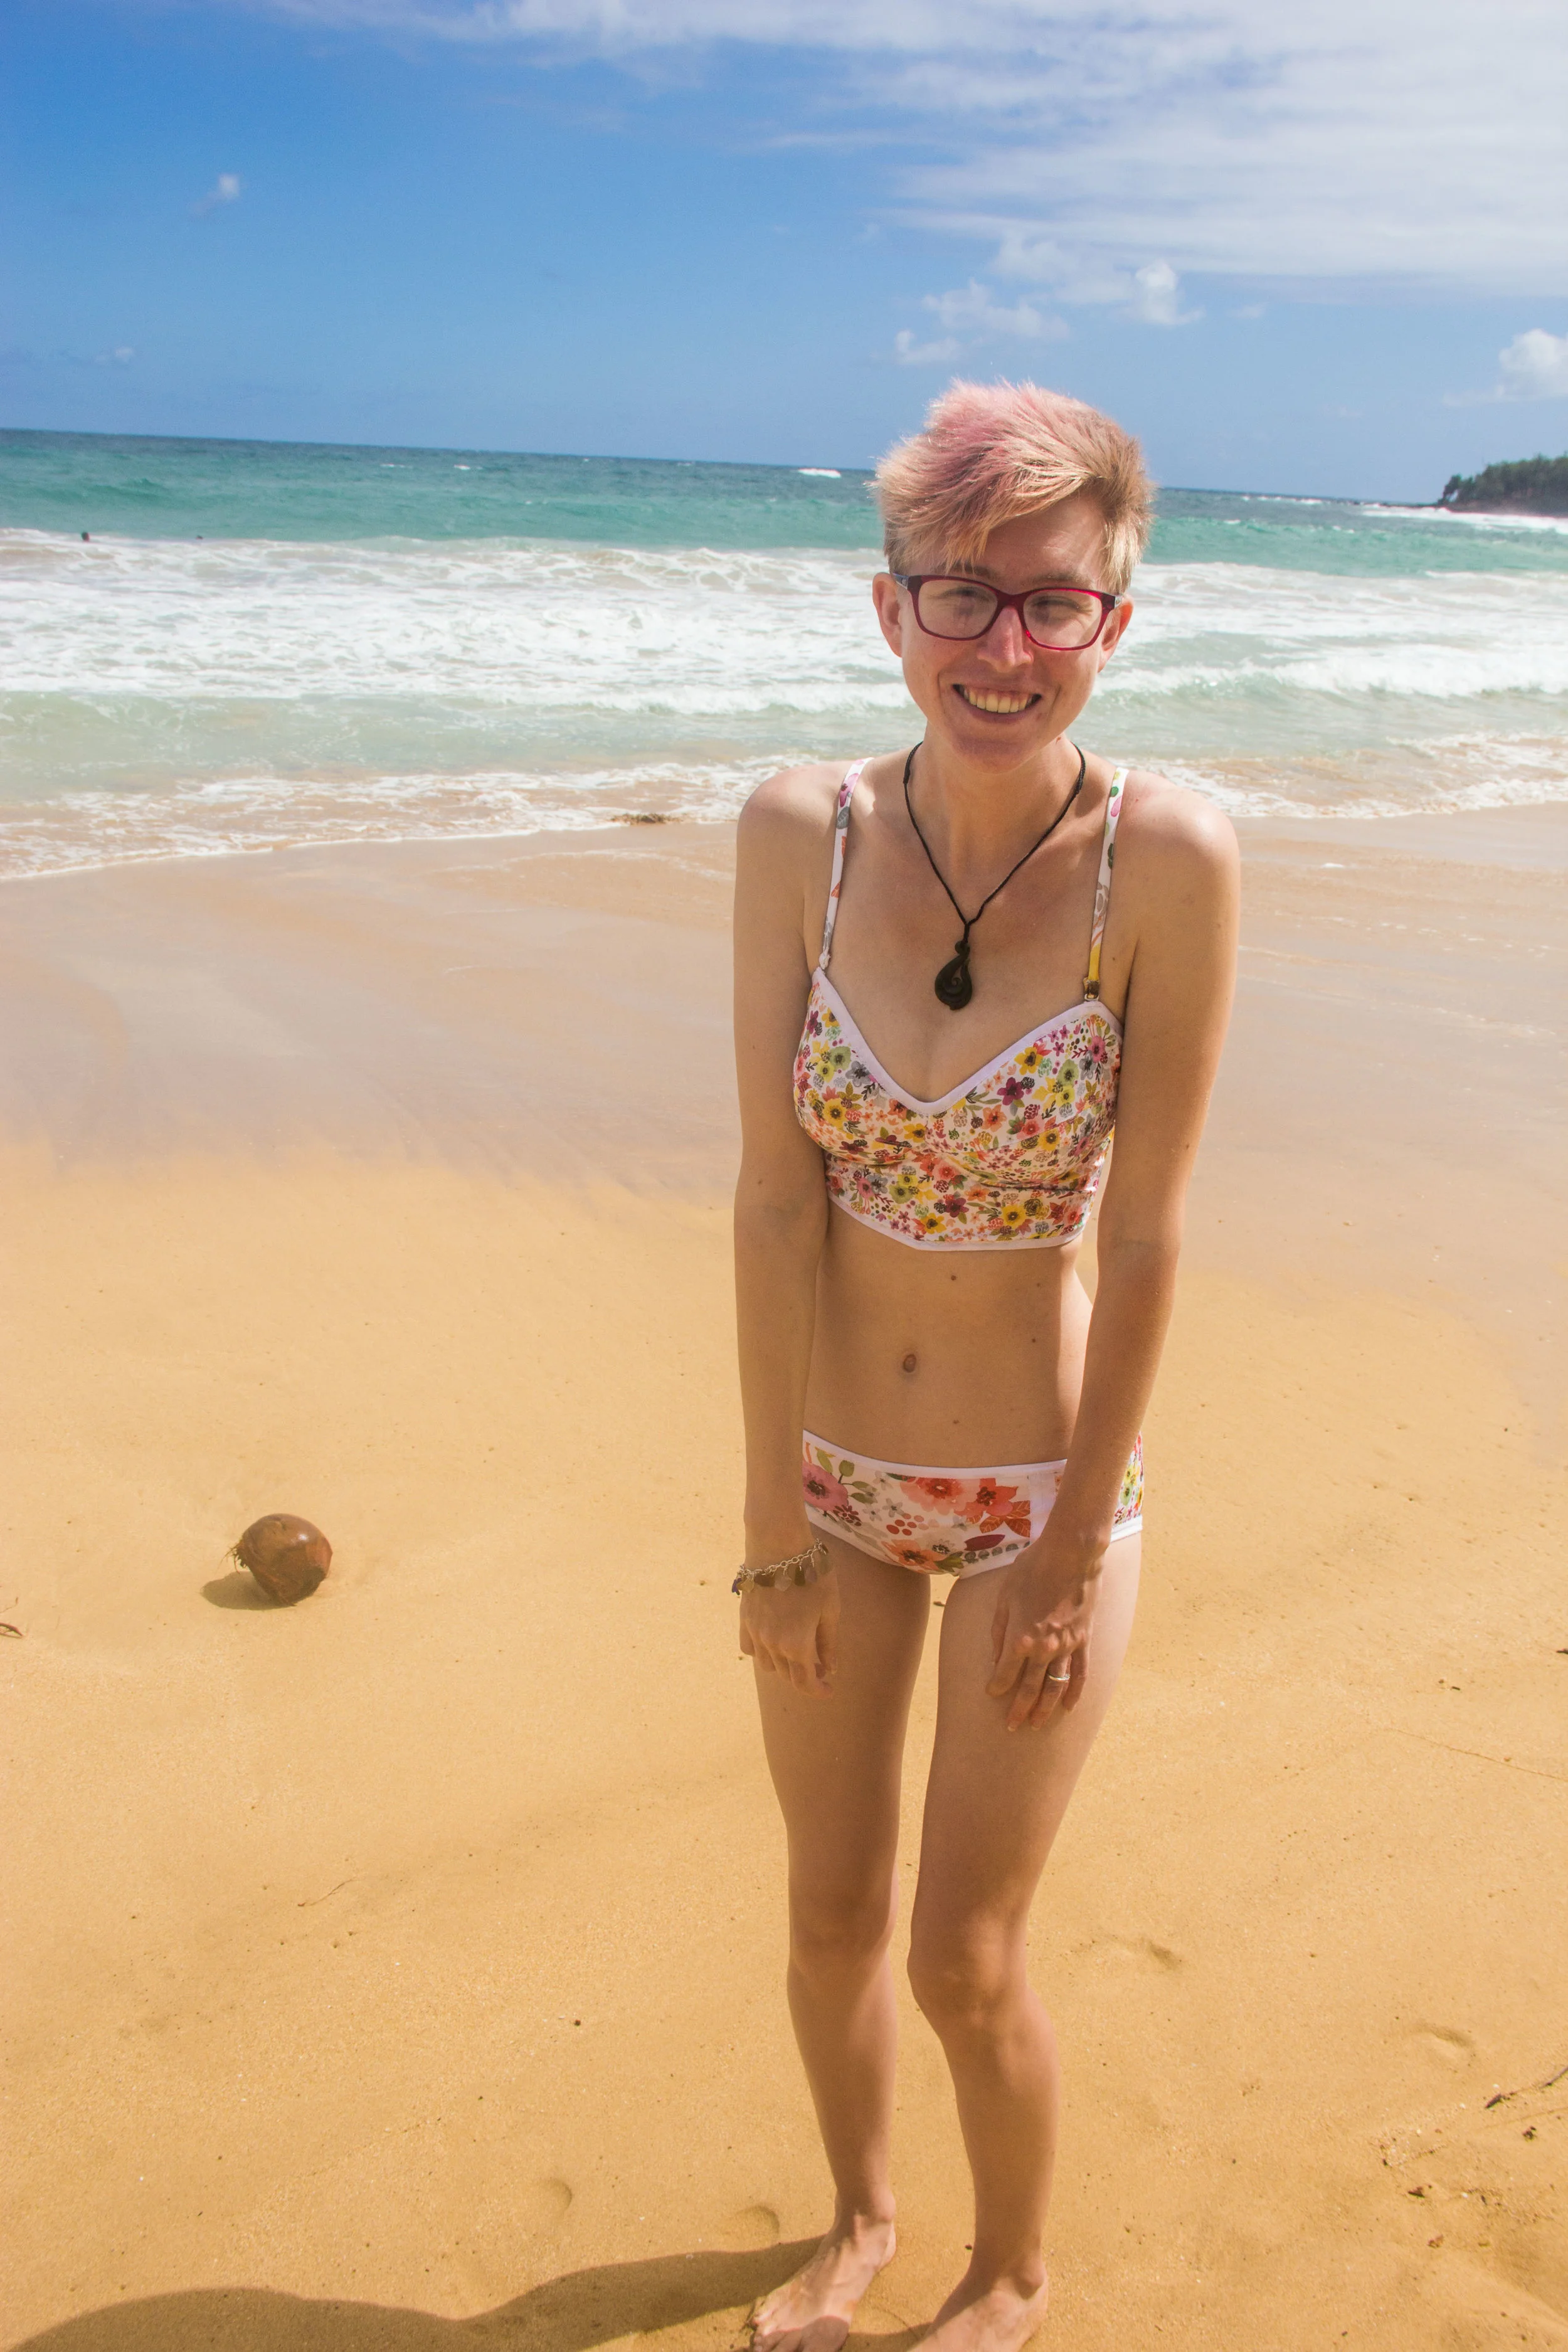
Okay. Now that you've got a bit of a back story, let's talk about that suit! The fabric is from the amazing Angel Gerardo whose beautiful watercolor designs are available on Spoonflower. I fell in love with the white background version of this floral design, and when I messaged her to ask if she could make it in the smaller motif size, she had it up and listed for me in less than a day! I knew the larger motif wasn't going to work with the small pieces in my three piece cup, but I wanted to show off the awesome detail in the print that you can see in the larger version, so I ordered fat quarters of each. It was a perfect amount of fabric for my suit, with very little leftover!

I was, as many swimsuit-making-sewing-bloggers before me, pretty nervous about ordering the fabric without laying hands on it first. This was my first ever order from Spoonflower after all! I did a lot of searching and couldn't find anyone who was upset with the quality of their Spoonflower sport lycra, so I figured it was pretty safe. I prewashed all the fabric (just to be extra safe, and to see if anything faded or bled which it did not), and not only did it stitch up beautifully, the fabric has held up well through sand, sun, a whole bottle of sunscreen, and lots of very salty ocean - as well as two washings by now! I can't speak for how it does in chlorine because I'm allergic, but I'm sure it would go swimmingly. (ahem.)

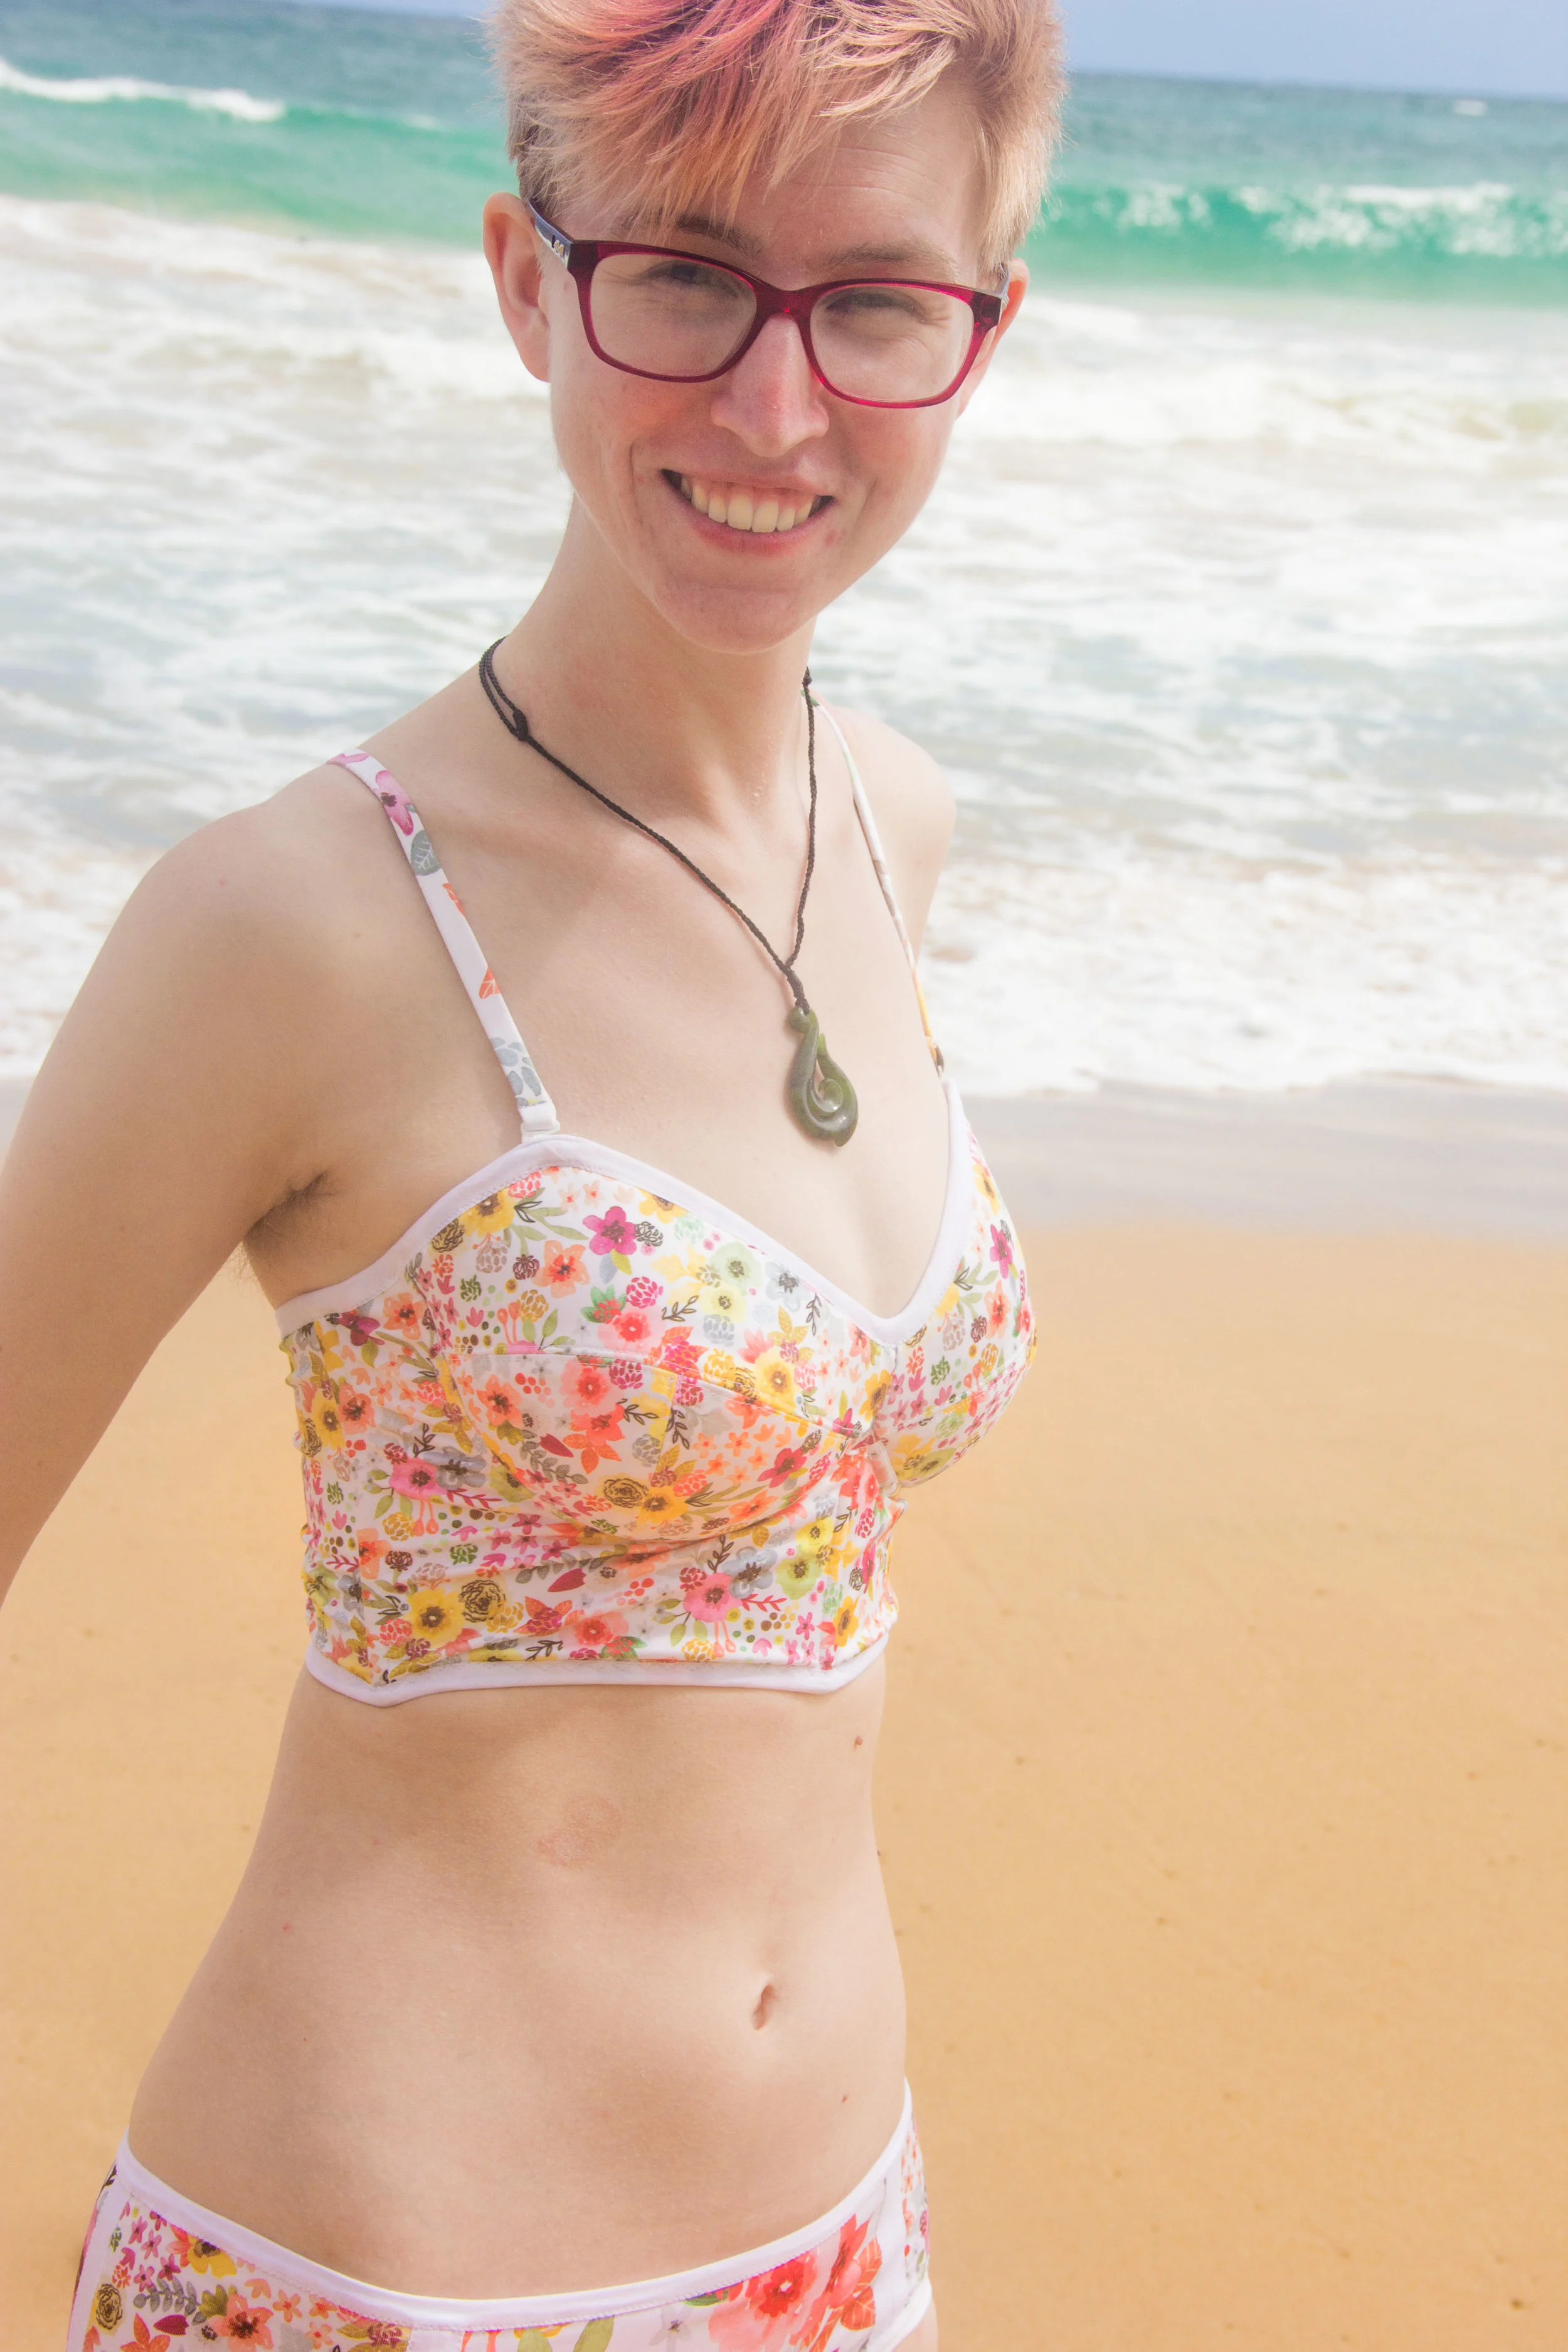
As I said, this suit uses the same pattern as my floral satin bustier - but I did alter a few style lines. I redrew the curve of the top edge for my straps, I omitted the boning centered under each breast (which I think now I should have kept because that's where those wrinkles are coming from), and I modified the back with little tabs so that it laces up instead of using the traditional bra hook.

The cups are foam lined with swimsuit lining, the cradle is also lined with swimsuit lining but stabilized with two layers of sheer nylon, and the back pieces - although in retrospect one might argue that this is not necessary - are lined with powernet. The suit fabric itself is very dense and has a great rebound, so I probably could have gotten away without the powernet, but you know... creature comforts. Plus, it needed to be lined with something so the seams were hidden!

Everything that isn't the Spoonflower fabric came from Elle Joan's shop - I sent her a message at about 7:30 at night with a huge order and she managed to get it all shipped out the next morning! That was swimwear elastic, FOE, underwires, underwire casing, plus the swimwear lining. The foam, powernet, and nylon lining were from my stash technically, but they came from her shop as well!
The straps, just let me tell you, were a hassle and a half, but totally worth it! I used Emerald Erin's tutorial on making straps from swimwear elastic, and it was so clear and easy to follow - the only problem was my inability to source a thick straw to turn the straps with! We ended up having to make a trip to one of Auckland's night markets, and bought Jon a bubble tea so that I could use the straw to turn my straps. It worked excellently, although I've been informed that that particular bubble tea was pretty gross.

The bustier is finished with FOE at the top and bottom edges - I did have some issues with the CF seam that I didn't anticipate. The bustier has lace that is hand stitched above the bridge there, but this fabric didn't appreciate the hand stitching as much. In retrospect I could have re-drawn the cup seams so that they fit all the way into the wireline, but I like the extra coverage and I can't have wires that come up that far anyways, so it's a good compromise. I extended one of the wire channeling pieces on the inside to cover the seamline, which works well for me, if a bit of an unorthodox solution. Also my channeling, for those of you paying attention, is in fact two different colors. I had a tiny bit of nude channeling left over so I snuck it in with the white.

My straps, once finished, are attached to the suit using G-hooks so that I have the option of removing them to wear the top strapless... I mostly did this for the technical practice as I'm not sure I'll ever go strapless (a rogue ocean wave is always going to dislodge things... even if your engineering is superb...) I think generally the reason people have strapless suits is so that they don't get strap tan lines, but that also implies you're going to lay out in the sun and tan, which is really not a thing my pasty white self really does. At least not without approximately a gallon of SPF 200+, a beach umbrella, a towel, and a rashgard bodysuit. (that is only slightly hyperbolic).
The lacing piece for the back is another length of encased swim elastic, threaded through loops and tied into knots to keep it from unlacing when I take it on and off. Next time, I'd make the lace longer so that it could unlace further... it's a hilarious contortion act to get this thing on over my head, especially if I'm already sweaty, sandy, or trying to change in the back of a hot car or in a questionable state park bathroom while trying to touch as little as possible. Ask me how I know.

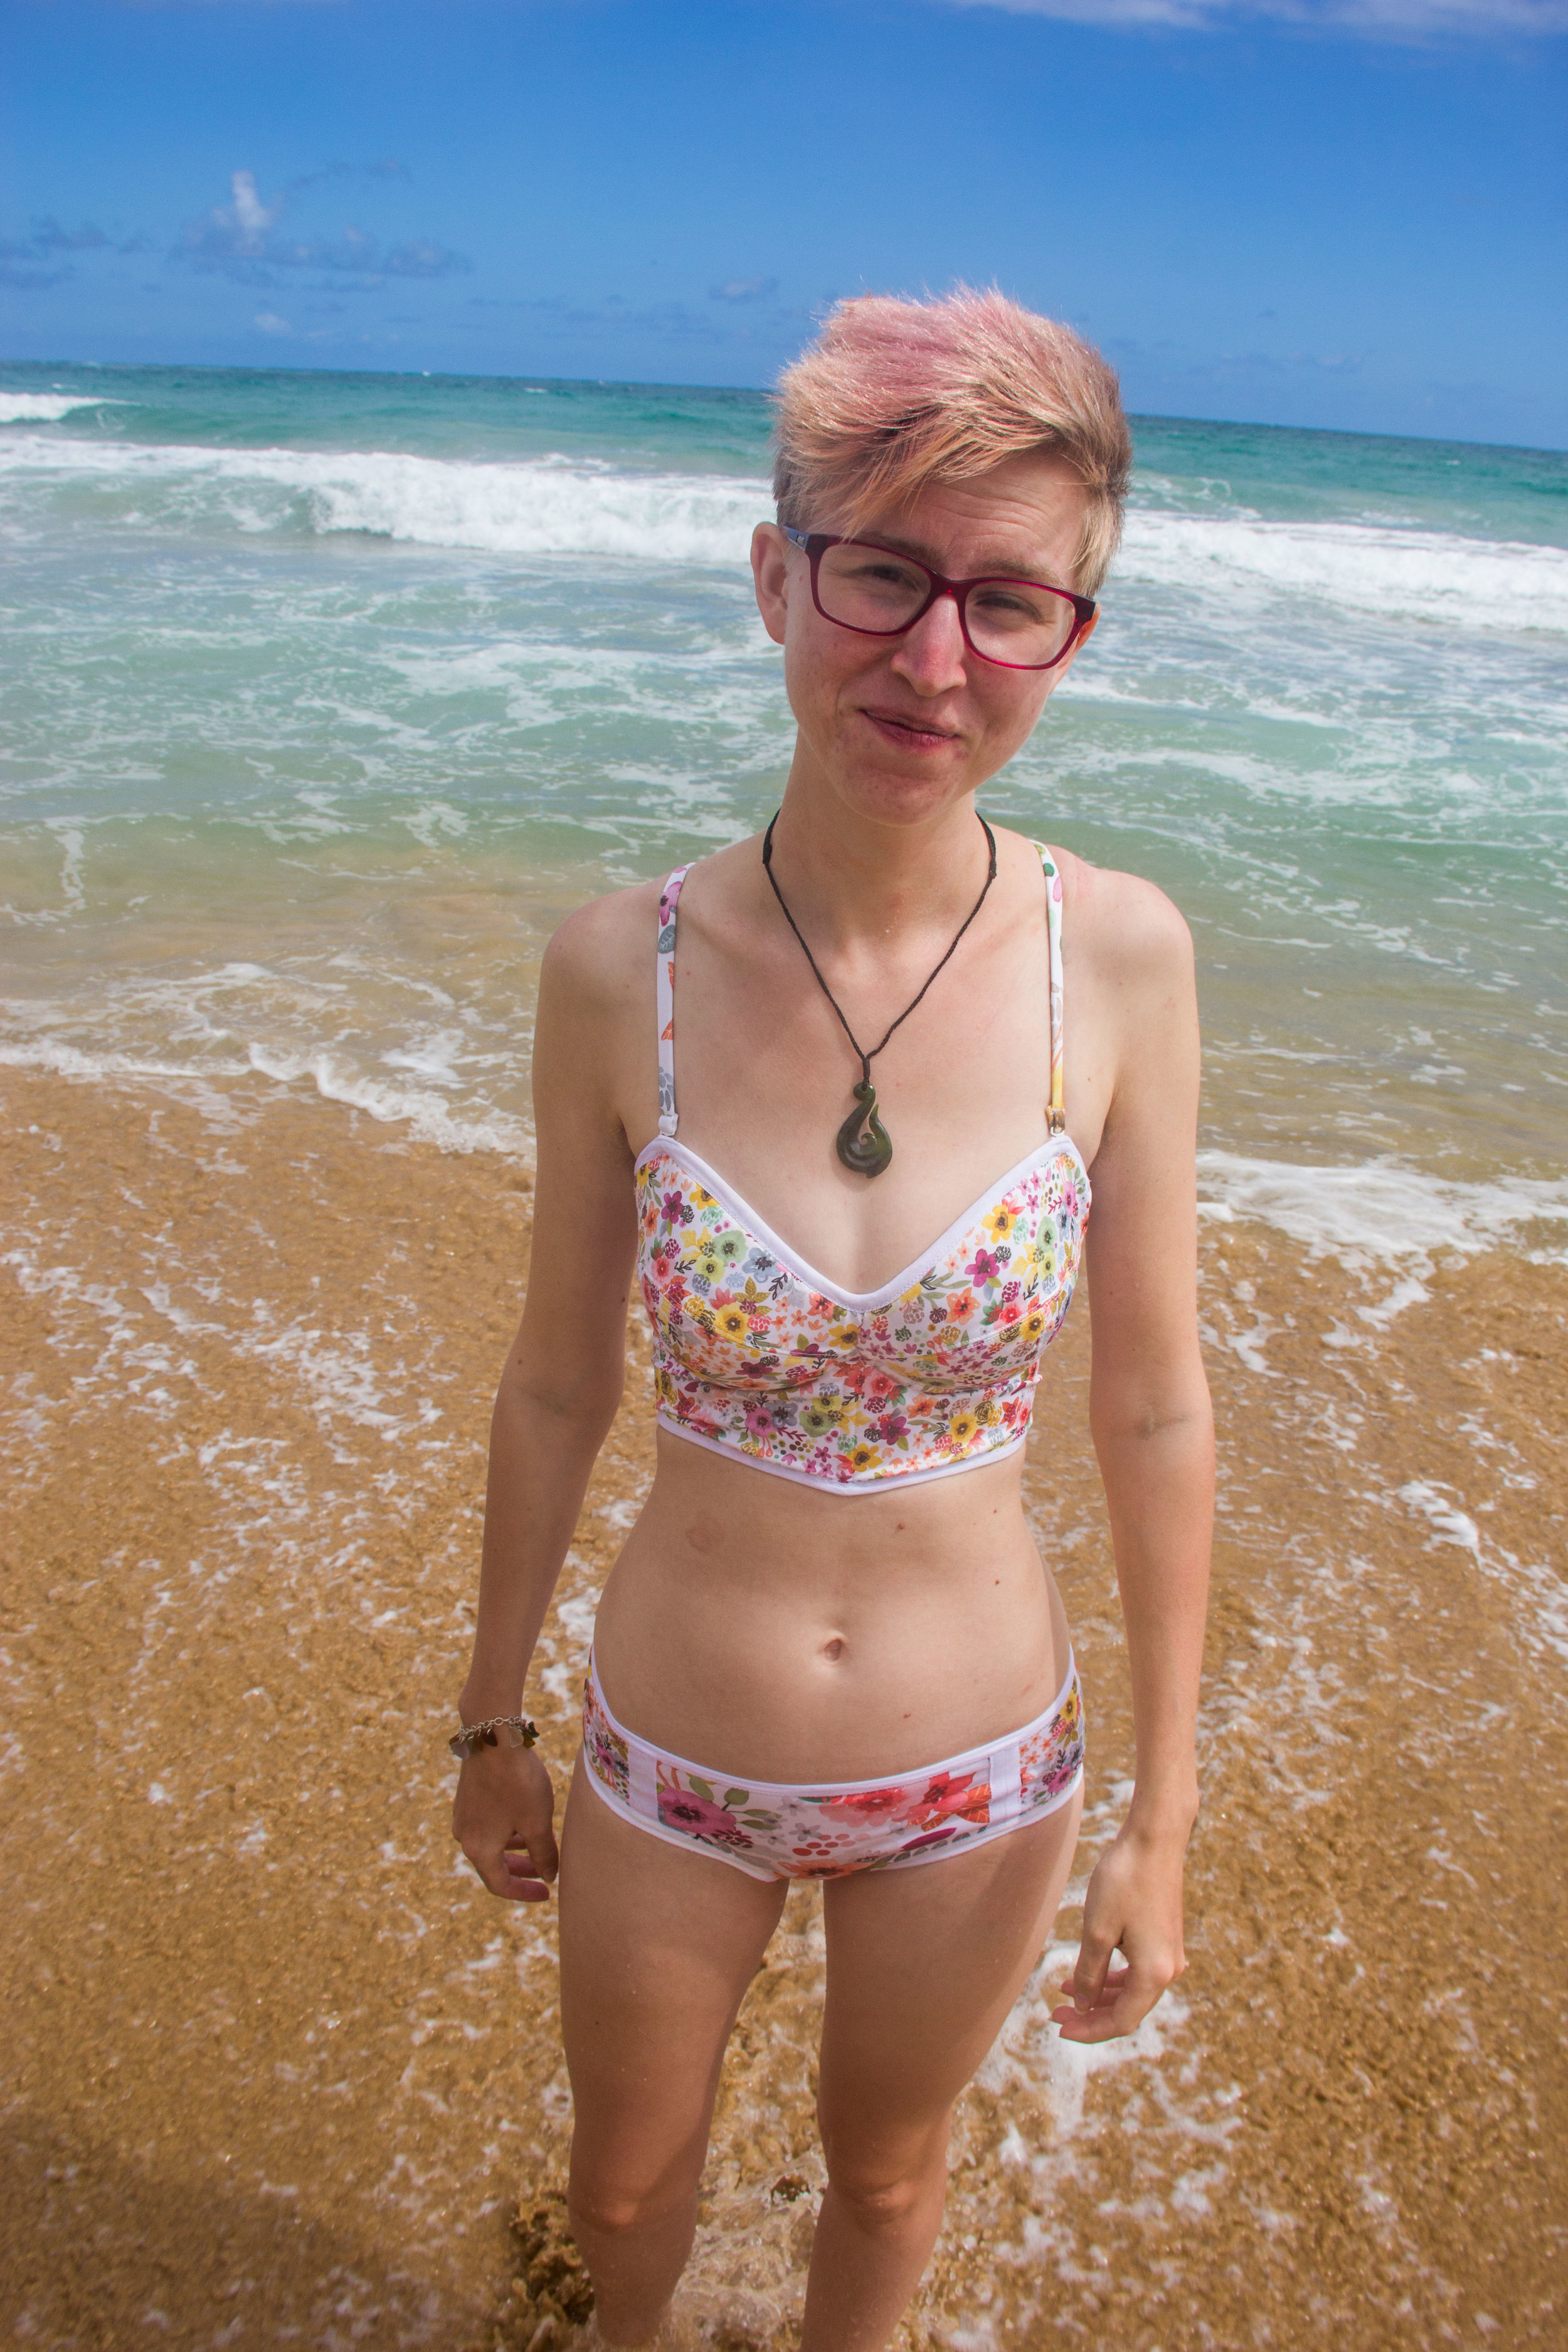
The bottoms turned out.... well. There's nothing actually wrong with them. They're just not very flattering...? I love the two sizes of the print, and the little white strips on the sides, but in real life they're just not very satisfying. I used a self-drafted pattern that I've made three or four pairs of undies from in the past, but failed to account for the fact that undie fabric has a higher stretch percentage than swimsuit lycra. I sewed them up and realized they were much too tight to wear, so I unpicked the two back seams and sewed in strips of FOE for a total of about one extra inch in circumference. They fit, but something about the cut still looks kind of off to me. I talked myself out of high waisted bottoms because I thought they would interfere with the bustier top, but now I wish I'd stuck with my gut and done the high waisted style. On the other hand, maybe I just need to adjust the shape of the leg hole?

In all reality, this is still the best-fitting swimsuit I've had since... well, probably ever, and I'm not exactly in the water enough to warrant an entire swim wardrobe, so this lovely lady is probably going to stay how she is. I'd have to order more fabric if I wanted to make a high waisted version, which I still may consider in the future but like I said, I mostly stick to dry land...
In Hawaii, this suit enjoyed some time swimming in the Pacific, climbing around on some very cool lava rocks, and even going stand up paddleboarding! Perhaps most importantly, everything stayed in place with no adjustment necessary, so I'll count that as a win! The one time I changed into the suit before we left for the beach, I sort of regretted the tie back when the knot was trapped between my (very bony) spine and the backrest of the car... but you can't win 'em all. It's not like swimsuits are meant for cars...

Okay. Whew. There was a lot to talk about there! the trip was excellent, but I'm still very happy to be back to my usual weekly project madness now! Even if I didn't get to 80% me-made (I'd call it a solid 45%), that irresistible force means I've got three more completed makes that all happened in the week between when my visa was approved and when we left for Hawaii (nothing like a self-imposed deadline to light a fire under you...) and I can't wait to share them all with you! Plus, I've also got the long-awaited and very much delayed tutorial for DIY bra hooks which is nearly finished (there are diagrams)...! So stick around, and please say hi in the comments! I have missed you all and it's good to be back :)