

I'm sorry for the radio silence last week: On Saturday, I (finally!) bought a new-old dressmaking form which I'll use to drape parts of my wedding dress (I promise you'll hear about the plan soon!) and I spent the majority of the day up to my elbows in WD-40 un-sticking her adjustable stand (shout out to Jon's Dad, Ricky, who provided some much-needed elbow grease and also a vise grip - I severely underestimated the sticking power of 30 years of rust build-up). After that, there was a lot of wing-nut replacing and spider web removal. But! You'll hear more about that soon enough.
On Sunday Jon and I made a planter for six baby strawberry plants, got worms for our worm bin like the urban gardeners we aspire to be, and it was a beautiful day completely devoid of computer screens. My first skipped blog week in months. Today, I've got a long-awaited project for you!

I made some rumblings when I posted my Pink Partial Band Bra about doing a quick little tutorial on converting my full band draft - At the time, I wasn't able to find many resources for making that change, but I've found a few since then. I'll link them below. Since I converted mine through a series of educated guesses (and since things went so well and the pink bra is still my favorite, even though I used poor-quality picot elastic that's already fatiguing because I've worn it so much) I thought I'd share the process! Obviously, I've also got a new partial band bra to show you as well.
We'll start at the beginning. You'll need a well-fitting full band bra pattern (Mine is my go-to self drafted three piece cup, but the principals apply to any and all full band bra patterns, commercially drafted or otherwise). You'll also need a few pieces of paper to draw your new pattern pieces on, a pencil, a ruler, and then - eventually - your usual bramaking supplies.
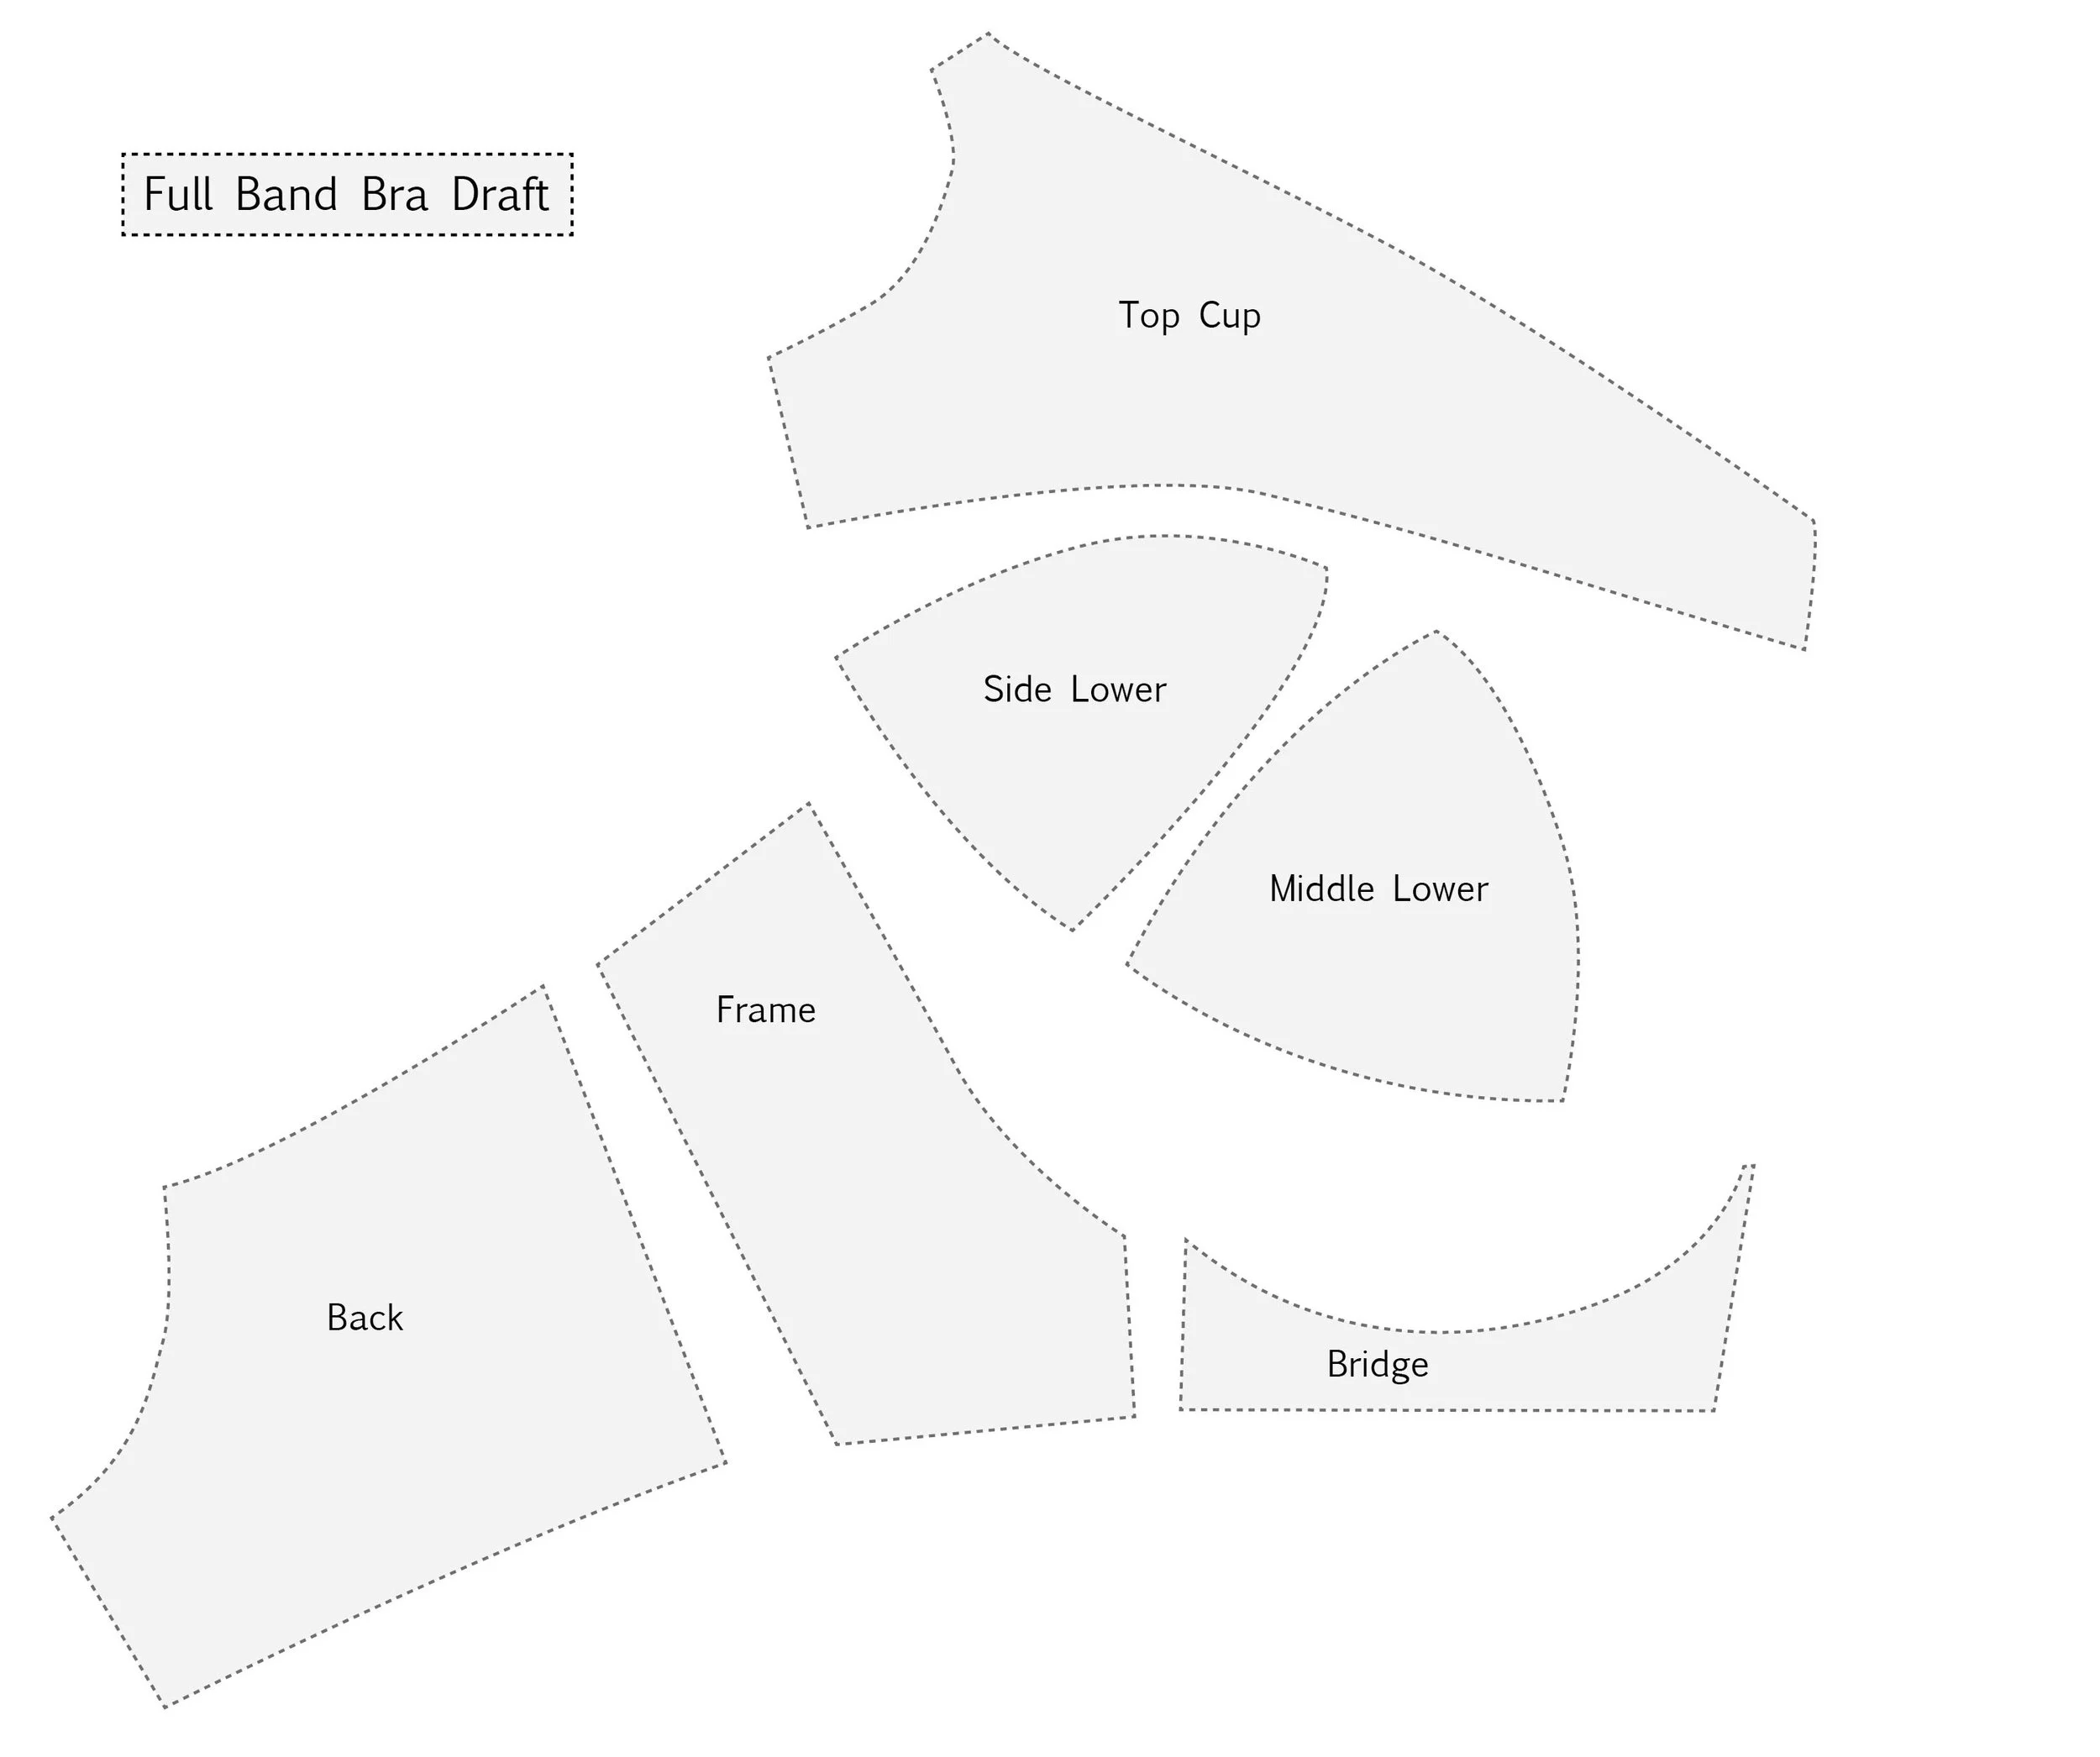
This is a quick outline of my full band bra draft - I've already removed my seam allowances, so we're ready to start making the adjustments.
We'll make our changes in two parts: First, to the band and frame, and then to the cups. Your pattern most likely has one or two frame/cradle pieces, and a back band piece. Lay all of those out in front of you (remove the seam allowances if you haven't already, and tape them together if you like) - we'll determine momentarily if you actually need to make any changes to your back band piece, though.

First, we need to decide how tall your bridge piece will be. My bra is a plunge, and my bridge is very narrow, so my piece turns out to be about the size of my thumbnail before I add seam allowance. If your bridge is wider or your wires taller in the middle, you'll have a bit more wiggle room to play with here, but just remember that this is a really high stress area of a bra, and the smaller it is the stronger it'll need to be. It does come down to personal preference though.
With your own bridge height and style ideas in mind, take your bridge piece (trace both sides of it if it's a cut-on-fold pattern), and draw a line where you'd like the bottom of your bridge to be. This line needs to be somewhere (anywhere, really) above the lowest point in the curve of your wire, but other than that it can be wherever you want. The blue shaded area in my diagram below shows the range I'd recommend drawing this line. When you're satisfied, cut along the line, and set your brand new bridge piece aside! (You may find it helpful to mark placement on your cup piece at this point)

I've chosen to cut some of the top off to make my bridge piece as well - you can see in the finished photos it's set slightly lower than the channelling.
Next, we'll do a similar thing for the sides of the frame. This is where you'll decide whether you need to adjust your back band piece or not. Start by butting your back band piece up against the side of your frame. We're going to be drawing a line from the area at the lower part of the wire where the curve begins to turn sharply vertical, to the back band piece.
If your pattern has a wider band, or if the lower edge of the band is significantly below the lowest point of the wire curve, you may have to remove some height from the band. Just keep in mind that removing height will remove support, so if you're on the bustier side, or less self-supporting, modify sparingly! Draw a line (either straight or slightly curved, that's personal preference! from the wire to the back band, like so:

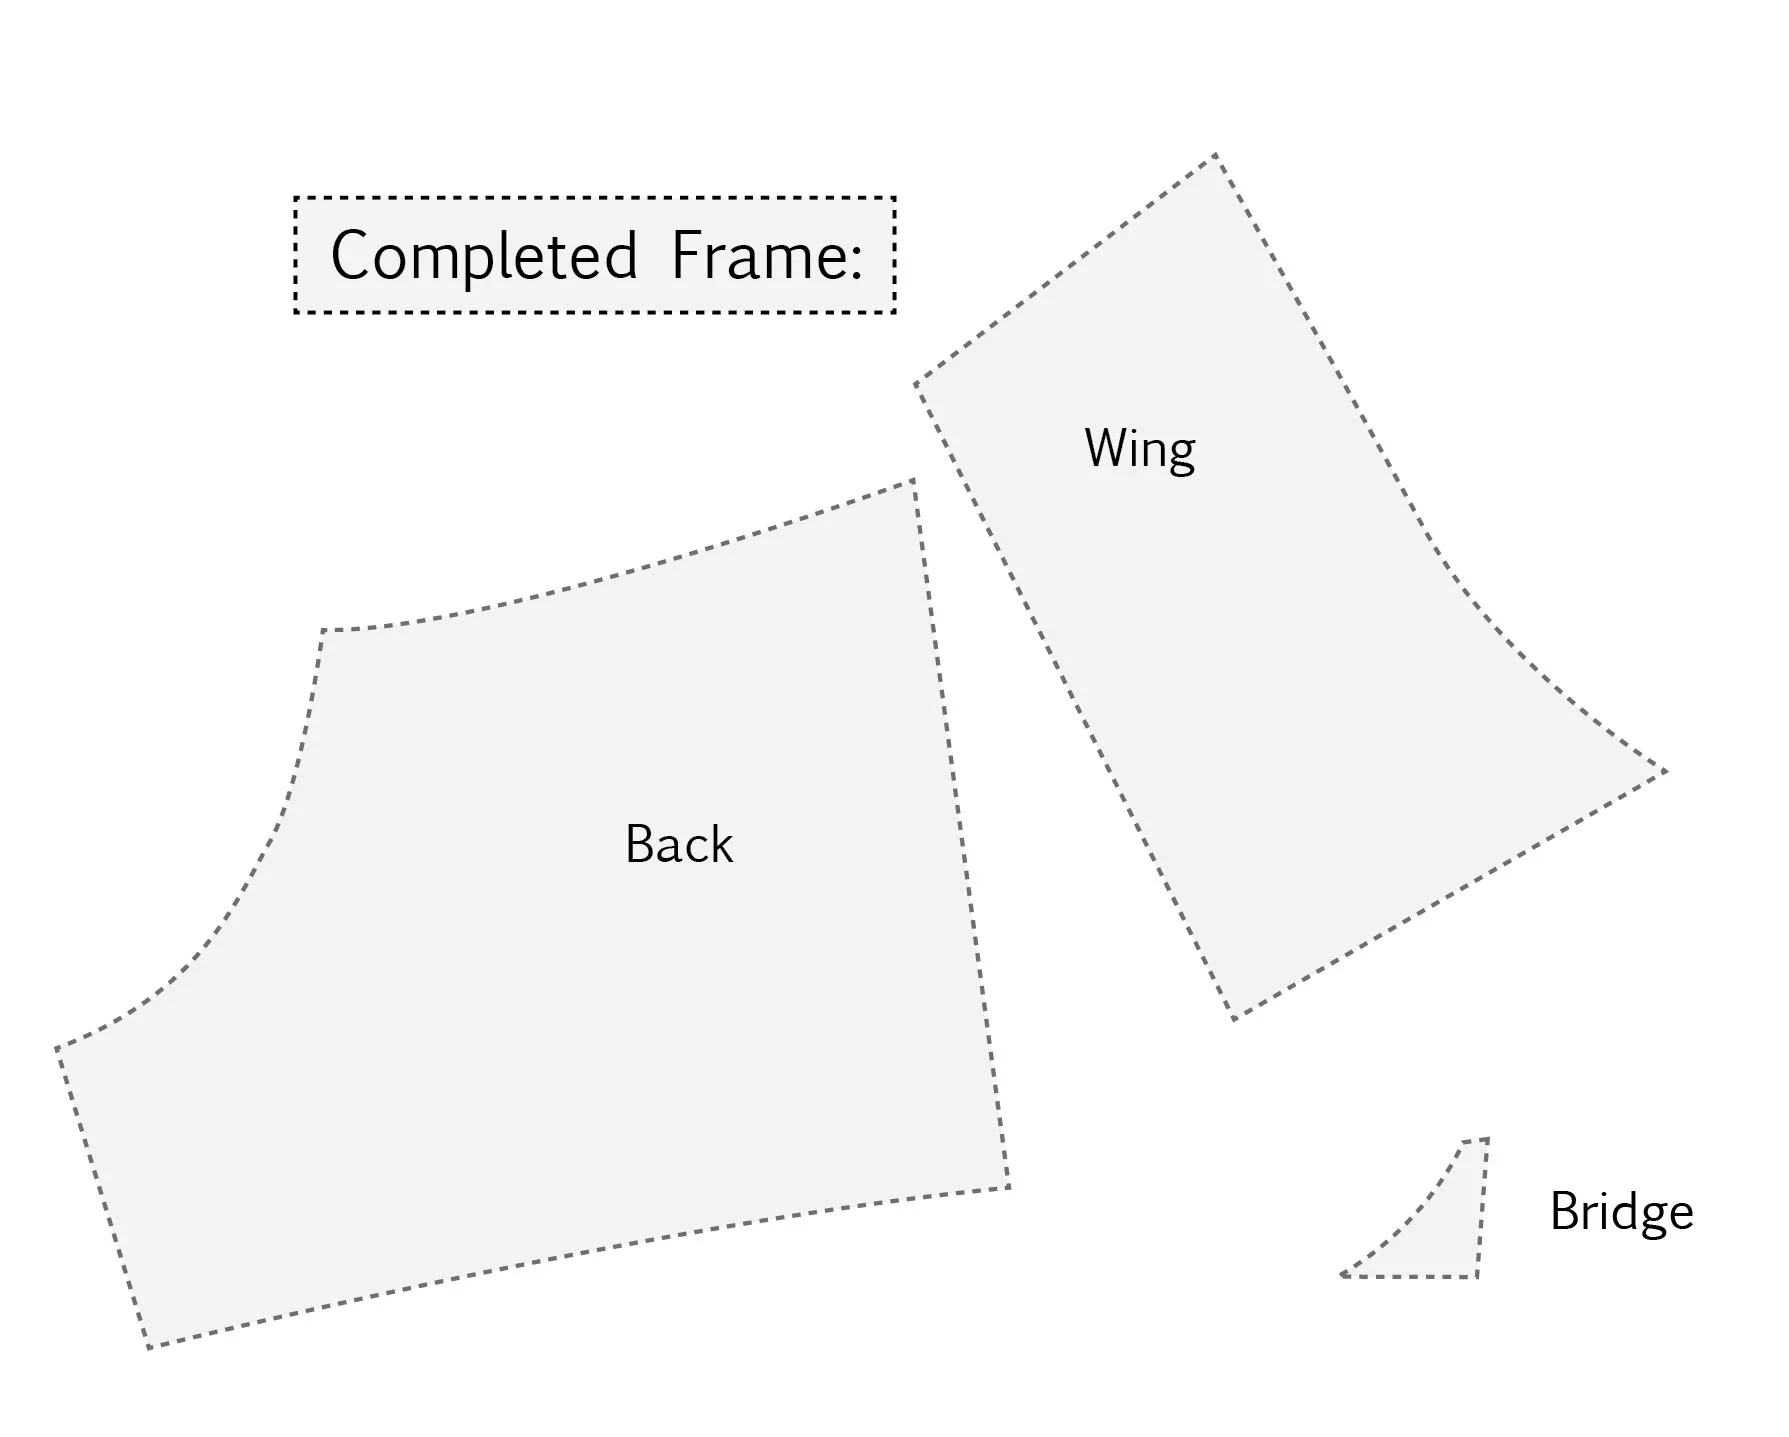
Carry that line into the back band piece if you need to. Once you're happy, make the cut! You'll want to separate your frame from the back band pieces at the side seam once again. Now that the side of the frame is a separate piece, we'll call it the 'wing'
The next step is to adjust the seam allowance of the cups. The biggest difference in the construction of our partial band bra will be the method in which we attach the wire channelling. In a full band bra, it's sewn into the cups and frame, then folded down and out (towards the frame) and stitched down again. In a partial band, the frame doesn't go all the way around the wireline, so there'd be nothing to attach it to! Because of this, we have to fold the channelling up and into the cup - and because of that, we need to add ourselves some extra seam allowance. Measure the width of the channelling you'll use to construct your bra, double that measurement, and add that to all the wireline seams of your cups. If the reason for doubling the channeling width is unclear, don't worry: It'll be easier to explain with pictures once we're constructing the bra. Now - grab your wing and bridge pieces from earlier, and add wireline seam allowances that are the width of the channelling (not doubled!). Then, add your usual (generally 1/4") seam allowances back to the rest of those pieces.

You may wish to trace your bridge piece so that it's no longer on a center fold, as well.
Sweet beans, friends! We've made a partial band adjustment! That wasn't hard at all, was it? Are you ready to start sewing?

Of course you are. Now, this tutorial assumes you've made a full band bra before, so I'm going to let go of your hand now so that you can go cut out your new pattern pieces. (one little note - don't cut off the seam allowance from the wireline seams of your foam, if you're using foam - but remove it from all other cup seams for the foam!) Good?

Good. Construction is pretty similar to a full band bra at first - construct your cups, finishing the neckline seam and basting about 1/4" in from the edge of the wireline just to keep all those layers in place. Next, sew the back band pieces to the wings, and attach the band elastic. Weird, I know! The cups aren't even in yet! But that elastic is going to be encased in the channelling seam, so you need it to be ready first. Set those aside, and sew your bridge piece. Mine is so small that I decided not to add band elastic to the bottom edge, but you can add it if you'd like. It's just my outer fabric lined with two layers of sheer cup lining, to give it a bit of density.
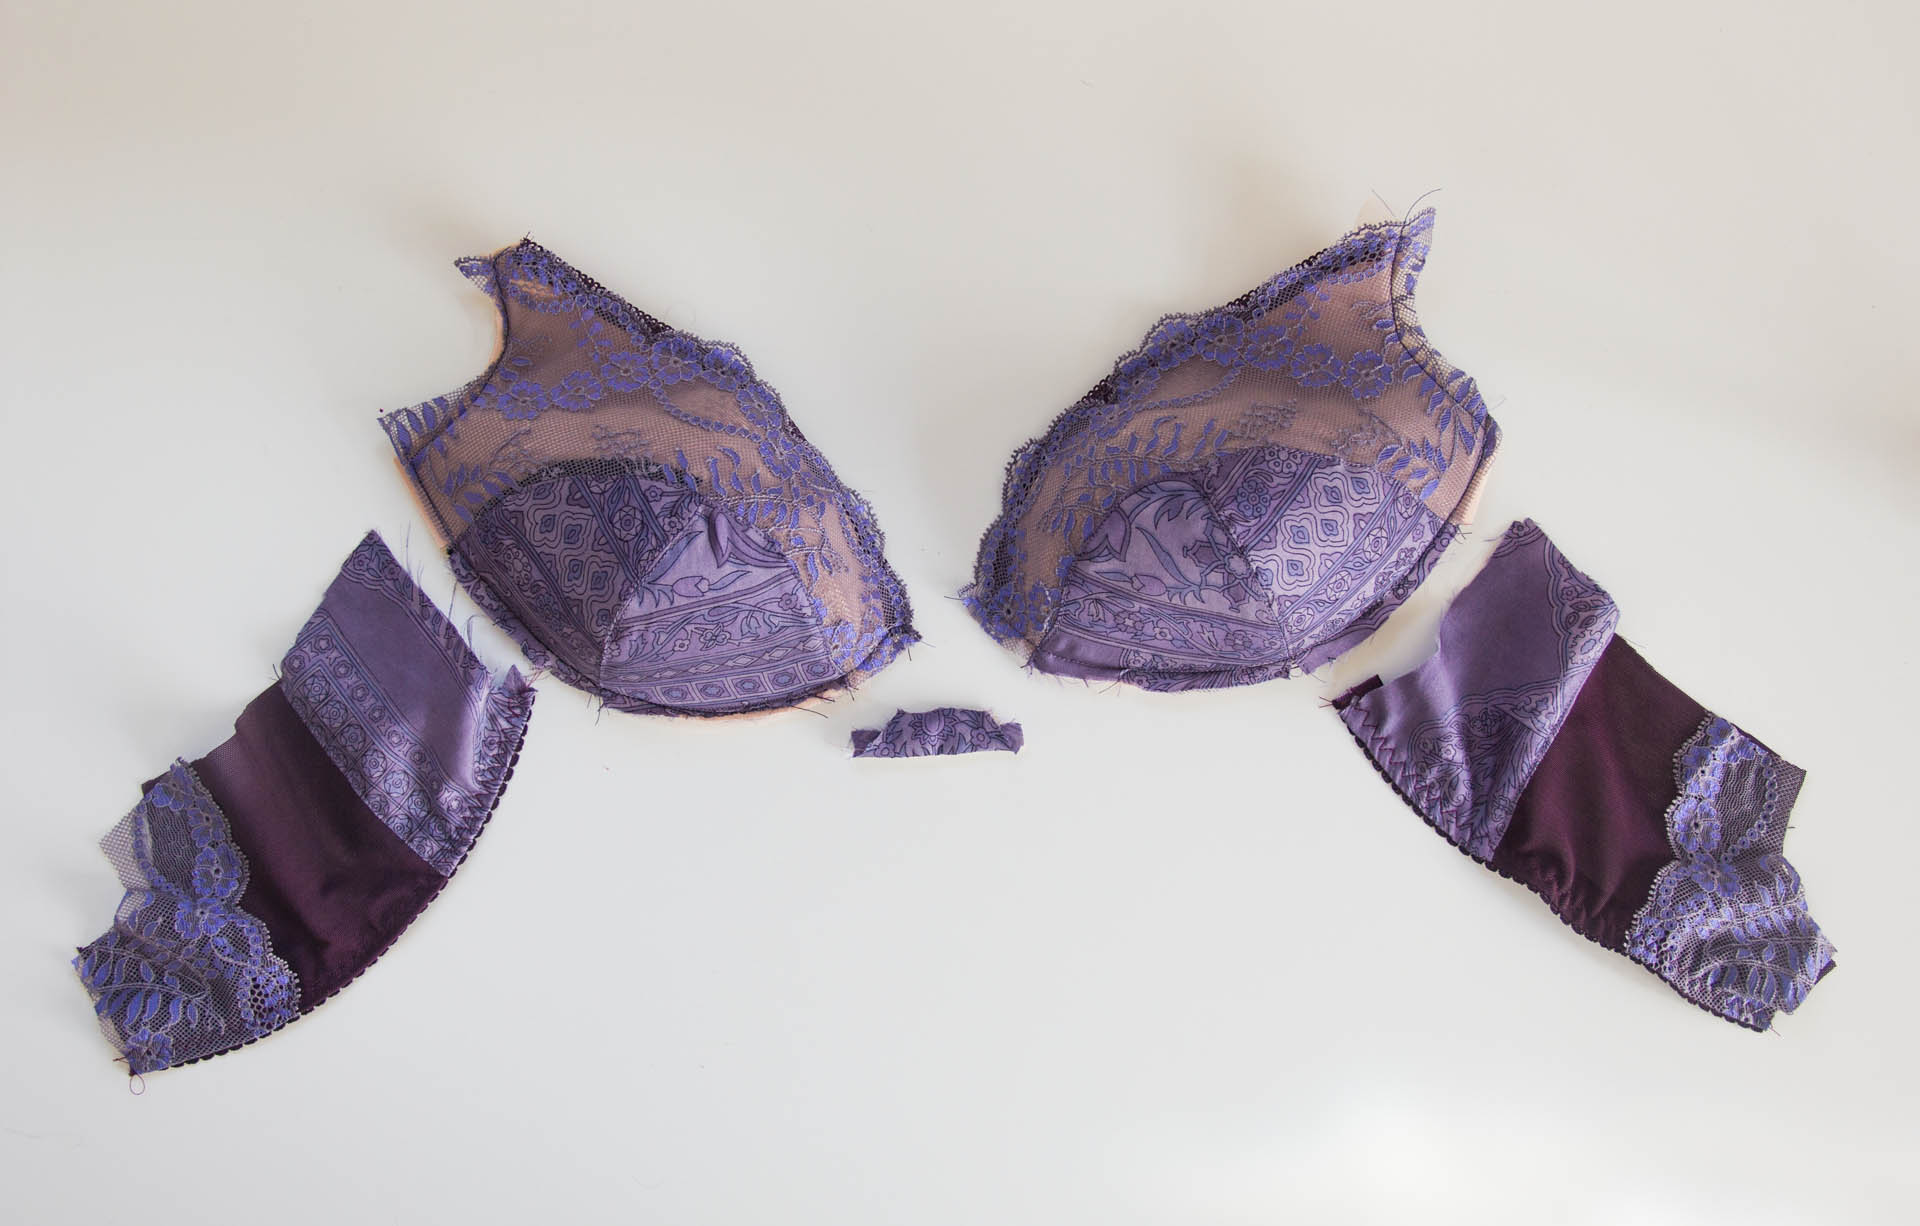

Next, line up the wing-band piece with the completed cup, and baste it down with a 1/4" seam allowance. Repeat for the second cup, and then line up your bridge piece in the center of the cups and do the same. What of that extra channelling width we added to the cup pieces, though? Hold your horses, I'm nearly there.
Fold the wings up over the bra cups, and hold the bra so that the outside of the cup (therefore the inside of the band) is facing you. Your channelling has a curve to it - make sure that the inside of this curve faces the raw edge of the bra cup seam allowance. The channelling will not follow the curve of the bra cup. Line up the channelling with the raw edge of the bra cup, and stitch it down. It's gonna fight you a bit at this stage, but I promise you can do it. Go slow, I don't recommend pins.
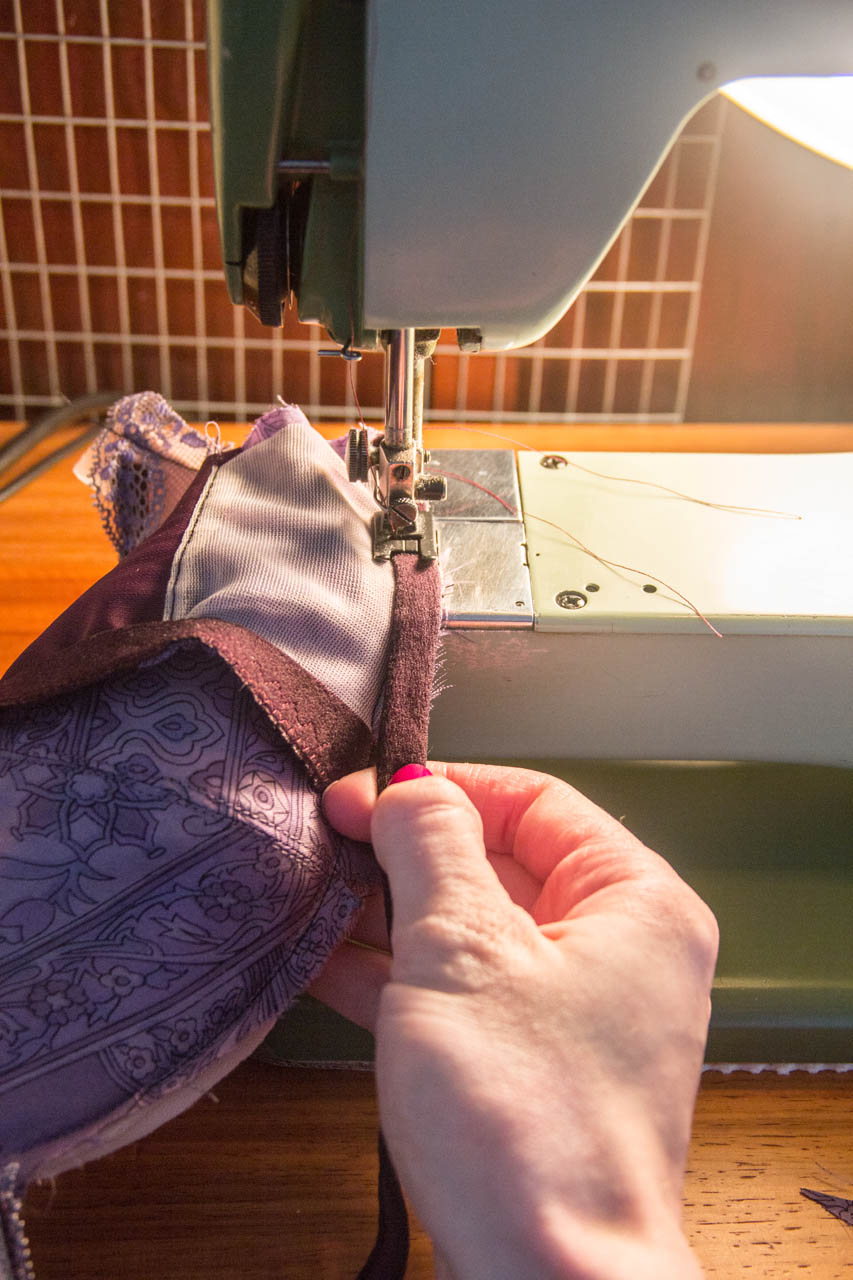
("Line up the channelling with the bra cup, which is already fighting you, and then try to balance a heavy camera with your other hand")
Once you've sewn this first pass of channelling to both cups, flip your bra around so the inside is facing up, and your bra should look a bit like this:

Why yes, eagle eyed reader - the channelling on my cups doesn't match! I ran out of the purple and decided to use up a navy blue scrap instead of setting up my dye station all over again.
Okay! Now we'll take a quick break from sewing to explain why we added that extra width to the seam allowance of our cups but not our wing pieces. In case you hadn't figured it out, the next step is going to be to stitch the other side of the channelling down to the inside of the cups, thus creating a stable place to house the wire. As I mentioned before, when you have a full band bra the channelling flips down into the frame, whereas in a partial band bra it flips up into the cup. If we left the seam allowance as is, flipping the channelling up would result in a bra with a wire that would sit on top of your breast tissue, rather than under it along the breast root. By adding an extra channelling-width, we've effectively moved the wire back down to where it originally was on your full band bra, while still folding it up into the cup piece. We only added one channelling-width to the wing and bridge pieces, because those pieces aren't folded in with the channelling.

Before you stitch down the second pass to secure your channelling, trim as much bulk as you can out of the wireline seam. If you're using foam, this area gets bulky very quickly. I like to use a pair of duckbill applique scissors for this, and I've also switched to a larger machine needle to sew this pass of channelling. It's up to you whether you sew your channelling down from the inside or the outside of the bra - my personal preference is to stitch from the top to help control any potential puckers, but you do you. However you choose to proceed, topstitch both edges of the channelling down to secure it to the cups.

On the right, the cup topstitched with two rows of stitching, which holds the channelling under the cup. On the left, the channelling is attached but not yet topstitched.
This is where things go back to normal! Attach your straps, insert the wires, stitch the underarm and top-band elastic, then the clasp, and you've got yourself a partial band bra! That wasn't hard at all, was it?

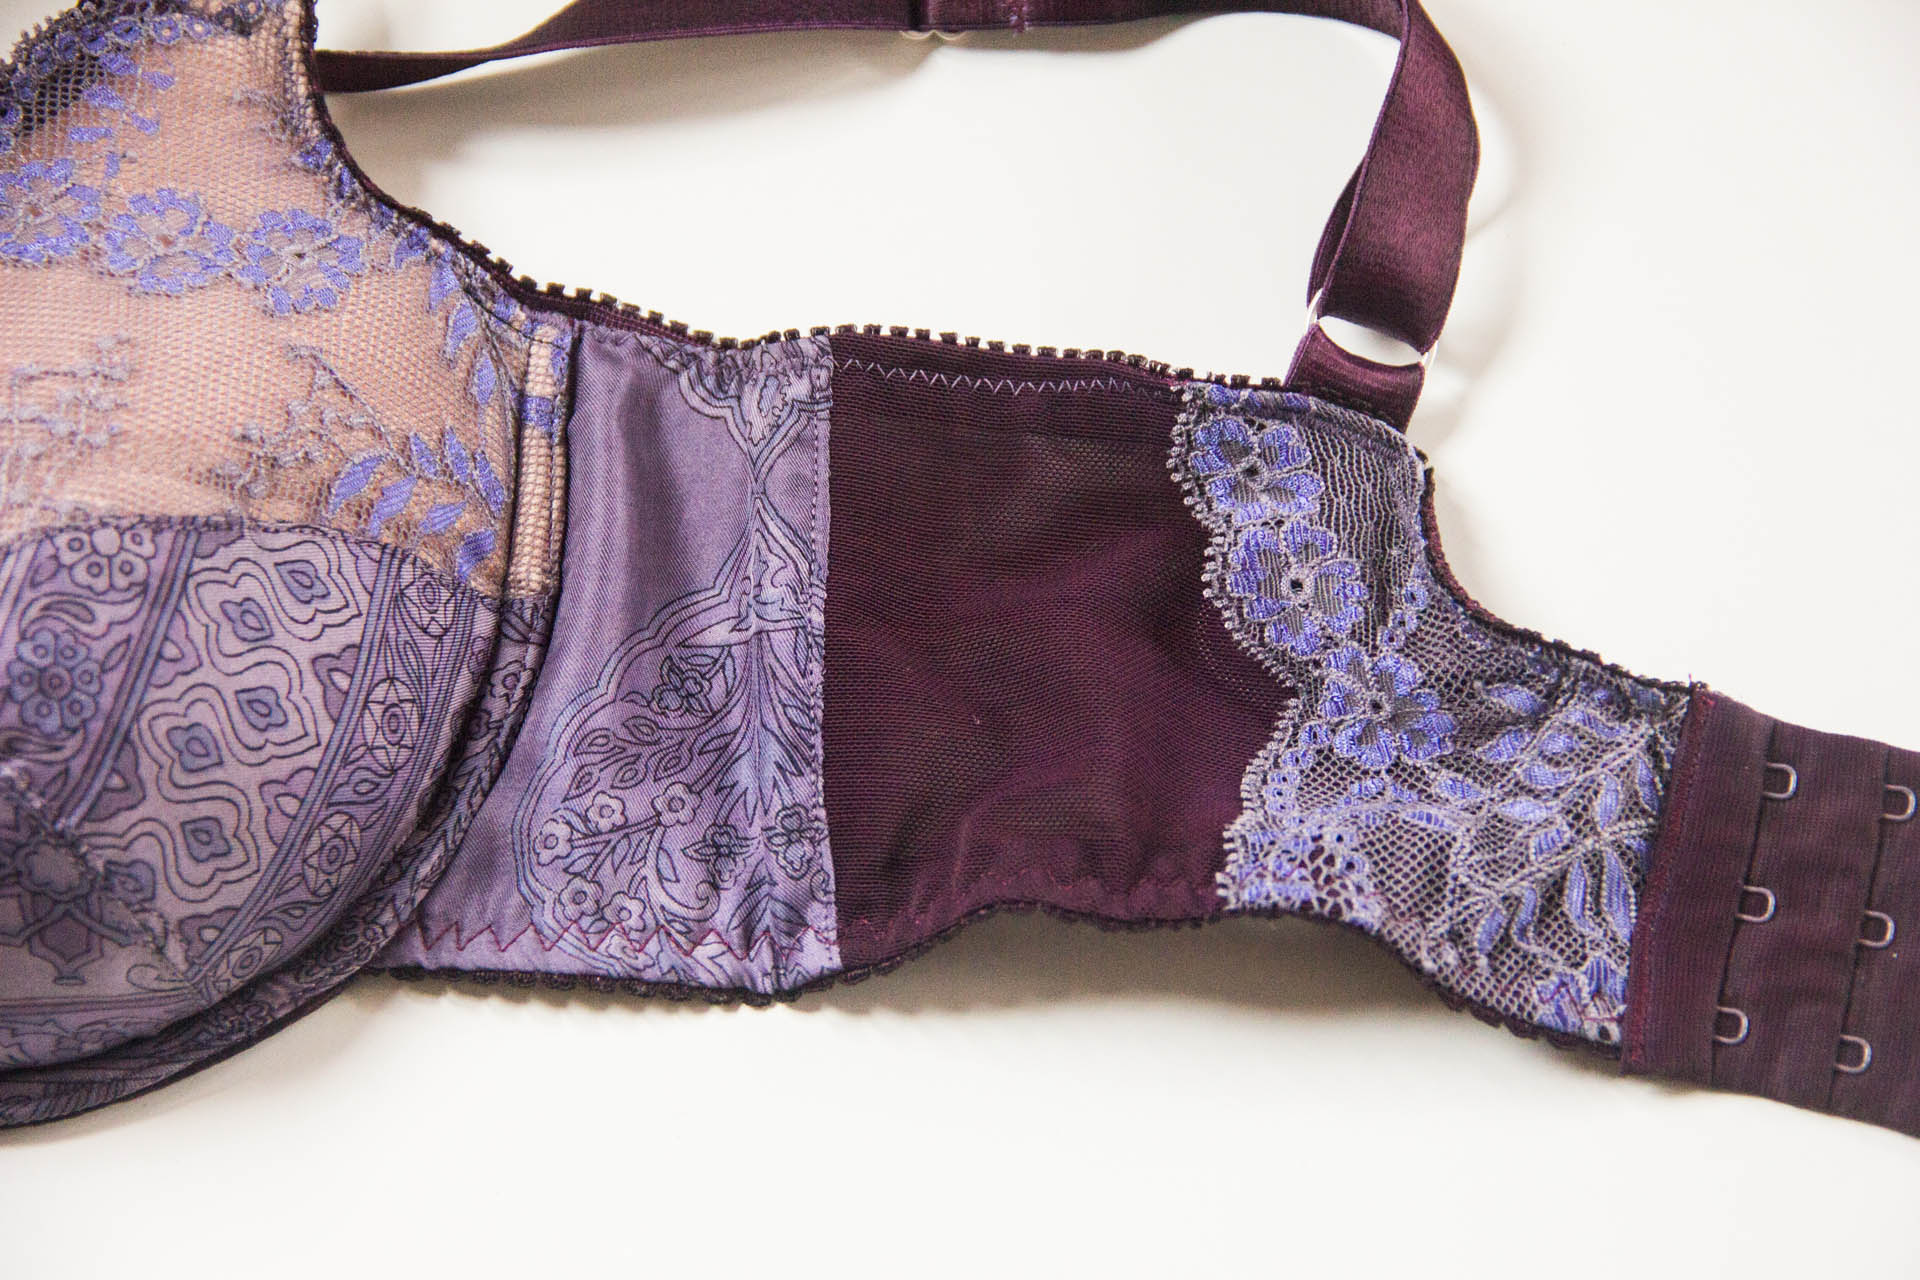
My bra is a stash match made in heaven: Some sari silk I found as part of a mystery scrap bag purchase (the bag was $5 and contains 10 or 12 usable pieces of brightly decorated silk), and lace I already had that matched impeccably well. I dyed all my elastics with some 'Purple Haze' Acid dye from Dharma - They turned out darker and more 'plum' than I would have liked, but that's fine. Strap, underbust, channelling, and clasp are all from Elle Joan's - along with the sheer cup lining, foam (Which I'm now officially out of), powernet, and hardware.

Aaaand, a full view of that mismatched channelling. My little secret - as long as you guys don't tell anyone.
Per my usual, it's a silk and lace outer layer, foam lined, and then a double-layer bra tulle powerbar to increase the inwards-push I need to get my boobs out of my armpits. Thick straps because I like thick straps. Aside from using a significantly better quality picot elastic, this one is nearly identical to my pink one. I definitely need to get cracking on more of these!

I've made versions of this bra in silk before, but this particular silk was a sandwashed twill weave which was extremely fussy on the bias. The sandwashed texture meant it wanted to stick to my presser foot on the way through the machine too, which was unhelpful to say the least. I do have a few small puckers although I managed to smooth almost everything out.

I also added some lace overlays to the center back just to help bring the lighter color around.

So there we go! A long post full of pictures, but hopefully it's given you a few ideas if you're thinking about making the switch to partial band. That choice, like anything else about a bra, is totally personal preference and up to the wearer, but I've found that I can still get as much support as I need from this style, and that it's a bit less restrictive (therefore a bit more comfortable) than its full band compatriots. As always, if you have any questions about the tutorial (or can suggest a better way of doing things!) I'm all ears! You know I love to hear from you!