• blog
  • What Kat's Made
  • The Wedding Dress
  • Tambour Embroidery
    • Workshops and Teaching
    • Shop
    • Beadwork Portfolio
    • Tutorials & Guides
    • About Me
Menu

Kat Makes

Kat Waters
  • blog
  • What Kat's Made
  • The Wedding Dress
  • Tambour Embroidery
  • More
    • Workshops and Teaching
    • Shop
    • Beadwork Portfolio
    • Tutorials & Guides
    • About Me

Blog: Kat Makes

Adventures in Obsession

diy driftwood jewelry rack

Driftwood Jewelry Rack DIY

July 30, 2018

You might recognize me as that sewing blogger who only ever wears the same two necklaces (and you wouldn't be wrong about that) but contrary to popular belief, I do own other jewelry. We don't have a lot of storage in our little half-house, so the mantra is always 'build height and add wall storage'. There's only so much you can do with a rental, but I've successfully gotten my jewelry out of a pile on my shelf and on to a wall organizer in a way that's attractive, useful, and apartment-friendly to boot! Plus, the whole thing cost under $10 and took less than 2 hours. Can't beat that for organizational home improvement!

driftwood jewelry rack

The foundation of the object is two pieces of driftwood I found on a beach in Whangarei when Jon and I were there visiting his family a year or so ago. I snagged them because they looked beautiful together, and also because they were small straight pieces on a beach littered with large logs and gnarly bits that Jon wouldn't let me drag back to the car... I figured I'd use them as photo props for a jewelry business I never started, and after they sat gathering dust on a windowsill for over a year I'm very happy to have finally found an use for them!

driftwood jewelry rack DIY supplies

Additional purchased supplies are listed as follows:

  • 1 packet of 1/2" screw-in hooks
  • 1 packet of the tiniest available screw-in eyes
  • 1 meter of silver chain

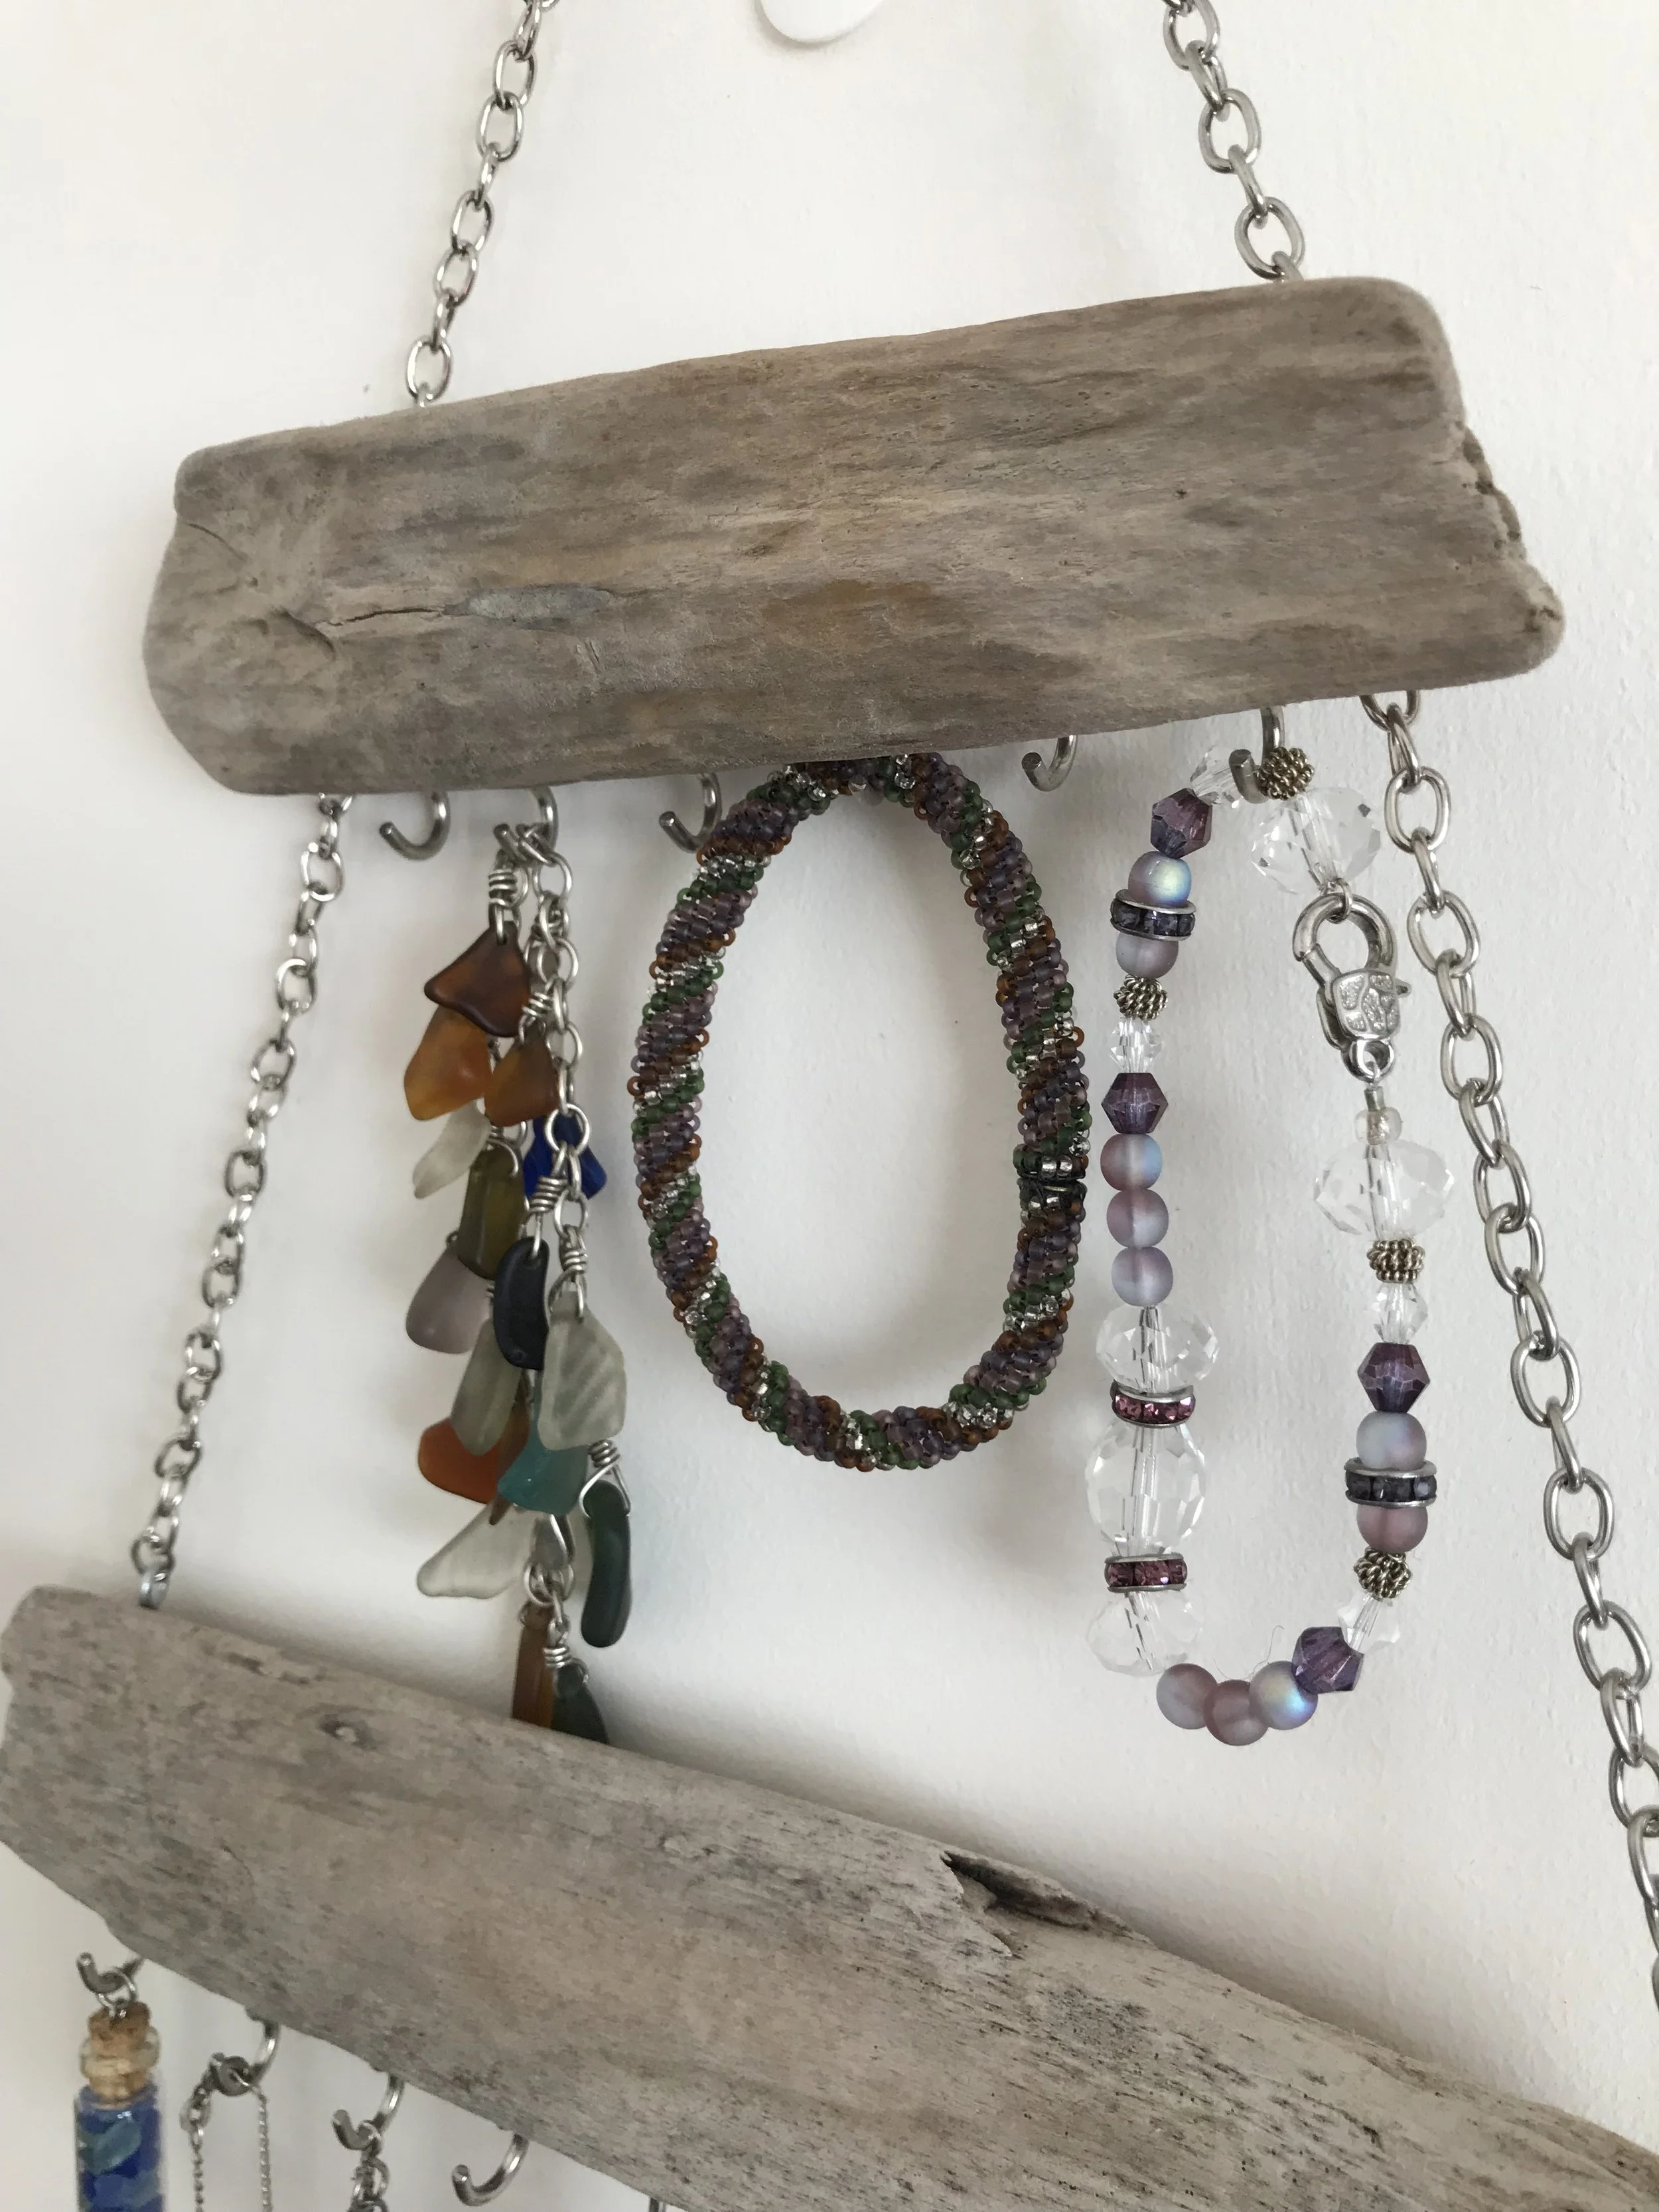
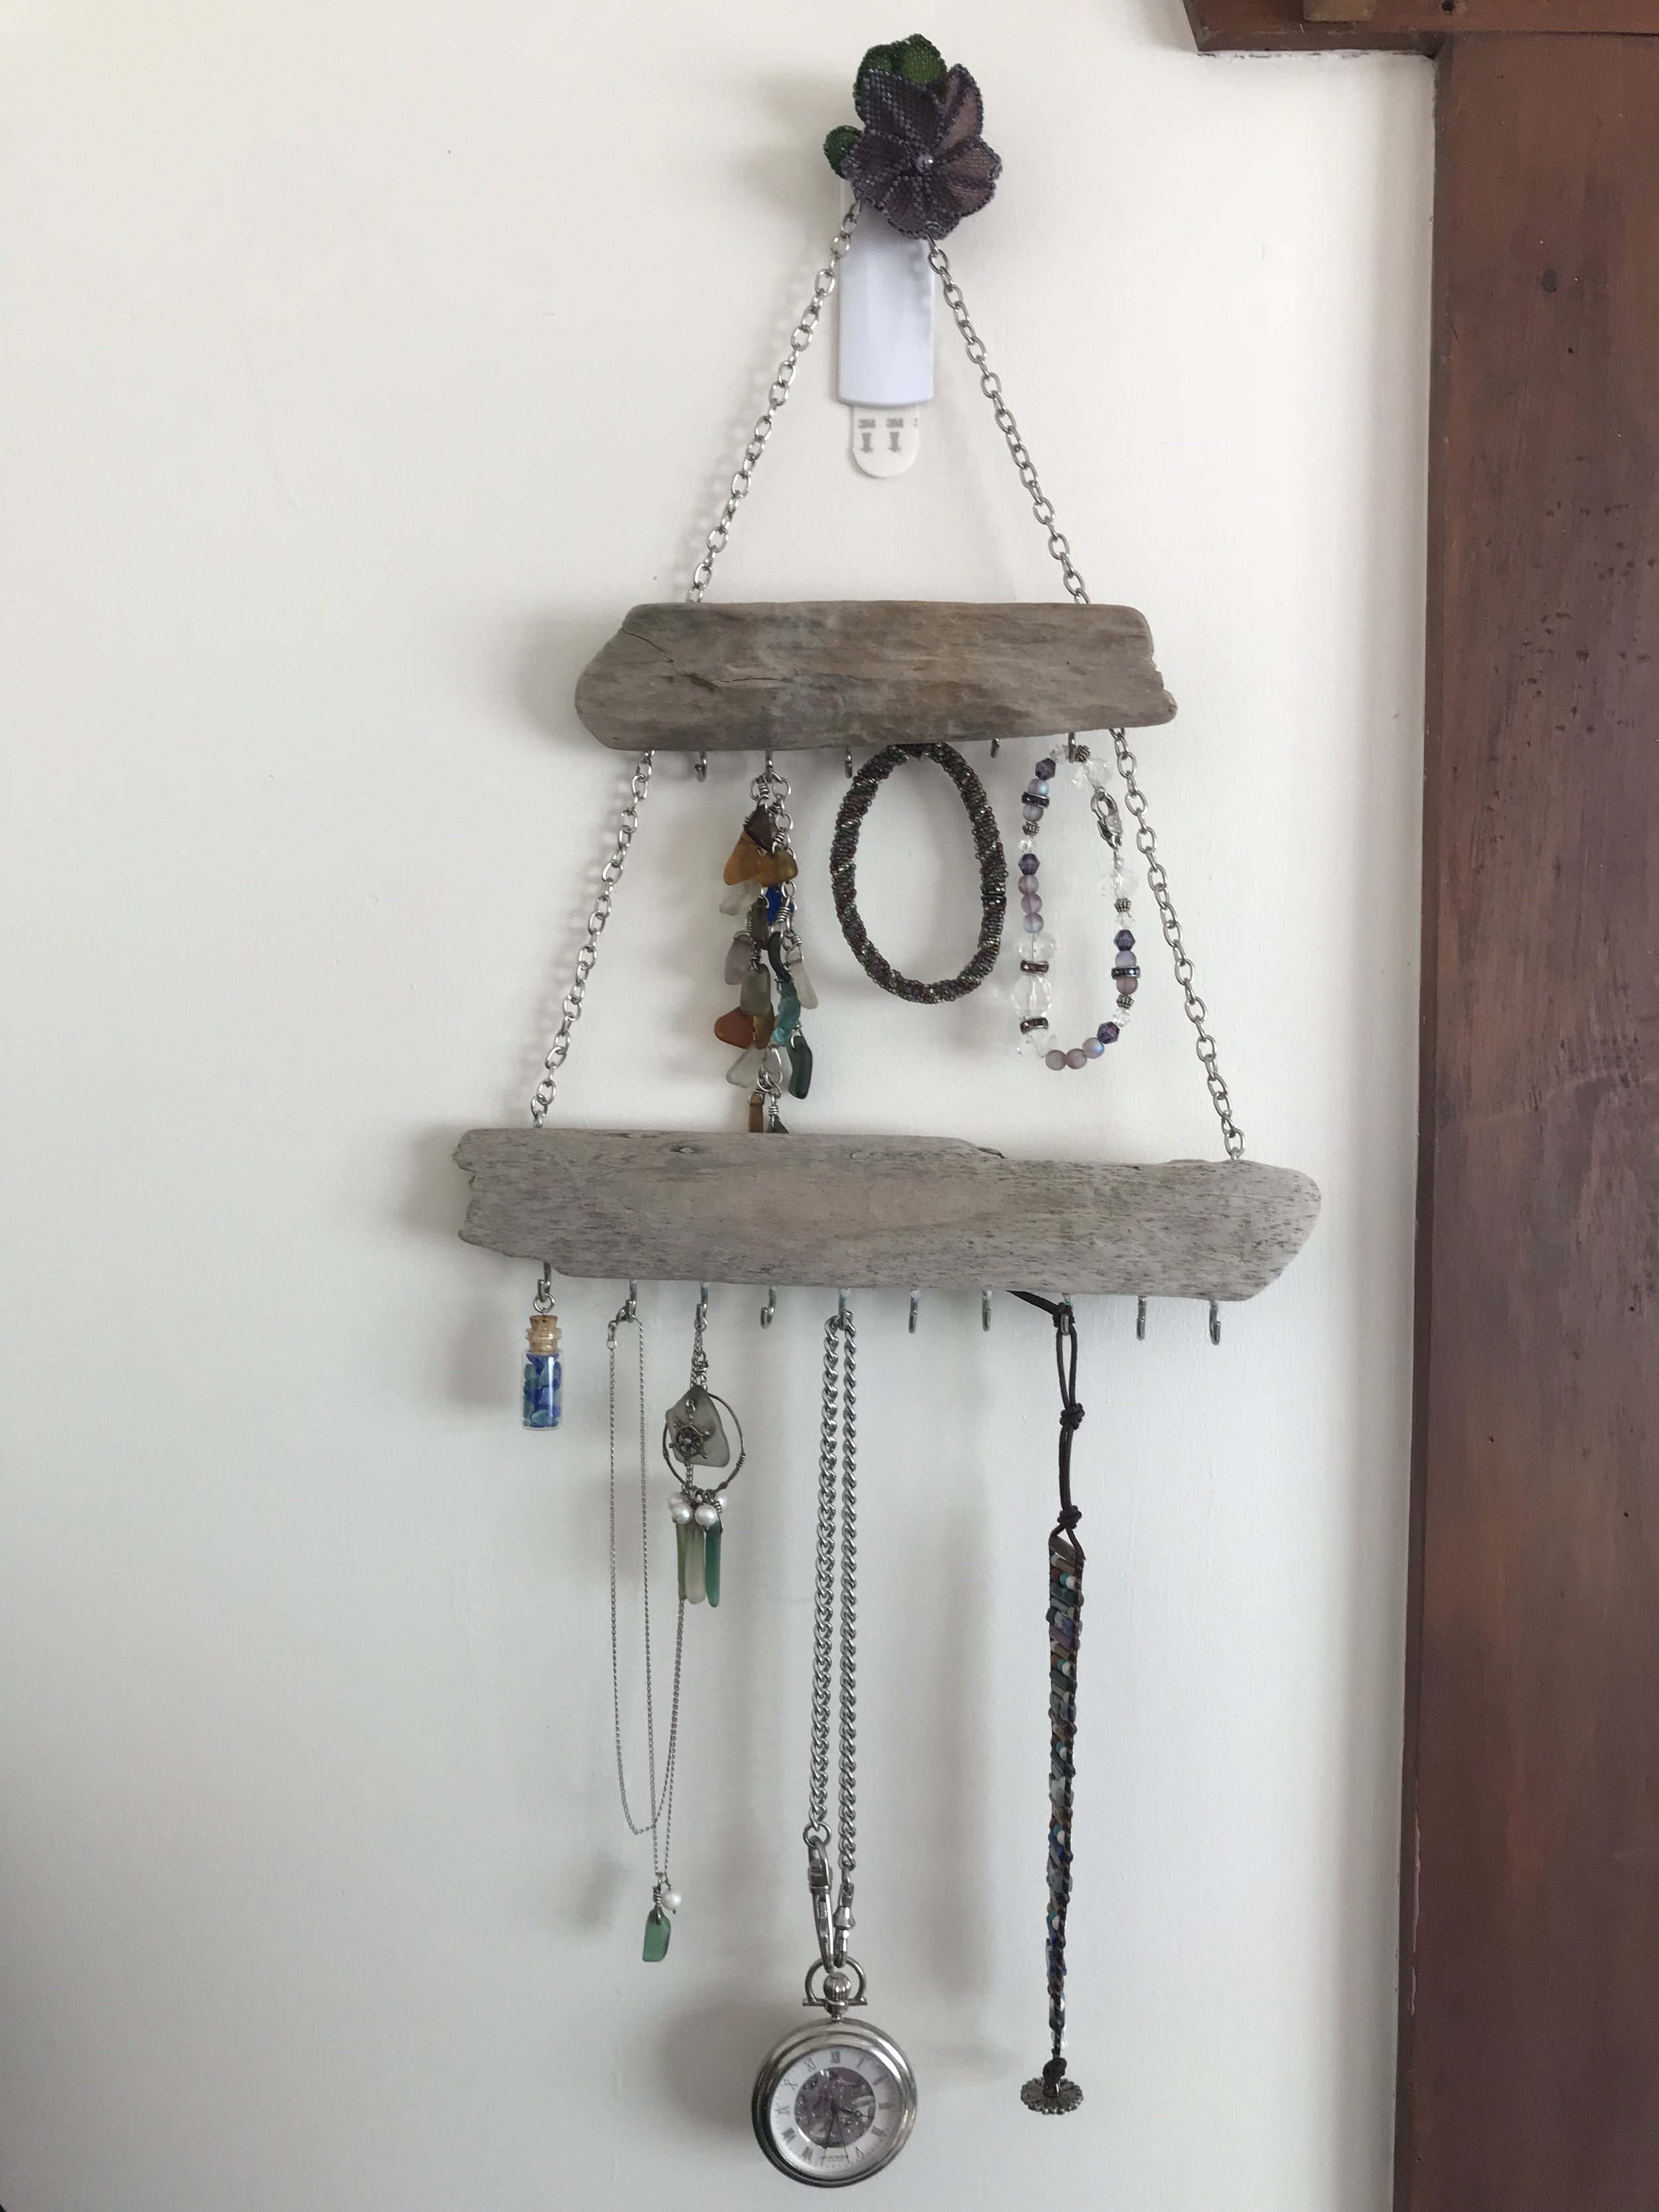
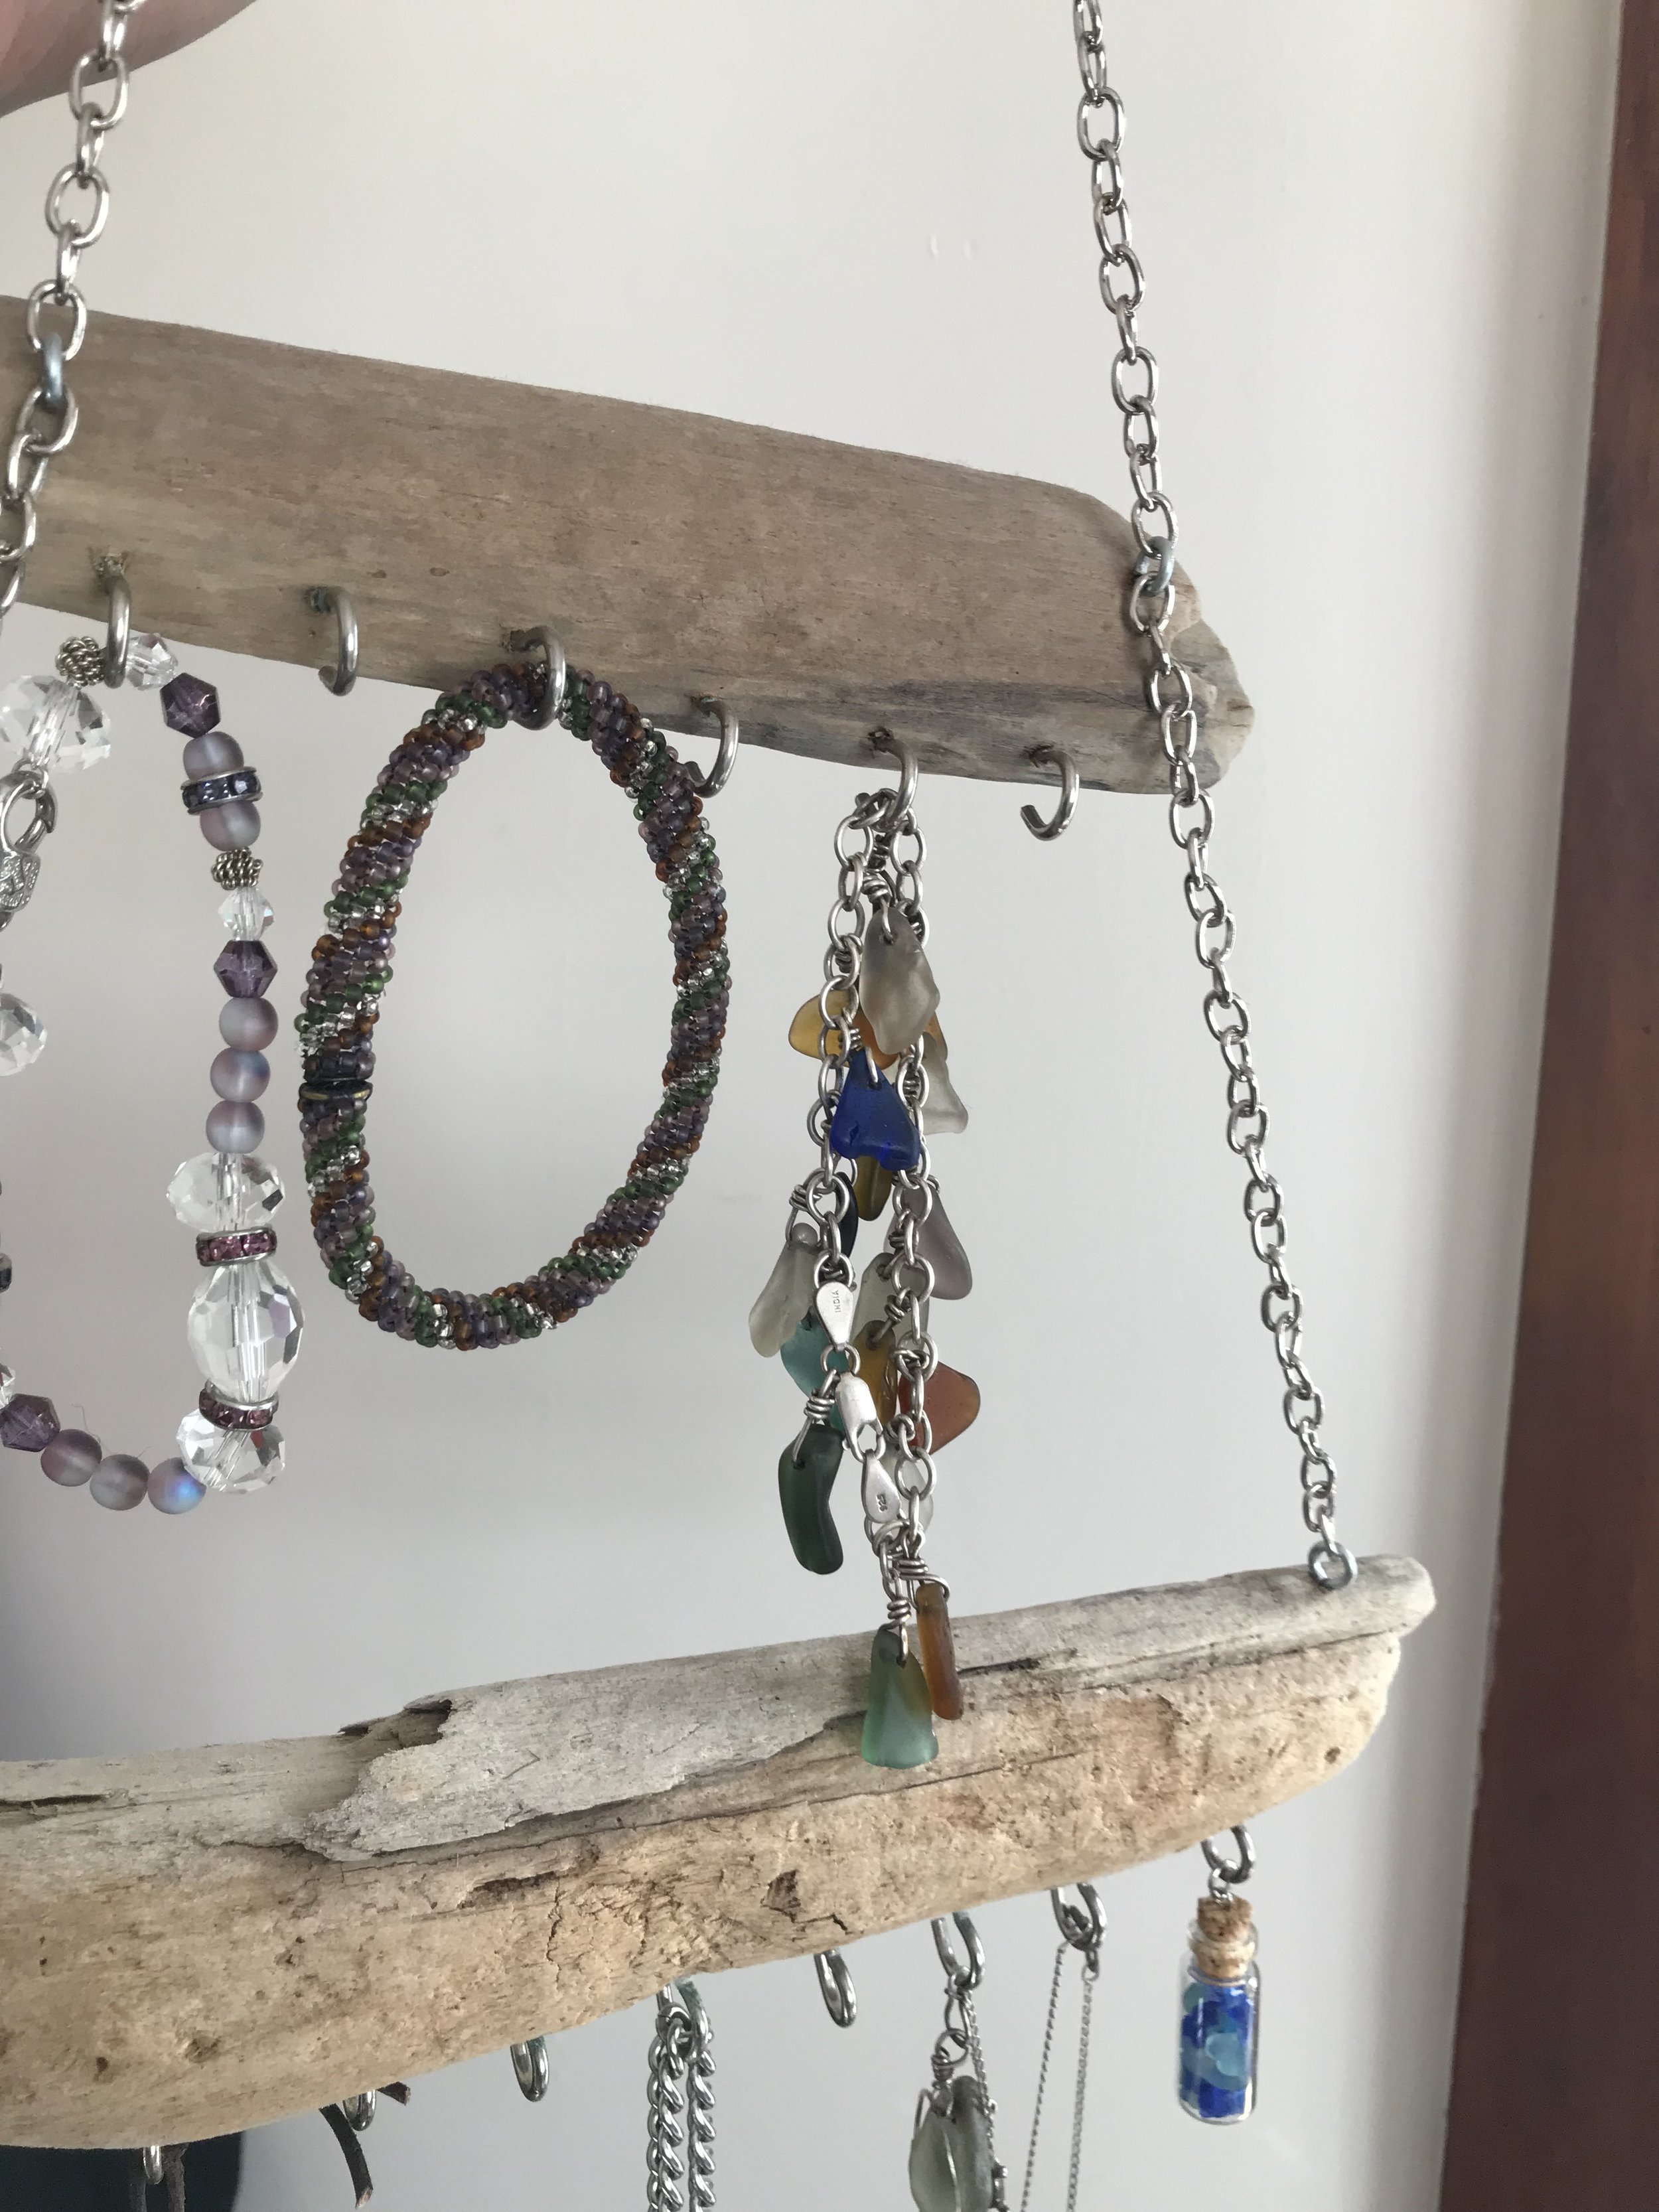
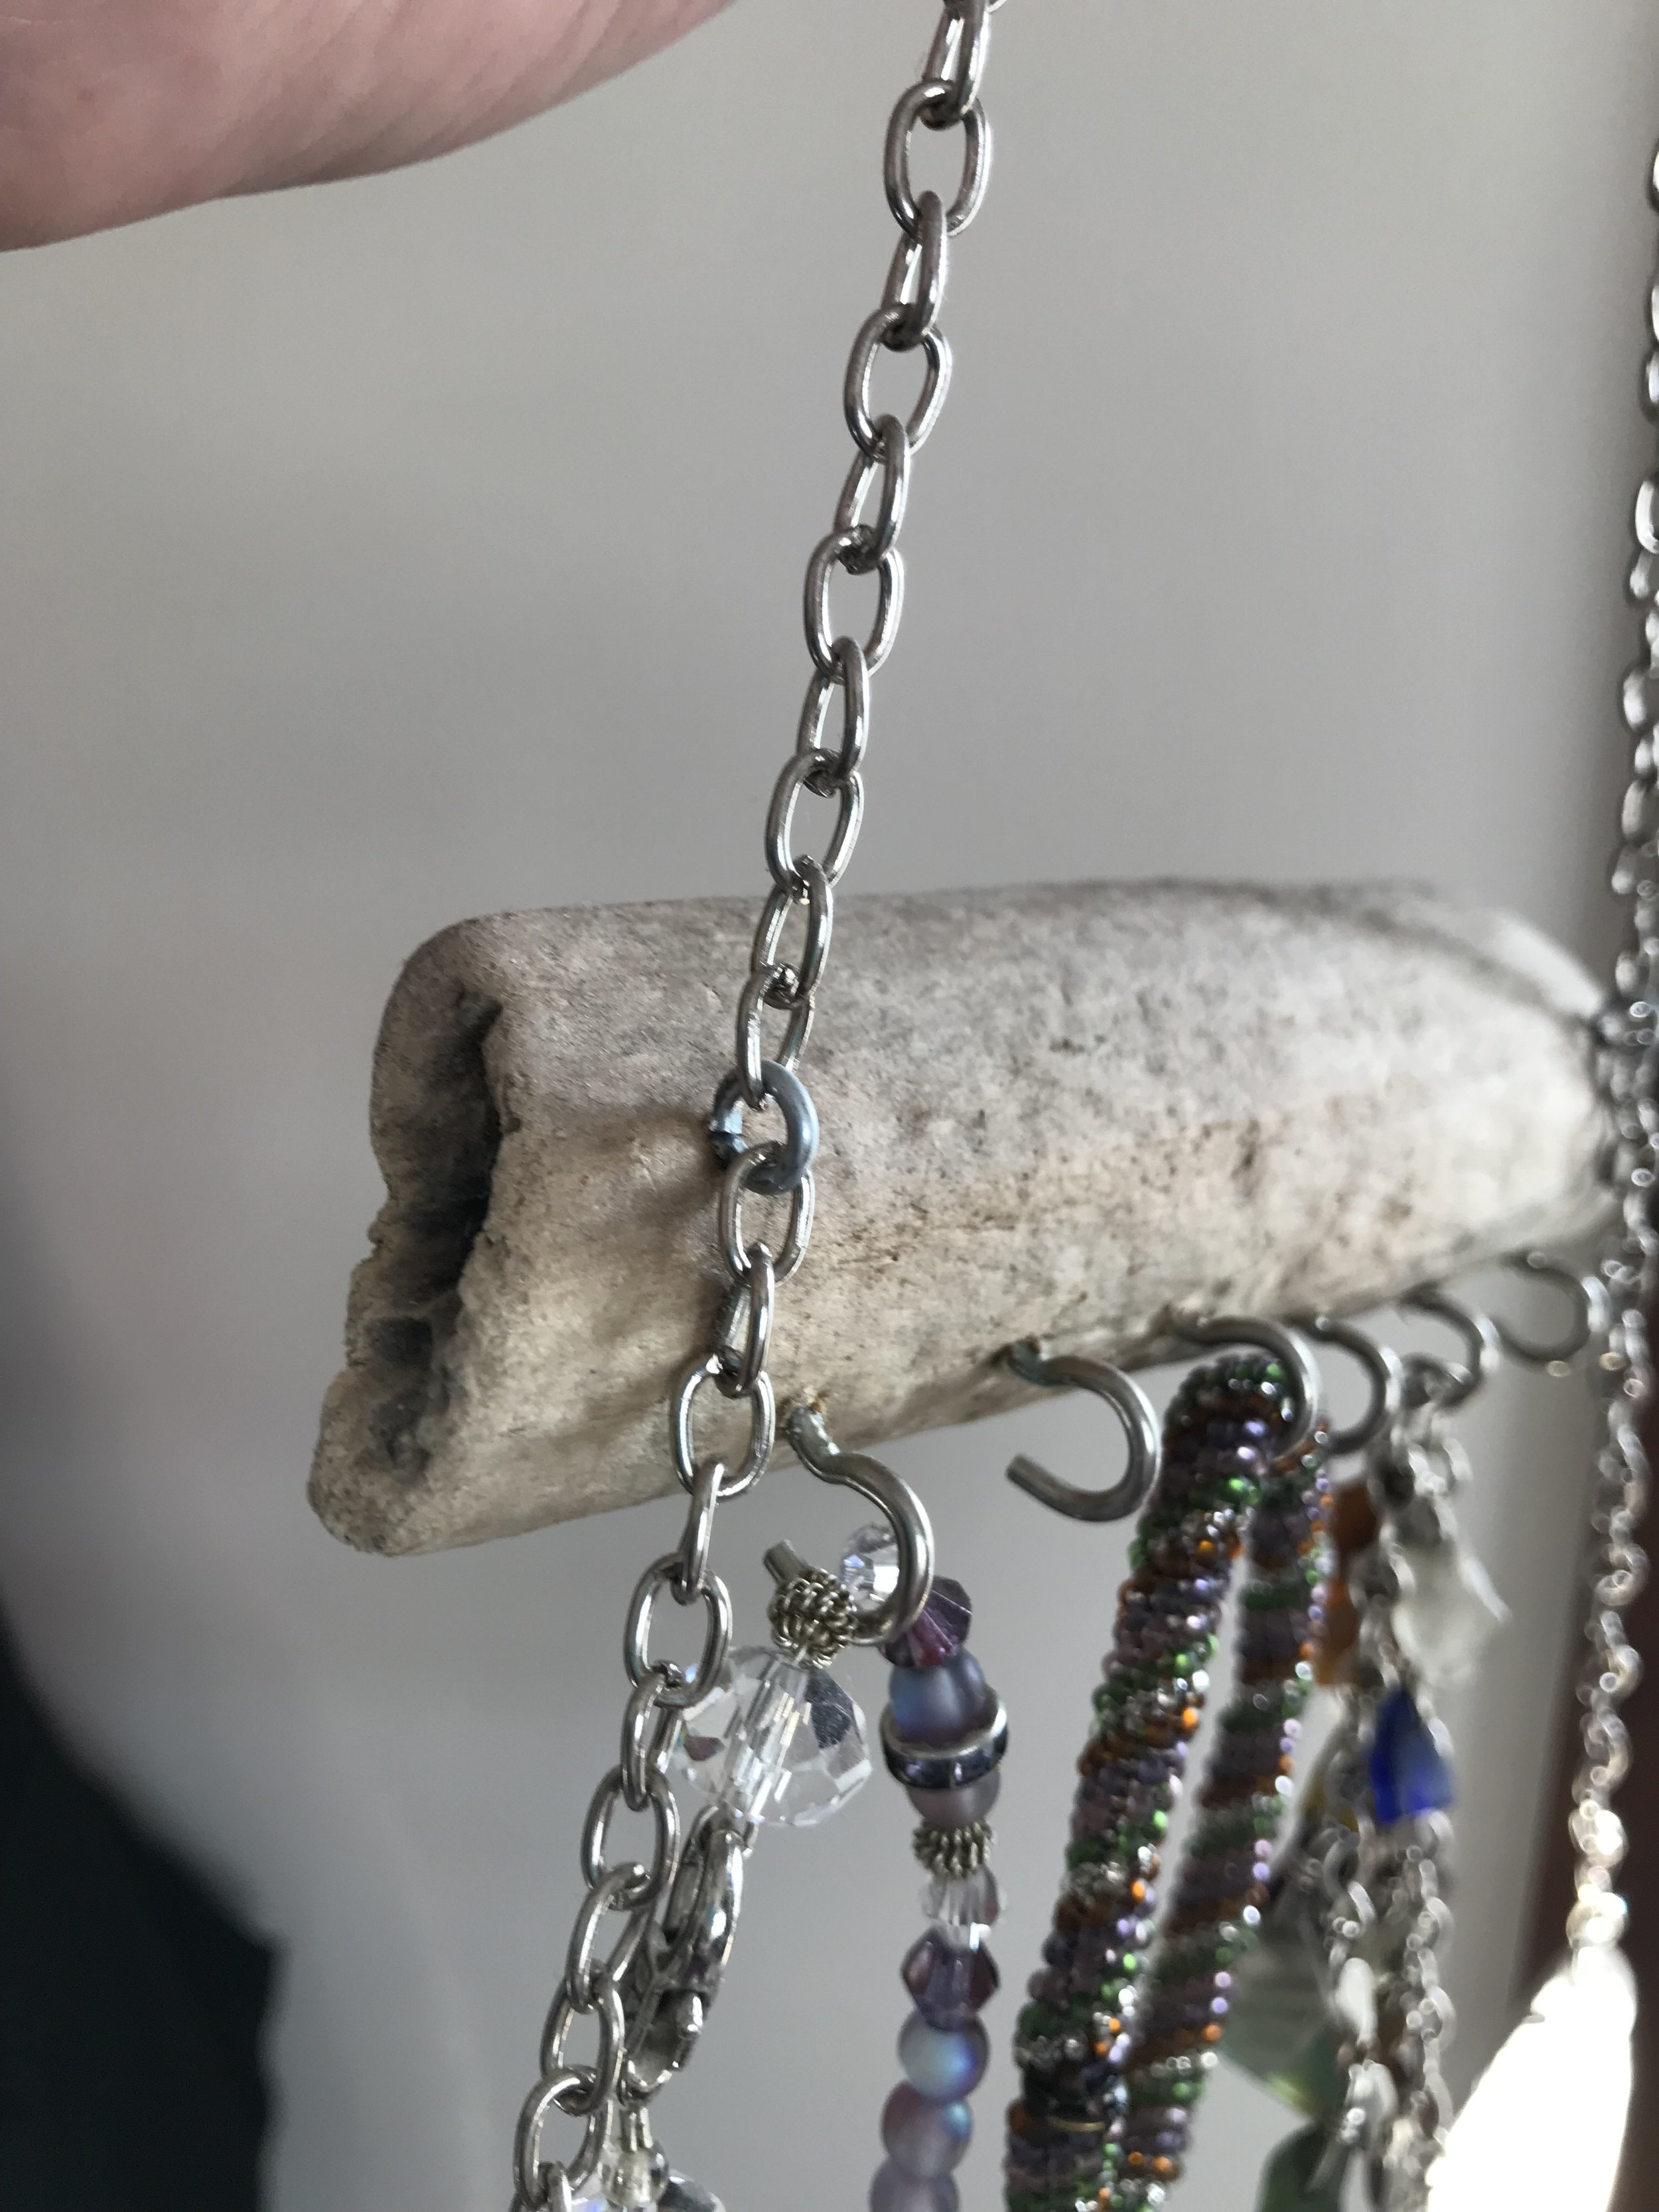
It's really that simple! I spaced my hooks about 3/4" apart along what I determined to be the 'bottom' of each piece of wood, poked a starter-hole with an awl, and then screwed each hook in by hand (you can use pliers as well, but driftwood goes a bit soft if it's been floating a while so you may be surprised at how easy they are to insert). Then, I added a set of eyes to the back ends of each piece, and used two pairs of pliers to pry the chain links apart and close them over the eyes. This created two hanging levels - one for short things like bracelets and one for longer necklaces (and my pocketwatch!)

make a jewelry rack

Then it was as simple as choosing some real-estate on the wall for it and popping up a command hook (no holes in this rental, yo!). I disguised my command hook with a beaded flower pin I made ages ago, but they make those pretty looking command hooks these days that you could totally use instead.

detail of jewelry rack

On a side note, I made most of the jewelry on the rack: a sea glass bracelet and necklace, the little strung crystal bracelet, and the little cylindrical woven one.

This seems like an unusually short post for my standards, but hey - not an overly complicated project! To be completely honest, This is another one that's been finished for a while. It's only just getting its turn in the blog-light because I'm currently in full panic mode making my Frocktails Auckland dress along with a vacation capsule for next month - and several bags of wedding dress supplies are giving me a solidly guilt-trippy side eye from the corner next to the couch. I've got a giant to-do list in a color coded and multi-tabbed google sheet, though, so we're getting places. Slowly, but getting places nonetheless.

IMG_5469.jpg
In Tutorials, Projects Tags driftwood diy, jewelry rack, jewelry hanging, handmade jewelry, sea glass and driftwood, diy project, wall hanging, driftwood, handmade life
← Sewing a Wrap Dress (Part 2, my Frocktails Dress)Embroidered Tulle Cut-On Sleeve Shirt →

Support me on Patreon

Hi! I'm Kat, I don't have any cats, and this is organized chaos. If you'd like to chat about catlessness, sewing, knitting, or other forms of world domination, I'd love to hear from you!katherine.klebenow@gmail.com

Hi! I'm Kat, I FINALLY have a cat, and this is organized chaos. If you'd like to chat about cats, sewing, knitting, or other forms of world domination, I'd love to hear from you!

hellokat.makes@gmail.com

Category
  • Bernina
  • Bramaking
  • Machine Embroidery
  • Making Clothes
  • Pattern Sewing
  • Project Wedding Dress
  • Projects
  • Self Drafted Sewing
  • Shoemaking
  • Tambour and Beadwork
  • The Monthly Draft
  • Travel
  • Tutorials
  • Yarn and Handknits
Subscribe on YouTube
Featured
Tutorial: Sewing a custom Cat Carrier Cover for your cat's travel box
Oct 9, 2024
Tutorial: Sewing a custom Cat Carrier Cover for your cat's travel box
Oct 9, 2024

Today's project is a cover, custom made to fit over my cats' travel carrier. This project has everything - custom drafting, magnets, hardware installation, problem solving: All in the name of keeping my kitties happy in transit! It's a long one - you've been warned.

Oct 9, 2024
Weaving your First Project on a Rigid Heddle Loom
Apr 26, 2023
Weaving your First Project on a Rigid Heddle Loom
Apr 26, 2023

My very first project on my new rigid heddle loom! I so enjoyed learning this new skill - here are a collection of tips as well as links to tutorials I found helpful as I made my first project!

Apr 26, 2023
DIY, Sewing, and Craft Supply Shops in New Zealand
Apr 13, 2023
DIY, Sewing, and Craft Supply Shops in New Zealand
Apr 13, 2023

Ever wondered where to get a weirdly specific hardware? supplies for making shoes, bags, or embroidered tea towels? Dye supplies or fancy zips? I've compiled a list of my favourite sources!

Apr 13, 2023
Sewing the Haptic Lab Constellation Quilt (again)
Mar 30, 2023
Sewing the Haptic Lab Constellation Quilt (again)
Mar 30, 2023

I’m making a northern stars constellation quilt to match my southern stars one! This one has started quite a bit differently from the last one - so I’ve shared my process in case it helps you with a similar project!

Mar 30, 2023
The Tambour Embroidery Hoop Holder: A Woodworking DIY
Mar 23, 2023
The Tambour Embroidery Hoop Holder: A Woodworking DIY
Mar 23, 2023

In which our intrepid tambour embroidery fanatic once again attempts woodworking in the name of beads. (Also, in which fortunately the attempt is once again successful!)

Mar 23, 2023
The Home Sewist's Guide to Snap Fasteners for baby clothes, bag making, and more
Mar 15, 2023
The Home Sewist's Guide to Snap Fasteners for baby clothes, bag making, and more
Mar 15, 2023

A deep dive into the world of snap fasteners! Did you know there were so many options to choose from? We go through five popular options for fasteners and discuss the pros and cons, as well as applications, of each

Mar 15, 2023
Lillian's Embroidered Wedding Veil
Mar 1, 2023
Lillian's Embroidered Wedding Veil
Mar 1, 2023

Making Lill’s cathedral length floral embroidered wedding dress - all in one monster post!

Mar 1, 2023
Art Deco Wardrobe Collection
Feb 19, 2023
Art Deco Wardrobe Collection
Feb 19, 2023

This was going to be the year I finally attended the Art Deco festival in Napier - here’s everything I made to wear for the weekend, all in one place!

Feb 19, 2023
Tutorial: Pullover Hoodie with Cat Pocket
Nov 9, 2022
Tutorial: Pullover Hoodie with Cat Pocket
Nov 9, 2022

Do you have a velcro kitty like me? I made my very own cat-pocket hoodie so I can carry my little guy around wherever he wants to go, and it’s a tutorial now so you can make one yourself!

Nov 9, 2022
The Prick and Pounce Method for Tambour Embroidery
Nov 9, 2022
The Prick and Pounce Method for Tambour Embroidery
Nov 9, 2022

Today we’re exploring one of the oldest methods of embroidery design transfer - the prick and pounce method!

Nov 9, 2022

Get the Updates!

Customize Updates
choose 'Blog Updates' to get an email whenever I publish a new post, and 'Newsletter' for the newsletter. Or choose both!
Thank you!

Instagram

Woven scarf number two! For this one, I tried weaving with laceweight which I was *certain* would require a 15 dent heddle but the wpi math said 12.5 so I went with it. Woven on my @ashford_wheels_looms 16” rigid heddle loom using alpaca yarn w
Pink scenes from a weekend of sewing: I’m having a summer birthday for the first time in almost a decade, and the occasion calls for a summer birthday dress! I’m tackling the bustier style, which i anticipate may be a bit of a mission bec
Happy first Gotcha Day to this little dude! It’s been so fun to watch him grow up from a tiny little puffball into a Whole Cat, who is somehow also just a tiny human fellow in a cat suit 💕 here’s to another 365, and may the future, perha
Finished Scarf!! It took a while for the weather to cooperate for these photos but that’s all good because it gave me time to write my blog post! 

This is my Very First Ever project on a rigid heddle loom- mine is the @ashford_wheels_looms 16&
Archive
  • October 2024
  • April 2023
  • March 2023
  • February 2023
  • November 2022
  • March 2022
  • January 2022
  • November 2021
  • September 2021
  • July 2021
  • January 2021
  • April 2020
  • March 2020
  • August 2019
  • July 2019
  • June 2019
  • May 2019
  • April 2019
  • March 2019
  • February 2019
  • December 2018
  • November 2018
  • October 2018
  • September 2018
  • August 2018
  • July 2018
  • June 2018
  • May 2018
  • April 2018
  • March 2018
  • February 2018
  • January 2018
  • December 2017
  • November 2017
  • October 2017
  • September 2017
  • August 2017
  • July 2017
  • June 2017
  • May 2017
  • April 2017
  • March 2017
  • February 2017
  • January 2017
  • December 2016
  • November 2016
  • October 2016
  • September 2016
  • August 2016
  • July 2016
  • June 2016
  • January 2016
  • December 2015
  • May 2015
  • April 2015
  • March 2015
  • December 2014
  • November 2014
  • October 2014
  • August 2014
  • June 2014
  • March 2014
  • January 2014

Get the Updates!

Put your Email Address in the box, and I'll ask the friendly internet robots to send you a message when I post an update!

I'll send an email for each new post.

Thank you!