
I've made a sketch-to-finish custom dress you guys! For someone who isn't me!
Here's the thing. The answer to "What do you want to do when you grow up?" used to change pretty weekly for me (so did my favorite color, and my favorite food...) but for quite a long while now it's been some version of the following: I commute from my house down a winding brick path through lush flowers and shade trees to a small shed at the back of the property. The shed contains every sewing machine I've ever wished I could have, plus cutting tables, a gravity feed iron (it's the small things) and room for my obscene fabric stash, and it's all perfectly decorated and doesn't look like a hoarder lives there, even though one totally does. (There's a sitting area, heating, a bathroom, and a small kitchenette so I never technically have to leave if I don't want to) I make custom clothing for people (but I never have to hem pants or make curtains) and I somehow get paid for this magical life. There is also a cat that I'm somehow not allergic to.

For reference, I'm not a complete nut case. Brooks-Ann Camper is an amazing custom wedding dressmaker (full disclosure, I've read every single post on her blog) - and her studio is not unlike my imaginary backyard shed. Her custom dresses are beautiful and (perhaps more importantly) always exactly what her clients want. I want to be Brooks-Ann.
I guess that's why I decided to treat this project the way Brooks-Ann treats hers.
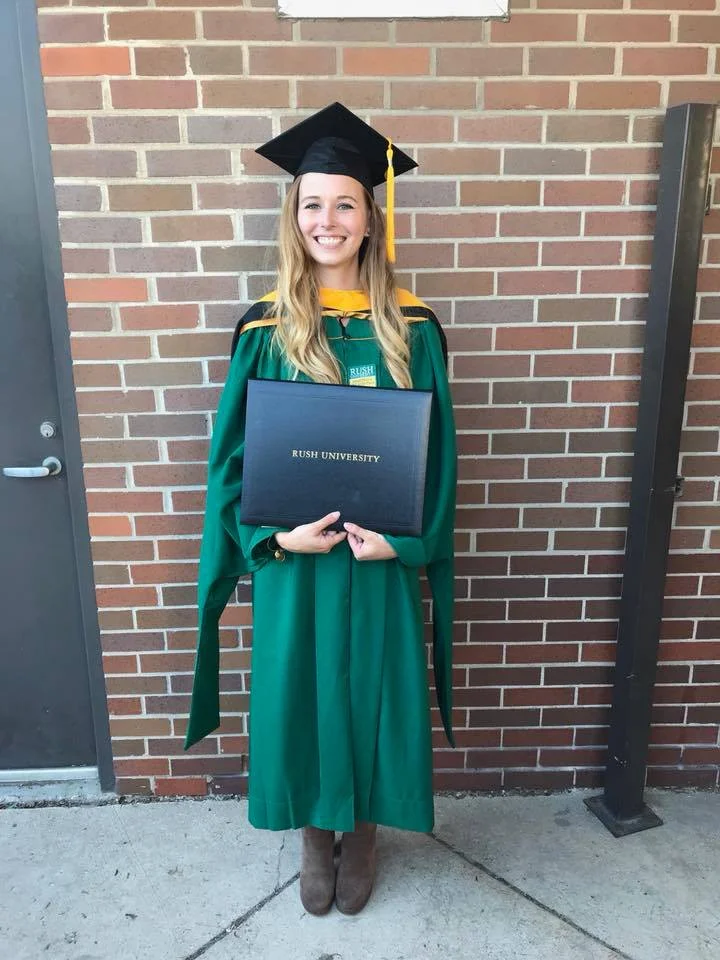
Meet Lillian - one of two younger sisters. Lillian has just recently graduated with her Master's in Speech and Language Pathology, and for a few months she was here, in New Zealand, finishing up said Master's with an internship. Because Lillian apparently has more faith in me than I do myself, she asked me to make her graduation dress.
You have to understand a thing before we keep going: The last time Lill asked me to make her a dress, it was for her prom, and not only was I behind on construction the whole time (yes, that bodice is a solid wall of embroidered seed beads), I also had very little pattern drafting skill and the dress ended up being so comically small that the zipper broke and my mom had to lace her into it with a strip of ribbon and I'm pretty sure she was late to prom because of it. It was a nice dress, but not one of my shining moments as a sewist.

The prom dress was seven or eight years ago now, so I'd like to think I've improved a bit (I know how to actually draft patterns now! And make fitting adjustments! That's a start) but I was still nervous. Prom aside, it's also the first time in a solid couple of months that I've made anything that wasn't for myself (baby clothes don't count...) and since Lill is not my twin, I'd have a whole host of different fitting issues than I'm used to dealing with in my own clothes.

First, we started a Pinterest board so I could get an idea of what she wanted. She'd point out specific elements on different dresses, and we'd throw around different ideas to combine them. Here are some of the highlights:
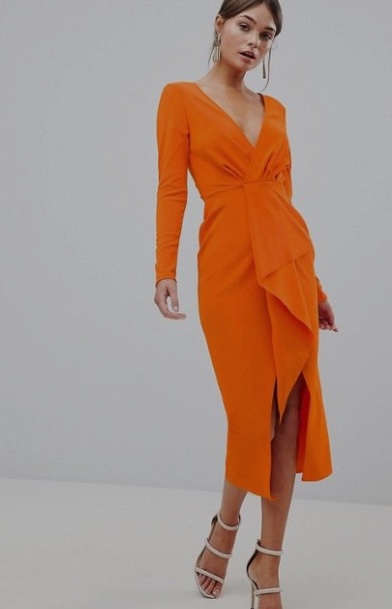


She wanted fabric that had a fair amount of structure, and pretty closely fitted minimalist shape with some kind of stand-out design feature. It had to be temperature appropriate for a late spring evening graduation ceremony, with the expectation that there'd be drinks and celebrations after. The skirt couldn't show under the graduation gown, and she wanted it to match the green of the gown as well. Eventually, we ended up with more pin-spiration than we knew what to do with, so we decided to take all of our ideas shopping and see what popped up. After a few fabric store misses, we landed at Draper's Fabrics on the last day of their 50% off sale, and found the perfect navy blue silk dupioni for the dress, and a deliciously soft silk crepe de chine for the lining. Finding the fabric allowed us to condense our ideas down into one plan, and I drew a few sketches of our dress right there in the shop. I don't really wear navy and I almost always go for fabrics that have as much drape as possible rather than fuller bodied fabrics, so I was really excited to get to play with this new style!

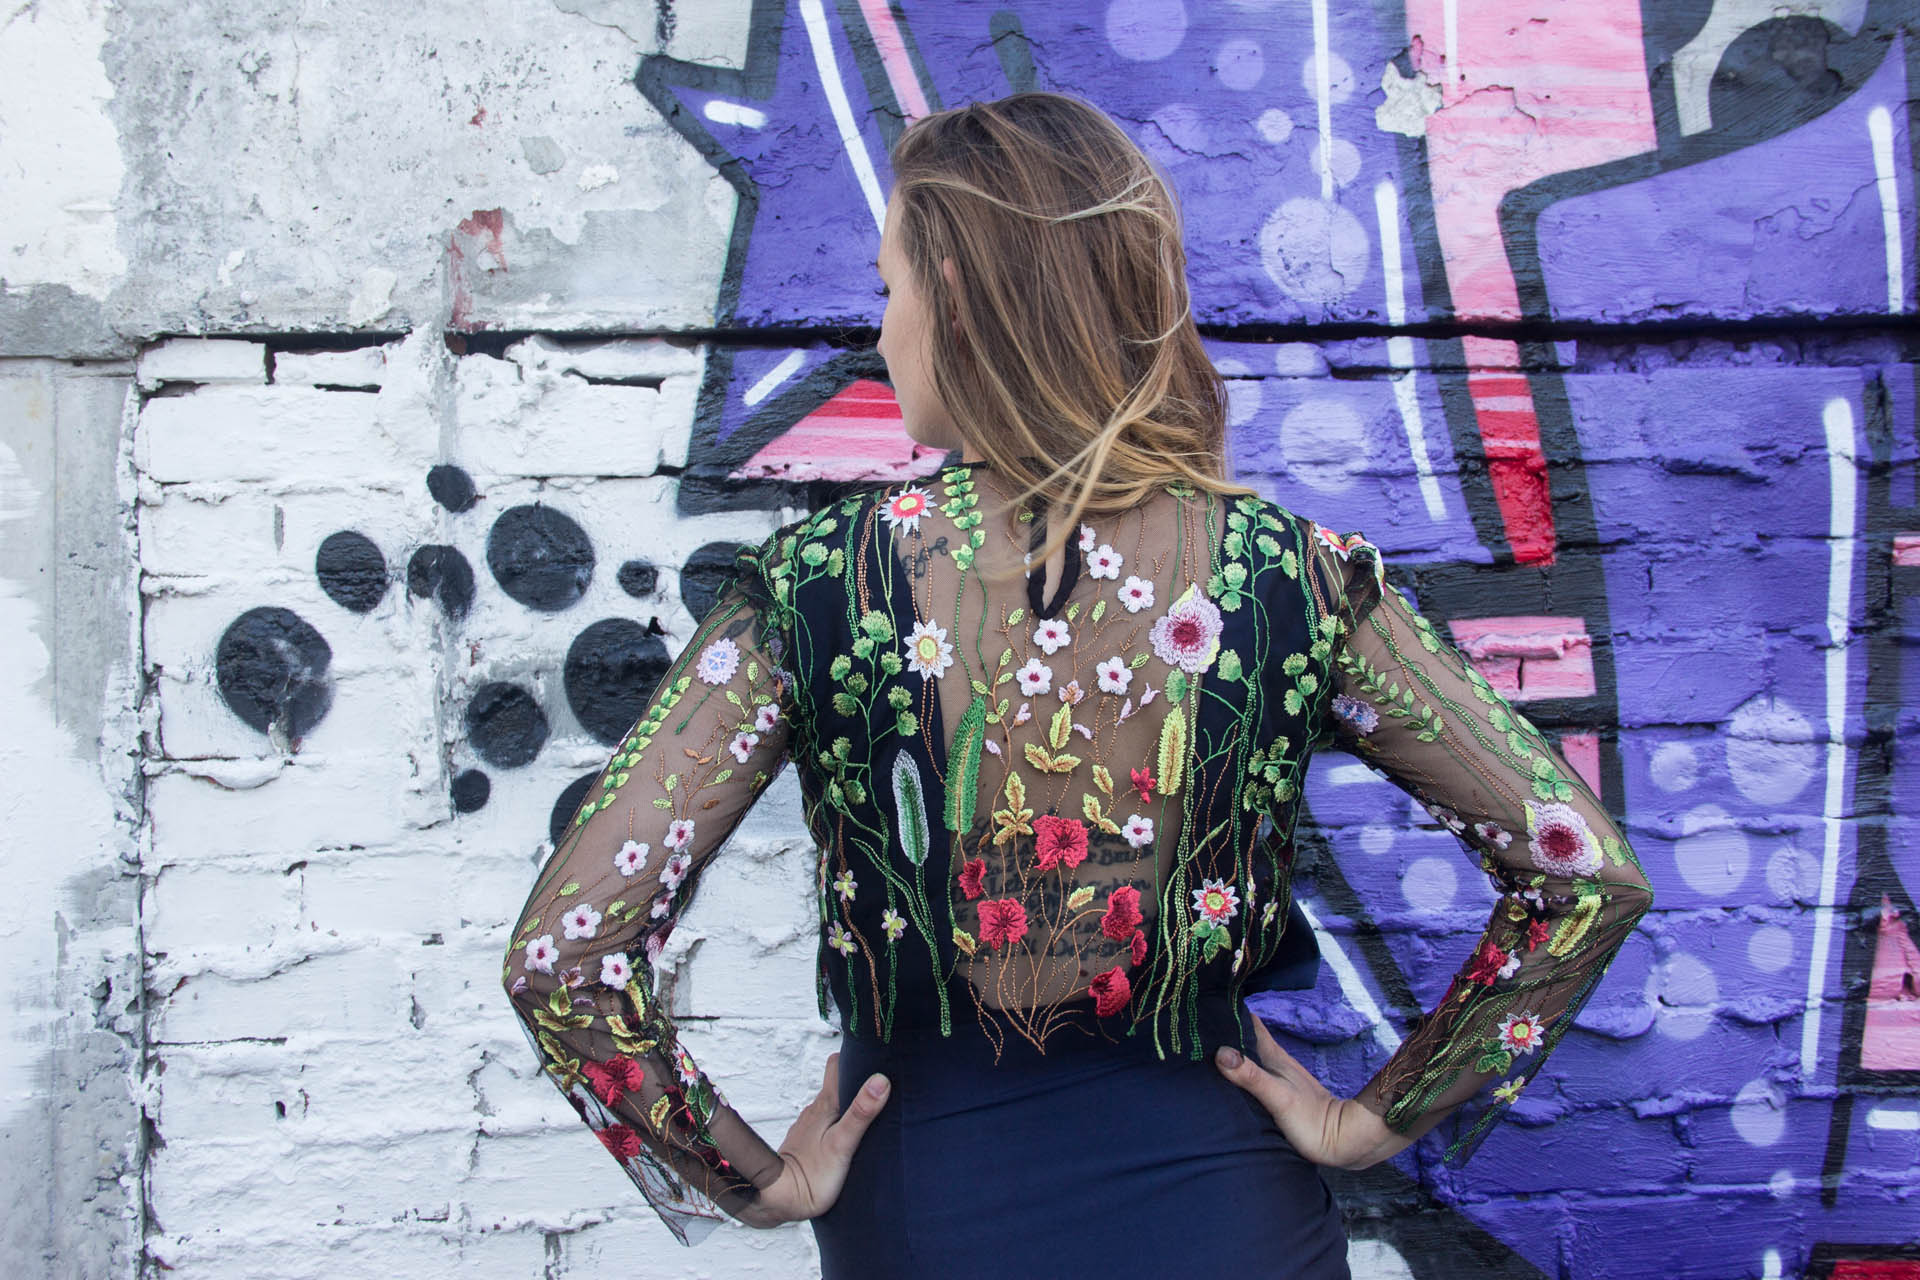
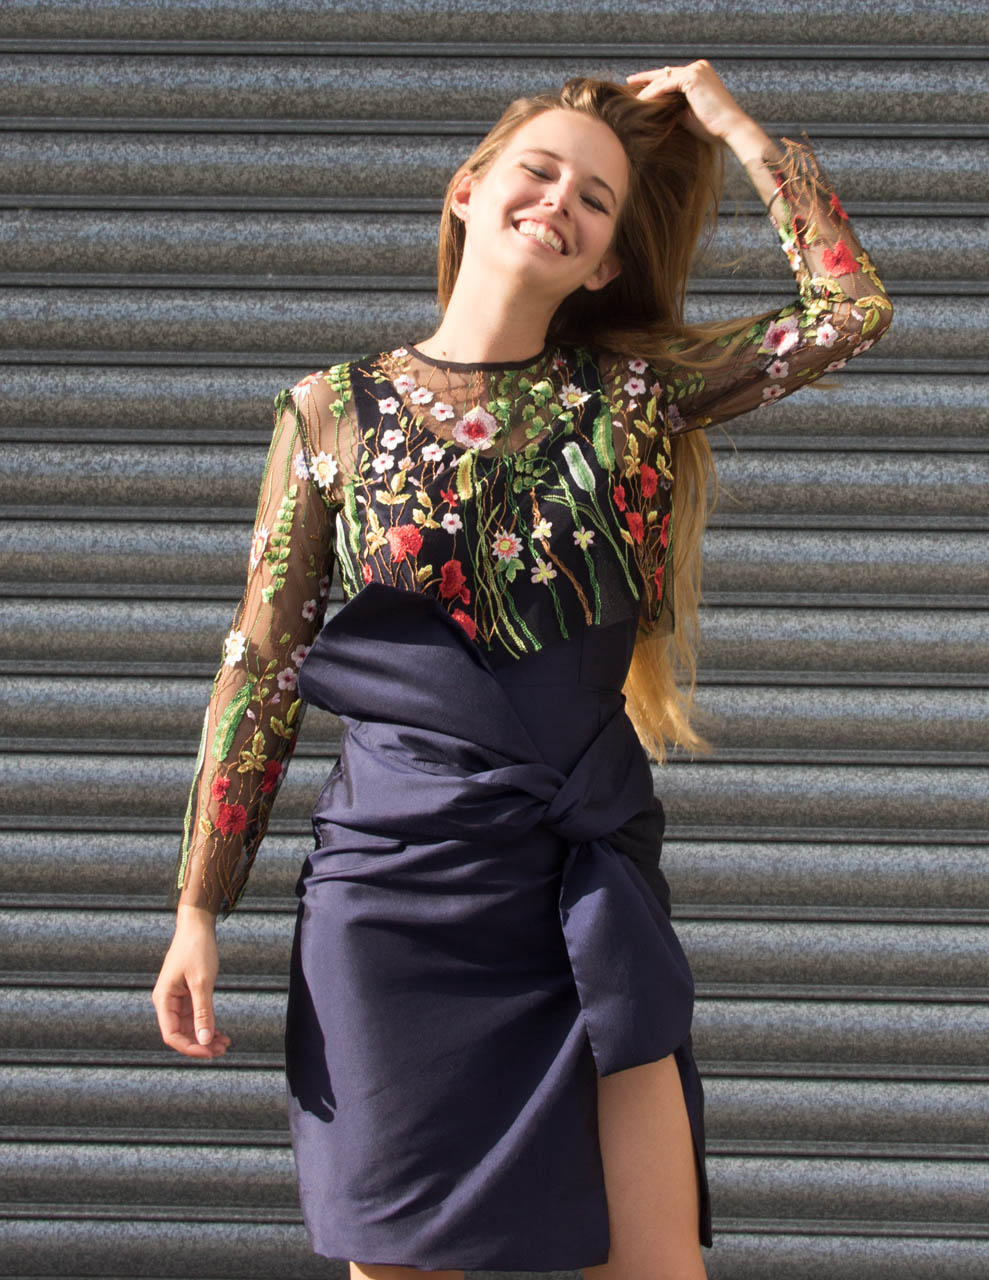
We did hope to find a sheer embroidered fabric to work in somehow, but couldn't find anything local. I ended up ordering this embroidered tulle from Stonemountain & Daughter and having it shipped from California - and it's turned out completely perfect! We decided on a fitted backless pencil dress with a front slit and a tie-sash detail secured in the side seams, and then a separate long sleeved shirt out of the embroidered tulle that will add some colorful detail to the dress, and that can also be worn separately with other outfits.

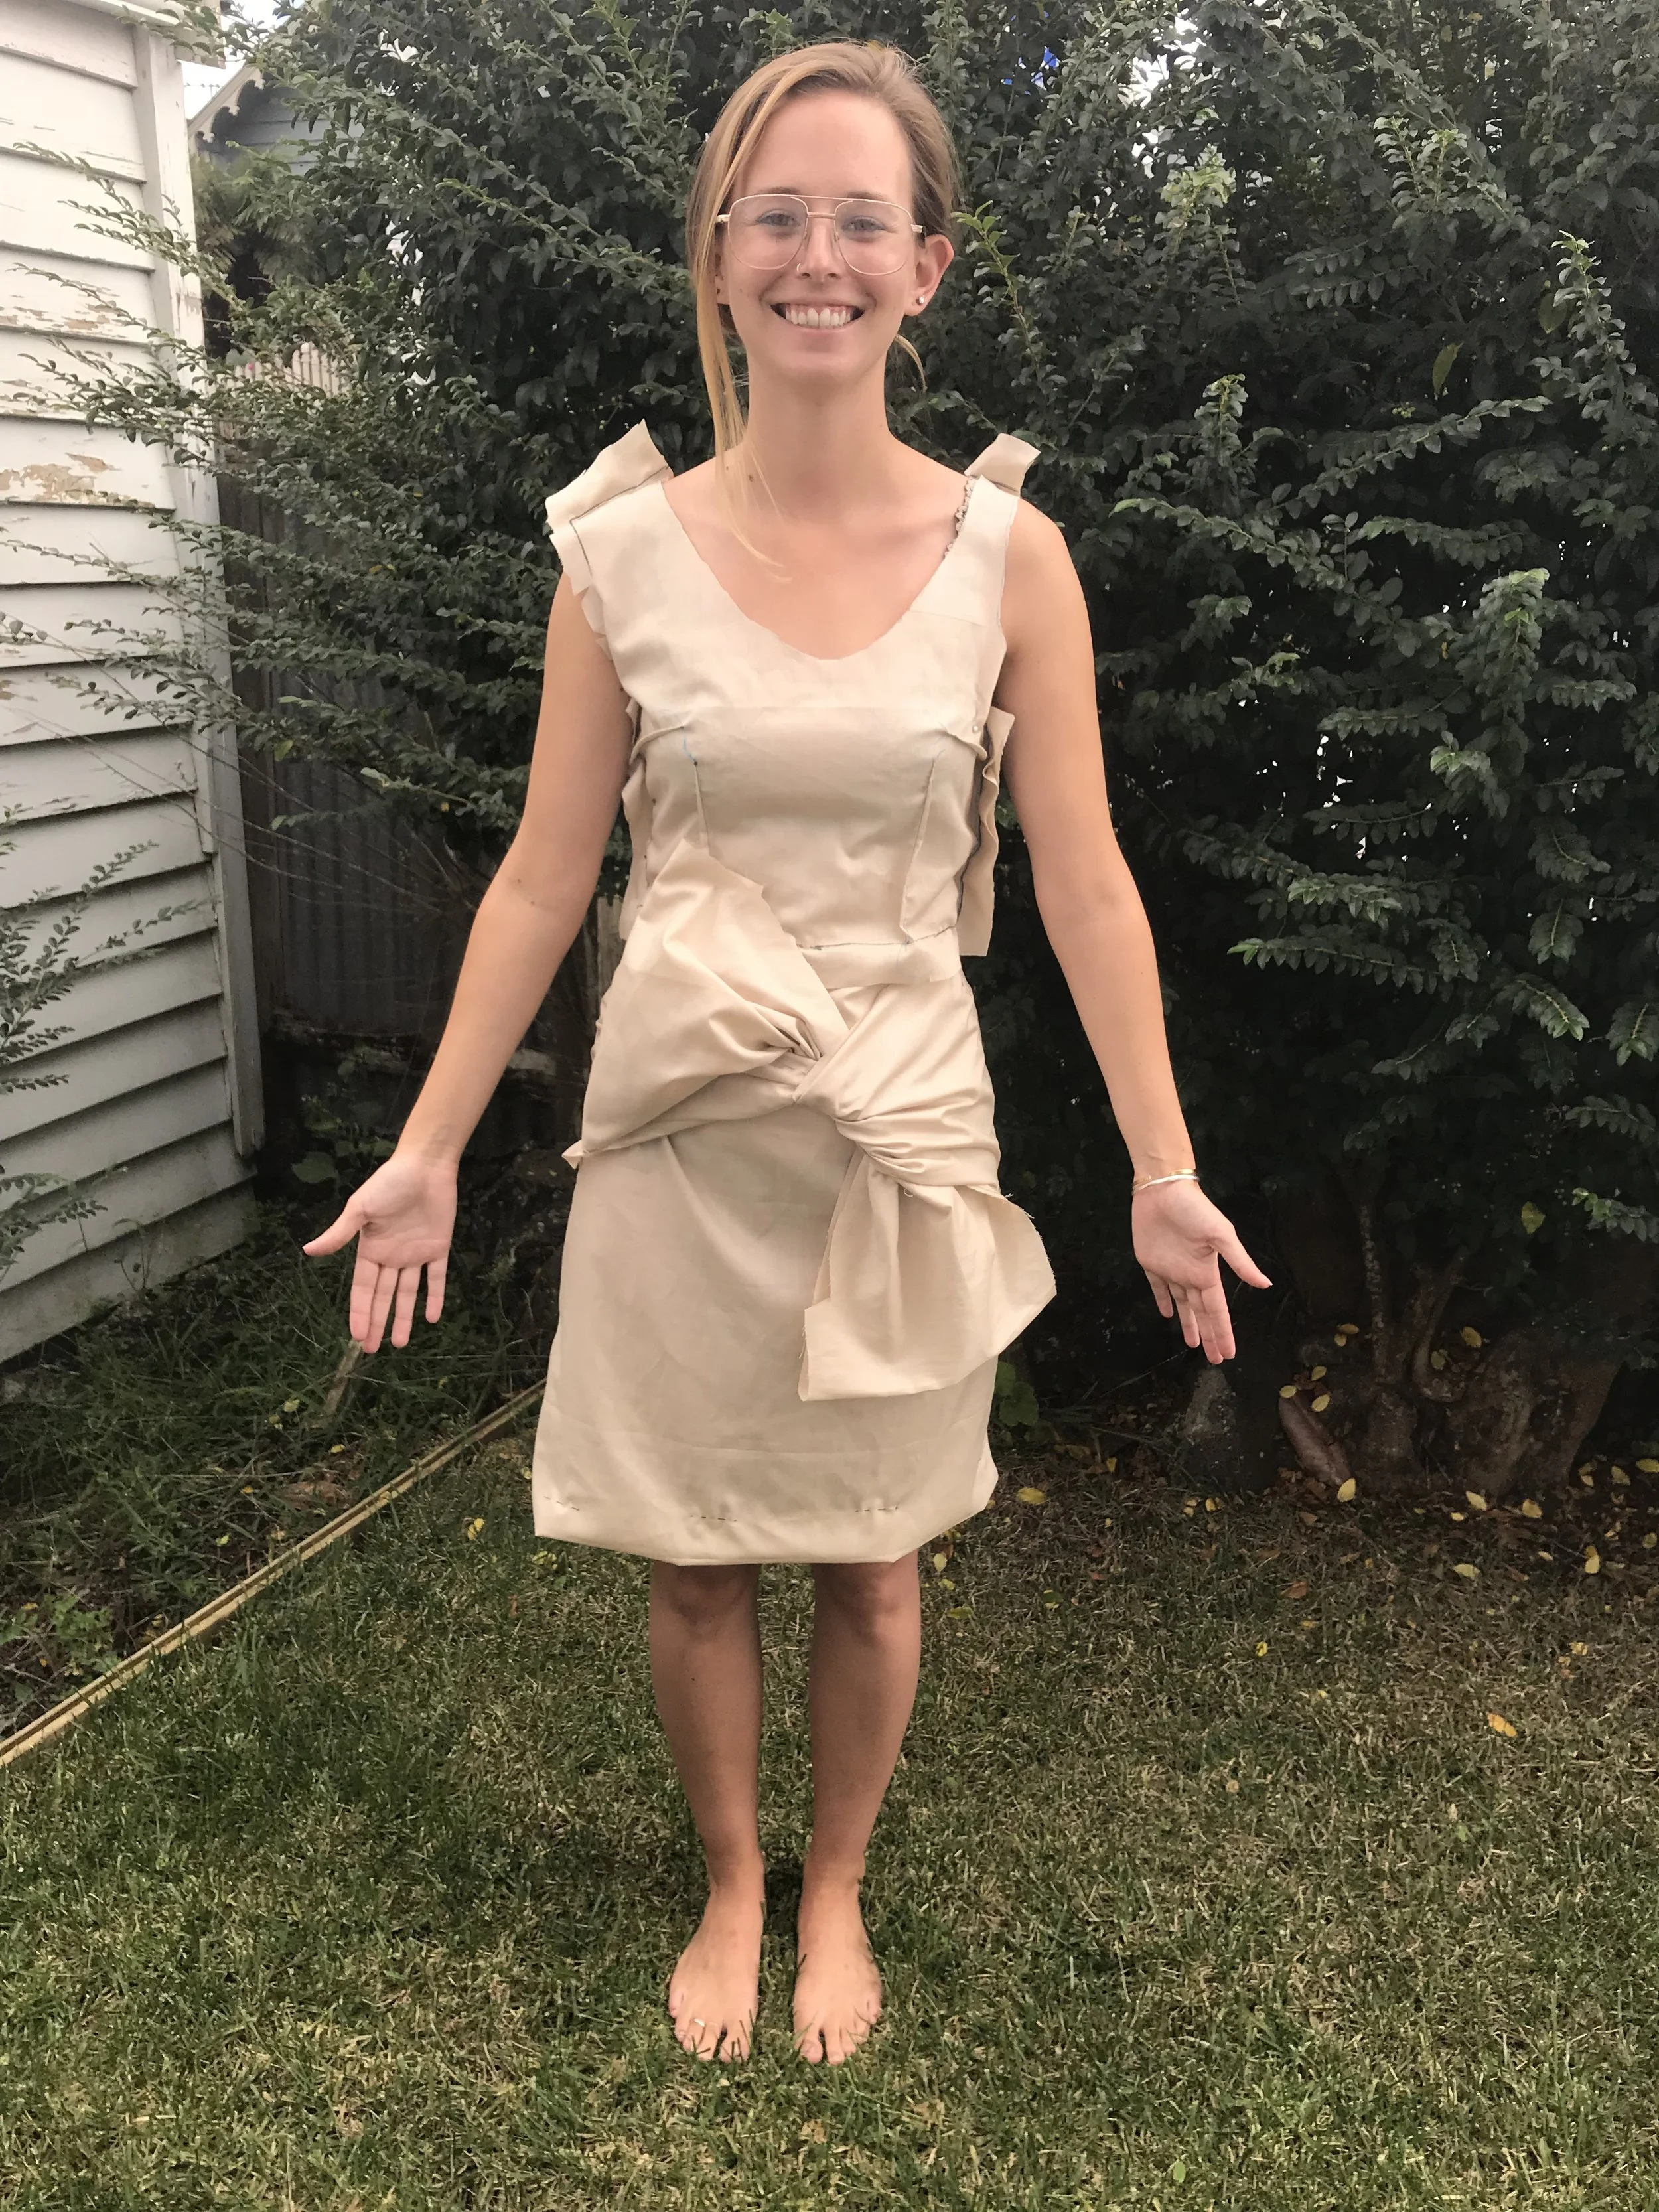
I took down all of Lill's measurements and drafted a torso and skirt block for her, and we drew on and cut up that block to establish the design lines of the finished dress. I also added some sashes to the muslins so we could play around with tying them at different lengths. My initial block required a larger bust dart and a 2" sway back adjustment. For the muslin, we took 3" off the hemline and I rotated some armhole gaping into the bust dart, and slightly adjusted the slope of the shoulders. From a huge sewing nerd perspective, it was so much fun to work on a body that has a different shape to mine! I've never needed a sway back adjustment in my life, but I felt very pleased with myself for recognizing that one was required and executing it too!
Because I wanted to make sure everything that was happening was in both of our heads, I was particularly meticulous with the note-taking and diagram making for this project. I've got a whole two pages of notes, sketches, and measurements in my bullet-ish journal, which not only helped me organize my thoughts as the project progressed, but should also be a valuable resource in the future the next time I want to make something with Lill's measurements or with a similar fabric/construction. Plus, it's fun to have and look back on!

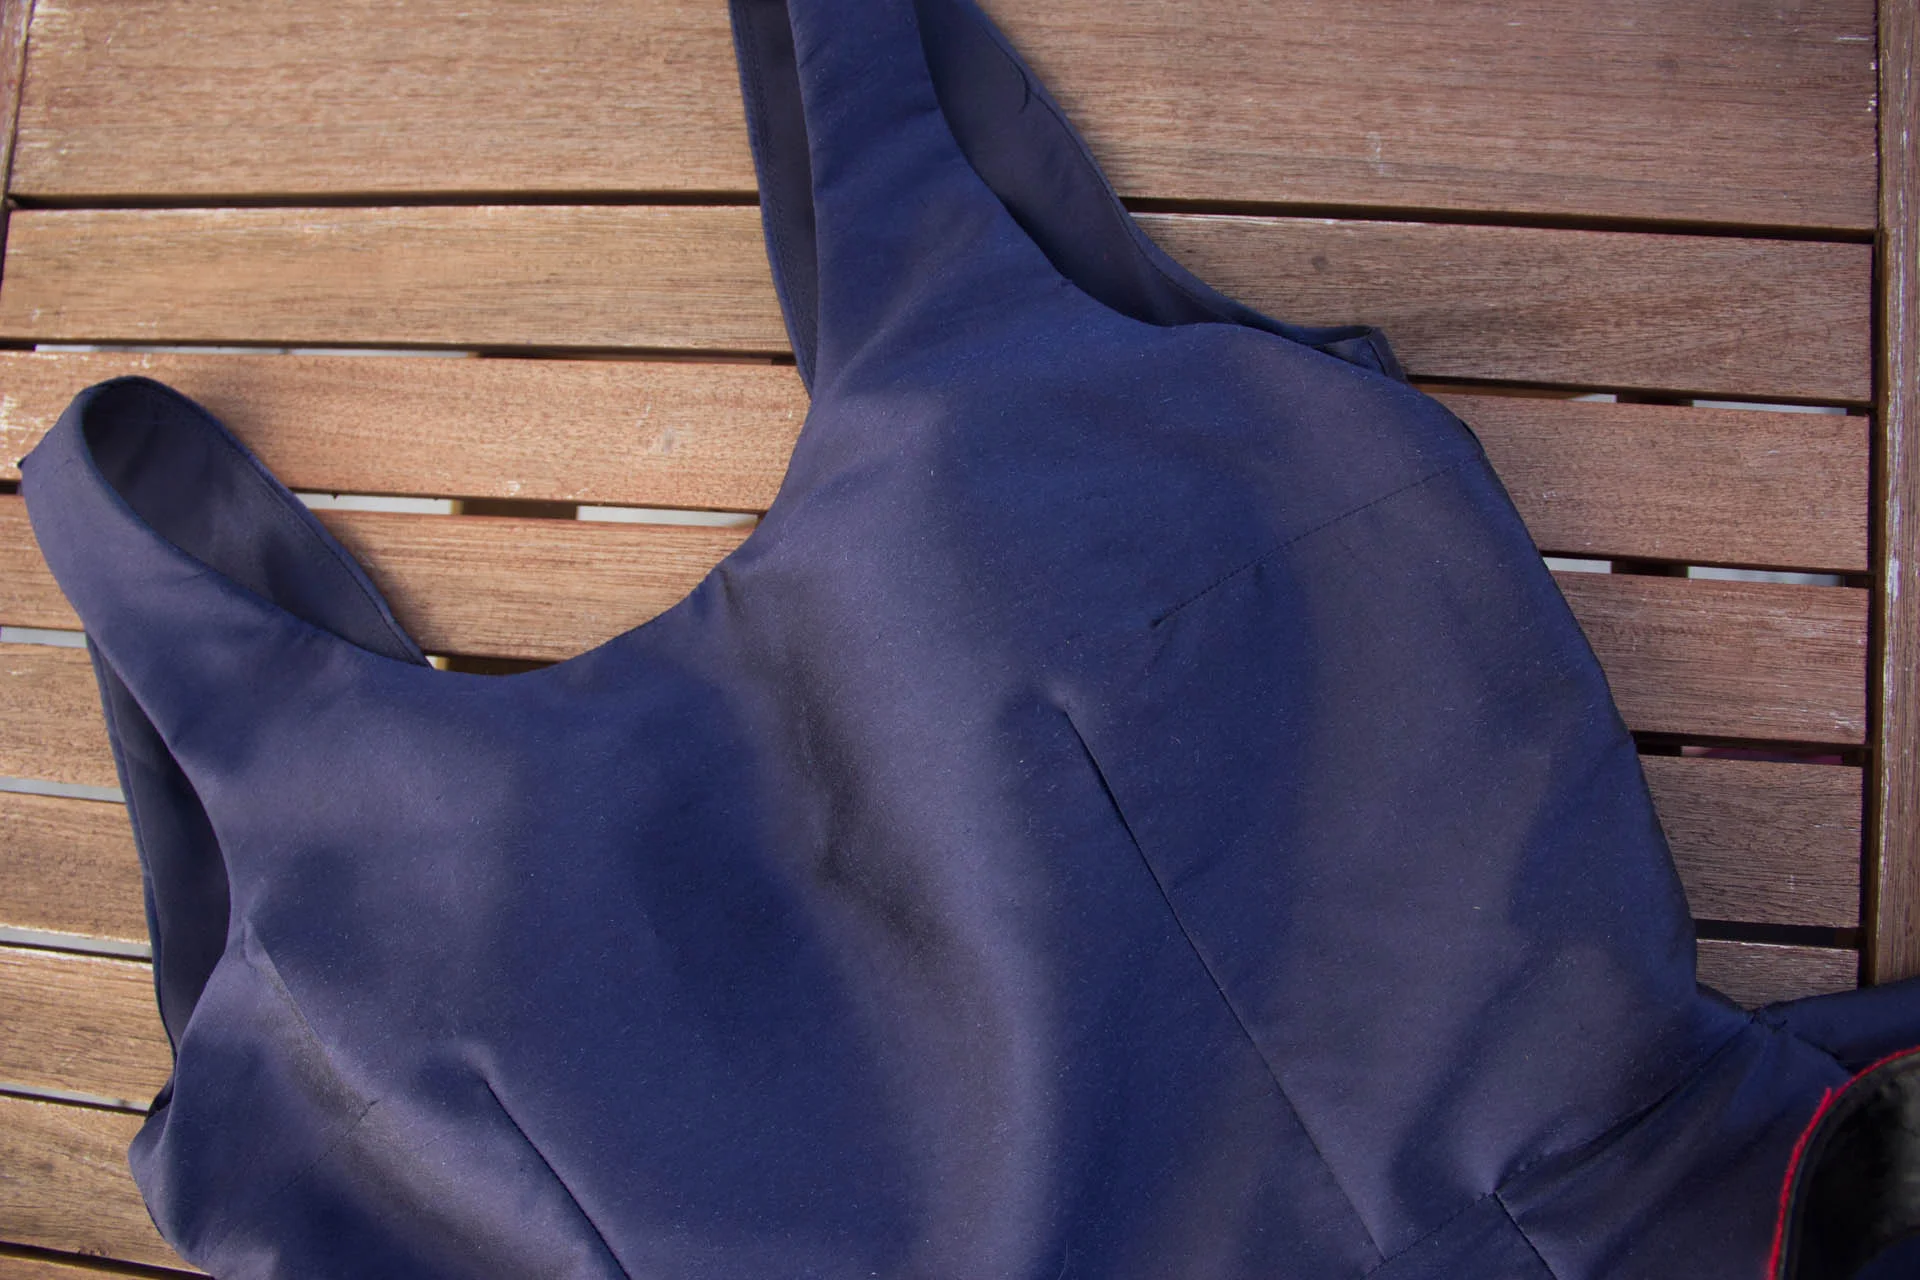
It's a pretty straightforward sew, made even easier by the stability of the dupioni. I constructed the bodice and skirt separately, attaching the lining to the neckline and back seams and understitching them before sewing the armholes. The shoulder seams I left alone, to be hand stitched at the final fitting stage just in case. I also stitched a strip of stay tape, held slightly taut, to the edges of the back opening so that they'd stay in place over the curve of Lill's shoulder blades. This makes those seams look slightly rumpled on the hanger, but the seams even out when she's wearing it. After the bodice, the skirt turned into a bit of an origami session. After constructing the skirt and skirt lining front and back pieces, I stitched the lining to the skirt front along both edges of the slit - then I stitched the linings of skirt and bodice together, and turned the whole thing inside out through the zipper opening to stitch the skirt and bodice of the main fabric together, which basically completed construction. I left the hem, the zipper, and the shoulder seams for the final fitting and moved on to the tulle shirt.

This is the second delightfully fitted sleeve I've drafted with the Threads instructions, and I didn't think I could be happier about a sleeve than I was when I finished my linen collared shirt. I was, of course, nervous that I was going to end up with Huge Sleeve Problems, and then the darn thing fit on the first muslin. Doors are opening, I tell you. Anyways, the shirt is really, really simple. I graded up one size from the bodice block to give Lill a bit of breathing room, eliminated all darts to keep the design uninterrupted, and then just drafted the sleeve. (Oh man, one year ago Kat would die. Just drafted the sleeve. Just like that!) It's sewn with a regular straight stitch and no edge finishing because the tulle doesn't unravel anyways and I couldn't think of a way to finish them that would be minimally visible from the outside. I made a back keyhole opening with a bit of black rayon bias tape so she can get it over her head, and that was pretty much it!

When Lill came over for the 'final' fitting, we only had a few changes to make. I pinned the seamlines where the zipper would be inserted, I pinned the shoulders as snug as possible (to prevent slippage) and we made an adjustment to the shape of the skirt. I had drafted it to fall almost straight down from her hips, but we decided that, in combination with the bow, there was too much fullness to contend with there. I took in the side seams about 2" at the hem, tapering to nothing at the hip so that the skirt has more of an inverted tulip shape. We also decided to add another layer of interfacing to the tie sashes since things were looking a bit floppy. Last, I gave her the option of some moulded bust pads (not the thick push-up kind, mostly just a layer of protection since the backless style means you have to go braless) - I tacked them to the lining so she can take them out later if she wants to.

I put 'final' in quotes because we actually had one more fitting after the last one. With the dress zipped (phew!) and everything else finished, we decided that we needed some snaps to keep the tie in the right place and prevent it from loosening up as she wore it. I added one for the bottom end, right below the knot and above the slit, and two for the top - one on each edge - so that it would have just the right amount of fold and texture to look effortless. I used a large snap for the bottom and two small ones for the top, so if she tries to tie it backwards she'll be able to figure out why things aren't working when the snaps don't attach. I made her practice tying it a couple times until I was sure she'd be able to do it without me, and then - just like that - it was all finished! We had a little neighbourhood wander to find some perfect photo locations, and then I sent her home with washing and ironing instructions.

In true Brooks-Ann style, I've held off posting about the dress until Lill's graduation, but it's official now! She's got her Masters in Speech and Language Pathology and she's off on her job search in the US! I'm so pleased that I was able to contribute to her graduation even though I couldn't be there, and I'm even happier that my contribution came in the form of a sewing project. Meanwhile, Jon's just happy at the concept that fabric came into the house and then left. She's not exactly five minutes up the road anymore though, so any future requests may be a bit more difficult.

It's the first week of May as well, so here's my little round up of my outfits:

1. Black Merino Tee, Mid Rise Ginger Jeans, and Thyone Cardigan
2. Self Drafted Jumpsuit (unblogged), Square Sleeved Merino Cardigan
3. LS Purple Merino Tee, High Rise Ginger Skinnies, Snoqualmie Sweater
4. Black Merino Tee, Mid Rise Gingers, and Green Striped Cardigan
5. Merino travel pants, Flowy white tee, Square Sleeved Cardigan (RTW bra today)
6. Ginger Flares, Purple Merino Tee, Tencel Blazer (Jon's socks - does stolen stuff count against me here?)
As for wedding dress progress, things have not gone as planned. I wanted to make progress each day of the month, but it seems I can't manage it at the end of a workday - this week, I only made progress on things on Friday, Saturday, and Sunday. To be fair, I made quite a LOT of progress this weekend - a few rows on the shawl, plus the fitting of the ceremony dress bodice (video soon I promise!) but it's clearly going to take a bit of work if I'm to make as much progress this month as I wanted. We'll see how this week goes.