
Hello, dear reader. It was my birthday this past Wednesday - I'm 26, and if you believe the media it's all downhill from here, but I for one feel like I'm having a pretty great year. I've tried really hard to make local, creative friends and in that have succeeded so far, I'm about 80% happy with the clothes I'm wearing every day (which is a solid amount higher than that number's ever been), I'm very happy with my life situation and Jon is about halfway through his Paramedicine degree as well. He's past the stage of worrying that he made the wrong choice in quitting his job and going back to school, and on to solidly enjoying the path to his dream career. Living with a person who's carrying out their dream really makes you want to pursue yours as well, so I'm working on that. I'm just not sure what my dream is yet... it sort of changes weekly.

I have this sort of mini-tradition/weakness for making a birthday dress (I'm definitely not the only person with this tradition but y'know...) and although I've only been doing it for four or five years, I'm still always happy to have a dress whose 'first wear' is on my birthday. It makes for fond memories, at least. This year, I've ended up with quite a few projects that have deadlines - a coworker's baby is due in a few weeks and who needs a little handmade merino wardrobe, I've got some self imposed wedding progress to make, a few small gifts, a vacation requiring a capsule wardrobe (another weakness, I'll admit) and Frocktails Auckland (a social event for people who make stuff to meet/eat/drink/be merry/take lots of photos) there's no requirement to make something new... but you know - any excuse for a party dress. I feel like I'm hitting all the sewing stereotypes in one paragraph here. I just need a cat to lay out on the fabric I'm trying to cut and I'll have reached peak sewing blogger nerd-dom.

That's all a very long-winded way of saying that because I am the Birthday Girl, I get to decide what constitutes a Birthday Dress - and just because this dress is a wearable muslin for my Frocktails dress doubling as a beach dress for my vacation in August tripling as dedication to a self-imposed buying ban (until the stash can be contained), it is also allowed to be my Birthday Dress because I said so. Good? I thought you'd agree.

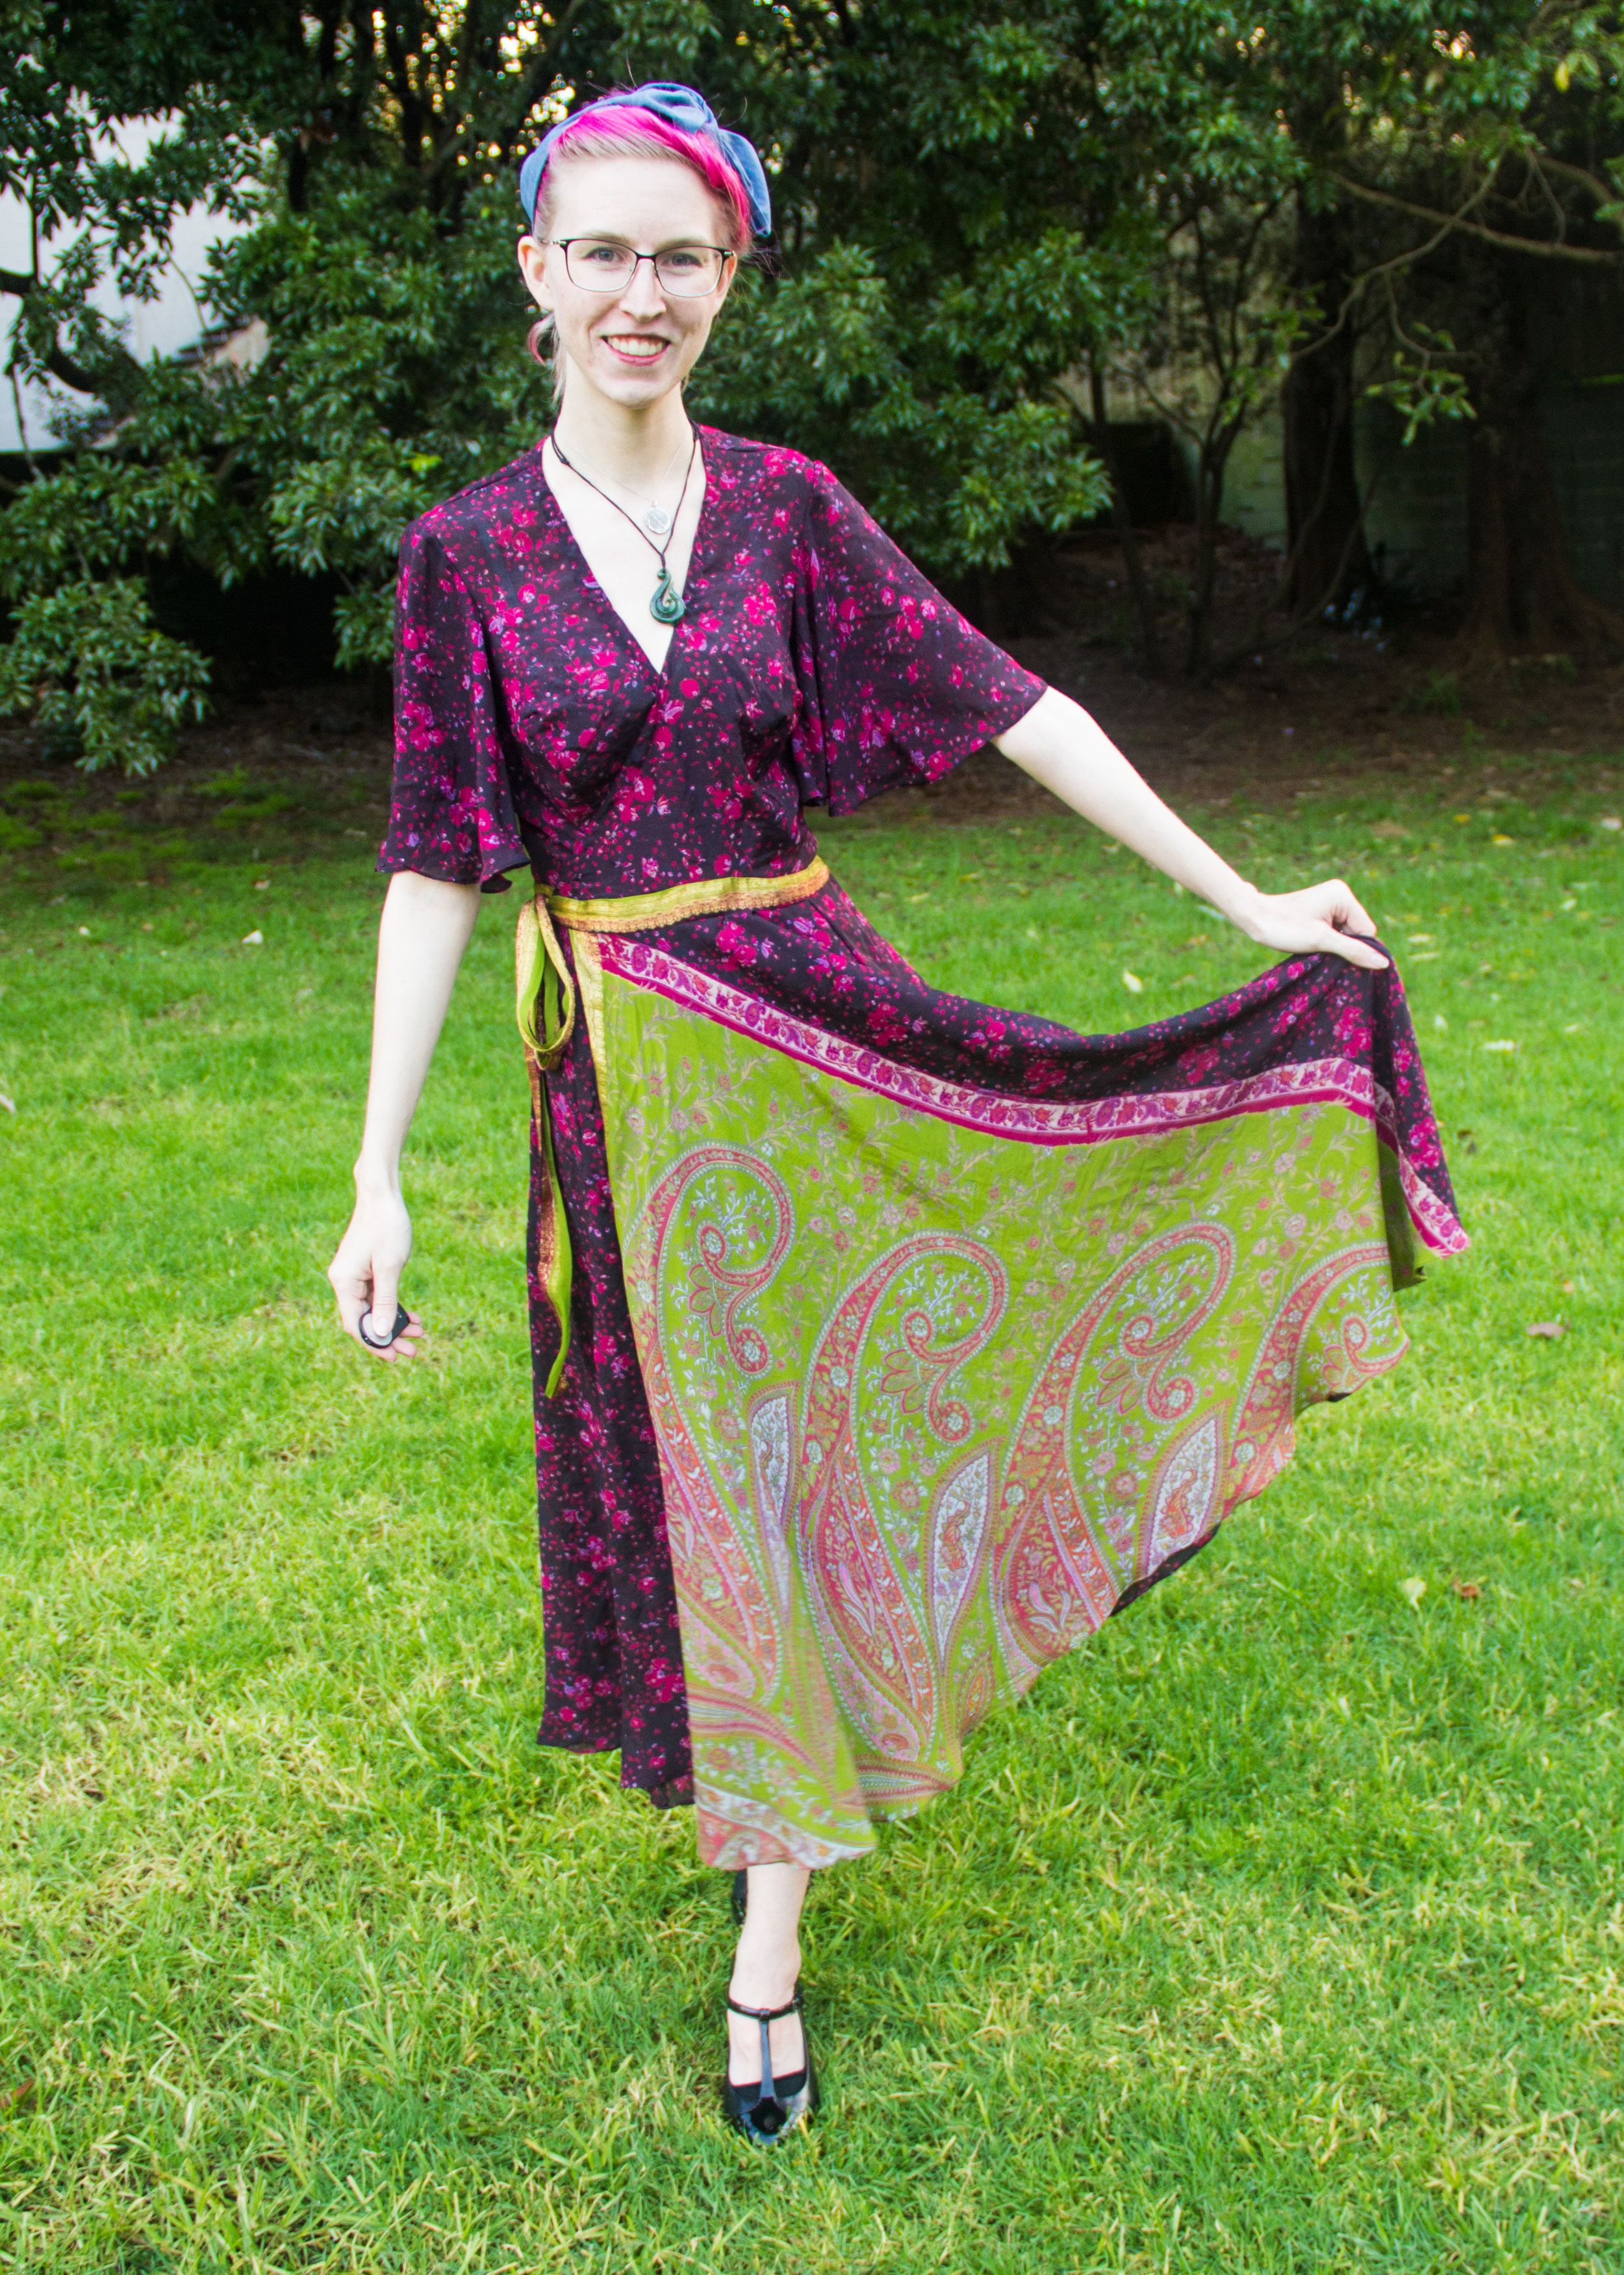
In addition to being all of those things, this dress is the first time I've ever drafted a wrap dress, and it is made from a secondhand sari that has been marinating in my stash for about two years. I was telling myself it was viscose (it was too inexpensive to be silk) but I did a little burn test from a scrap after I cut everything out, and well... let's just say I'd better wake up and smell the burning plastic. I do love that print, though. 1m at one end of the sari switches from the purple flowery print to a lime green paisley print which I incorporated into the front panel of my skirt. So cool!

The design for my Frocktails dress was pretty vague until I found the perfect fabric for it, but as the design came together I realized that it was also perfectly suited to this sari fabric - hence the wearable muslin idea. I knew I wanted a wrap dress with flutter sleeves and some kind of dramatic skirt, and for a wearable muslin I couldn't be happier with how it turned out! Shall we have a look at the draft?
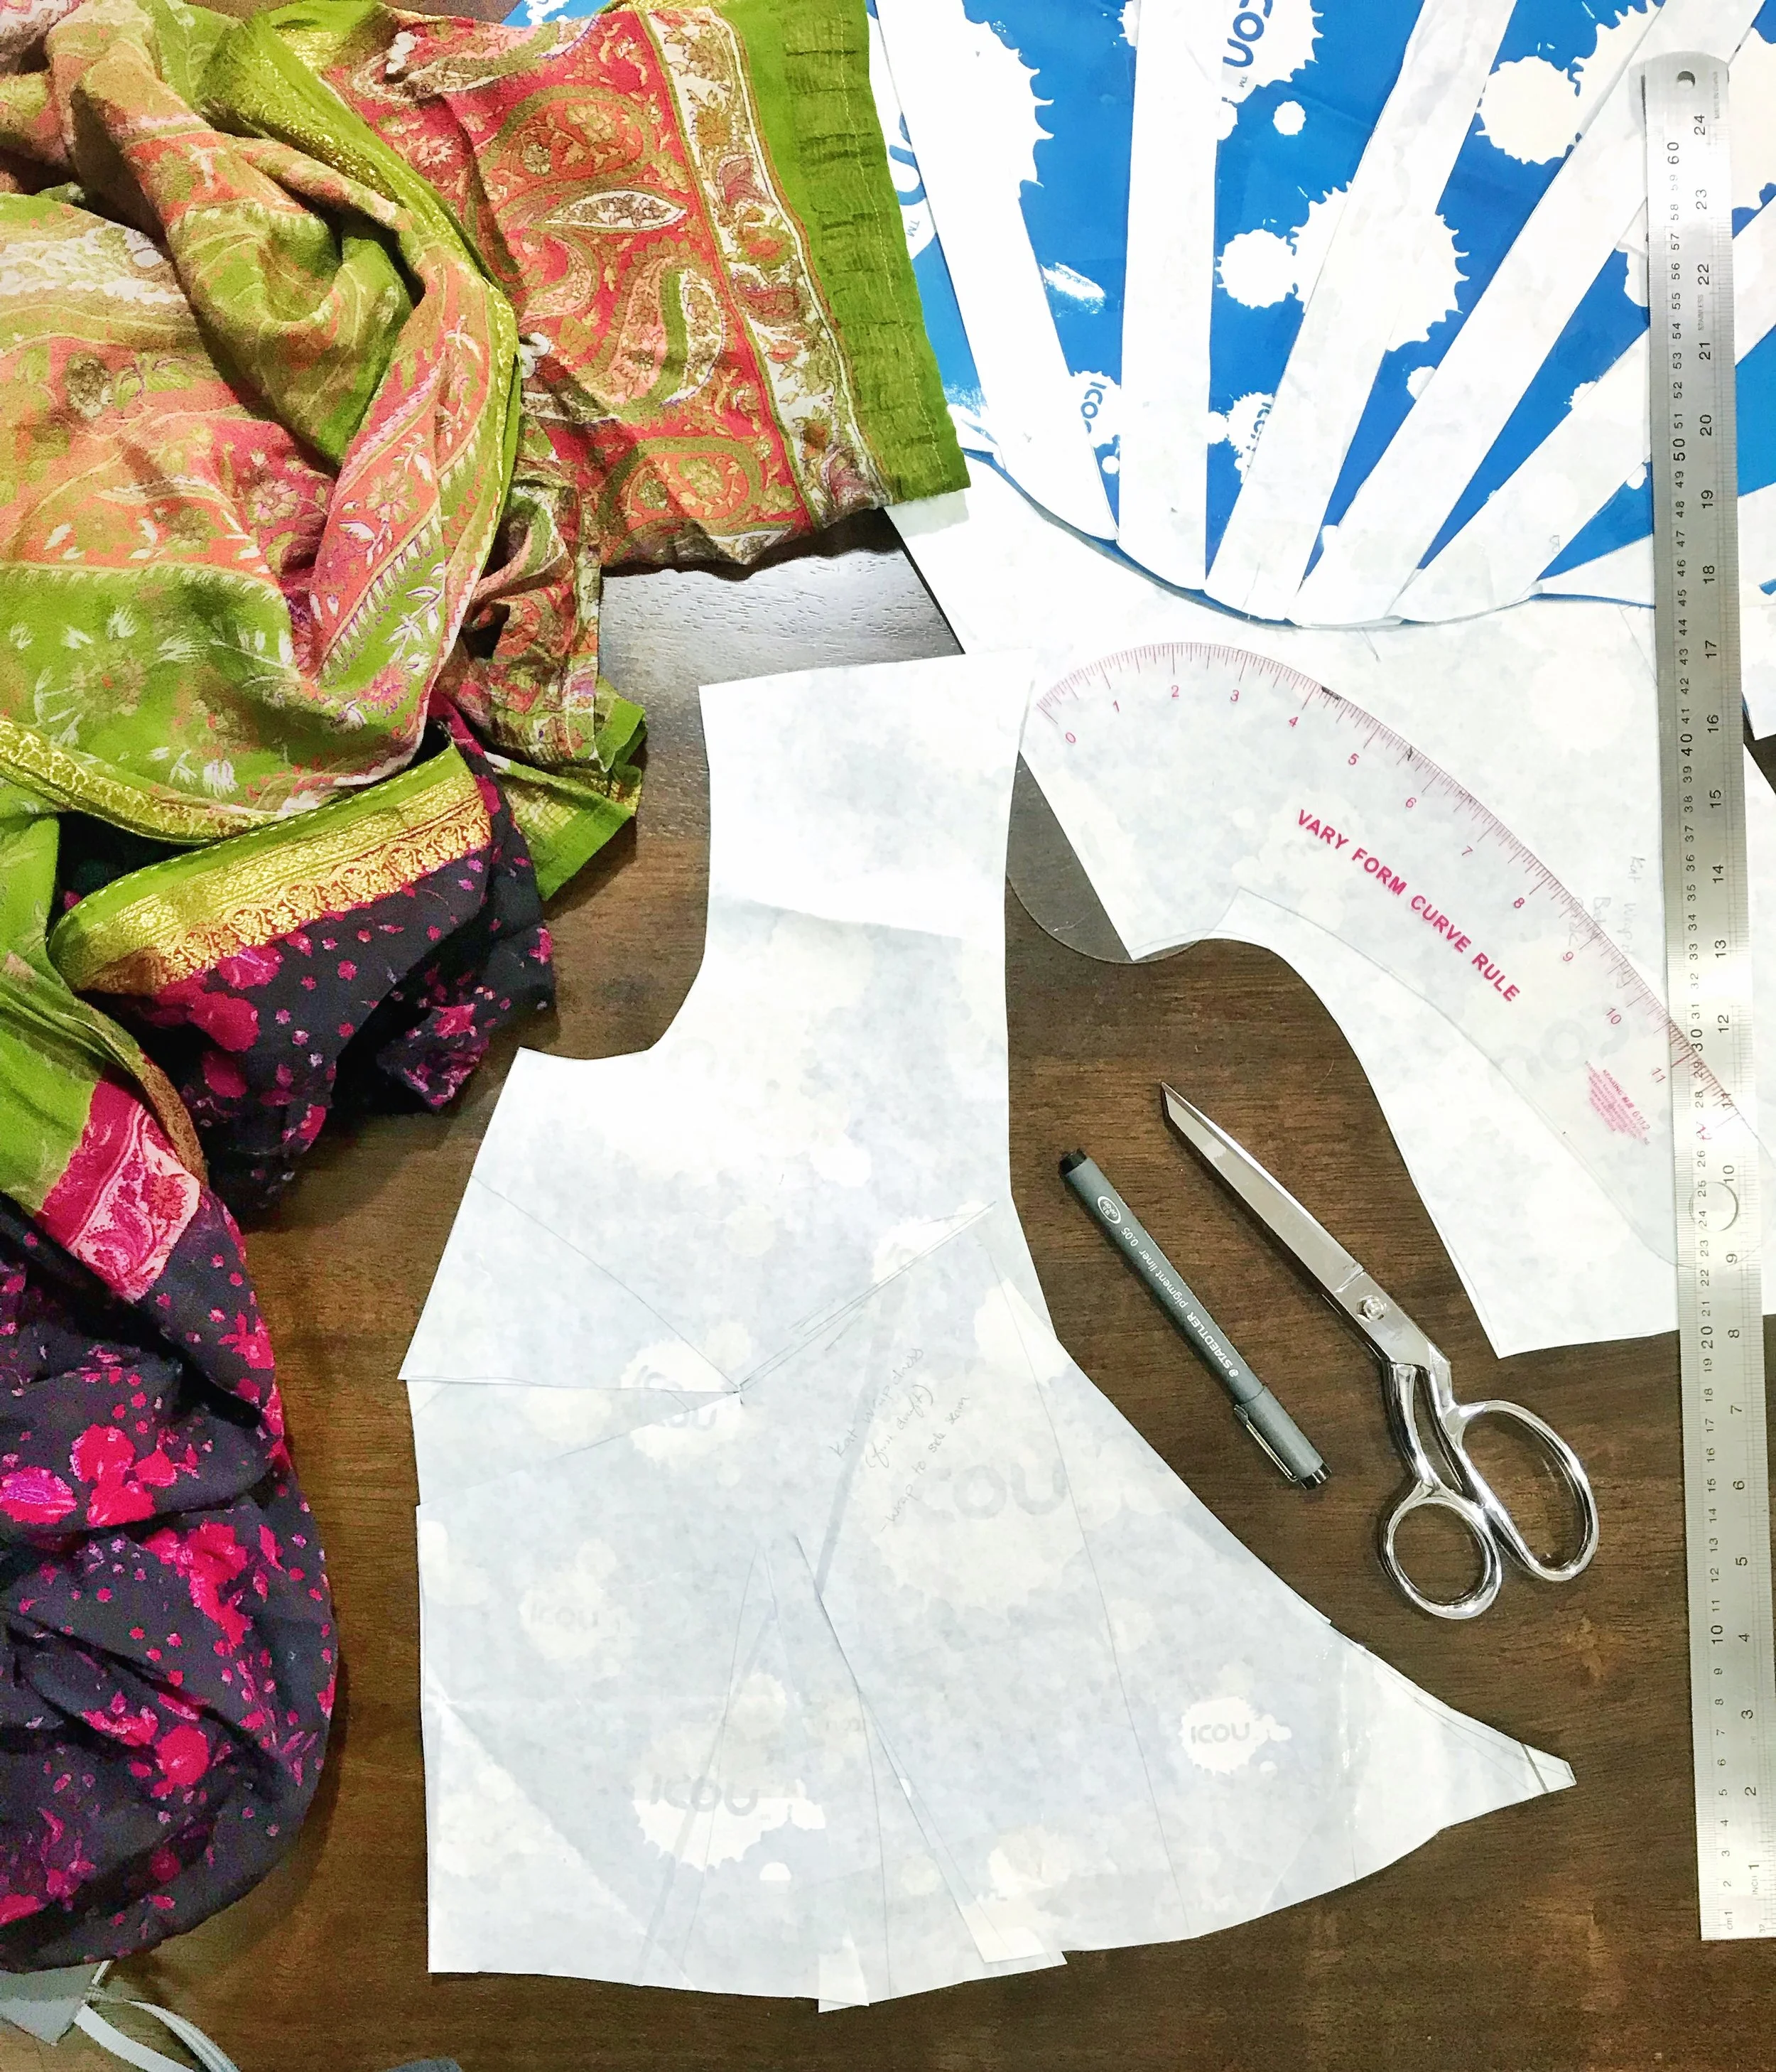
I started with a version of my body block to which I'd added 1/4" of ease to each side seam and dropped the armscye by 3/8" - so a pretty close-fitting block with breathing room, basically. I traced out a full front and drew a curved line from the left shoulder to the right waistline, trying to cross the centerline about where I wanted the V neck to end up. Then, I cut along this new wrap line and removed the dart from the right side of the waist. This now becomes both the right and the left front of the wrap dress - it's really not as hard as it looks! The sleeve is a classic flutter sleeve - drafted by cutting my original sleeve draft into 1" strips and spreading them from the sleeve cap out to the hem. What a funny looking sleeve cap curve it turns into!

I made a quick and dirty muslin with some leftover fabric because the thing with wrap dresses (both RTW and patterns) is that if you have any kind of a bust, you're going to have bust gaping. Since the wrap line pretty much directly crosses the bias of the fabric, since I was planning on working in shifty fabrics that would have a lot of give on the bias, and since I am a person with a bust, I knew I was going to need to dart some excess fabric out of my new neckline, but I had no idea how much. I used a leftover fabric from Lill's beach cover up - a shifty rayon that was the closest to my final fabric I could get without spending money - and knocked together a bodice with one sleeve just to see how things were going to go. As expected, I had a pretty significant bust gape situation going on. I pinned out the excess at the neckline so that it met the apex of the breast, transferred the width of this new dart back to my draft, and then redistributed the width of that dart, putting half in the bust dart and half in the waist dart (I felt it was too much to go into one dart all on its own - I could also have created a shoulder dart here but I don't generally like shoulder darts all that much).

It looks REALLY funky as a draft - the neckline curve is quite severe, and both the bust and waist darts are pretty large, but the draft doesn't lie. I decided to go ahead with my wearable muslin and see if I could gain any additional fit knowledge by making the completed garment. My Frocktails dress fabric cost more than anything else I've made in quite a long time (there's an underlining involved so it's 8 meters of fabric) so I wanted to be sure everything would be perfect (it's going to be an AMAZING wedding guest dress if I ever get invited to a wedding. Also, I don't have a winter formal dress so it's gonna be super useful... as far as frivolous dresses go...)

Okay can we just appreciate for a moment how DIFFICULT it is to take skirt-twirling photos with a camera on a self timer? I was SO DIZZY.
The Sari measured 5.5 meters and about 35" wide, so I had a fair amount of albeit narrow fabric to work with. Cutting the bodice took just over 1m of fabric, so about 4.3m left for the skirt - would you believe I ended up having to piece one of the circle skirt panels together, and that it didn't quite make a whole circle?! I don't think I'll ever understand whatever dark mystery of the universe it is that always eats my fabric up when I try to make a circle skirt. It's like, as soon as I say (or even think) the words "Circle Skirt" a black hole opens up in my sewing room and just swallows up half my fabric! You can't tell that I've got a pieced section, but I don't want one in my frocktails dress so I'll have to be careful.
The circle skirt is drafted to fit the 'wrap waist' measurement, which is NOT the same as the waist measurement of the finished dress. I don't know why it took me so long to get my head around this concept (it was late? I shouldn't be allowed to do math after a glass of wine?) but here it is - the skirt must be drafted for the whole length of the bodice - that's your finished waist measurement, plus the amount of overlap you've got in your skirt. In my case, that's a 26" waist plus 12" of wrap, so a 38" waist opening for the skirt. If you figure out the radius of your waist-circle, you can draft the circle skirt from there. (if you've never drafted a circle skirt before, first of all I would definitely advise getting on THAT bandwagon pronto because circle skirts are the bomb diggity, and second, if you need help drafting a circle skirt, just google 'circle skirt calculator': there are a lot of results there to help you out, so I won't add to that commotion)

So - skirt drafted, cut, and pieced together, bodice cut and sewn up (french seams in the bodice, and serged in the skirt because I'm a rebel and this is a wearable muslin after all), and I made an on-the-fly decision to use the sari's gold trim to make the waistband and tie of the dress. I originally wanted to trim the sleeves with it, but it turned out to be much too stiff and looked a bit like the sleeves were wearing their own petticoats.

I did end up having to make one fitting adjustment - my front waist was much too low, so the waistband sloped down in the front - that was probably made worse by the weight of the skirt. I took 1.5" of height out of the bottom of the bodice, grading back to nothing at the sides - for the dress, it was as simple as re-stitching the bodice to the waistband along the new line.
I finished the neckline with some self bias binding, and I'm very happy with how secure it feels - it passes the dancing, shimmying, and bending over tests intact, and it looks very nice as well. I think for the final version I'll try for a thinner bias binding (that chiffon is more sheer) and I intend to hand stitch it down instead of machine sewing the last pass, but overall it worked a treat!

Can you spot the pieced section of my skirt?
At this point, all that was left to do was hem the sleeves and the circle skirt. If you're part of that group from two paragraphs ago who has yet to make a circle skirt, here's another very important tip: Once completed, you should always let a circle skirt hang for a few days to let it drop before you finish the hem. because the panels are cut partially on the bias (but not completely) gravity is going to pull at those fibers at different rates and your hem will always be wavy if you don't give it time to settle. I also put off hemming the sleeves, because my flutter sleeve is basically just a half-circle skirt attached to an armhole, so they were likely to drop as well.
Whenever I have a skirt that needs to drop, I hang it in the bathroom, as close to the shower as possible, for its resting period. I have no scientific proof to back this up, but I think the steam helps it settle into its new shape.

(I didn't remember to take a photo other than this IG story)
I finished everything up on Saturday, and let it hang in the bathroom until Tuesday evening (Birthday was on Wednesday you see!) - and look how much my hem had dropped in that time! The seams were all on the straight grain, so the bias is in the middle of each panel - I ended up trimming almost 6" off some sections! The sleeves were less dire - only about 3/4" needed to be removed. I'm planning on hand rolling the hem of my frocktails dress (because several meters of handkerchief hem on chiffon sounds thrilling*) but I decided to use my Bernina's rolled hem foot this time around for both the skirt and sleeves. I do love the rolled hem foot, and I so infrequently get to use it! It's a bit fussy around the bias areas and it can get wavy if you're not careful - I stabilized with bits of tissue paper around the tricky spots.
*sarcasm.

Things I'll change for the next version:
-Transfer the drooping front waist adjustment to my pattern
-Consider pockets???
-French seams for the whole thing, not just the bodice
-Handstitch handkerchief hem skirt and sleeves
-Finish the neckline differently. Either hand bound bias, or perhaps a facing?

For the record, I was completely overdressed for work on Wednesday, but I'm really happy with how well this dress turned out! It's been a long time since I made a dress for myself, and even longer since I made one quite so dramatic as this. I'm loving it! Obviously it's hardly a wardrobe workhorse, but I knew that going in and I had too much fun making it to care. It's going to be perfect to wear at the beach, it fits well, and it fulfilled its job as a wearable muslin. I'm also pretty sure it would be fine to wear as a normal dress- for chiffon it's pretty opaque- though I might wear a slip underneath (as I did when I wore it to work) just in case.
Historically, when I've tried on RTW wrap dresses, I find that they fit funny in the arms, they gape at the bust, and they don't sit securely around my waist. I'm really pleased that I've managed to solve all three of those problems with this draft, added a sleeve that's nothing short of fabulous, and ended up with a really flattering dress. Can I say that? Can I say it looks bangin'? It's my birthday, I do what I want.
