

Okay, my little guinea pigs. Today we're trying something different.
I've been trying to think of ways to sort of 'grow' the blog. I'm not talking about making money, or getting sponsors, or that ~twelve ways to monetize your blog~ hoodoo that you read on Pinterest. No, I'm talking about you and I, learning new things, sharing experiences, and growing together. So today I want to run something past you. If it doesn't work, this can just be one more post on one more sewing blog, but I'm really curious to see what you think. So here goes nothing!
Welcome to the Monthly Draft. Instead of skipping to the end of a project with the highlights and the photos, I want us to go through the whole process together. So today, I'm going to take you from a sketch, to sheets of paper and a ruler, to a pile of fabric and a sewing machine, all the way to a finished pencil skirt! No pattern required, yo: we're gonna make our own. Sound good? I hope so.
Materials:
- A roll, or a few large sheets, of sturdy paper
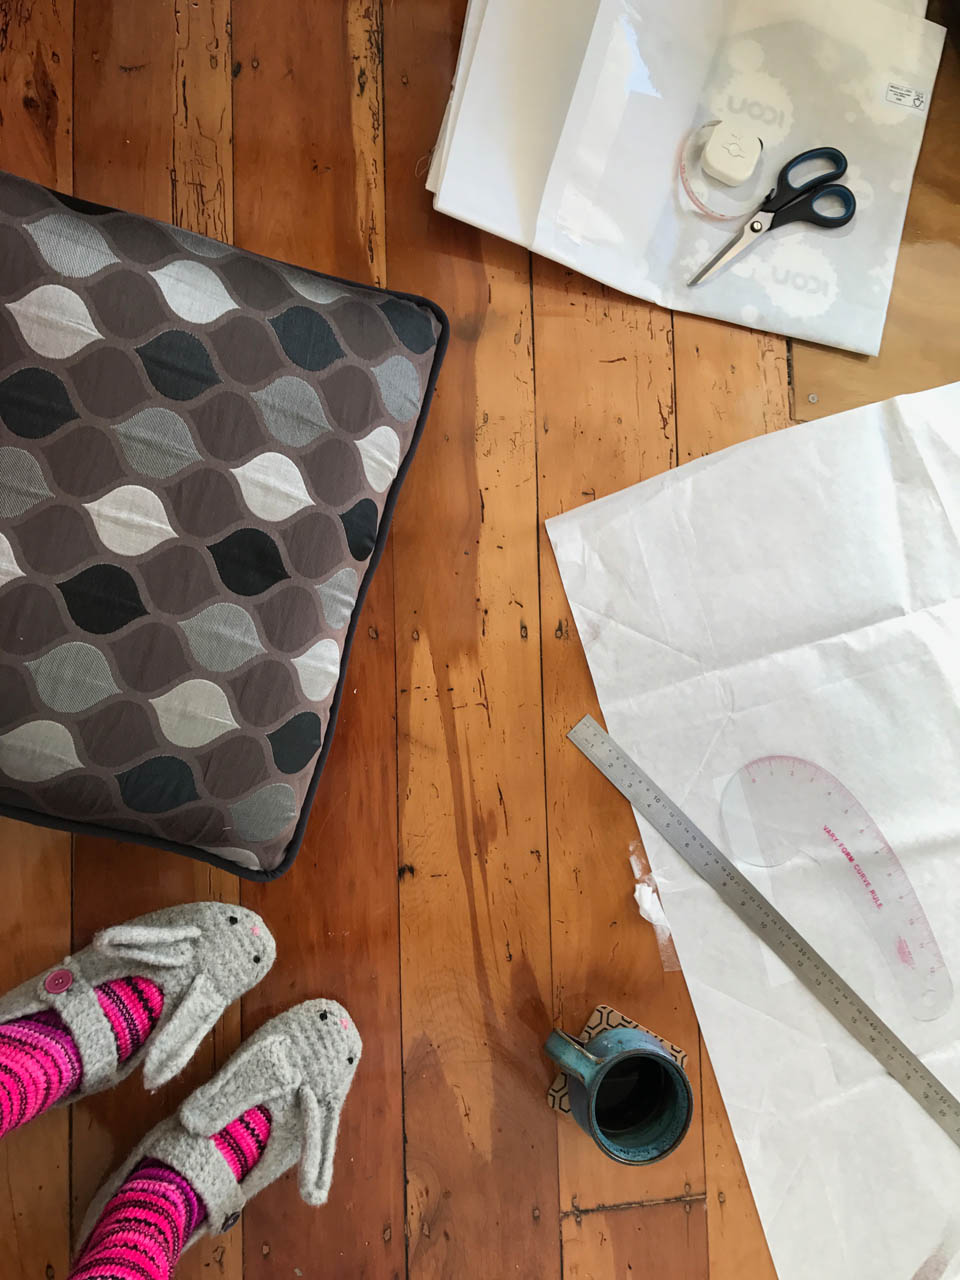
- A ruler, measuring tape, and french curve (although you could wing that last one)
- Pencil, eraser, and paper scissors.
- Muslin/scrap fabric, and a pen or thin fabric marker
- Pencil skirt fabric, lining, interfacing, thread and zipper (I'll talk about this stuff in detail further on down in the post, don't worry!)
- Your trusty sewing machine, and the Special Fabric Scissors you hide in that drawer with the lock on it (or is that just me?).
Before we begin, I just want to make sure we're all on the same page about something. There's a lot of personal preference involved here. I'm choosing certain design elements because I want my skirt to look a certain way, but hey, this is why drafting is cool! If you want your skirt to look different, you do you!
Part 1: The Plan
Today, we want to sew a pencil skirt. Before we even begin the draft (let alone cutting and sewing!) we need to figure out exactly what that means. What length will it be? What kind of waistband? Is it lined? What fabric will we use?
Usually, the easiest way to sort that out is with a sketch. I've photographed mine, and unless you plan on making exactly what I've made, with the same fabric and seam treatments and for the same measurements...now would be a great time for you to draw one too! (you can use my maker's journal download if you need a body to draw on)
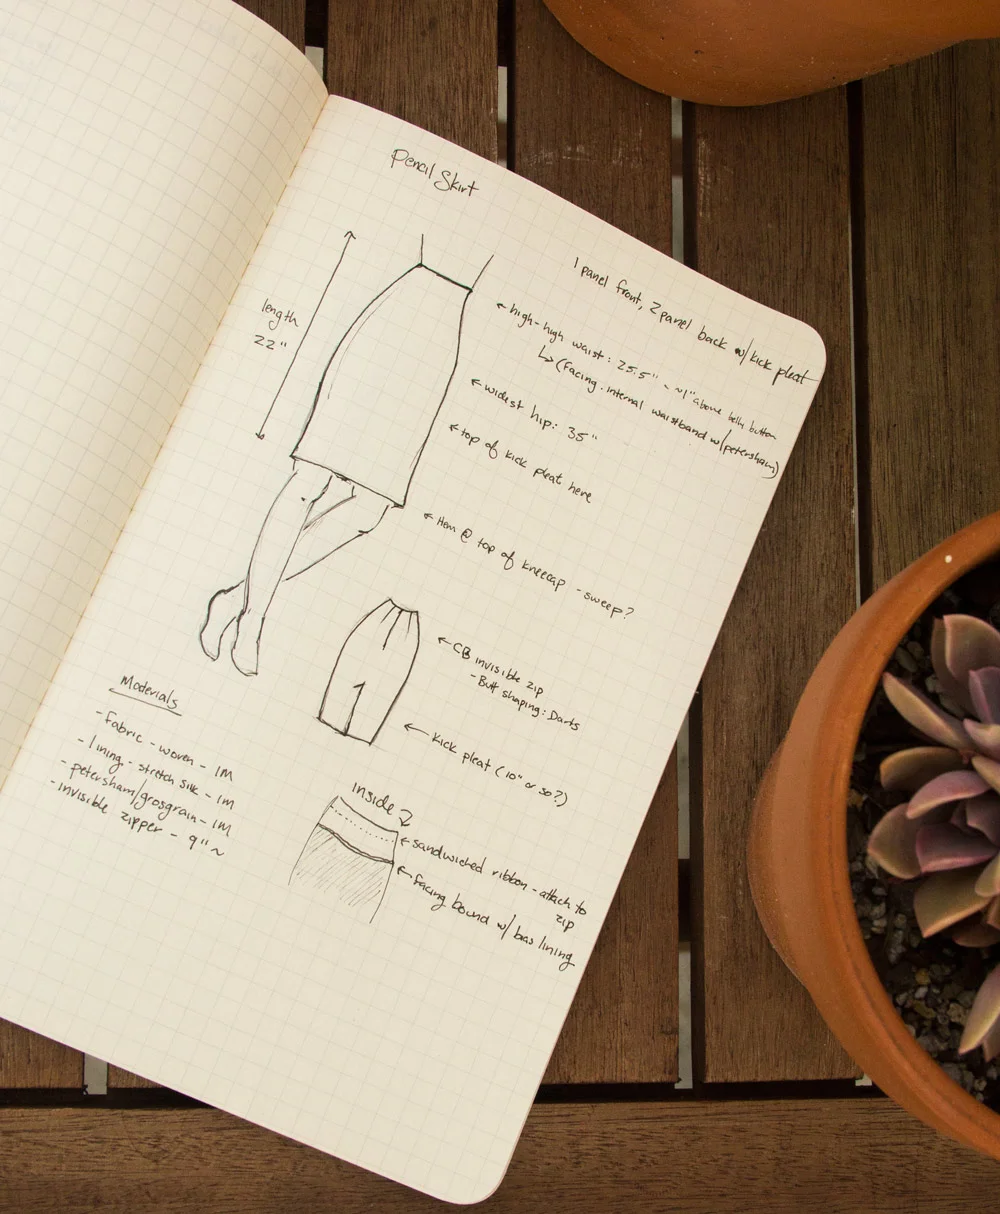
My pencil skirt is going to be high waisted and top-of-knee length, made from a very drapey but not too stretchy wool/silk blend twill, with silk crepe de chine lining. It'll be quite narrow at the hem but I'm going to make a kick pleat in the back so I can still run from zombies if required, and I'm making an invisible waistband with grosgrain ribbon and a facing, and a center back zipper and (gasp!) no pockets. I've made those notes in my sketch. Speaking of fabric, now is a really good time to prewash!
This particular project (at least, in the way I'm treating it) is really best suited for a woven fabric with little to no stretch - but the rest of the details are up to you! The kick pleat could be omitted, you could choose to do a sewn-on waistband. You could insert an exposed metal zipper, or choose not to line your skirt. Heck, you could even sew a front fly and make your skirt out of denim - the possibilities here are literally endless. Dream big!
Take your waist, hip and length measurements if you haven't already, and note them in your sketch. Also, measure the approximate distance between your waist and hip. For our purposes today, your waist measurement is wherever you'd like your skirt to come up to, your hip measurement is the widest part of you that you're going to need to get the skirt over (generally low on the hipbone over the fullest part of the booty) and the length will be from the top of your skirt (waist) to approximately wherever you want the hem to be. I like to err on the long side at this stage - you can always hem it shorter! Note those measurements on the paper with your sketch.
Great! now that we have a clear idea of what we want to sew, we're ready to draft. You're going to need a large space to spread out on - a dining room table, or (if you're like me) a clear bit of floor and a cushion to put your butt on. Bring your sketch with you!
Part 2: The Draft
I'm going to include drafting as well as muslin fitting in this section. It's probably mostly personal preference, but I generally tend to batch the muslin in with the drafting rather than counting it as 'actual sewing' - I think it makes more sense that way.
Lay a sheet of paper out in front of you. I'm going to draft my skirt front off the edge of the paper because I'm cutting that piece on the fold. I'm also going to show this to you in a series of diagrams because I drew everything in pencil and it didn't really show up very well in the pictures...
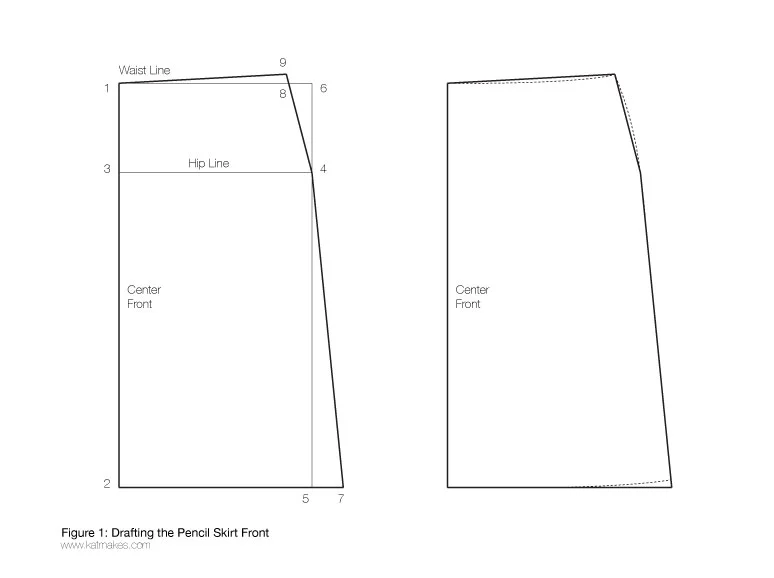
For the skirt front: Draw a vertical line from 1 to 2 that equals your (estimated) skirt length. Then, measure your waist-to-hip distance from 1 to 3, and draw a horizontal line that is 1/4 of your hip measurement (plus 1/4" to 1/2" for ease)- to point 4. Draw another horizontal line from 2 that equals the distance from 3 to 4, and mark point 5. Draw a vertical line connecting 5 to 4, and extend it by your hip-to-waist measurement so that it's in line with 1. Connect 6 to 1 with a straight horizontal line. 5 to 7 is an estimate, based on how wide of a sweep you want for the skirt. I went with 2.5", but ended up removing almost all of it when I muslined. Measure 1/4 of the waist measurement (plus 1/4" to 1/2" for ease) from 1, and mark this as 8. Measure 1/2" up from 8 to 9, then connect 9 to 1.
Still with me? We're nearly there. Next, measure 1/2" up from 7 at the bottom of the skirt, and curve the hem up slightly to meet that point. use a french curve or curved ruler to even out the angles at the hip and waistline, so that you have gently curving seams. When you're done, you can cut this piece out!
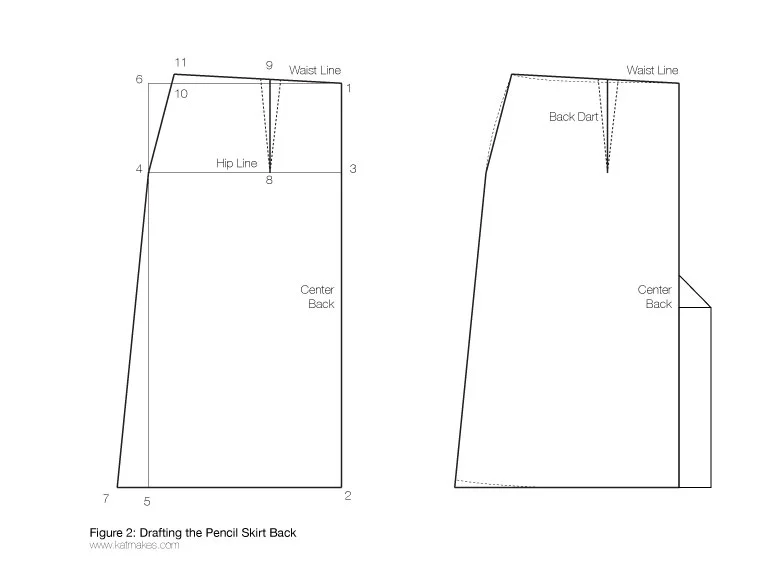
The back is very similar to the front, with the exception of the darts and the kick pleat. Draw a vertical line from 1 to 2 that's the finished length of your skirt. 1 to 3 is the hip to waist measurement, then draw a line across to 4 that is 1/4 of the hip measurement plus your ease, same as the front. 2 to 5 is equal to 1 to 3. connect 5 to 4, then extend by the hip to waist measurement and mark point 6. Measure from 5 to 7 the same sweep amount you used at the front, and connect to 4. Measure 1/8" of hip measurement minus 1" from 3 to get 8 (the bottom of the dart), and square up a line to the waistline. Measure 1/2" from the center of the dart line in each direction to make a 1" dart. 1 to 10 is 1/4" of the waist measurement, plus 1" for the dart. Measure 1/4" up from 10, mark 11, and connect back to 1. As before, curve the side seam edge of the bottom of the skirt, and curve the waist and hip seams as you did for the front. Add the kick pleat by measuring 2" out from the center seam, 10 inches from the hem parallel to the center back seam, and connect back to the center back seam 12 inches from the hem ( a 45 degree line)
Great! You should have all your pieces drafted and cut out now, so it's time to see if this pile of measurements fits right in fabric. Depending on your exact body shape, you'll have varying degrees of success at this stage. I know, you used your measurements to make the draft so it should be close, but the draft won't take into account things like the exact curve of your hips, or a sway back, etc. The muslin will let you make required modifications, and also give you a chance to establish a good length.
At this point, you may have noticed that I haven't added seam allowances to my draft. This is because I'm pretty confident I'll have fit changes to make before the pattern is finished, and it's a lot of extra work to do twice. I use a cheap $2/m woven polyester for my muslins, and I trace around each piece (sans seam allowance) in pen before cutting them out with an eyeballed 1" or so seam allowance. I then sew on the pen-lines with a wide basting stitch, and make adjustments as necessary with my larger than life seam allowances. Ready to see it in action?
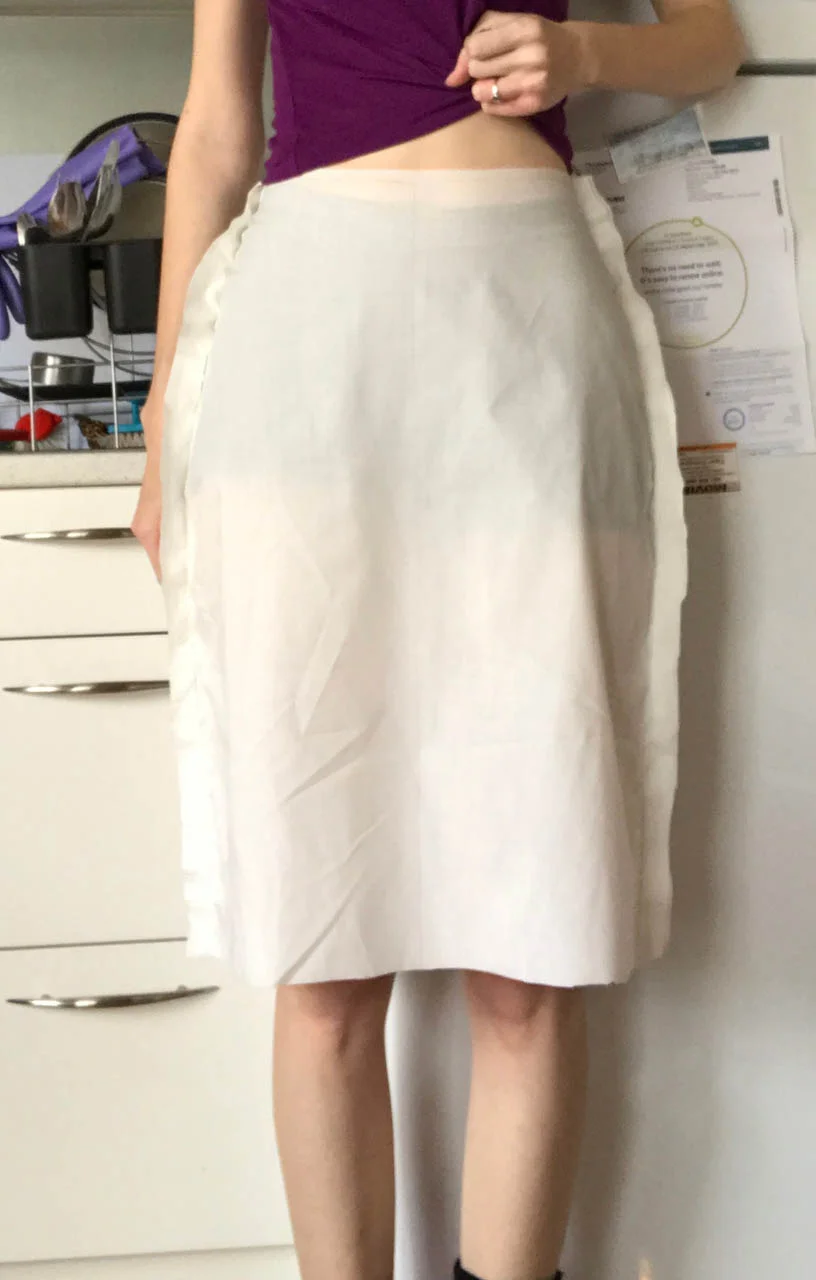
First, I cut out the pieces as drafted, sew them together (on the pen lines!), iron my seams flat, and then try the skirt on with the seam allowances facing out. This makes any obvious modifications easy to pin out. Here's the muslin as drafted:

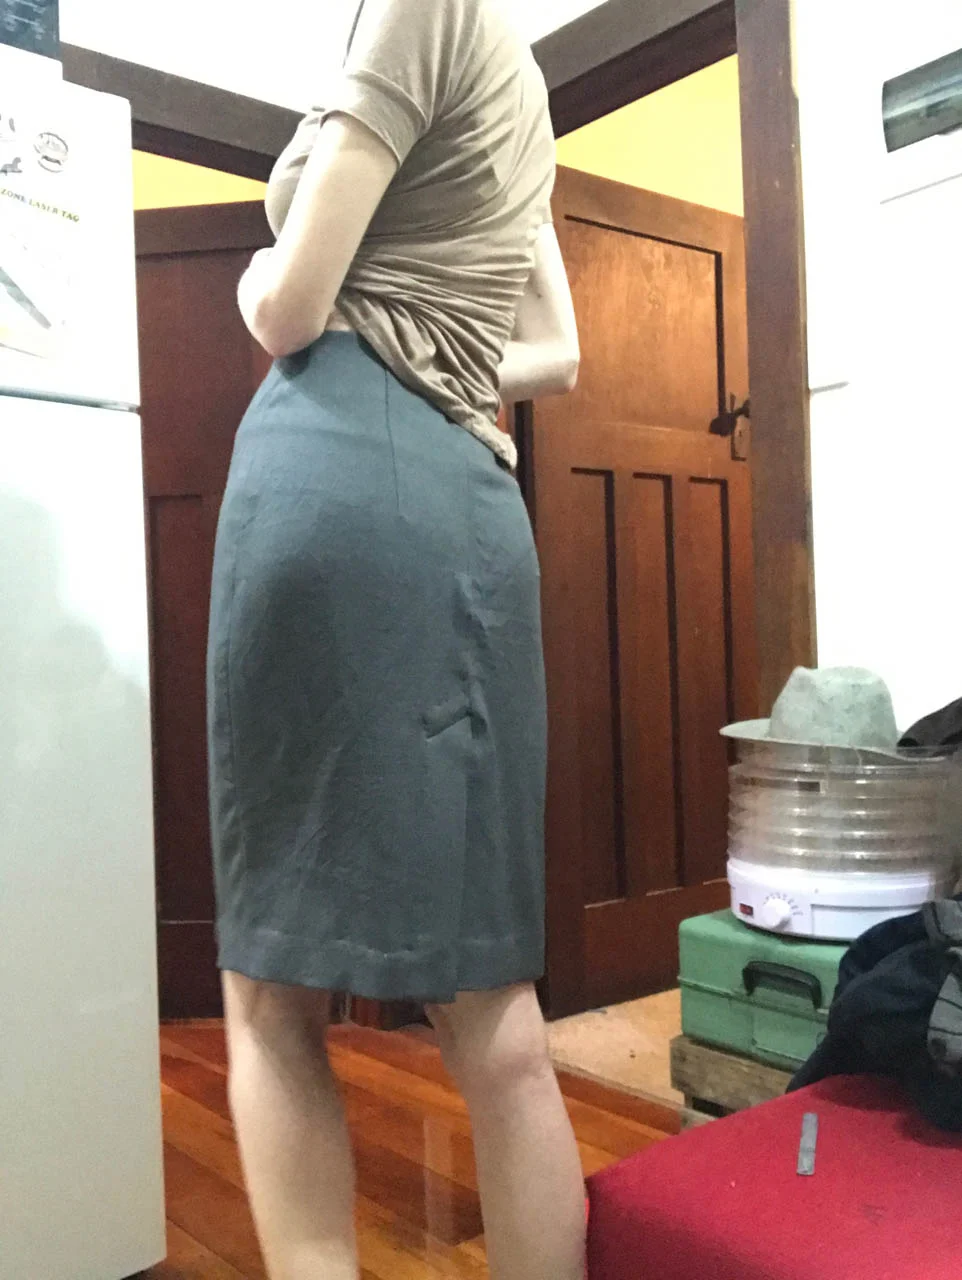
The fit is pretty good, but I'm going to scoop 1/4" out of the front of the waistline, and I'm also going to remove a substantial amount from the lower skirt, grading to nothing at the widest part of the hip to get the narrow silhouette like my sketch. Next, I stitch up the changes to my skirt, cut off any excess fabric (down to my 1" seam allowances still), iron it flat again, and try it on. Here's what I've changed:

The sweep of the skirt is much narrower now, which is more the shape I was going for. At this point, I tested walking around a bit to be sure it wasn't too tight around my legs. You'll want to pay close attention to the curve of the hip- are there any wrinkles there? Mine looks pretty good but in a skirt this simple, those seams are very responsible for fit so they have to be the right shape!


Once you've made the changes to the muslin, you'll need to transfer them back to the paper pattern. Mine were pretty straighforward- I just nipped in the edges of the skirt by about 1.5" grading to nothing at the hip, and cut the excess off. Depending on your fit changes, you may need to re-trace the pattern or make a second muslin to get it right. Once you're happy, trace off your pattern again and add seam allowances to your desired width. I went with 5/8" to make alterations easier in the future, but that's up to you!

How does it feel? I confess I actually worked on this project over two days, so if you feel like you've had enough for one day, you can totally put a pin in this and come back to it tomorrow. Ideally, the muslin stage leaves us confident that the final garment will fit so that while we're sewing the actual fabric, we're not worried, trying it on after every seam, or hoping that it'll turn out. You should know at this point that your skirt will fit - after all, it's drafted to your measurements! If you're not confident, keep making muslins until you are! It's worth the extra time, I promise.
Part 3: The Sew
Gosh, we've done so much work already, and we haven't even touched our final fabric yet! Good thing it's finally time! If you're confident in your muslin, then the hard part is basically over.
As I mentioned, I'm working with a wool/silk twill lined with stretch crepe de chine. I'm going to be detailing the construction of this particular skirt, so if your pencil skirt has different design elements (or fabric) than mine make sure you work accordingly! First, I stitched the side seams for both the lining and the main fabric, pressing each open as I went.

(At this point, I had an odd surprise-fitting adjustment to make. Bodies are rarely symmetrical, and since I rarely make fitted lower-half garments I didn't realize it, but it looks like my left hip is a bit flatter in shape than my right. I had a small bubble in the seam just above my left hipbone, so I ended up re-stitching the hip part of my side seam on that side about 1/4" in from the original seam line. I've marked this adjustment on my pattern piece in case I come back to it in the future.) It's okay to make on the fly adjustments as you need to!


The facing pieces are used to hide the grosgrain waistband which is pretty much the only actual structure of this skirt (Seriously - for as well as it fits, this thing looks like a saggy, deflated balloon on the hanger...) The waistband construction is markedly different than your typical sewn-on variety, so things went in a slightly different order. First, I constructed the facing separately, and bound the lower edge with silk bias binding leftover after cutting the lining.

The facing is stitched to the body + lining of the skirt, right sides together. Then, I pressed the seam allowance up (towards the facing) and understitched as close to the seam on the facing side as possible.

I have black thread in my bobbin at this stage, and brown in the top so it's easy to see which is which below. After that's finished, I press a curve into my grosgrain ribbon following the direction it seems to want to go (petersham is ideal here, but I couldn't actually find any locally) - and lined it up with the understitching seam line.


Then, I edgestitched right next to the understitching seam line, catching the grosgrain ribbon. This gives the effect of two lines of understitching on the outside of the skirt, keeps the facing from flipping out, keeps all the stress of the waistband off of the fabric, and secures the structure of the ribbon so that the skirt will stay snugly in place when it's zipped.

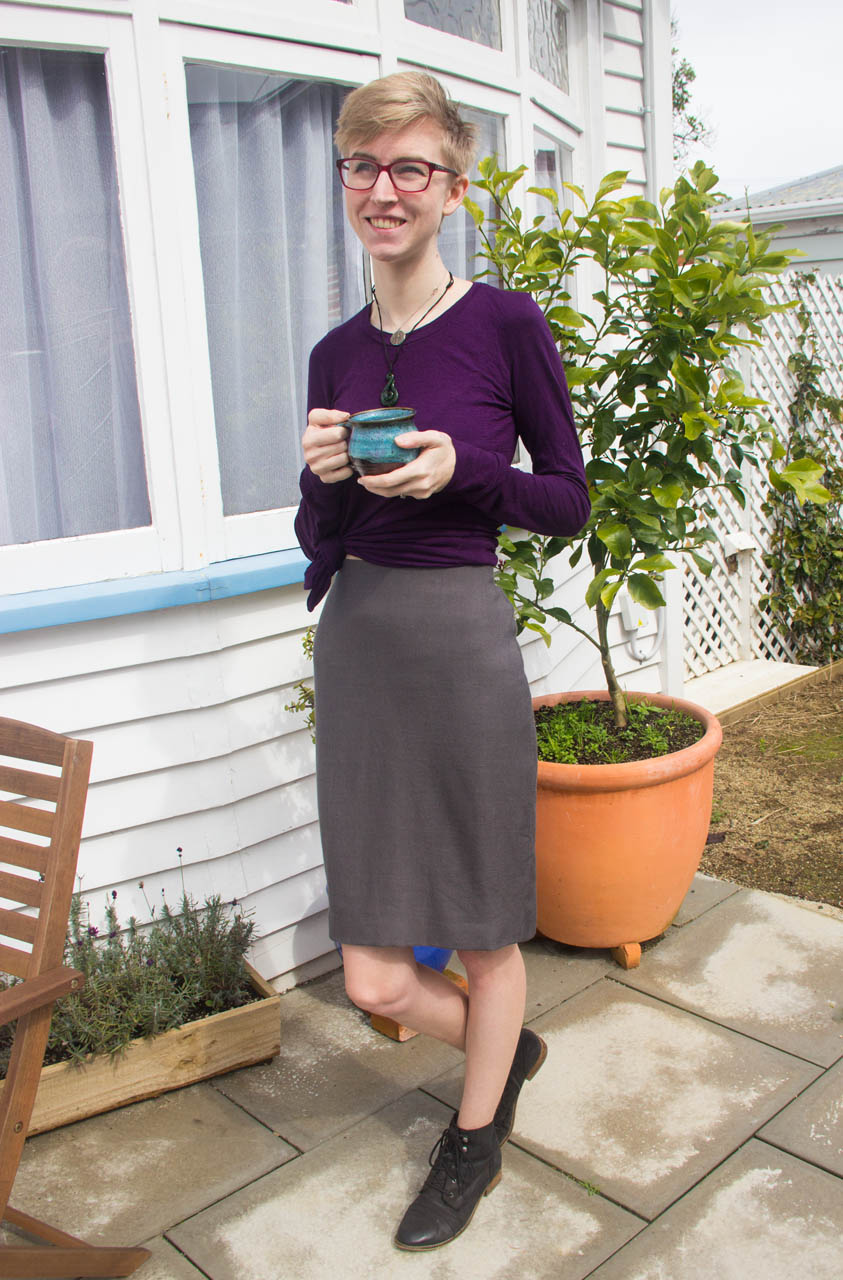
Next, we insert the invisible zipper at the center back, tucking the top of the zip inside the facing, then finish the rest of the back seam and set the kick pleat. I ended up sewing right sides together for both sides of my kick pleat at this stage, although I really should have done this sooner. Then, I folded the angled part of the seam allowance down and top stitched it to get a clean finish. Would you believe it's the only topstitching on the entire project? Lastly (after testing the fit and pinning out the hem) I hand stitched the hem at 1.5" - about 3/4" shorter than I initially muslined for, but we're allowed to make changes on the fly. It's level with the top of my kneecaps - a bit short because most of my shoes are flats, but it'll be good with heels too. Et Voila! Our pencil skirt is finished!

Before I leave you for the week, I want to at least touch on my feelings for this project in its finished form. Between this and the culottes, I've been working on a lot of 'tailoring' type projects with suiting fabrics lately, which I am loving. Seriously. Such well behaved fabric, pressing and holding creases and being generally amazing. I want to make an actual tailored suit, this is so much fun! On the other hand, I'll be the first to admit that this skirt is a complete 180 from my usual style. In fact, I have never in my life worn a pencil skirt (A fact, which, interestingly didn't don on me until I was stitching up the last bit of the hem...) I'm a paint-stained jeans, swishy skirts and merino sweaters kinda person, and this skirt is really...polished? I'm loving the fit right now, and I'm hoping that alone will be enough for it to carry me through any style weirdness until I can 'learn' how to wear it, but it's too early to tell at this point. I guess we'll find out!
Whew, we made it, guys! What do you think, should The Monthly Draft become a monthly thing? I'm really depending on your thoughts here, because it takes about twice as long to sew up a project when you're documenting the steps. Plus, I've got my wedding dress project to consider...! If you like this crazy idea of mine, please let me know in the comments, in an email, on instagram, or via carrier pigeon. Also, feel free to drop non-subtle hints if you'd like to see anything in particular drafted up in future episodes. I'd like to stick to pretty simple things at first but I'm easily influenced! Last of all, if you do happen to draft up the pencil skirt from today's post, pleeeeease let me know (any of the above contact methods will do!) so I can get appropriately excited!
