
Since I finished this shirt, and its perfect sleeve, I've been trying to think of the best way to carry on with fun, interesting projects in The Monthly Draft. The thing is, the hardest part about sewing with a pattern (any pattern, really) is the challenge of getting it to fit you. When I sew from patterns created from my block, I don't have to worry about fit. All of those projects were made from my body block, and all of them fit!
So - the best way to draft patterns you know will fit you is to draft yourself a body block (also sometimes called a 'sloper') that fits you. This is mine:


It's not an especially attractive object, but as far as function is concerned, it's a masterpiece of colossal proportions. Every top I draft is based on this shell. I even drafted the sleeve off of it, with some additional arm measurements. If you are Batman, then the body block is like outcome of the Wayne Technologies division. Like the Batmobile, or the Bat Suit - with your body block, you'll be unstoppable! (Maybe stick to garment making, and leave protecting Gotham to the pros though...)
In a perfect world, I'd get you to take your set of measurements, and I'd give you a list of instructions, and you'd draw a little connect-the-dots diagram on a big sheet of paper, and your block would fit you perfectly right off the bat. That rarely happens with real bodies though. It certainly didn't happen with mine. Aside from the fact that I'm 6" taller than the average woman, I've also got a really big difference between my bust and waist measurements that no pattern will take into account. Everyone has things like that, so it's very likely your block won't fit you right off the bat.
For that reason - instead of telling you exactly what I think you need to do - I've broken the process down into two parts. First, I've compiled a list of resources for you to use to create your own block. That way, we'll all be on equal ground when we start making draft changes later on! Second, I'll go through some fitting and muslin-making tips to get your block fitting perfectly. Ready? Awesome.
Web References
This Tutorial by Melly Sews is a good step by step with clear pictures, using a diagonal type measuring system that my vintage drafting book also uses. It seems fairly common, but two notes of warning: First, it's very hard to measure yourself this way, so you'll want to use the buddy system. Second, if you are significantly shorter or taller than average, this method may not work for you.
These front and back tutorials from ikat bag are super in-depth. She drafts the block for her kiddo, so the pattern doesn't look quite like a grown-up's would (grown ups have waists and all) - but the techniques are exactly the same. The section on drafting the armscye curve is very detailed and helpful, and she's got a whole post on sleeves that's definitely worth reading if you haven't seen it yet.
Doja calls this method from her site, Elewa, 'quick and easy' which I don't think drafting a sloper necessarily is (take your time! good foundations make for good houses!) - but that said, it uses direct height measurements rather than diagonals, and is altogether extremely similar to the drafting textbook which I used to make my block. She also has a nifty little video to go with it, which is helpful. If you use this method, I would suggest not adding the ease she suggests, as you'll add that when you create patterns from your block later. Try this one if you're quite tall, quite short, or if you're really really in a pinch and need to take measurements without a buddy.
This Youtube Video from Christopher Sartorial is very similar to the one above, with a bit more explanation along the way.
This post from Isn't That Sew uses reference points to eliminate much of the math from drafting in a 'connect the dots around the perimeter' sort of way. My knee-jerk instinct is to shy away from this one, but if you have a very competent measuring buddy, in theory this would be a very accurate method. Many of the older style and 'industry favorite' instructions for slopers assume your body will fit close to some kind of [made up] average/category, so if you find yourself grading between sizes a lot, or if your body is on either extreme of the curvy spectrum (beanpole -> tomato), this might be a good option to start with.
This is a PDF of instructions for a bodice as well as a sleeve sloper. Unlike a lot of the other options, it includes a bust dart which I highly recommend drafting into your initial sloper if you are anything north of a B cup. I'm probably a teensy bit biased, but basically if you're not sure, put in a bust dart. They're easy enough to remove later, anyhow.
(If you have any drafting reference I've missed, please add them in the comments and I'll stick them in the list!)
Book References
When I first started drafting, it was part of a class. My professor gave us all xeroxed copies of the pattern drafting section of one of her textbooks, and I regret never asking what the name of the book was. I still don't know, though I still have the pages.
This is my pattern drafting bible. It's in the public domain, which is very nifty. M. Rhor's book has a couple of different drafting methods for what he calls the 'basic dress foundation' which are good, but I personally didn't succeed with his version of sleeve drafting.
This book is the gold standard according to most other pattern makers I follow, though I haven't actually been able to lay hands on a copy yet. Once you learn the basics of drafting the block, and then slashing, spreading, adding, and subtracting - books become more inspirational and less instructional.
Making the First Muslin
When your pieces are drafted, you'll want to cut them out so that you can use them to make the muslin. I'm going to be controversial here and tell you not to bother with seam allowances right now - if that makes you uncomfortable, go ahead and add them, but you're most likely going to need to make adjustments and the seam allowances are just going to get in the way.
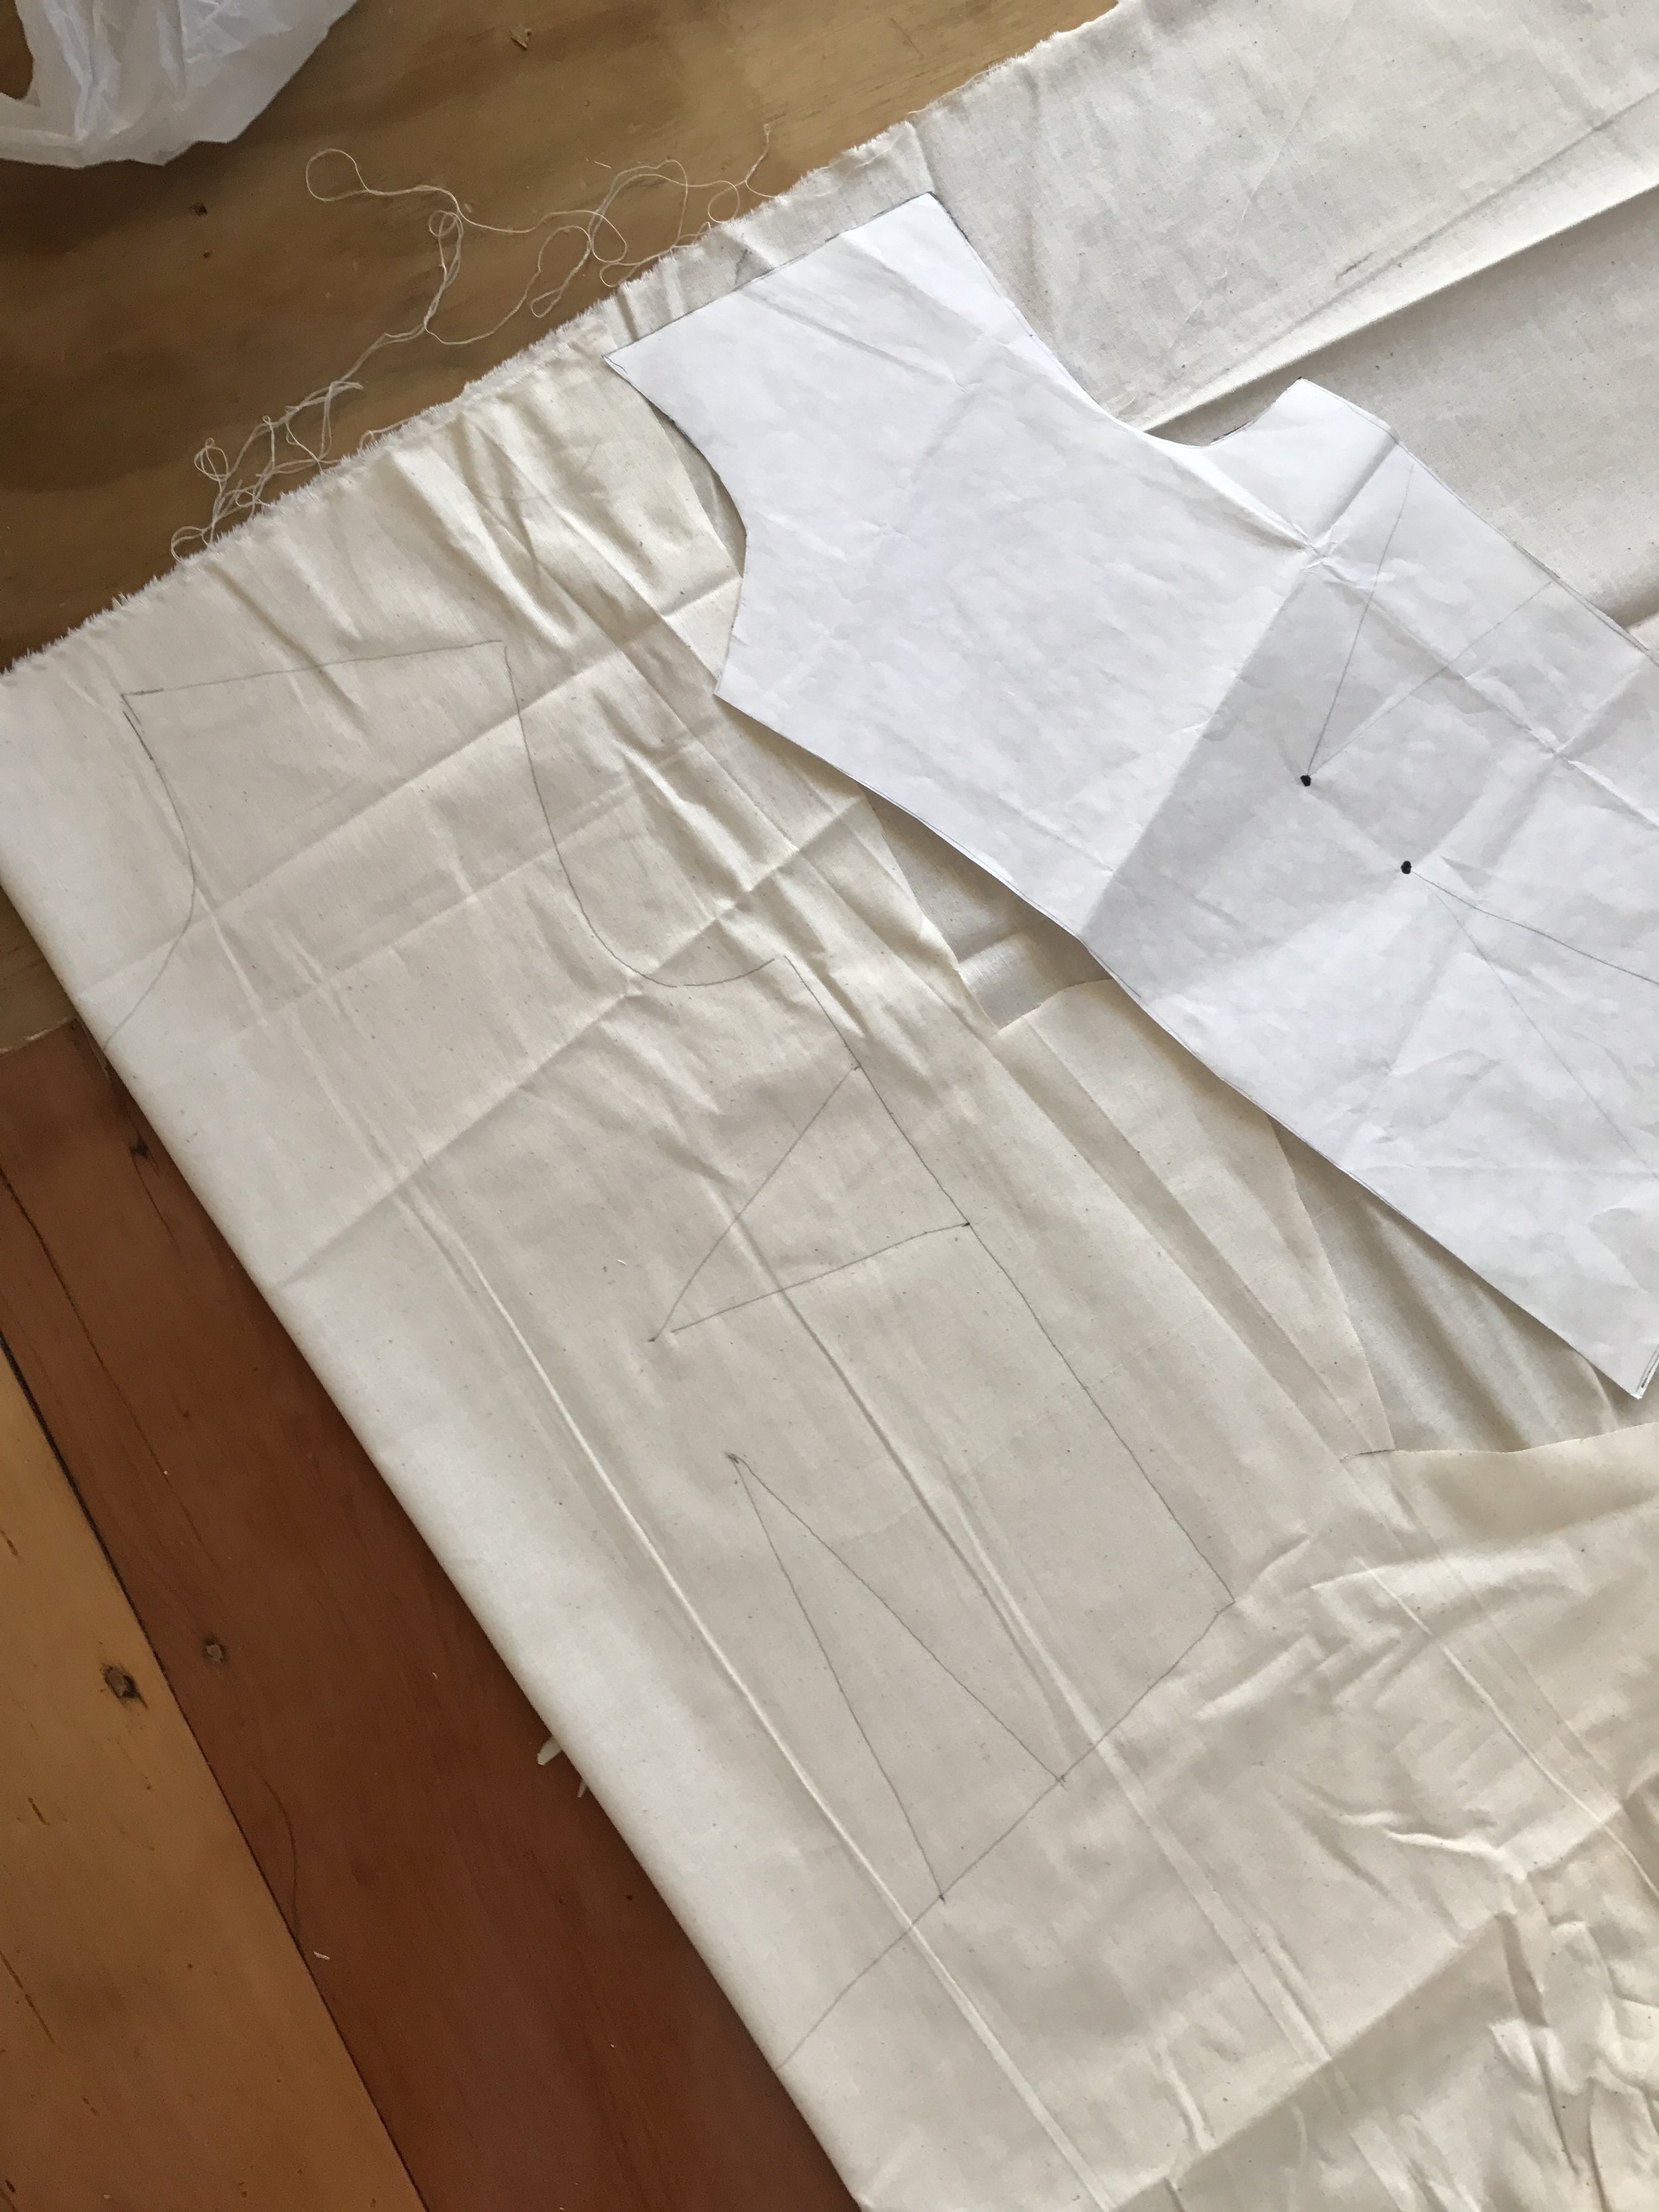
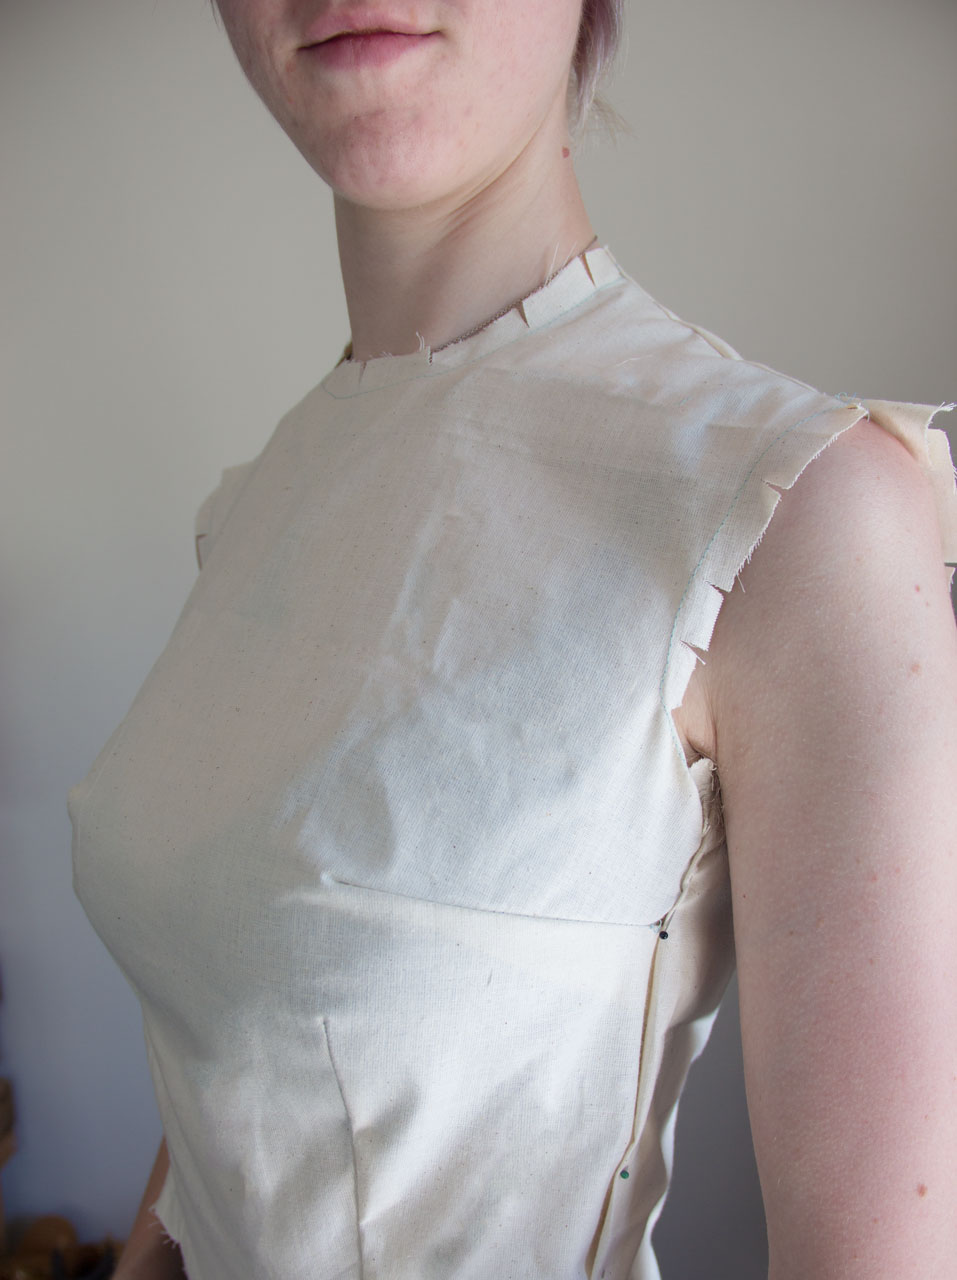
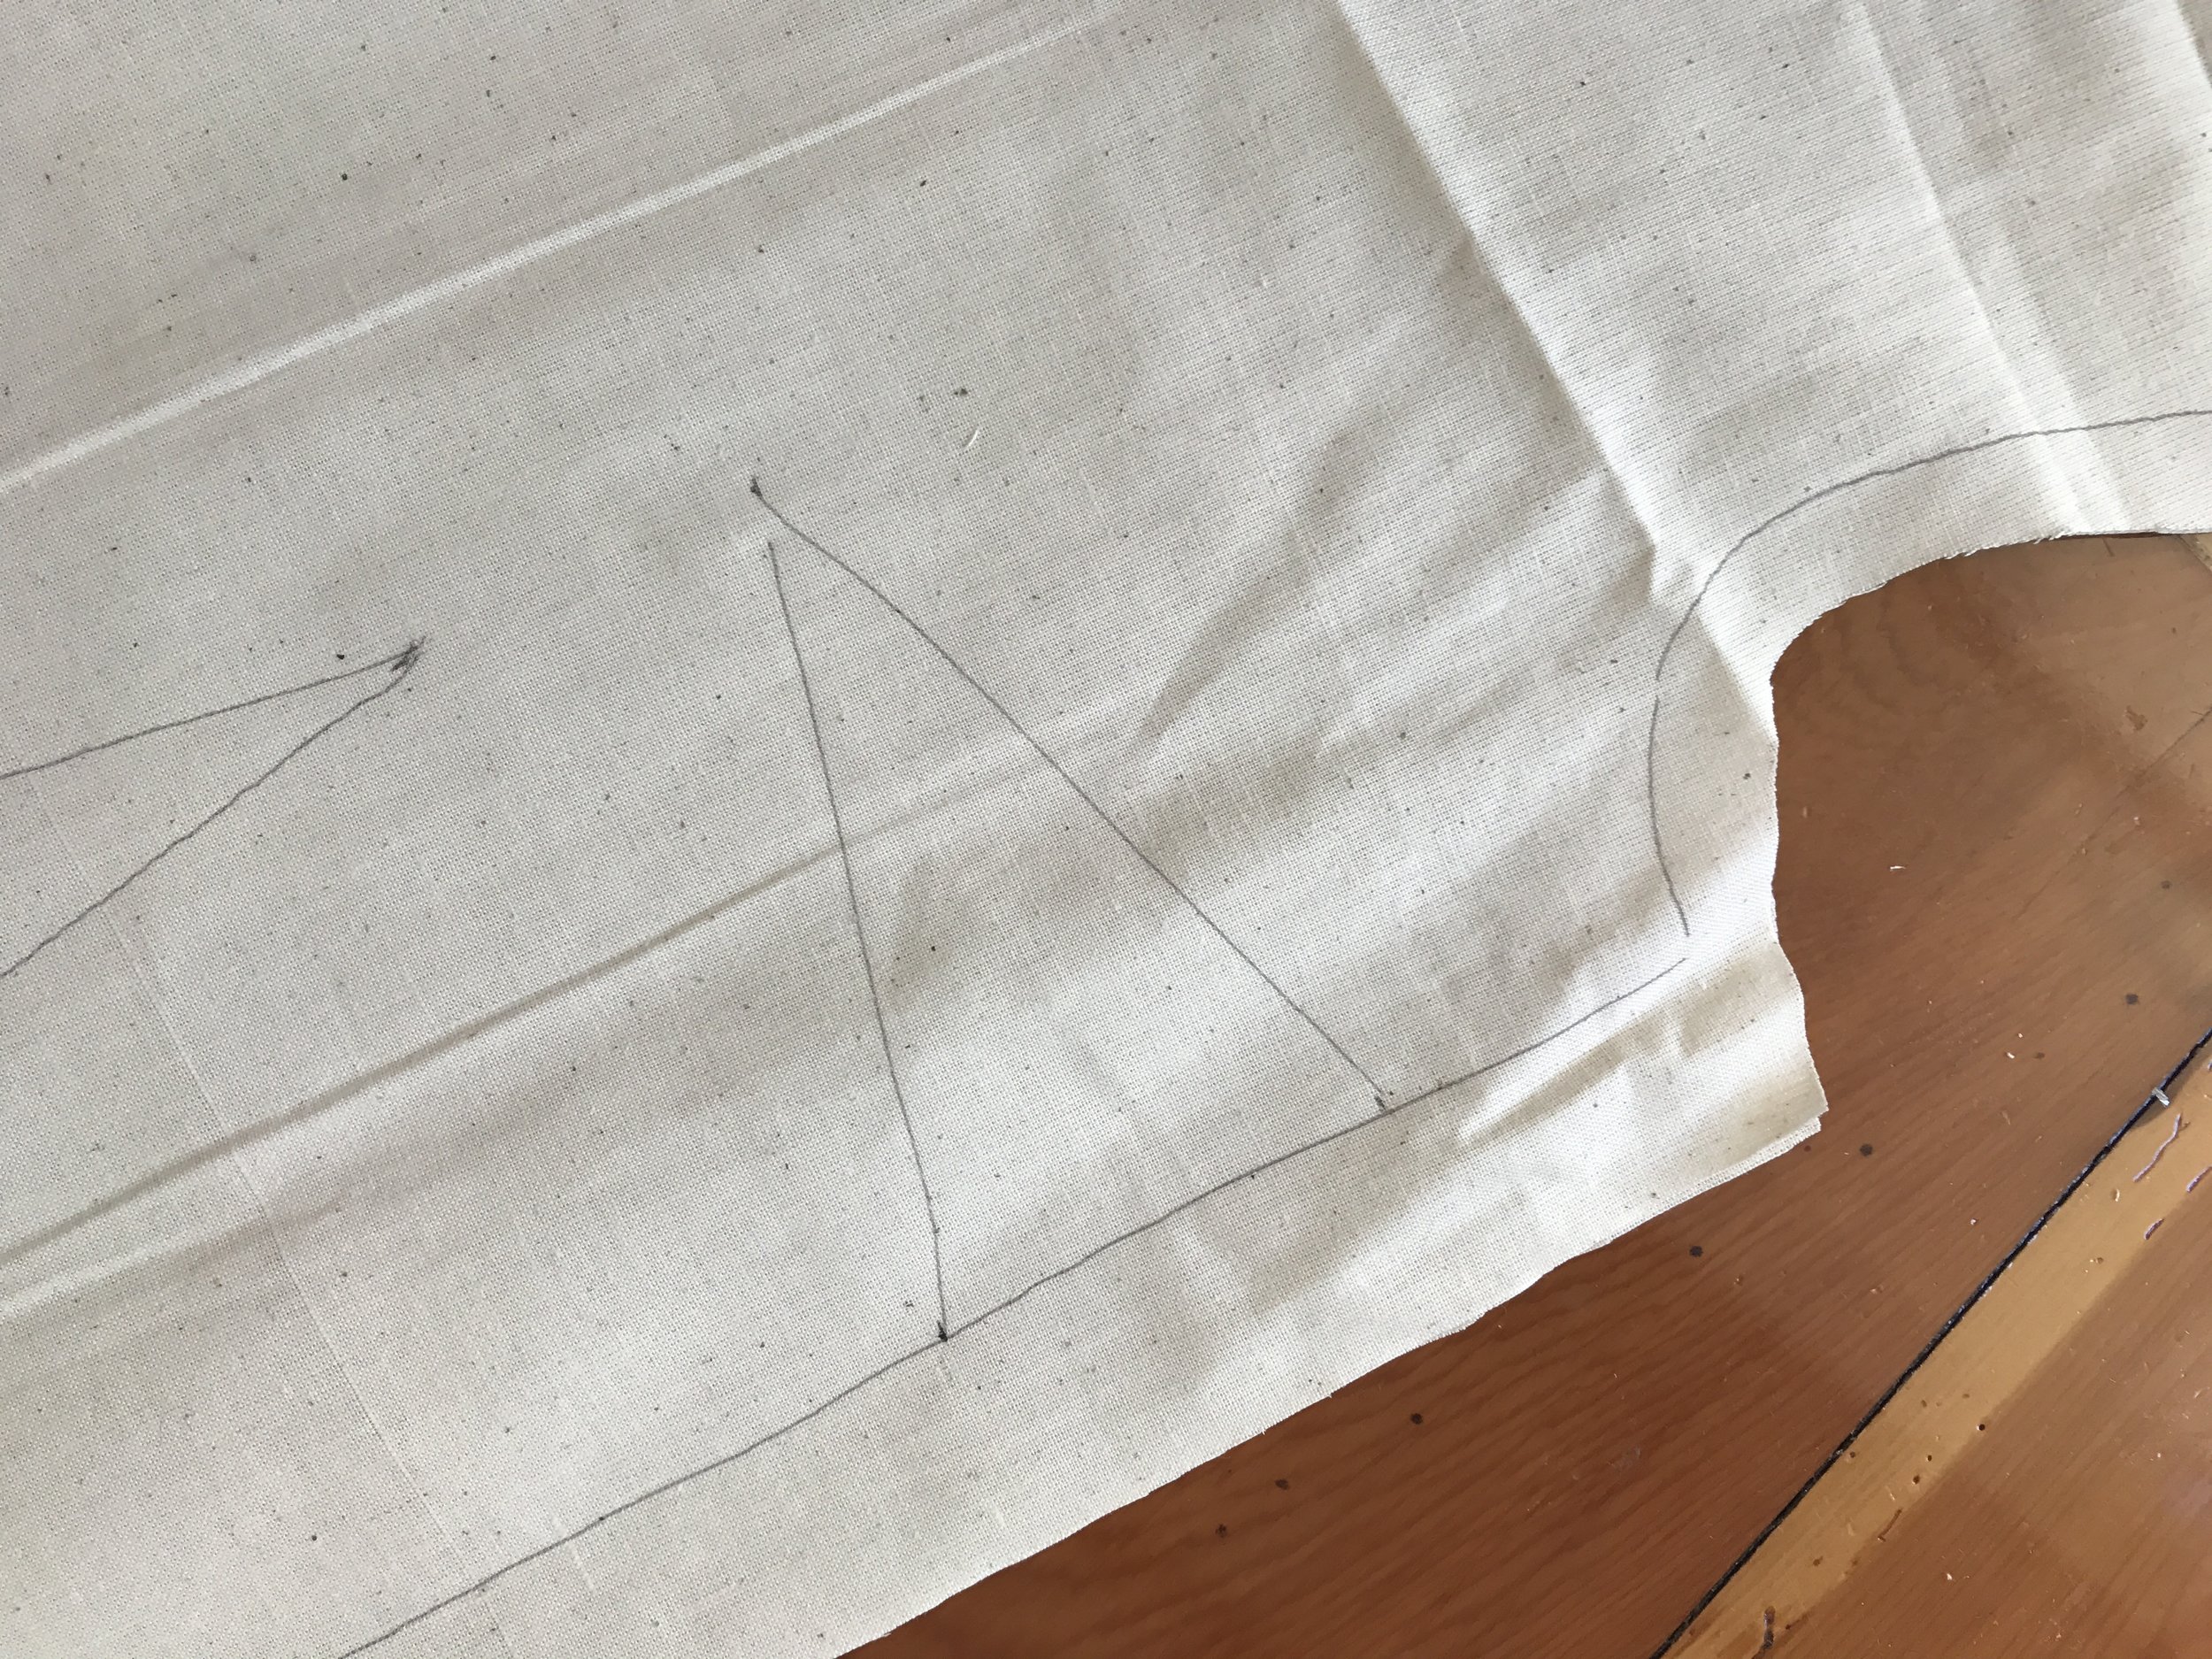
Cut out your paper sloper pieces, sans seam allowances, and trace them out along the seam lines with a nice dark pen on light colored, stable woven fabric. Ideally, muslin works here - something that holds its shape and doesn't stretch out too much. Cut out the pieces from the muslin with 1-2" of seam allowance so you'll have plenty of room to play around if you need extra fabric anywhere. (For second, third rounds and fine tuning, you can go down to 1", and I generally cut the arm and neck edges at 1/2") Sew your darts, one side seam, and the opposite shoulder seam (so you can get your head through the opening) using a long basting stitch.
For the neck and arm openings, sew a basting stitch on top of your marked seam line so that the edges don't stretch out when you try it on, and release the seam allowances by clipping curves around the armhole and neck openings. Iron the block before you try it on (you laugh, but try diagnosing a wrinkle you think is fit-related, only to find out it's just a plain old crease in the fabric...). Then (wearing a good foundation garment which you also wore while taking your measurements!) try on the muslin!

Whenever I make anything new, I always try it on with the seams facing out first, because it's a heck of a lot easier to mess with the seams when you're not trying to fold things in multiple directions. Once you're certain you've got your adjustments fairly close, you can flip it around so that the inside is actually inside to get an overall view of how you feel about it, and see if there are any smaller fit adjustments still required.

(Even as it is, looking at the photos I think I've got a few changes to make to the waistline... and maybe rotate some of the waist dart into the side seam...I keep having to remind myself that there is such a thing as overfitting...)
Troubleshooting Fit in the Muslin
I know, I know, you took all those exact measurements, followed the instructions, and the thing still doesn't fit! That's okay. That's normal. It should be pretty close (Make sure you haven't got three armholes and all) but there are some things about your body that you're just never going to be able to measure with a tape. The goal is for it to fit smoothly over your body with no wrinkles, stress lines, or bagginess - so look for those things. Is the fabric pulling anywhere? often stress wrinkles 'point' to the problem area, and we'll diagnose fit issues by figuring out where the stress is coming from. Feel free to rip into the muslin, re-pin, add extra or pin fabric out, whatever needs to happen. Make a list of your changes (write directly on your muslin if you want!) so that you can modify the block.
It's tempting, when looking at yourself in a mirror, to stand with perfect posture, but try to make yourself stand naturally so that you can get a good idea of how you'll actually wear the garment. If you can't maintain posture with your shoulders back and perfectly square, your chest puffed out and your tummy sucked in all day, then why would you fit that version of your body? The point of making beautifully fitting clothes is that they make you feel confident and comfortable. Lumps, bumps, gangly bits and all. If it helps, you can try 'living in' the muslin for half an hour or so - go make your shopping list, or do a quick sewing area tidy - before you go look at yourself to see what you notice from wearing before you actually look at it.
In particular, look for strain across the tummy, stress marks pointing to the bust, and any lines originating at or under the shoulder/armhole area. Make sure there's no gaping around the armhole - it should fit flat against your body all the way around, and underneath your arm it should come as high as possible but shouldn't pinch you anywhere when your arm hangs naturally at your side. Feeling constricted by the block when you take a deep breath is normal - it doesn't have wearing ease like a garment you'd wear during the day - but this is also an useful tool, as it can make some fitting problems appear more obvious. Look for how the block changes when you move and breathe. You'll also want to look for bunching - unlike a stress wrinkle, this will be fabric pooling in an area. First, try eliminating the excess fabric with darts, but check that your bunching isn't directly above/below/next to an area with strain as well. For example, in one of my versions I had bunching under my boobs that I thought was full-bust related, but it turned out that the darts were too tight over my stomach so the block was just riding up, causing the loose fabric under the bust. Loosen the darts 1/4" and the whole thing was perfectly flat again.
Check that your bust dart (if you have one) and the waist dart point to your bust apex (usually the nipple. Please say a small prayer for my Google search results at using that word), and end 1-2" away from said apex. I find it helpful to mark the apex on the muslin, but you do you. Not everyone wants to walk around with an x-marks-the-spot on each nip. ;) Note that in an actual garment, the dart point would be about 2-3" away from the actual apex, but in a block it goes all the way for maximum fit.
If you feel like you're being too picky, remember that this block will be the groundwork for any top or dress you make from now on. It's okay to take your time because it'll save a lot of time down the road. Even if you still want to sew from patterns you buy, you can measure your block against those patterns to figure out what fit adjustments you want to make before you even start!
This is a delightful resource for fitting problems. It's a small pamphlet in the University of Florida online catalogue that has illustrations of different fit issues as well as instructions to correct them, so if you've got stubborn wrinkles you can't diagnose it's an excellent tool.
This post is a great little snapshot if you are just-quite-almost-nearly-there with your armhole and shoulder but it's just not quite right. It's especially useful as it covers rotating a pesky front armhole gape down into the bust dart, which, for the large busted among us, is a good adjustment to know, because the resulting armpit-frowns are very sad indeed.
Fit for Real People also has a great section on fitting woes, although the rest of the book centers around tissue fitting premade tissue patterns which isn't something I really do much at all.
If all else fails, my highly technical solution for diagnosing fitting issues that I don't understand is the Great Google. Generally, some version of "bodice fit wrinkles shoulder", "bust fit wrinkles bodice", "shoulder tightness pattern fitting" or whatever it is that doesn't look right will point you in the right direction. Again, if you have a favorite fitting reference, please share it in the comments so I can link it up here!
When you're happy with your adjustments, transfer them back to your block (cut a new version if you have to, and make sure you label it!) and voila: a fitted-to-you map for all future drafting!
Further Reading
This post from Allspice Abounds doesn't contain exact instructions (though your local library might have the book she used!) but it's a perfect example of the process I went through to get mine. Draft, make a muslin, then keep making muslins with fit alterations until it's exactly how you want it!
See you next week for a post on the opposite end of the 'quantity of photos' spectrum! ;)