
Thank you, first of all, for your fabulous feedback on my first Monthly Draft post! I'm so glad you guys think it was helpful, not too long and rambling, and that some of you are considering making pencil skirts of your own!
I realized (probably about halfway through writing episode one) that this was quite a big project to dig into at this point in my life - the wedding dress project grows with every passing day, I've got some real life goals that are going to start taking bites out of my sewing time (real life funds sewing life, so attention must be paid) and it's coming up on summer and I want to give all the beaches and forests my love and attention too!
That's all to say that the monthly draft is definitely carrying on for now, but I'm going to stick to smaller projects and work my way up over time. Hypothetically, that should work for you guys too, because drafting is very much one of those things that builds on its foundation. This month, we're drafting with stretch! I've drafted up a basic bikini-style panty pattern (although if you have a well fitting pair to trace off, that's totally allowed and definitely a time saver!) and I'm going to show you how to make four drafting and sewing variations to the basic pattern. Panties are quick to sew and they don't use a lot of fabric, so they're particularly good to practice making changes to a draft. From style lines to added fabric, the variations are infinite!

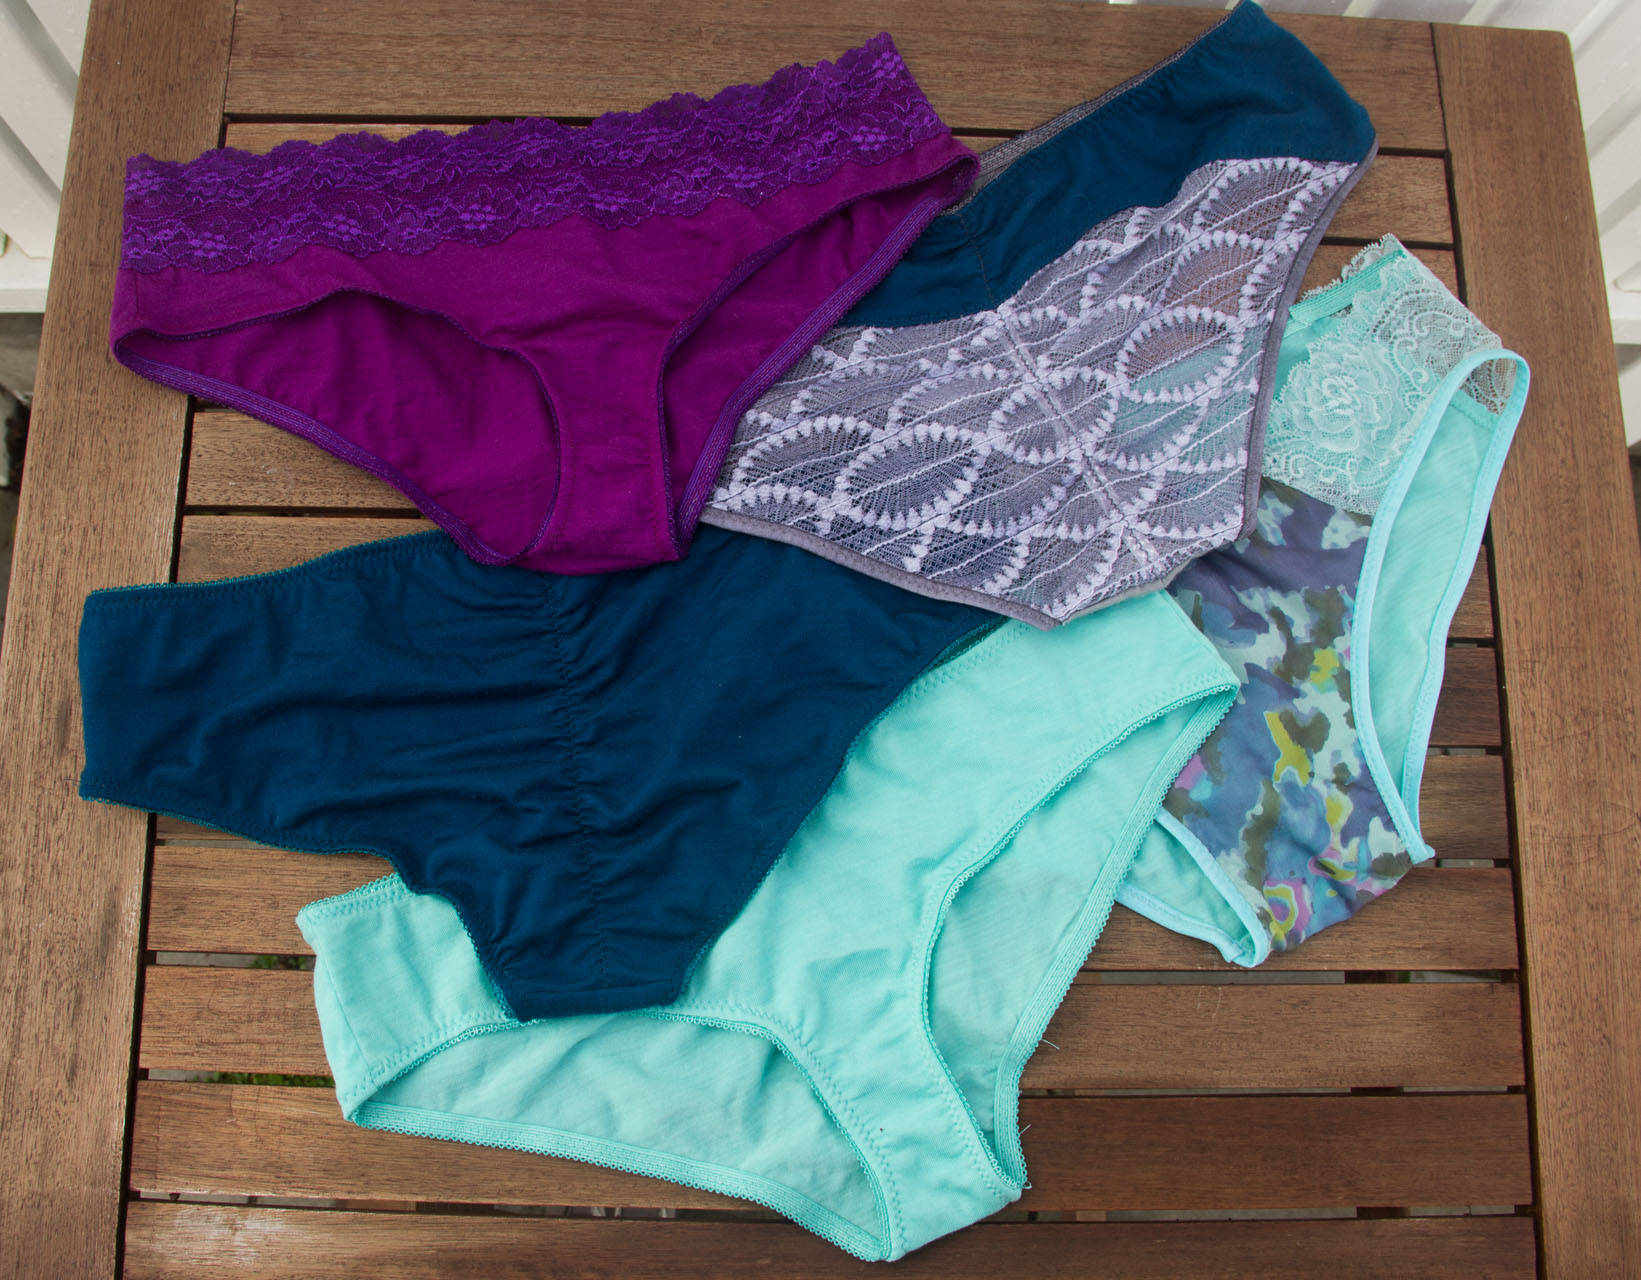
I also just want to take a moment to thank Plastic Sally's friend, Plastic Sam for offering up her body for modeling purposes today. She's such a trooper! She's also about one clothing size larger than me, and with what can only be described as a more athletic butt than mine - which you can probably tell in some of the shots.
Materials:
- A roll, or a few sheets, of sturdy paper
- A ruler, measuring tape, and french curve (french curve recommended for this project)
- Pencil, eraser, and paper scissors.
- Muslin/scrap knit fabric, and a pen or thin fabric marker
- Knit fabric for undies, plus cotton for the gusset lining if your knit isn't cotton, picot elastic, fold over elastic, and lace scraps as desired.
- Sewing machine, fabric scissors, and duckbilled applique scissors if you have them.
The Plan
As always, we start with a sketch. Before we can get to the fun stuff, we'll need to draft a basic block to use for our undies. I'm making a pretty standard bikini pattern and I'll make changes from there, but if you know you like certain things in your underwear, definitely make your changes accordingly! You want more booty coverage? Go hard. High waisted? Make it happen. Living the boyshort life? More power to you. Presumably you've been wearing underwear every day for a good number of years now, so think about your comfortable (and uncomfortable) pairs.

This is a great opportunity to use leftover fabrics! All of my fabrics and lace scraps are from previous projects, and my elastic was purchased white, in bulk, and dyed to match!
Draw yourself a little pair of underwear so you can figure out what measurements you need. My 'waist' measurement in this case is going to be a high hip, because I'm not making a high waisted style. Do you need a waist measurement? You'll need a full-hip measurement (over the widest part of the booty) a side-height (this is mostly a personal preference thing- I used the distance between my high hip and full hip as a starting point), crotch width (best measured off a well-fitting pair), from waist in front to crotch center, and from waist in back to crotch center. Got all those?

Now, what about this whole stretch thing? Taking those measurements doesn't account for the stretch of the fabric, you say! Well, you're right, young grasshopper. It doesn't. This is another one of those personal preference things, but however you do it, you'll need to adjust your measurements slightly for the stretch of the fabric. What kind are you using? is it a stable cotton t-shirt knit? does it have a bit of lycra? Generally, your fabric will probably have about 10 to 30% stretch, so you'll want to take 10 to 30% out of your measurements. I'm solidly in the 10% camp for underwear, but I like a more stable fabric as I mostly sew with natural fibers, and I'm not intending for them to feel like they're trying to contain anything. If you're sewing with, say, a light stretch mesh, or something lacking recovery, you could go up to 20, but you'll want to be mindful to sew your elastics gently so they don't show lines through your clothes. and if you're using this as a pattern for a swimsuit, go for 30 so the poor thing doesn't fly off when you jump into the pool. I'd also recommend a 20-30 type range if you're making shapewear with powernet but that's really a whole separate blog post.
So - account for your stretch by multiplying each measurement by .9 (for 10% reduction) .8 (for 20% reduction) or .7 (for 30% reduction). And now, we draft!
First, draw a vertical line equal to your entire crotch length, and mark the 'center' point. (the center is most likely not going to be the actual middle of that line - your back crotch length will be longer because there's a butt back there and all). Next, draw a line perpendicular to the crotch length line for the waist/top of panty line - the total measurement divided by four - at the bottom for the back, and at the top for the front. I added a waist rise to mine although this is optional - to add one, measure up from the left point of the waist line you've just drawn, (I measured 1") and then connect the new side point to the original center front line. To create side seams, look back to your sketch to determine the distance between the top of the panty and the leg opening. Mine started out at about 3" but this will change drastically if you want a high waist, a high cut leg, or other design changes. For the sake of consistency, let's measure 3" down from the waist along the crotch line, and draw another horizontal line equal to 1/4 of the measurement of the widest part of your hip. Do you see how my lines are slightly diagonal? That's because there's a bit of a difference between my waist and my full hip. It's very possible that yours will be more, or less, diagonal than mine depending on your shape. Create your side seams by connecting the ends of the waist and hip measurements, and repeat for the back.
The purpose of the gusset is to protect your body from seams, close fitting pants, and other things that might cause irritation. Want to see if I can write this paragraph without saying anything that's going to ping up weirdly in Google search results? Let's go. The gusset needs to be long enough to cover everything it needs to cover, but not so long that it wraps up your front or your bum and messes with the design lines of your fancy new underwear. There isn't really a standard size guide here, and there's so much personal preference involved - what I'm saying is take a stab at how wide you'd like the gusset to be, and then draw points on the vertical crotch line equalling its height. If it helps, my gusset is about five inches long. Now that you have that, draw two lines across at its top and bottom end points equalling 1/2 of the total width you'd like the gusset to cover. As I mentioned earlier, you can refer to a pair of well fitting undies to get this measurement, but it's very much a personal preference situation as well. I guessed at 1.75" for my half-back and 1.5" for my half-front, and that turned out to be much too wide after I'd made my first pair. I went back and shaved half an inch off the pattern pieces. This is why we test!
Now - what you have is a funny looking ladder type situation with one vertical line that has a lot of horizontal lines sticking out of it. The last step is to connect the dots and make leg holes! For the back leg, draw a shallow curved line connecting the hip dot to the back gusset dot. Then, follow the curve (in slightly) to the front gusset dot, then up along a fairly steep curve to connect again with the front hip dot. Voila! Cut your pieces apart, and we're ready to sew up a trial pair!
The Basic Pair
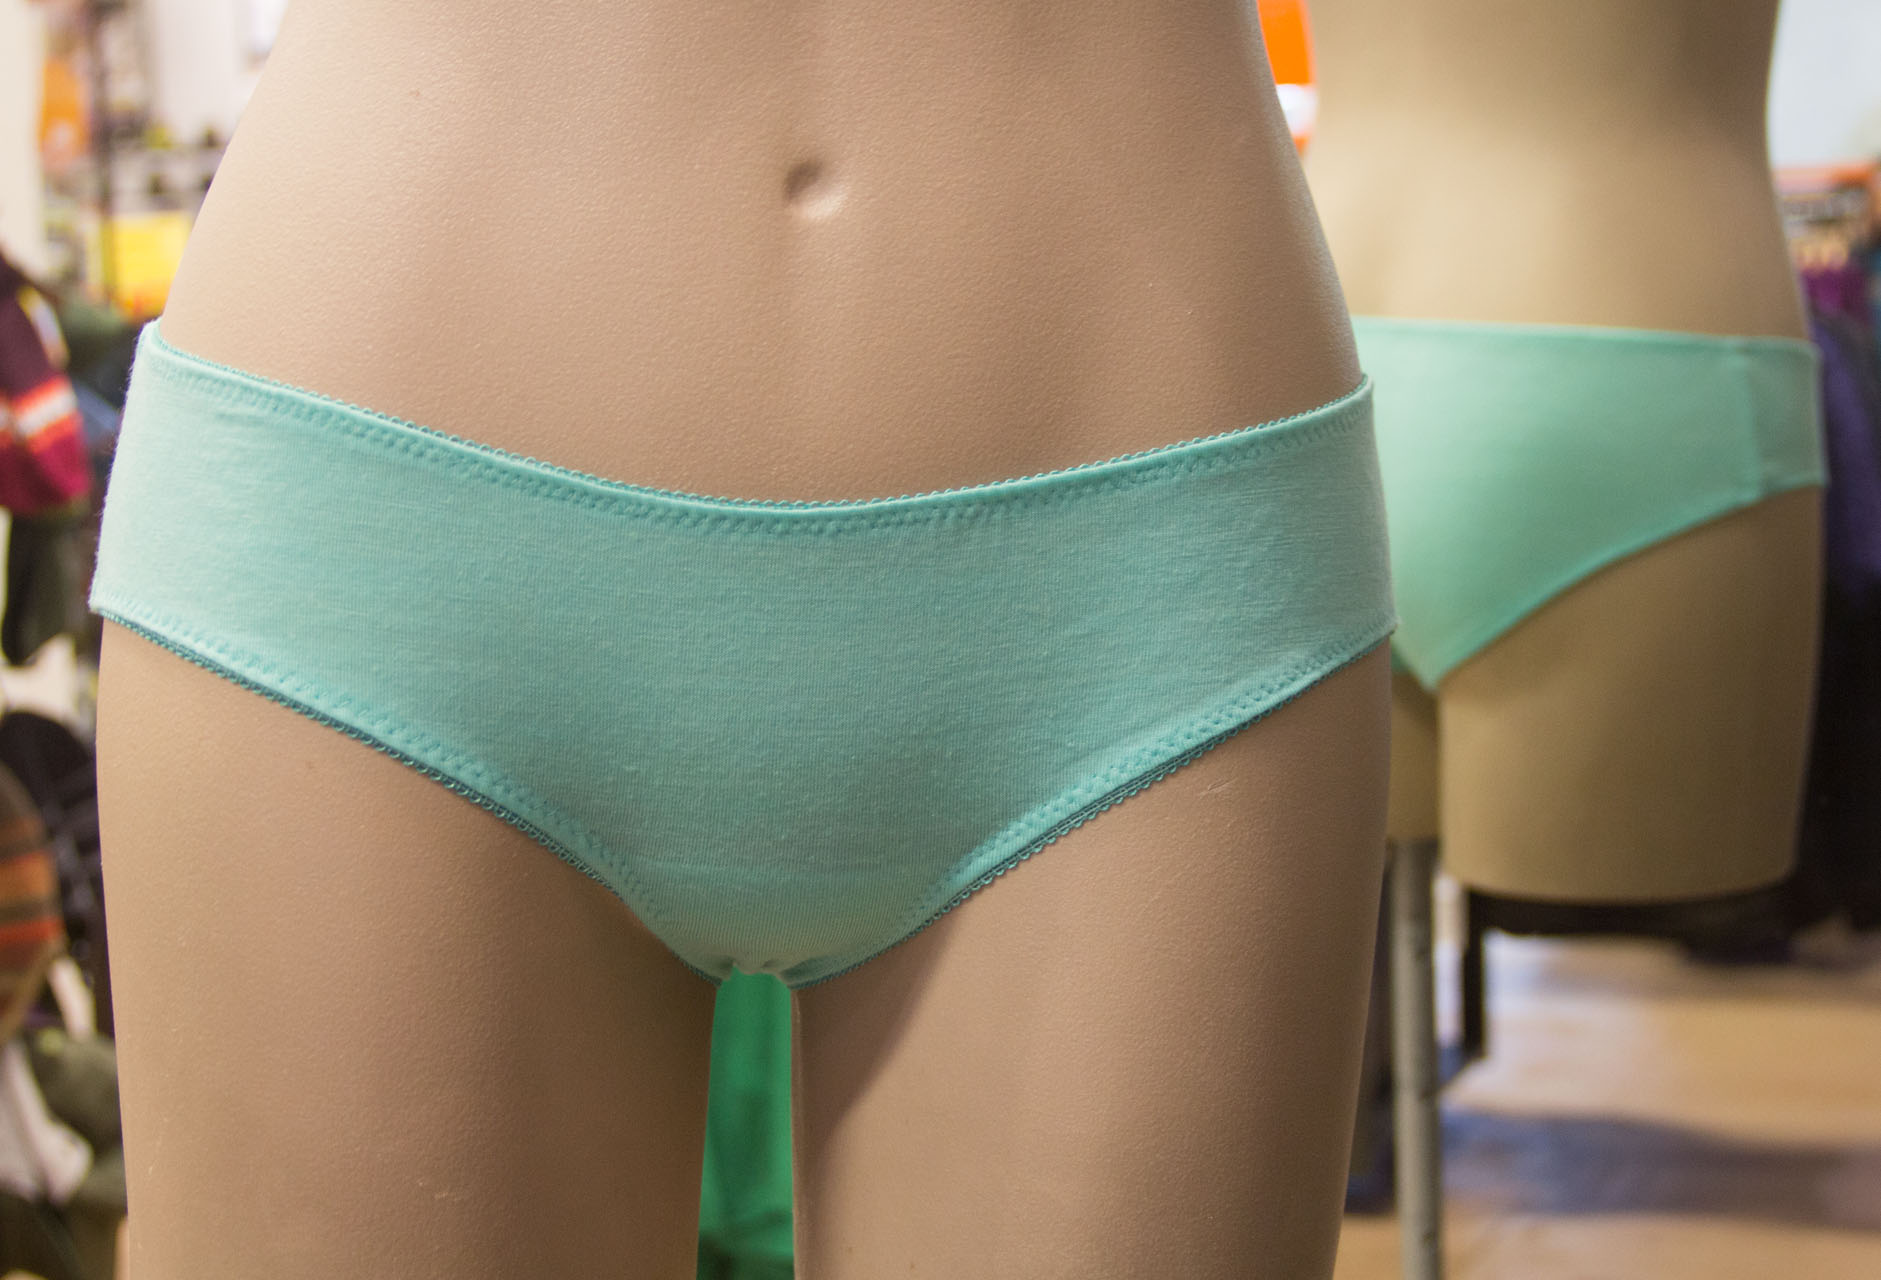
Once your basic panty block is done, you'll want to sew up a pair from your new pattern to test the fit before moving on to the variations. You can't really use cheap muslin here because the stretch factor is important, so try to find something that behaves similarly to the fabric you're intending to use. Alternatively, buy a bit extra of whatever fabric you're actually planning to use, and mock it up with that. For a muslin, I usually just eyeball a seam allowance (1/4" is my standard for lingerie, but don't add a seam allowance if you're intending to use fold over elastic!). The length of your elastics will depend mostly on how firm they are, but there's personal preference involved as well. Stitch your crotch seam together first by sandwiching the back piece between the front piece and the gusset.
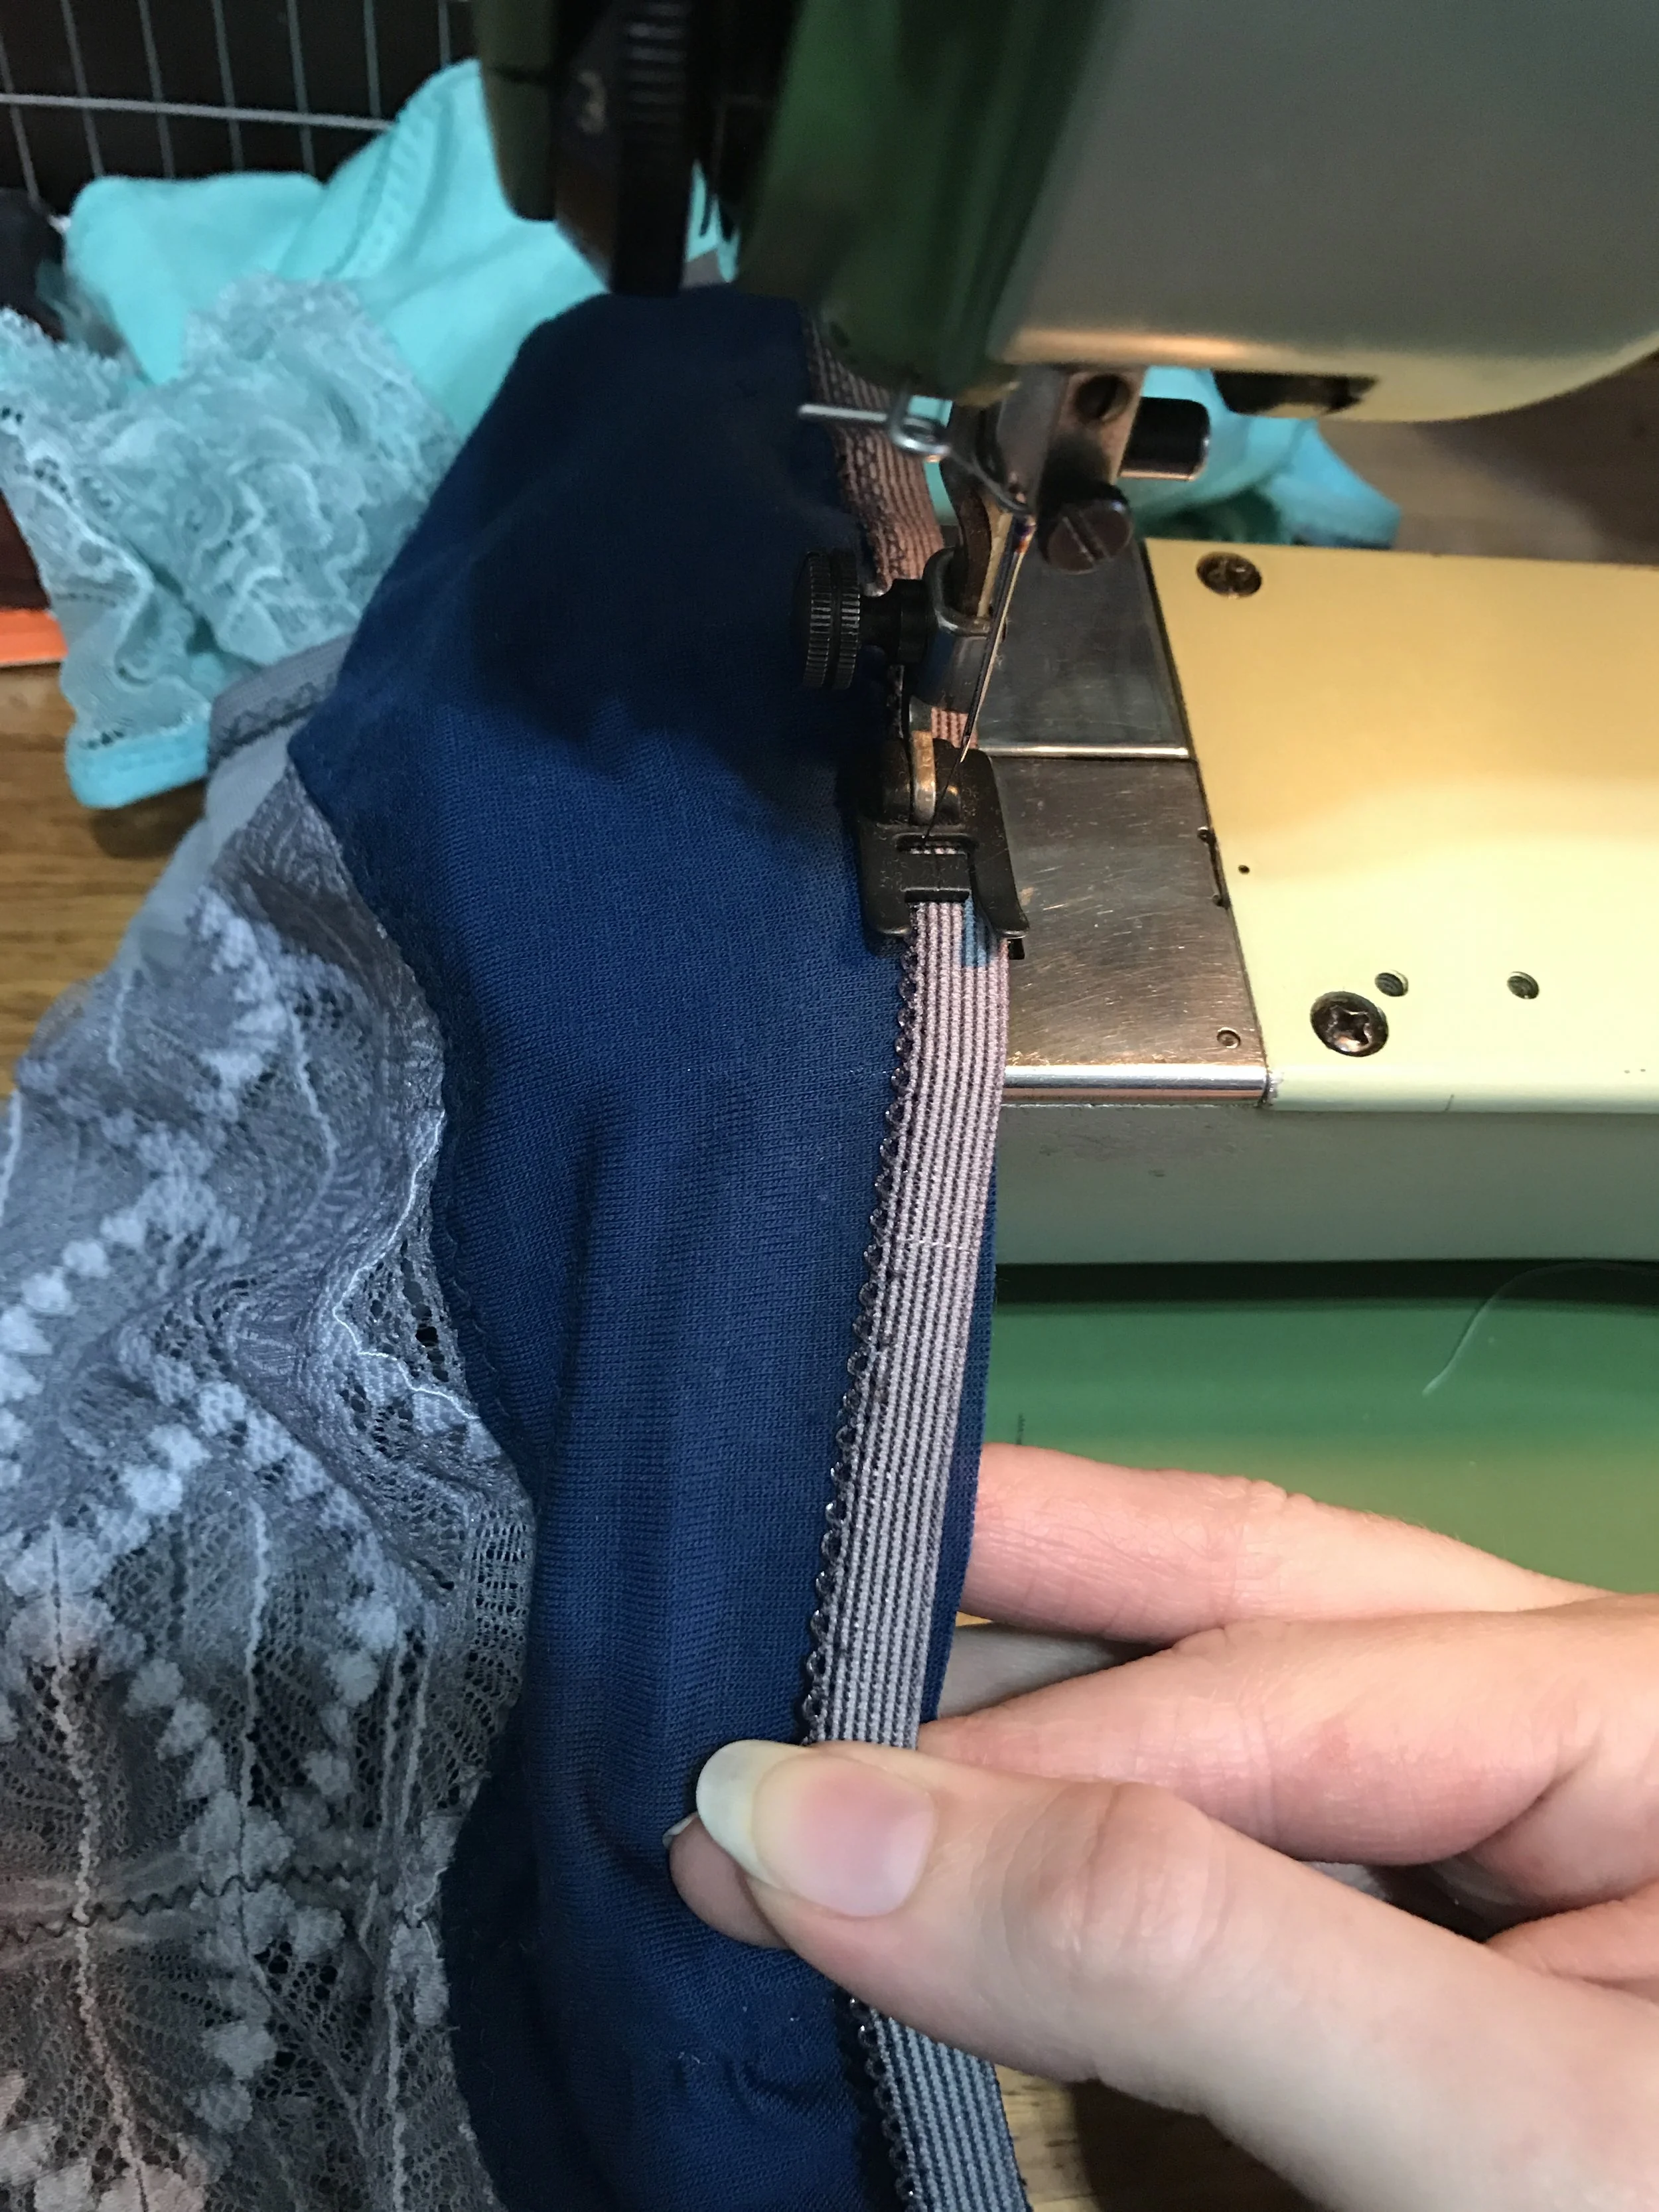
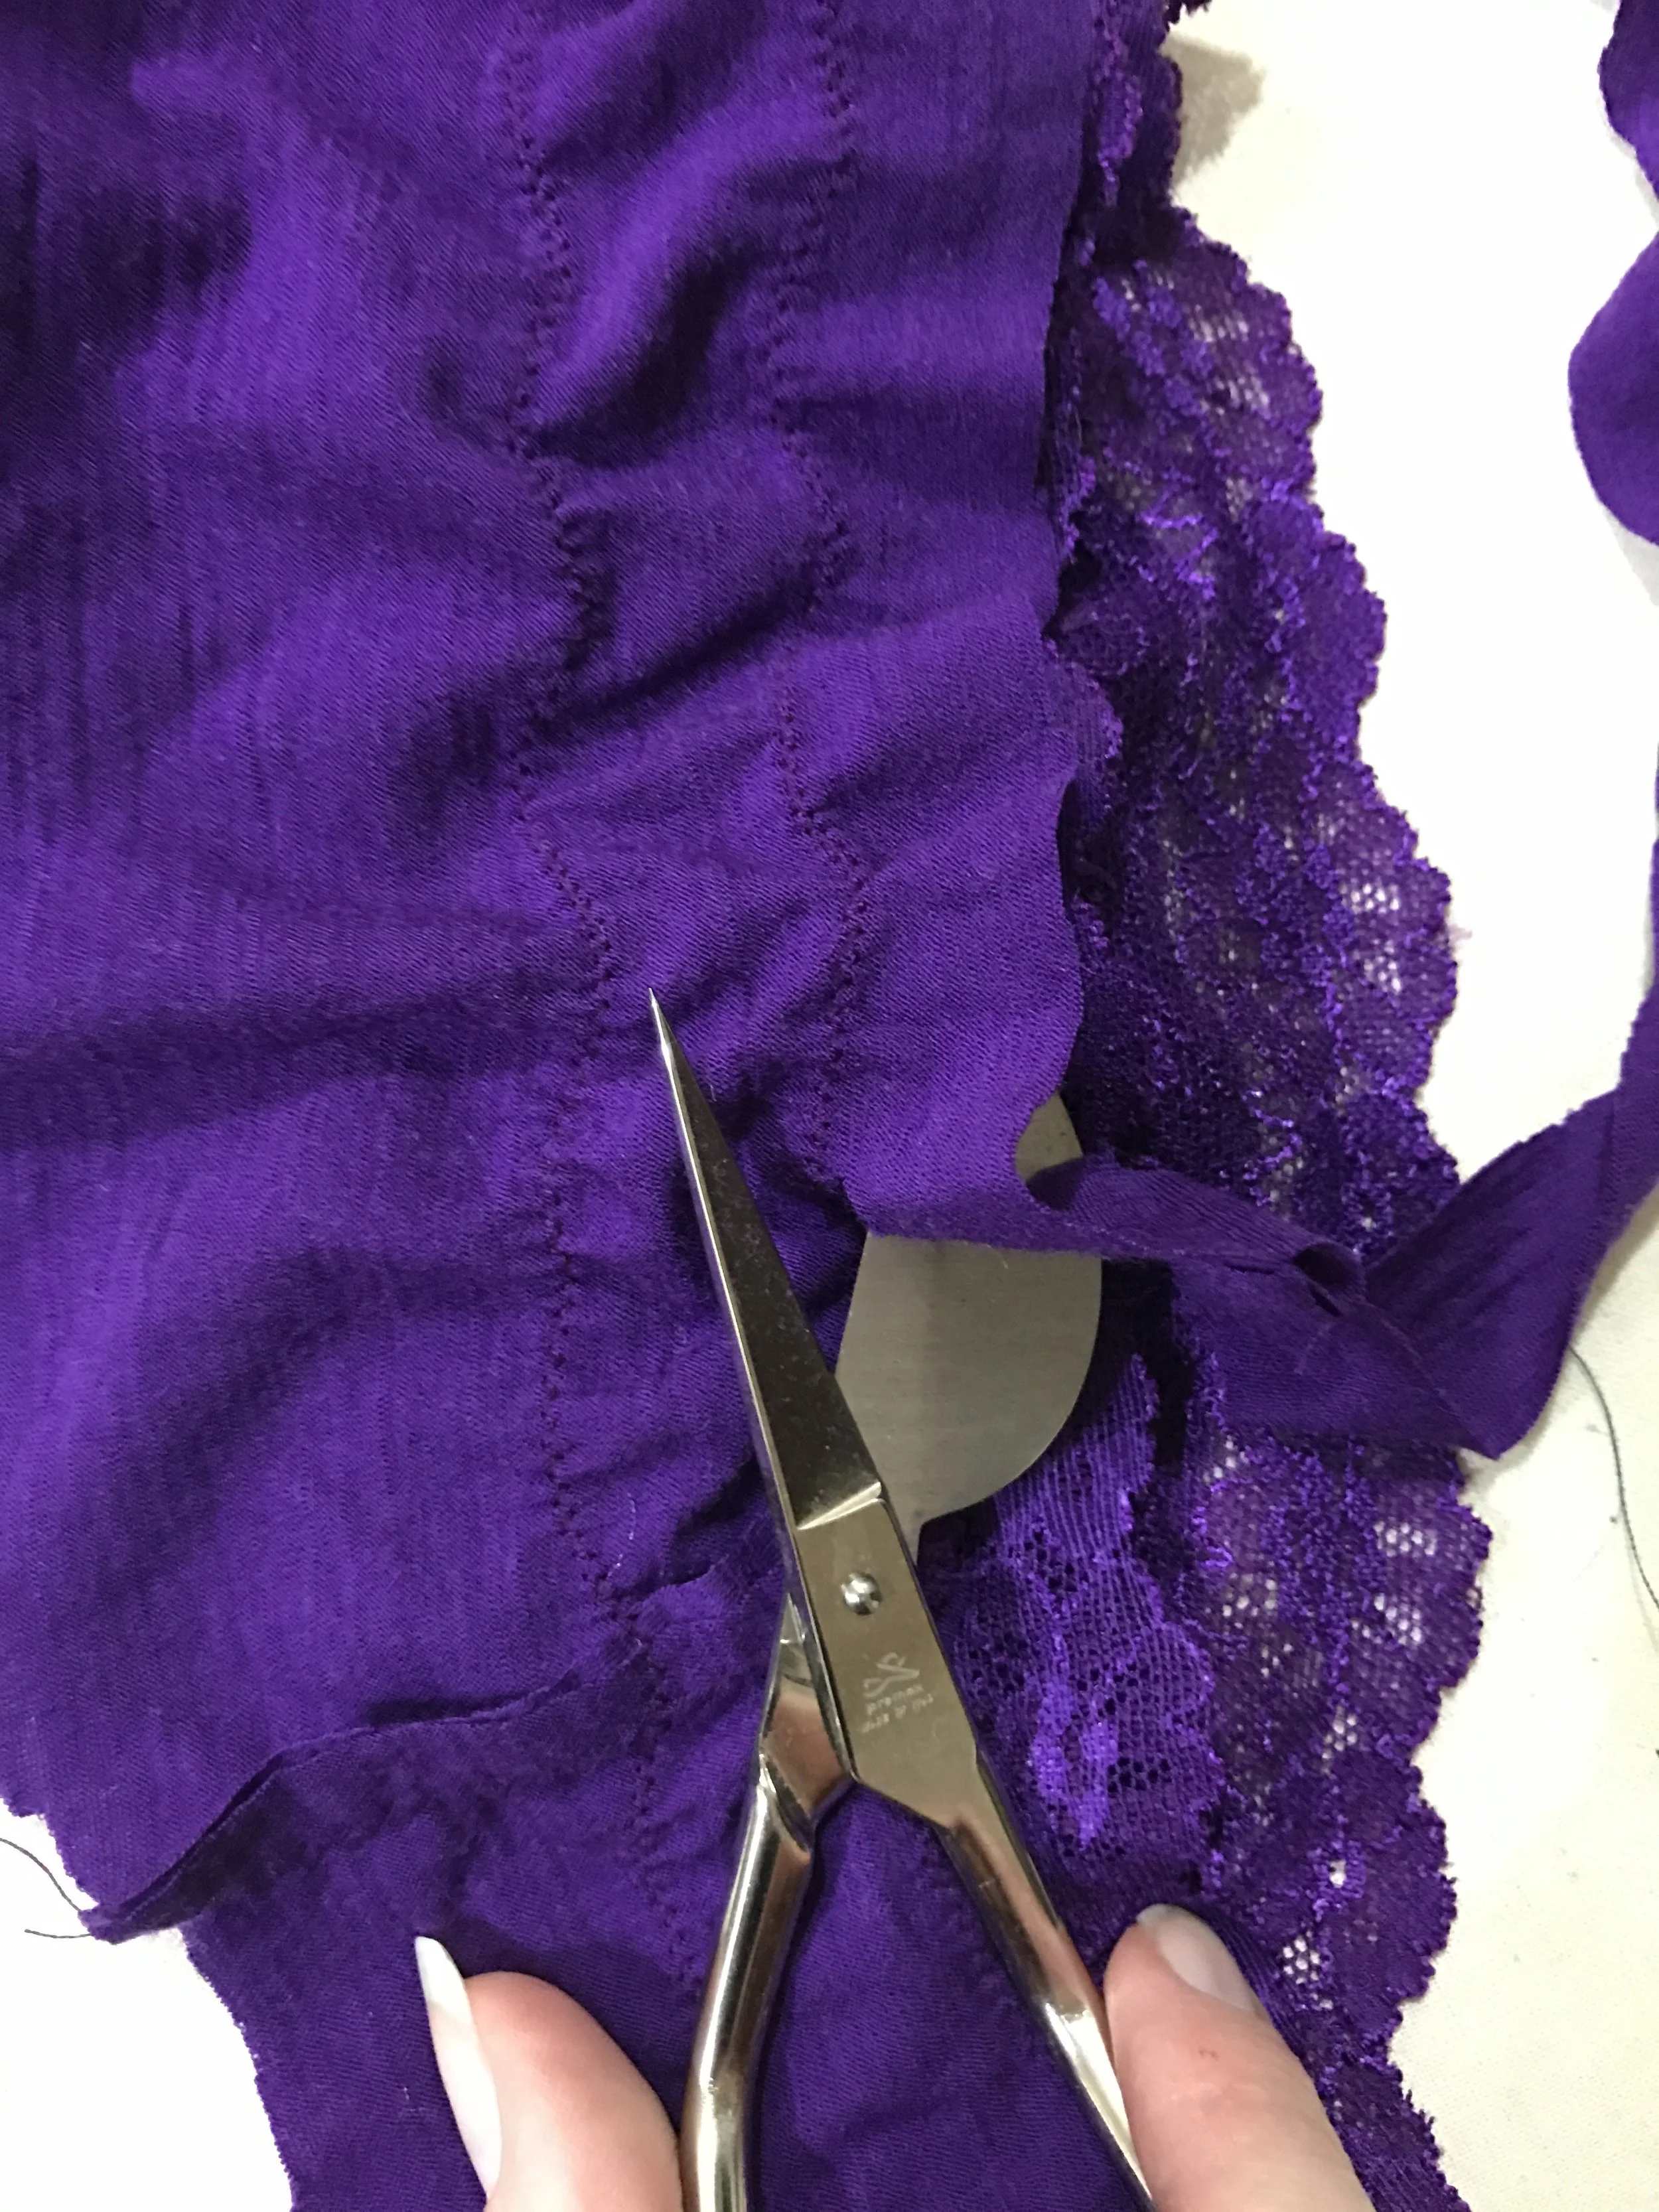
Staystitch the sides of your gusset to the front piece, then sew the side seams together. I'm going to give you super vague elastic instructions here, because it's going to be different for every body/booty, type of elastic, time of day (possibly kidding on that last point...) For picot elastic, align the bottom (plain) edge with the edge of your fabric, and use a medium-length zig zag stitch (mine's 2 wide and 2.75 long, for reference. This too depends on your fabric and elastic, but it's okay because this pair's a test!). Pull gently on the elastic as you sew, keeping it taunt. You're not looking for gathers, here - and don't forget that the panties are already 10, 20, or 30 percent smaller than you are. The elastic will definitely function to hold the panties on your body, but its main function is to hold the edges of the fabric flat against your body. Don't go crazy with the stretching! For the legs, I generally apply almost no stretch to the gusset area, and then concentrate a bit of extra stretch over the front leg curve to help it lie flat. To finish the picot elastic, trim any excess seam allowances down (I use my trusty duckbill scissors) and then flip it and stitch down again.


(Yes- I did forget to take a trimming picture on the first pair, so that second photo's elastic didn't just magically change color...)
Now - how do they fit? My fit adjustment was to remove some width from the crotch gusset area, but other than that I was pretty happy with the outcome. How'd you do with the elastic? was your first pass too tight? too loose? does the fabric itself fit? I'm afraid I won't be too helpful here as we're not doing fit photos, but my advice is to hang out in your new pair of underwear for a while so that you can see how they perform. If you look closely at my five pairs, you'll see that the width of the crotch is different on almost every pair. I wanted to experiment, and to be honest I think there's more than one right answer for me, in this case. That's okay too!
The Variations
I've made four different versions based on edits to the original draft we made above, because changing panty patterns is so much fun! I've structured this section a bit differently - the drafting and sewing is split up according to the variation, but I think from a reference point of view it'll be most helpful to have the different variations all in 'chapters' - so let's get going!
(I've also included instructions for techniques used, but only the first time the technique is mentioned.)
Version 1: Booty Ruching

From an aesthetics perspective, ruching is a good way to add dimension if (like me) you're on team flat booty. I've read people mentioning in the past that they're nervous that gathering like this might permanently ride up in an uncomfortable way, but we can solve that by drafting an extra wedge into the pattern, and then making sure that our strip of elastic is only slightly shorter than the original height of the pattern piece.
The front pattern piece remains the same. Make a slash in the back pattern piece and spread it from the center, as below:

I added an inch in height to mine, but that's purely personal preference. Before you begin construction, cut a piece of elastic that is either the original height of the back pattern piece (minus the new wedge) or 1/2" to 1" less, for maximum ruche factor. Stretch the elastic along the entire length of the back panty piece, and sew it down with a medium-width zig zag.

Construct the panties per the original construction method, sewing the gusset and front, staystitching the gusset, sewing the sides, and attaching the picot elastic to the waistband and leg openings. Voila! That was pretty simple, wasn't it?
Version 2: Wide LAce Waist

I had this piece of stretch lace trim leftover from another project, and only just enough to use as a waistband. We're not actually going to make any changes to our draft to make this version, just change the construction slightly for the lace. Cut out the original pattern as is, and sew the gusset and side seams together as normal. Now, cut a piece of lace that's slightly shorter than the full width of the panties. How much shorter will depend on your personal preference and how firm of a stretch the lace has. I cut mine 3/4" shorter and sewed it into a loop with a 1/4" seam allowance, so the total difference between the width of the panties and the width of the trim was about 1 1/4". Enough that the lace will hold flat against my body, but not so much that the stretch will cause horizontal stretch wrinkles. Align the lace's top edge with the top edge of your panties, and pin the lace to the fabric, equally distributing the slightly shorter trim around the body of the panties. Use a narrow zig zag stitch (My width was set to 2, length 2.75) to topstitch the lower edge of the trim to the panty, following the scallops of the lace as close to the edge as possible. If your lace is narrower (an inch wide or less) you can stop here and proceed to the trimming step.

If your lace is on the wider side, like mine, you may choose to make another pass of topstitching to stabilize the lace. Mine in particular has a tendency to fold over on itself along the middle, which I wanted to prevent. Topstitch a second row of zig zag stitches about halfway up, following a scallop pattern.
Using either duckbill applique scissors or very sharp snips, trim the excess fabric as close as you can to the zig zag stitches. What is left will be a lace partially overlayed on the panty fabric, and partially overlayed on your skin. How pretty!
Just finish up by attaching your preferred elastic to the legs, and you're done!
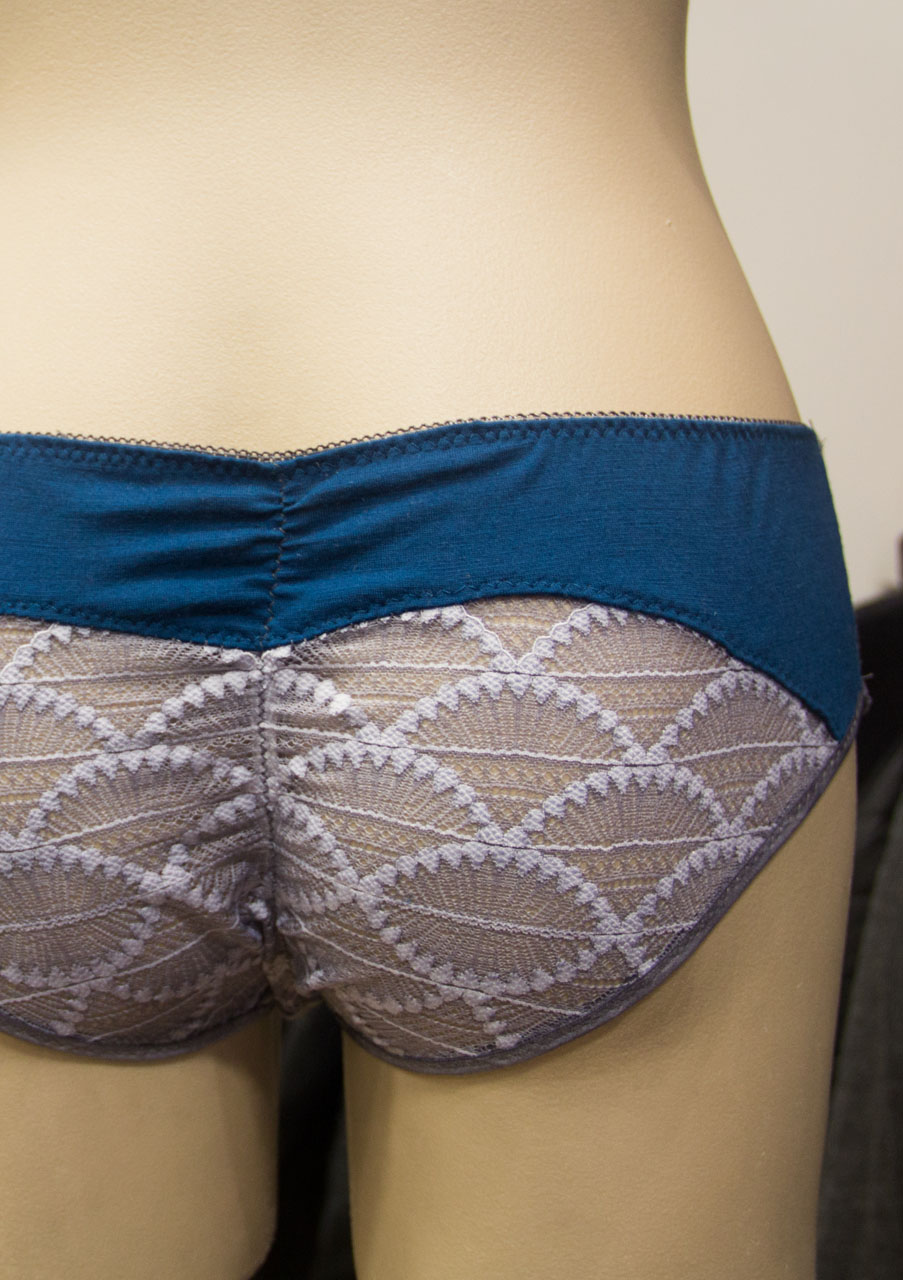
Version 3: Back Yoke with Lace (and optional Booty Ruching)

In this iteration, I've modified the pattern to include the back yoke but that's the only draft change we're making. The ruching in this version is less of a feature, so I made no pattern modifications and only cut my piece of elastic 3/4" shorter than the height of the pattern piece. Of course, you can swap out any pattern pieces with a stretch lace that's wide enough. For example, I could have chosen to make the lower part a solid and make my yoke lace as well. First, grab your panty back pattern piece, trace off a copy, and draw a gently curved line for the yoke. The more pronounced the curve, the tricker it'll be to sew, but you could totally go deeper for more drama if you wanted. Cut along your new line, and add seam allowances.

To sew, we'll construct the back piece first. sew the yoke to the lower piece with a narrow zig zag stitch, then iron it open (I pressed my seam up towards the yoke, but in general I'd say press it away from the lace) - and topstitch with another narrow zig zag. Add the booty ruching as described in version 1, and then construct the panties as normal. Here, I've added foldover elastic, which you might wish to add on your own. First, cut off the seam allowance from any seam you want to apply the elastic to. Holding the panty fabric right side up in your left hand, place the left edge of the elastic under the fabric so that the edge of the fabric lines up with the center fold of the elastic. Stitch the elastic down along the edge. Next, trim any excess over bulky seams, fold the elastic over its center fold, and topstitch again to secure the folded edge.


Finish the next leg and you're golden!

Version 4: Three Piece Panty

This one might look like the most complicated of the bunch, but it's really not hard at all. As with the yoke in version 3, we're just going to make new design lines in the pattern and then cut it apart into new pieces. Trace off copies of the front and the back pieces onto new paper so that the side seams match up (remember to remove the seam allowances!)
Then, mark slashes where you'd like to separate the pattern. I'm not going to lie, I totally eyeballed mine, thinking about where each seam would fall on my leg. Cut your pattern apart at the new seams, and add seam allowances.

I chose to emphasize the new style lines with different fabric choices - knit for the back, stretch lace sides, and a woven silk scrap for the front. I took a risk with the woven piece - since it doesn't stretch like the other fabrics, it's possible it would've been too tight, but my other fabrics are stretchy enough to make up for the front. You can just as easily use stretch fabrics for all three pieces. To emphasize the pretty border on my lace, I didn't cut on a seam allowance for the top edge, but I did for both the front and back pieces. To construct, just sew the side seams as normal, aligning the edges from the leg side so that the lace is slightly shorter than the neighboring fabric piece. Sew the picot elastic as normal to the back, but when you get to the lace, skip the first pass of zig zags, leaving enough elastic for the side, sew the front down, and complete the loop. When you flip the picot elastic inside after trimming, you'll find that it lines up with the top edge of the lace border, while neatly encasing the raw edges of the neighboring pieces in the usual way. Make your second pass to finish attaching the picot elastic, and that's the last of the variations in today's monthly draft finished!

The variations don't end here. Once you have your basic block, the possibilities are quite literally endless. For this post I've also limited myself to variations that stick to the original shape of the draft, but you can just as easily change your basic block to different shapes - boy short, thong, high waisted - anything you can think of!
As always, if you make a Monthly Draft project, send me an email, instagram message, or carrier pigeon to let me know how it went! Also, feel free to ask questions or make suggestions in the comments if you'd like to see something featured in a future Monthly Draft, or if I've done a horrible job of explaining something... it's been known to happen ;) Thanks so much for sticking around through another monster of a post, and I'll see you all next week!