

My favorite thing to make is clothes. Within that category, there are a few competitors for reigning champion of favorites (fancy dresses, but also jeans, but also hand tailored stuff, but also bras...) -whatever it is, it's definitely a clothing item.

This has not always been the case.
In high school, although I was competent with a sewing machine, my success rate for garments in the category of 'wearable' was, let's just say, not high. I didn't like sewing with commercial patterns and didn't understand fitting, so I did a lot of cut-and-sew-as-you-go. Without any patternmaking experience, it was frequently disastrous. I ended up teaching myself draping in time to make my senior prom dress, and I learned a lot about clothes by copying the RTW items in my closet, but I also spent a lot of time making one thing in particular that didn't require any fitting at all: Bags.
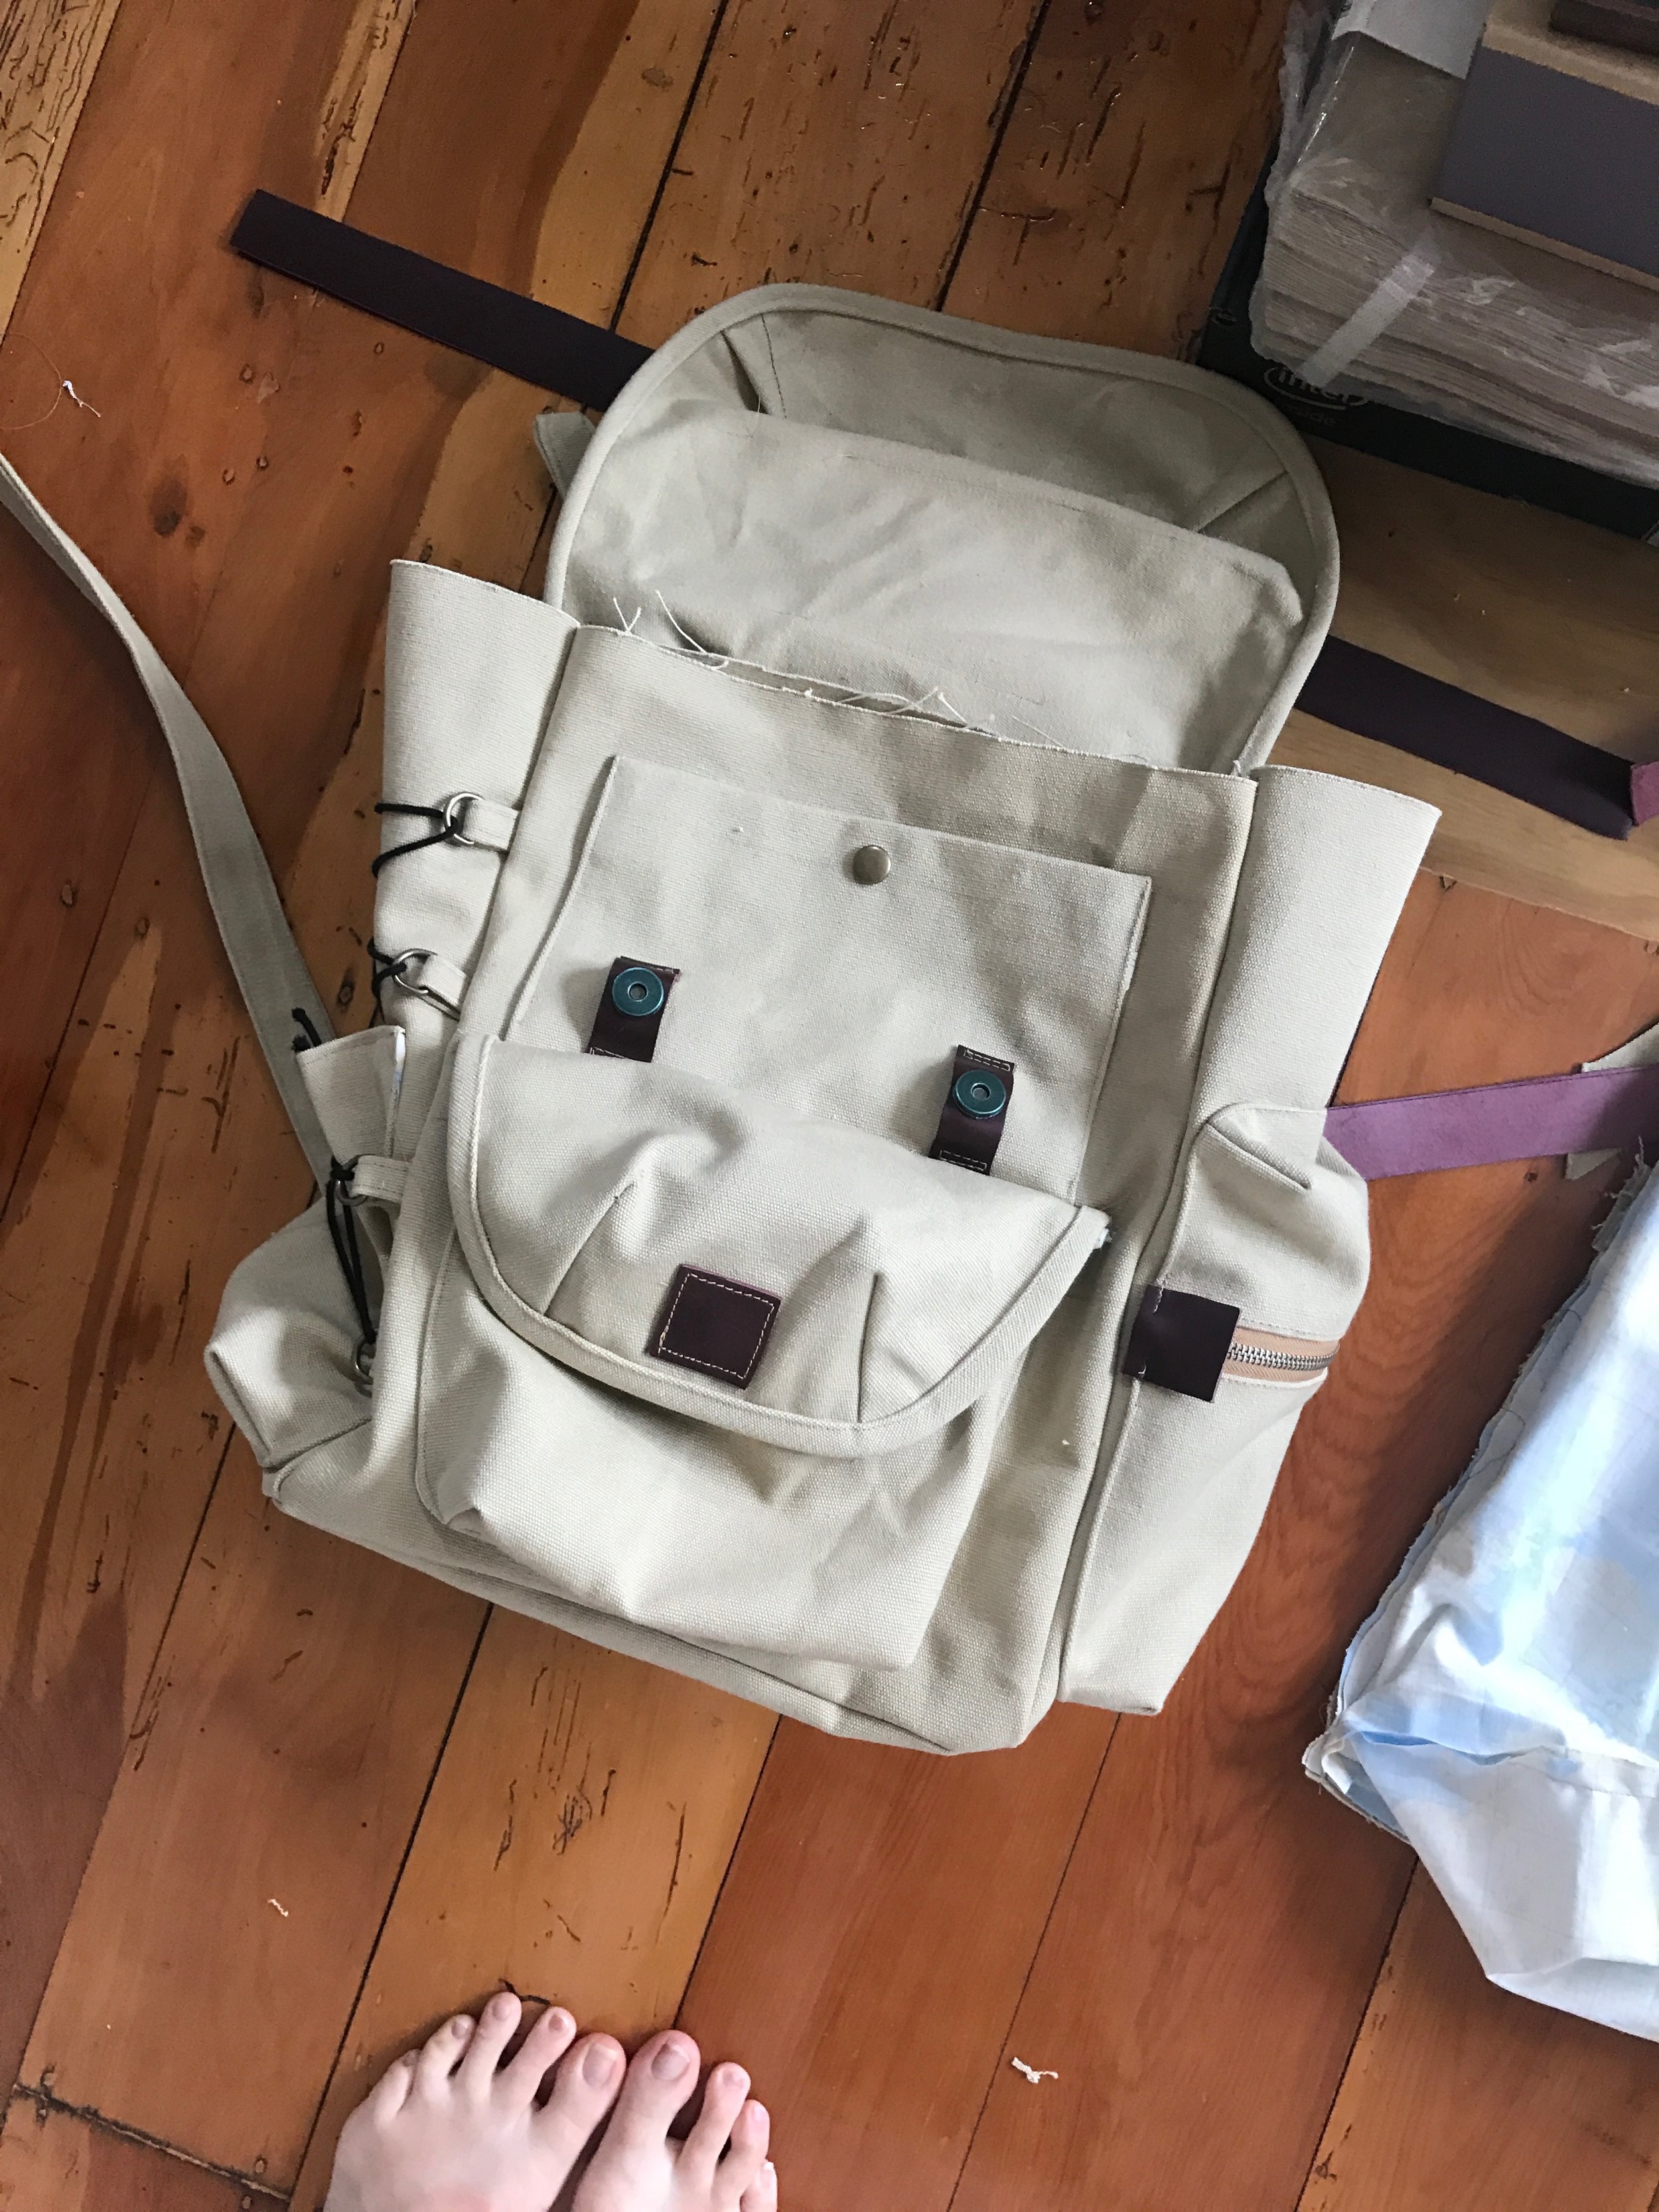
Yes, it is bothering me that the flap is flipped inside and that my closure is running away. I can’t go back and take more photos though, so use your imagination!
Bags, totes, purses, clutches, sacks - you name it, High School Me made it. I used denim, leather, suede, upholstery remnants, velvet, quilt fabric, duck tape - I knit one, and made two out of seat belts pulled from totaled cars. By the time I left for college, I had a whole plastic tub full of them, and I loved each and every one. I didn't really plan for it, but as soon as I figured out how to make clothes with a higher degree of success the bag making just kind of stopped. This is only the second bag I've made in the last seven years. (to be fair, the other one is my leather tote which I carry literally every single time I leave the house).
Generally, when I make a clothing item, I start with a draft, make a muslin, pin or sew some changes, transfer the changes to the pattern, and repeat that process until I'm happy with the design. The process for a bag is (still, apparently) a little bit different. With a few exceptions, the bag is a series of rectangles all sewn together, so I didn't use a pattern! Before I started sewing, I did a lot of research on different types of canvas bags. My main inspiration was the bag I used in college - an urban outfitters pack that my Mom bought for me, because I am a bag-zipper murderer. I used it as a day bag after school, and Jon started using it as a work bag a few years ago. Let's just say the poor thing hasn't aged well. I've replaced the lining, the faux leather decoration is completely shredded, and the whole thing is sun-bleached to a color unrecognizable from the original.
I didn't want a direct copy because there were some things that needed changing about this bag (different pocket construction, a water bottle holder, etc.) so I consulted Pinterest for some other ideas. I also made a generalized 'packing list' of everything I could think of that I'd want to use the bag for, and what would go inside it. I've arranged easy access to a knitting project, pens and pencils, water bottle, and a place to store a bulkier item like a sweater on the outside of the bag. I've also reinforced the spots that wore out the most quickly on my old backpack.

The most important part of the prep was sketching out the bag from each side, taking measurements of items I wanted to go inside (The laptop pocket fits the laptop!) and consulting a few airline websites to be sure it fit within the carry-on size restrictions. I made notes of the dimensions of each pattern piece in my sketches and then made a list of every single piece of hardware I'd drawn, ordered that lot, and started cutting pieces. It's a bit weird to start something without a pattern, but also kind of exhilarating!

Generally, a bag like this is constructed in sections. The front is cut (a rectangle, desired height and width plus 1/2" SA on all sides) then its pockets (a patch and a wide-mouthed flap pocket) are measured out and cut. The patch is easy - desired size plus seam allowances, and the flap pocket is a desired area plus a depth for the sides and bottom. I lined the pocket by creating the piece in both main and lining fabric, sewing them right sides together, turning them right side out, and attaching them from the outside so that all the seams are enclosed. The flap got two darts for shaping and stability, and a bias binding. Inside, the flap is sewn to the bottom of the patch pocket above it after being encased in bias binding as well. Then, I set the front piece aside and entirely constructed the two sides, the back (with straps and hanging loop), the top flap, and the lining before sewing all the pieces together. I generally leave hardware attachment for the end, but in this case the snaps and such should be attached along the way because the back of the piece will be very hard to get to once the lining's inserted.
I'm pretty ashamed to say that I did an absolutely abysmal job of taking progress photos - there are really only a few - like this one with my toes in it…I'm also hoping the Finished Object shots make up for it ;)
My sewing machine dealt with the single layers of leather like a champ, and was fine with up to eight layers of my very heavy duty canvas - but two layers of leather (where the straps and hanging loop overlap) was a bit of a struggle. I did end up reinforcing some key points with rivets, just in case. Although my machine handled it fine, the bag got more and more physically difficult to manhandle as it grew larger, because it was such a task to wrangle it through the sewing machine. I ended up with a sore shoulder from holding the thing up and tugging things around to the right position!

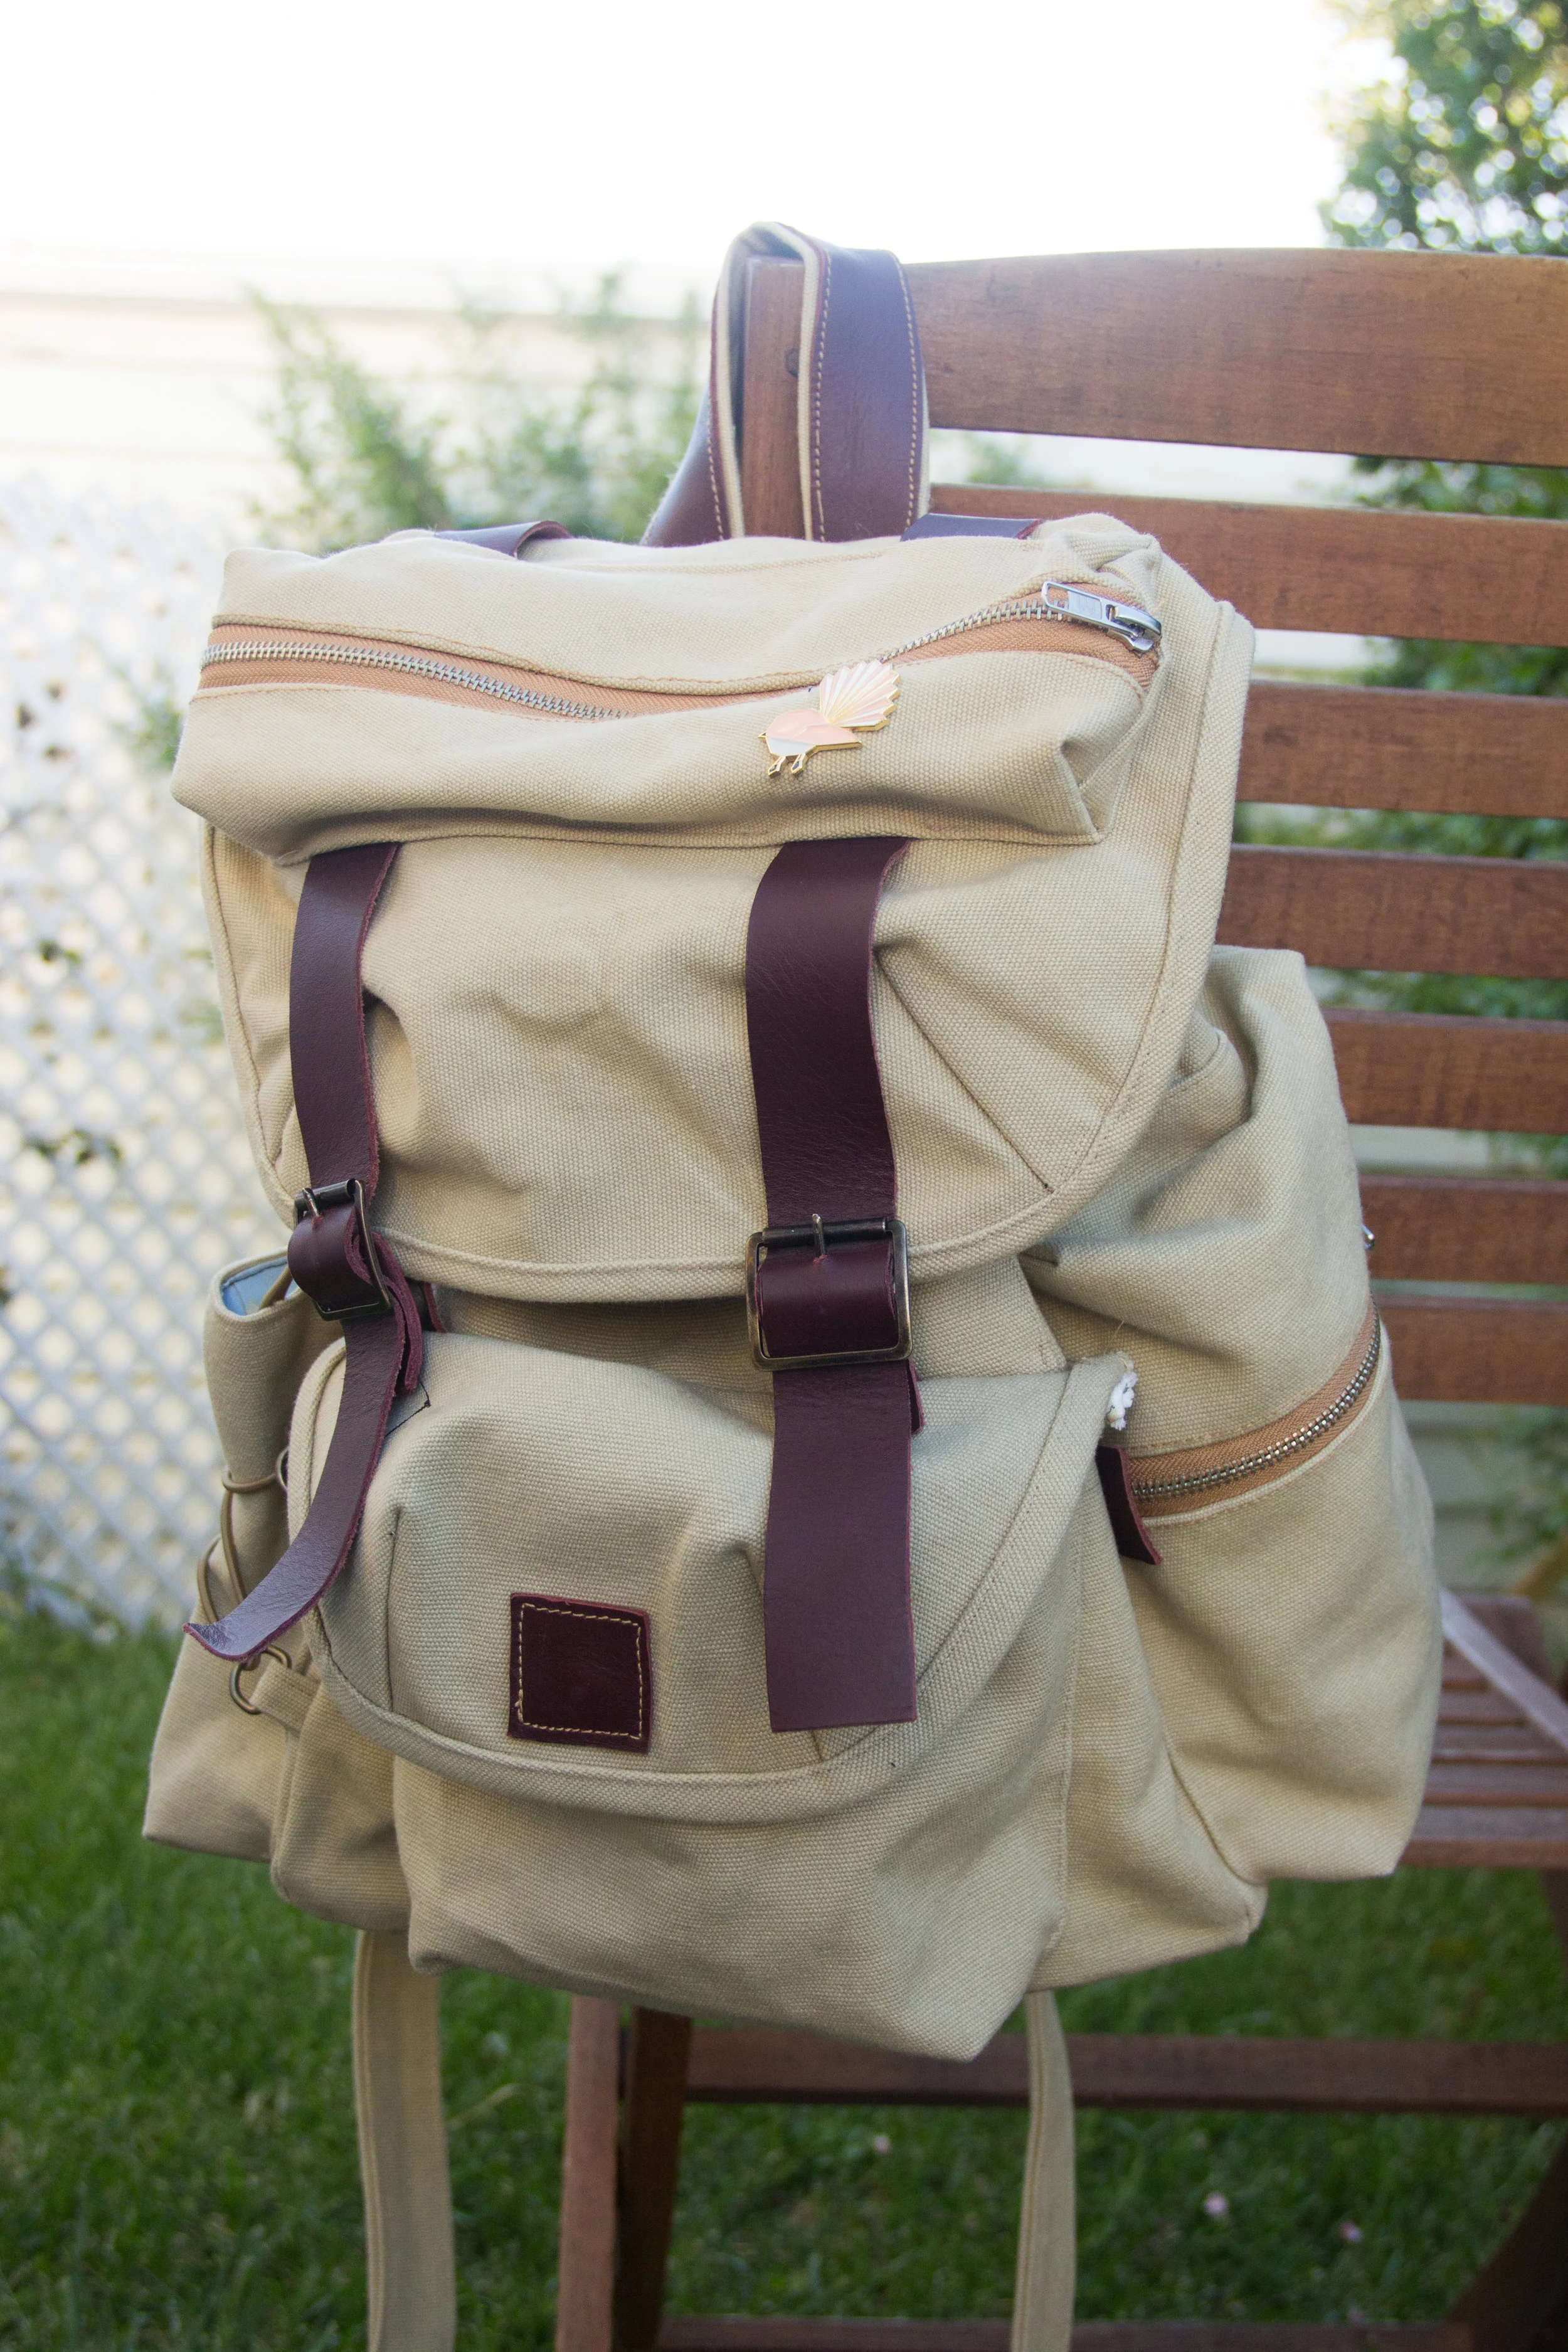
The straps aren’t actually buckled - a trick I copied from the original Urban Outfitters bag. The buckles are decorative, and underneath you’ll find magnetic snaps, so the top flap of the bag is easy to tug open. That said, the buckles mean it’s still adjustable if required.
Okay, I know you're curious. The 'this object is made from' section generally consists of one sentence or less - "I used this fabric and I got it from here" - but this fella. Gosh, what a mission. All the hardware came from GDL Trading in Auckland. Here's a list:
Heavy Cotton Canvas - from Mood (please don’t ask how much shipping was, I don’t want to talk about it)
Map Print quilting cotton for lining - from Bolt of Cloth in Auckland
8 12mm D rings
14 13mm grommets
2 32mm strap buckles
2 30mm decorative buckles
2 heavy duty snaps
3 magnetic clasps
2 metal zippers - from Spotlight
1.5m shock cord - from Rockywoods (which is amazing, by the way)
Double Capped Rivets (leftover from the picnic basket)
1 locking slider (rescued off a broken thing that had a drawstring)
Strap leather - The Fabric Store (originally purchased for my leather tote bag, I've used scraps of this leather for several other projects)
Rope top closure: The original shoelace from one of Jon’s hiking boots. (We swapped our hiking boot shoelaces for matching teal and purple ones because we’re nerds - I’ve had the original laces knocking around for a while and was too crunched for time to make a length of self-cord for the lining.)

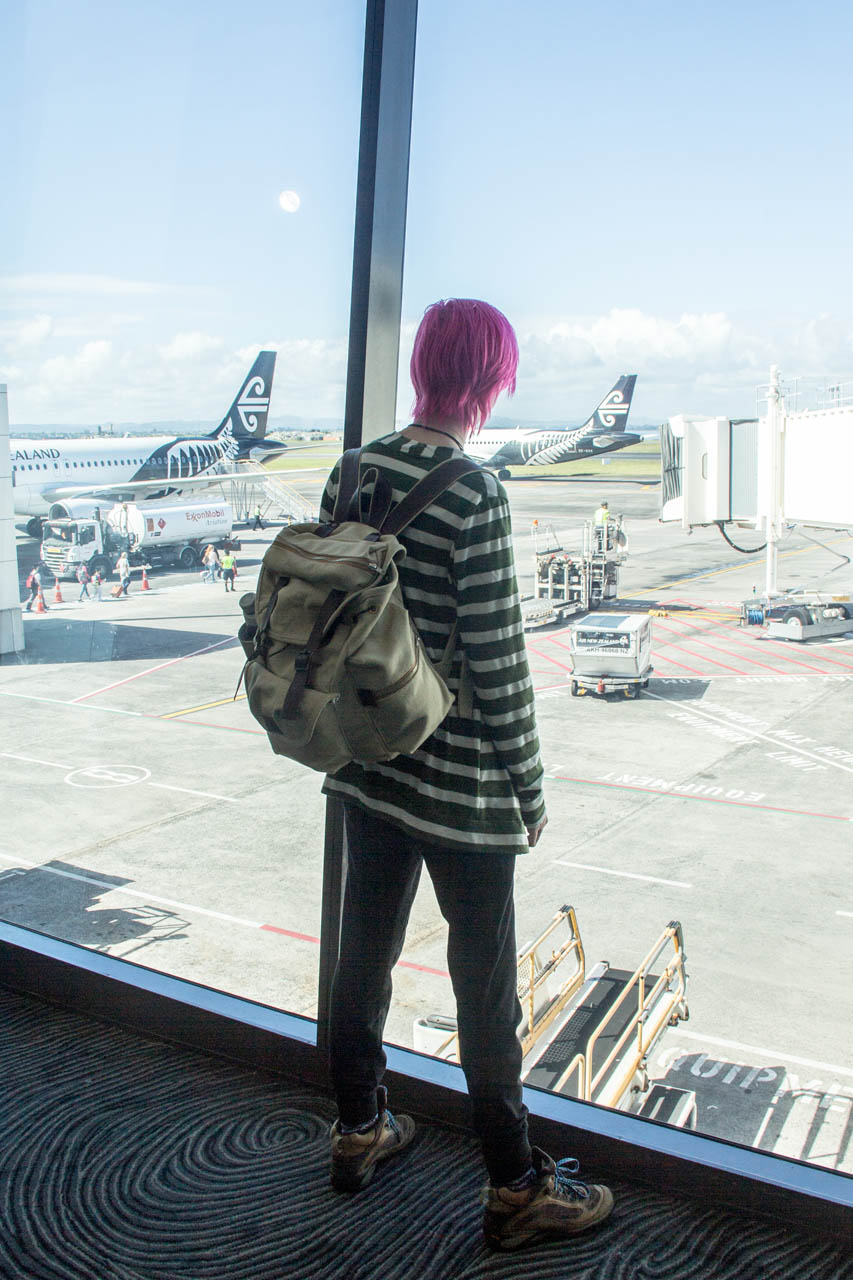
Whew! I'm really happy with how professional the hardware makes it look, but man, that sucker was a mission. Part of the reason I took so few in-progress photos was because even though I ordered the hardware in December and the fabric in August - I didn't get a chance to start making the bag until four days before we left on our trip to the states, and this bag was going to be my carry-on. Without a backup plan. I guess in terms of pre-vacation panic sewing, I'm a go hard or stay home kinda girl - but hey, I finished it! The day we left for the US, no less! There are a few things I wish I’d been able to do differently - the gold grommets which don’t match the rest of the antique brass hardware - and the bag straps use silver buckles as well. A few things I would have done differently in the construction order, but that’s always the way, isn’t it?

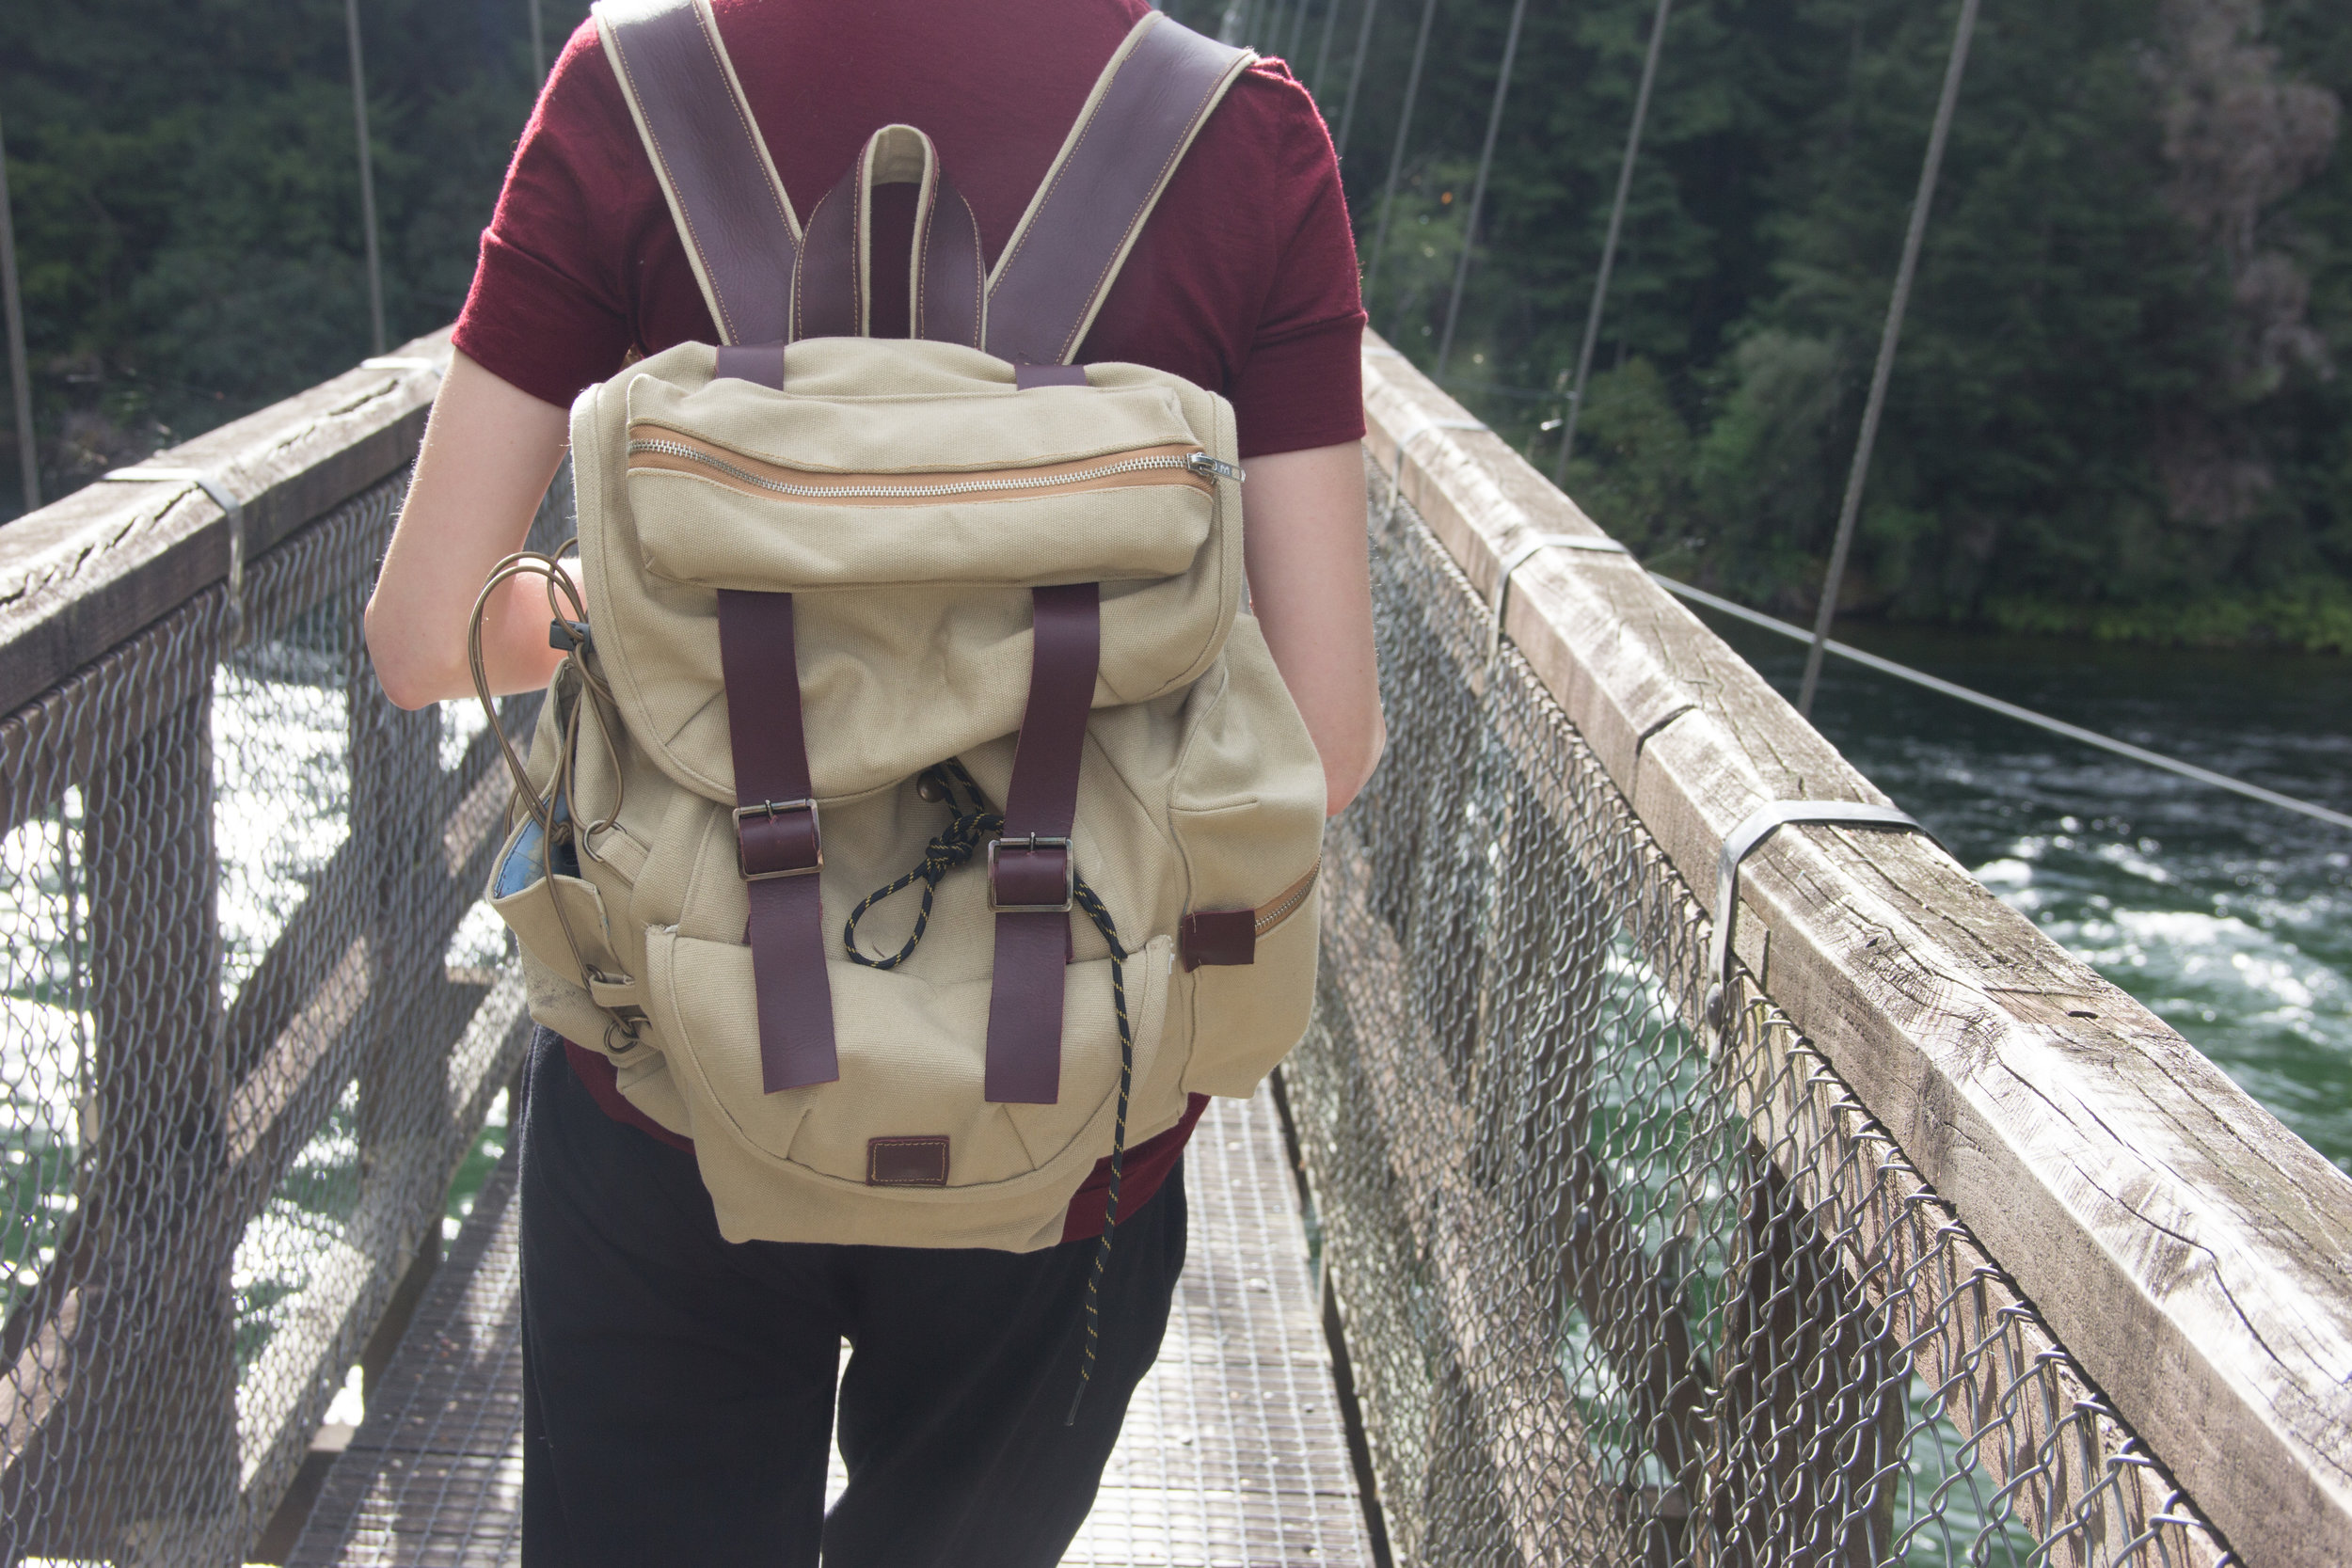
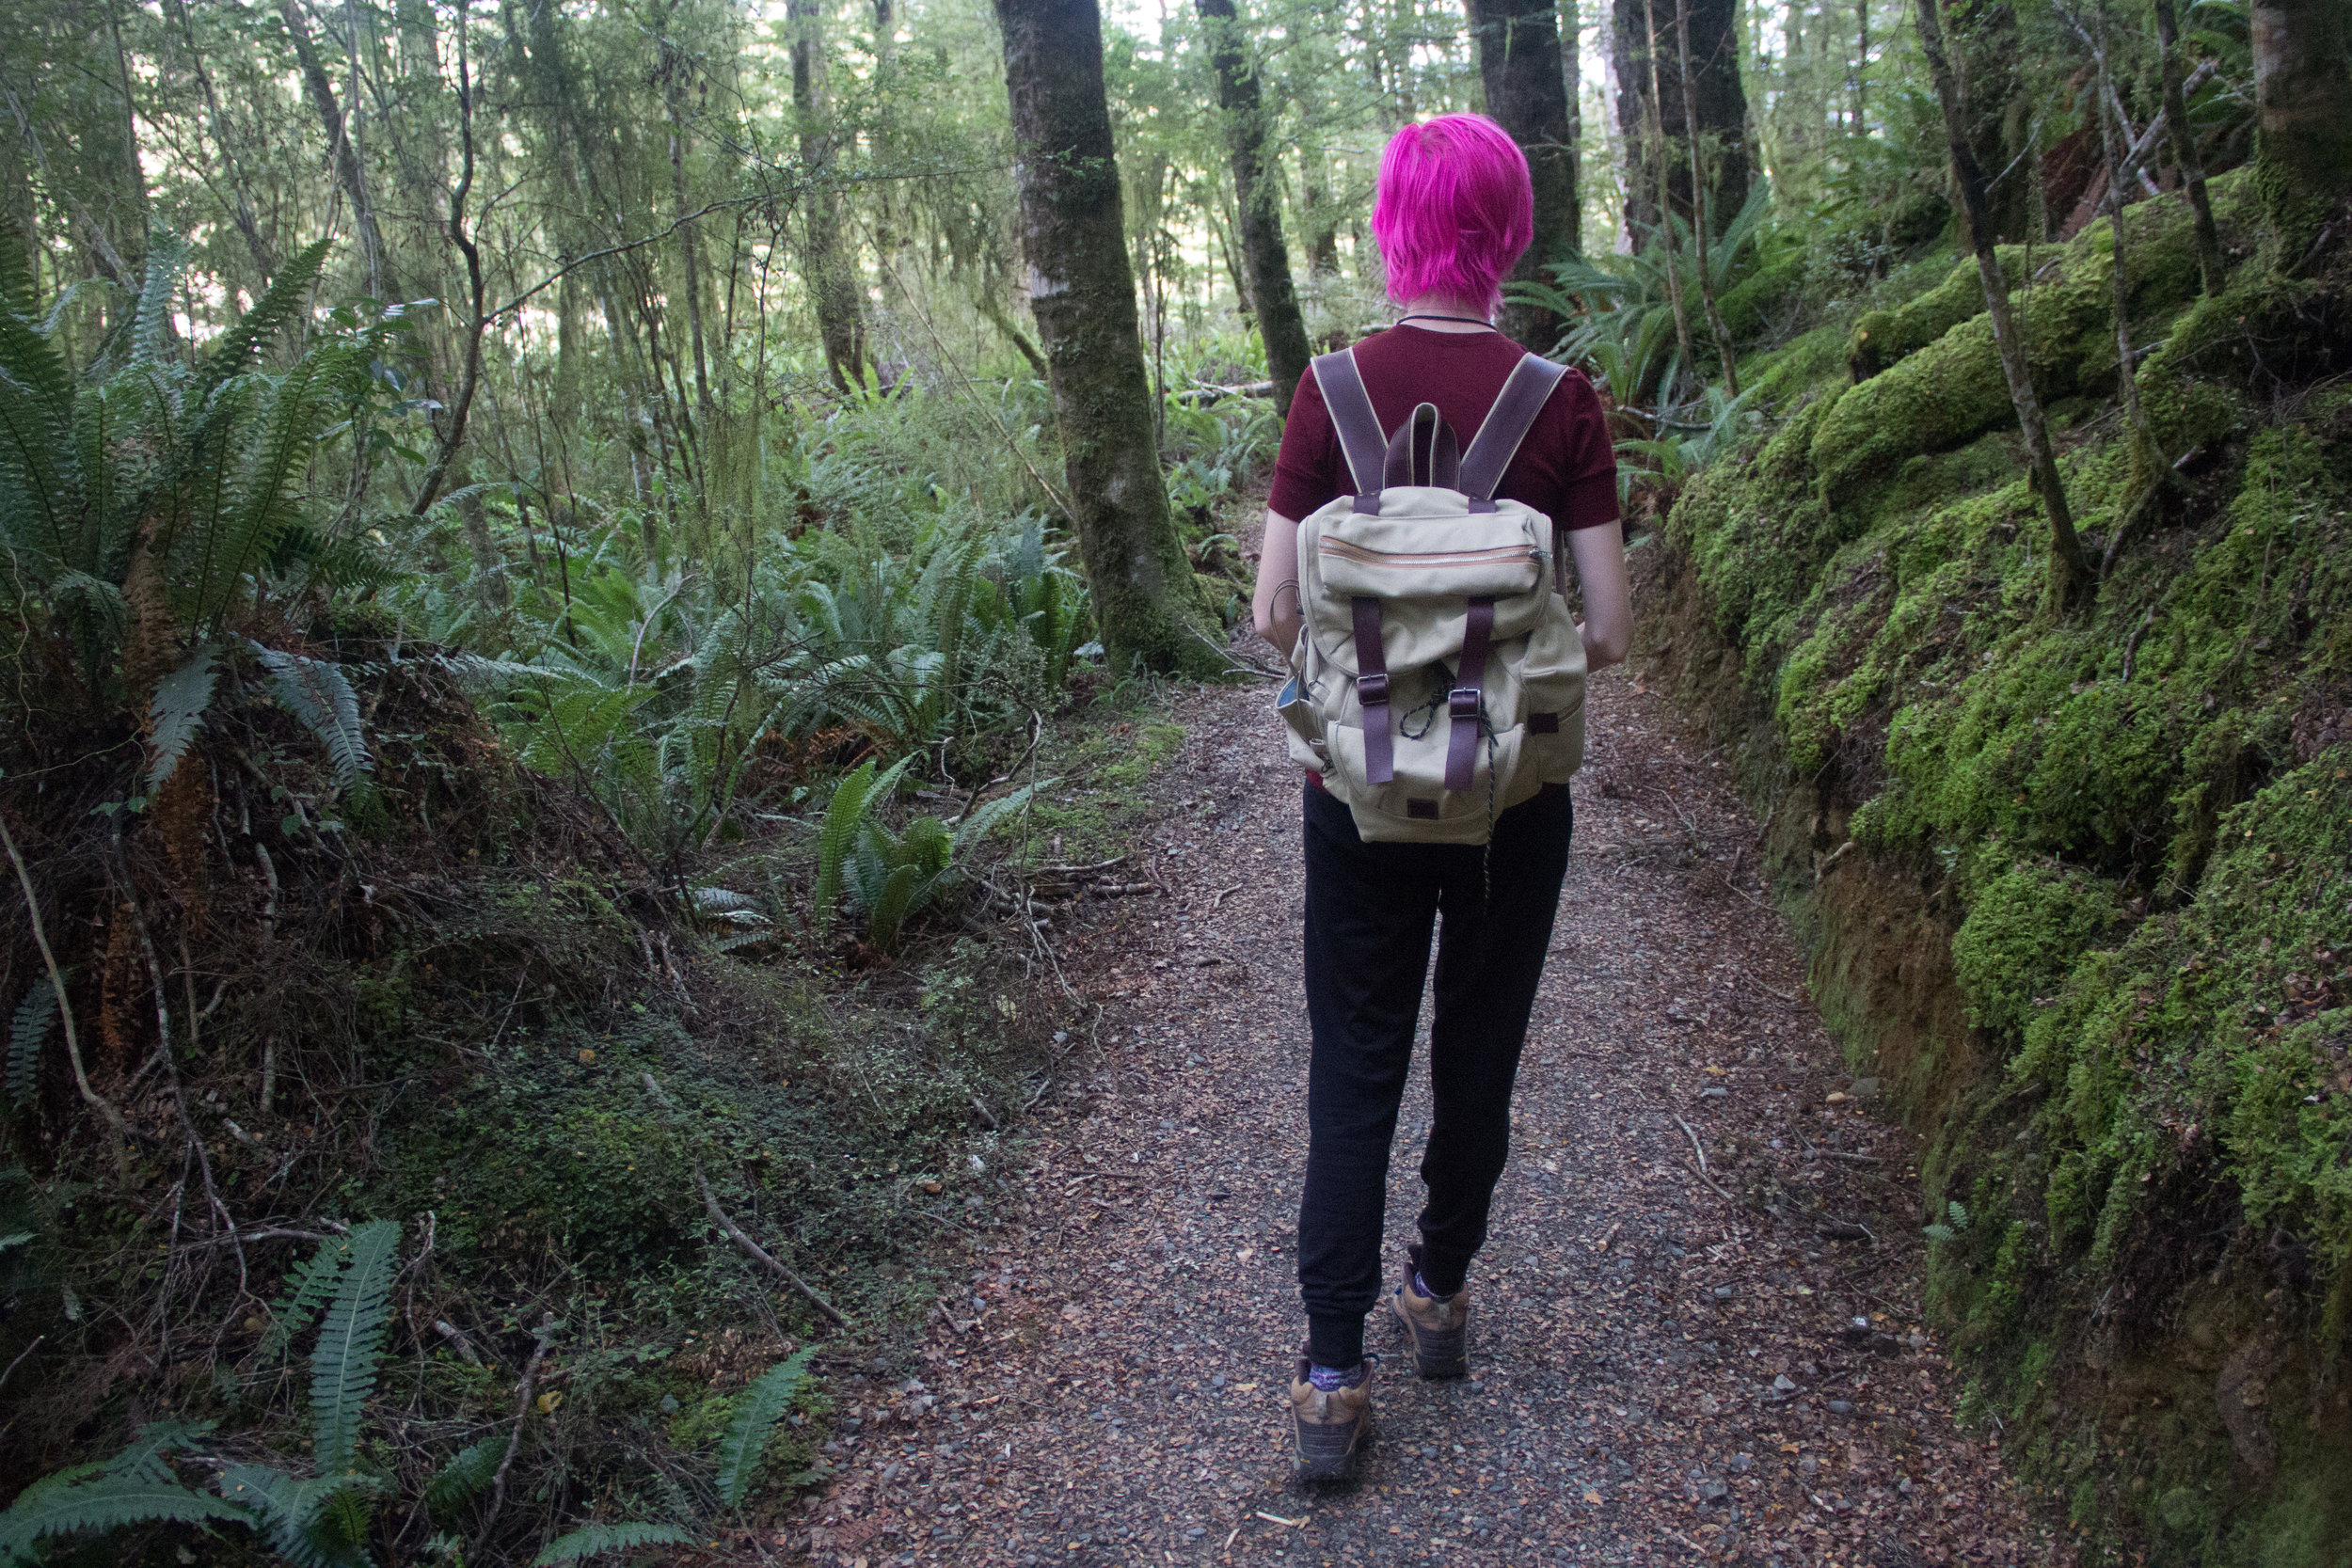
Not only was it a fabulous bag to have on our trip to the US, it also accompanied my sister and I to Queenstown, where I convinced her to take blog photos - I have such a soft spot for photos of my me-mades in 'the wild' so I went to town on that concept as much as I could! So far, this one's still a bit stiffer than the old UO version, but I'm pretty sure the fabric will relax over time. Right now, what I really want to do is decorate the whole thing with patches and enamel pins, like the cute little fantail I found in a shop in the Queenstown airport when our flight was delayed. You can kind of spot it in some of the photos!


On one side, the pocket is an open-topped snap closure affair, and it has a grid of shock cord over it which I can use to strap things like a sweater or a tripod to the outside of the bag. Inside that pocket, there’s a length of elastic which I use to secure my water bottle, when that is the thing in the pocket. It’s multi use! The other side has a zipper pocket that is specifically engineered to be the size of a sock knitting project, as this is the thing I most often knit while on adventures.


The top pocket is most useful for pens and pencils, but is also wide enough to accomodate my passport and a small wallet, so those things are easily accessible should I require them. I was originally planning a ‘secret’ passport pocket with an invisible zipper, but the fabric proved too thick for that level of fussiness. In the front pocket, I mostly keep tissues and less valuable stuff, because I was a bit concerned that I wouldn’t be able to feel it if someone came up behind me and tried to steal something. The snap base is attached to the leather square, which is in turn sewn to the pocket.
The wedding dress continues to progress! This coming weekend is labour weekend, which means I get an extra day off. It’s the first three day weekend of summer! I’m hoping that will mean I have time to film a video update for you! I might have to make it a two-parter at this point, I’ve got a lot to catch you up on!