
I KNEW I was going to have to split the beading up into two posts! It’s the main feature of the ceremony dress, I suppose, and I’ve spent the last three and a half months of my life working on it with still more to go, so you could say I have a fair amount to say about it.
Last time, we covered setup along with some initial roadblocks I encountered with the beading: bad thread choice, chair height problems, and tension issues. The next issues I faced was slightly less dire, but still pretty critical in the grand scheme of things.
I was happily moving along with the beading - flower outlines and main viney bits had spread to cover the side front piece as well as most of one of the side back pieces. I was starting in on some of the smaller scrollwork to fill the areas between the main vines. I did a few of these, turned over my frame (tambour is worked upside down, so I turn it over every so often to have a look at the front) - and suddenly no longer loved what I saw.
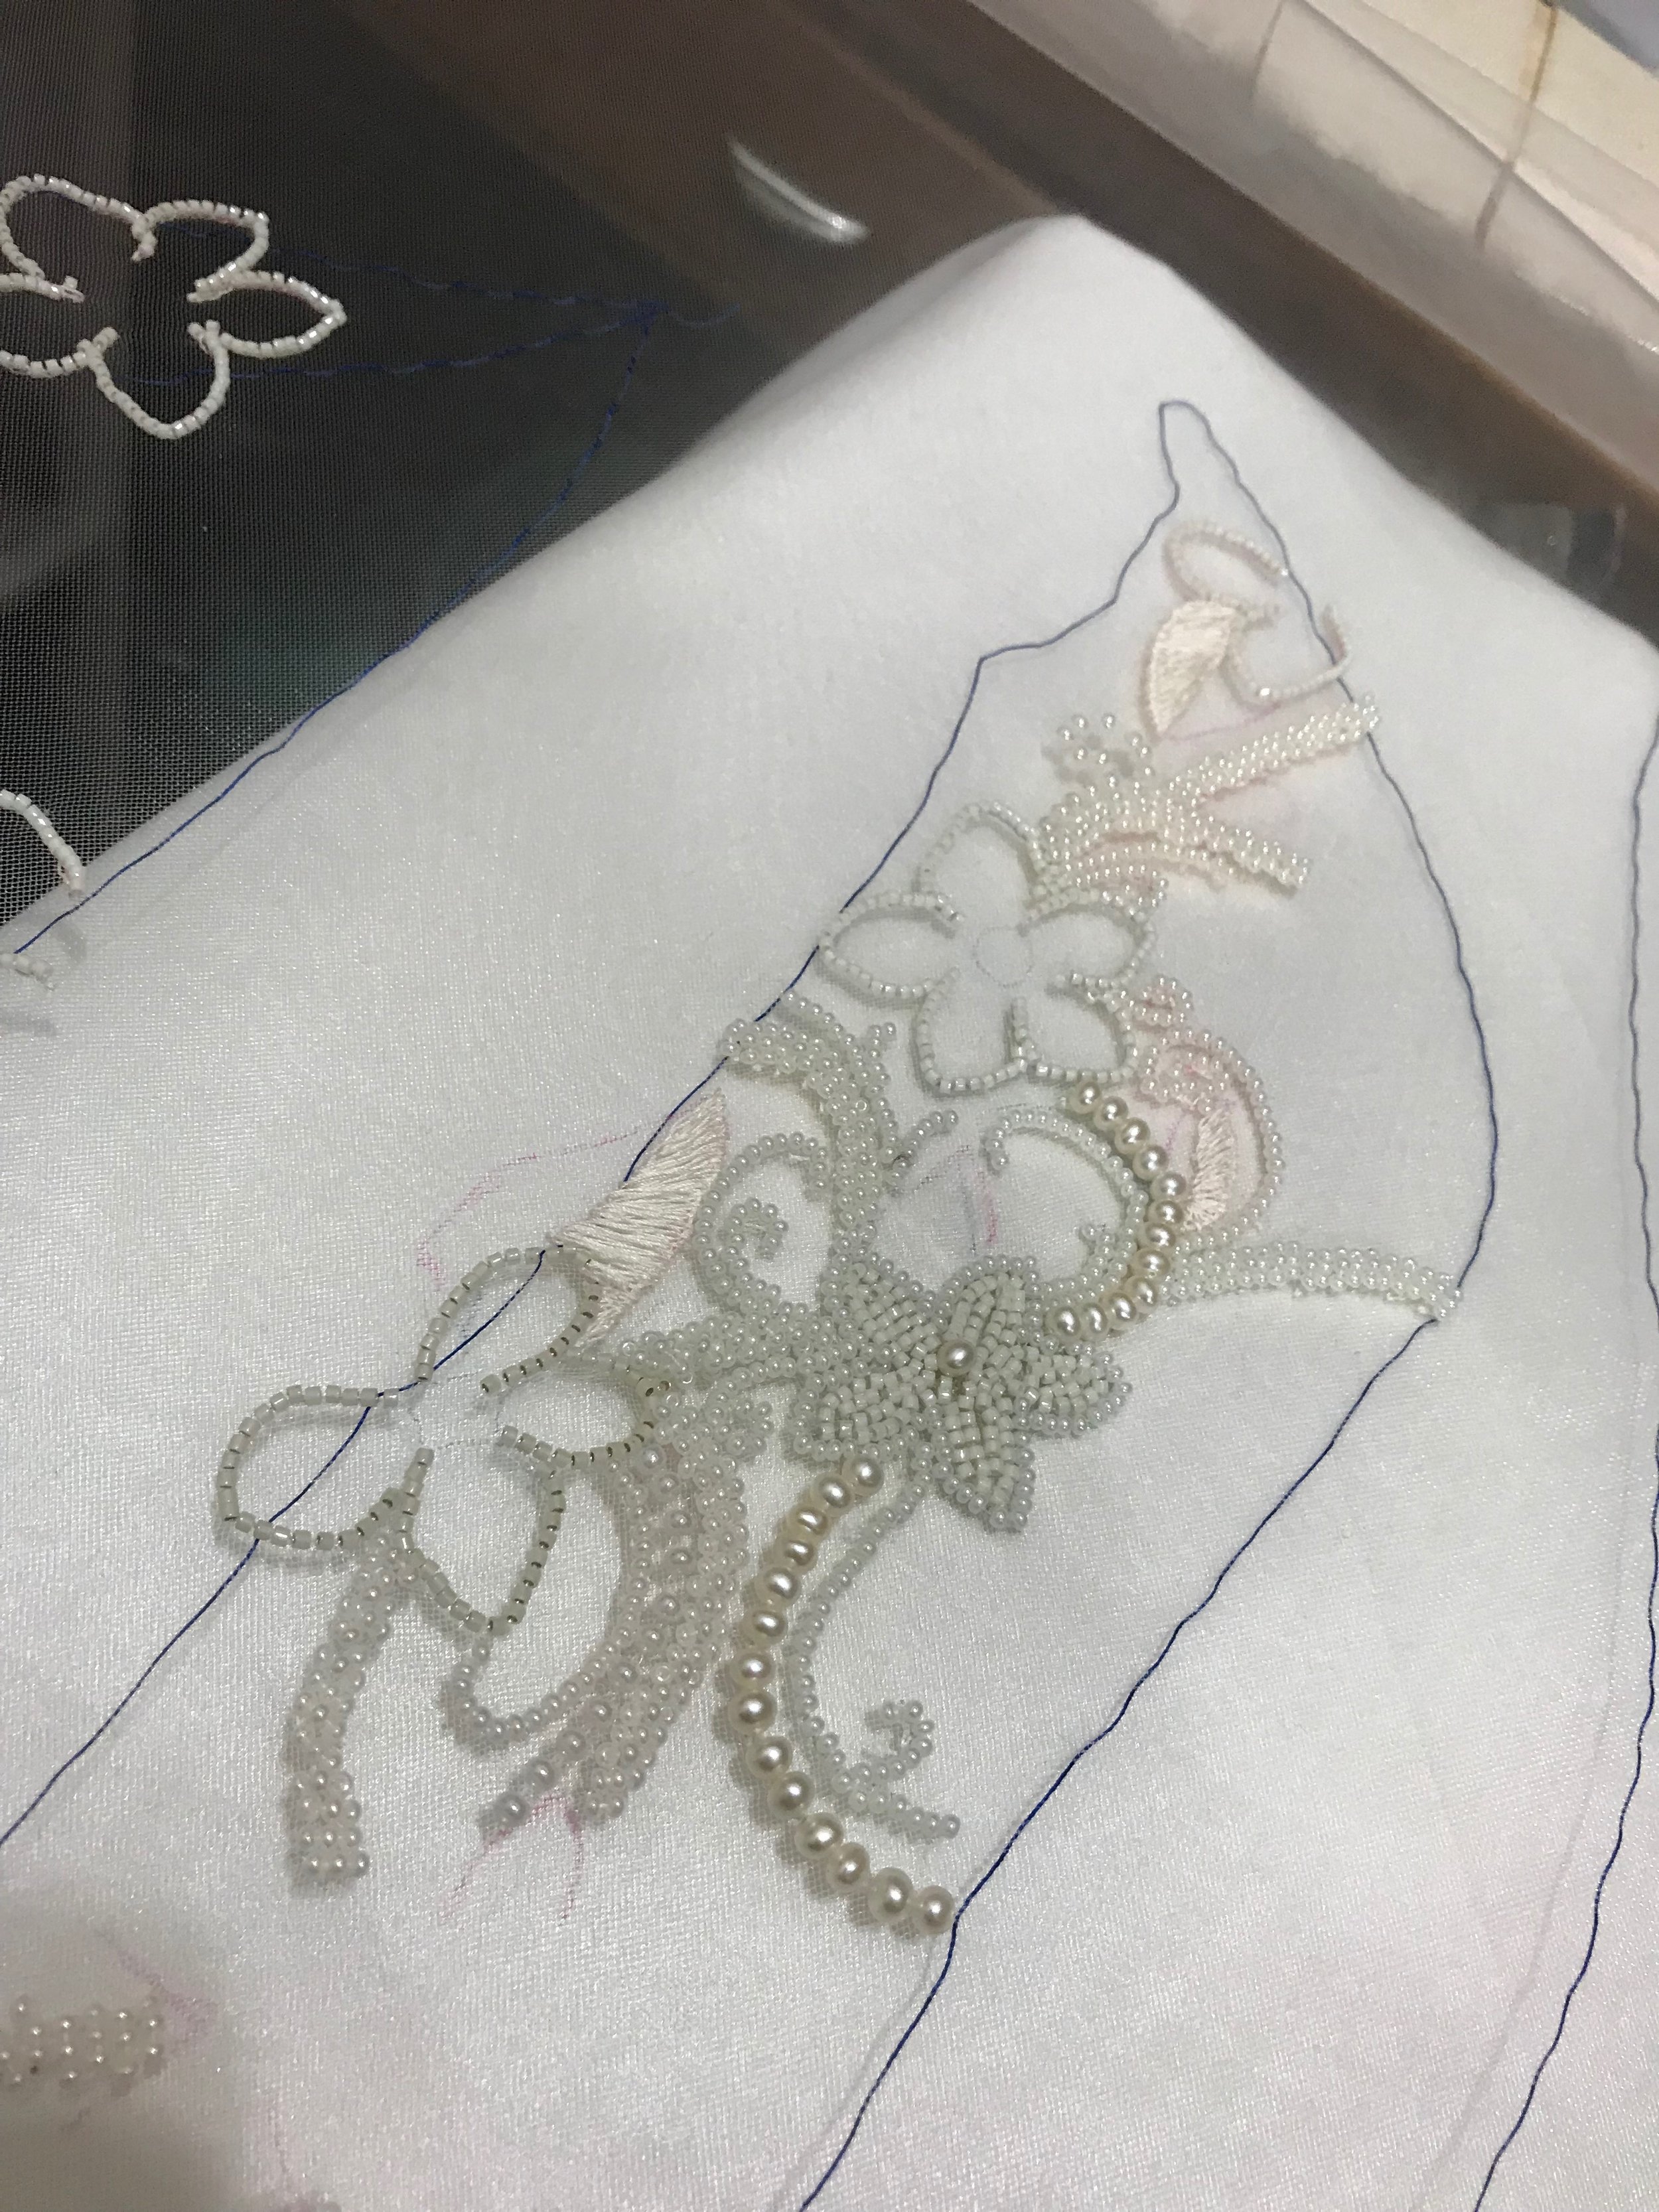
I’d turned it over a lot up to that point and had nothing but warm fuzzy feelings for it, but now - with the addition of the smaller scrolling tendrils, (using the same beads as the rope vines) things just looked… flat. I decided to put it down for 24 hours and come back to it, but my feelings hadn’t changed by the next day. I had realized in that time, however, that it wasn’t the design I had a problem with - it was the lack of texture. By using the same beads for so many elements, I was cutting down on texture opportunities and the result was that the design looked boring to me. I didn’t have any other beads to try though! I decided to order more beads - more shades of white and more sizes, and that surely that would solve my problem. I also finally ordered my sequins - I found them on Etsy as single strands from a source in Latvia, instead of ordering them directly from the French manufacturer where they only came in strand sets of 24 (with some insane associated shipping costs as well!) Here are some other beads I tried laying out before I decided I needed to order more:

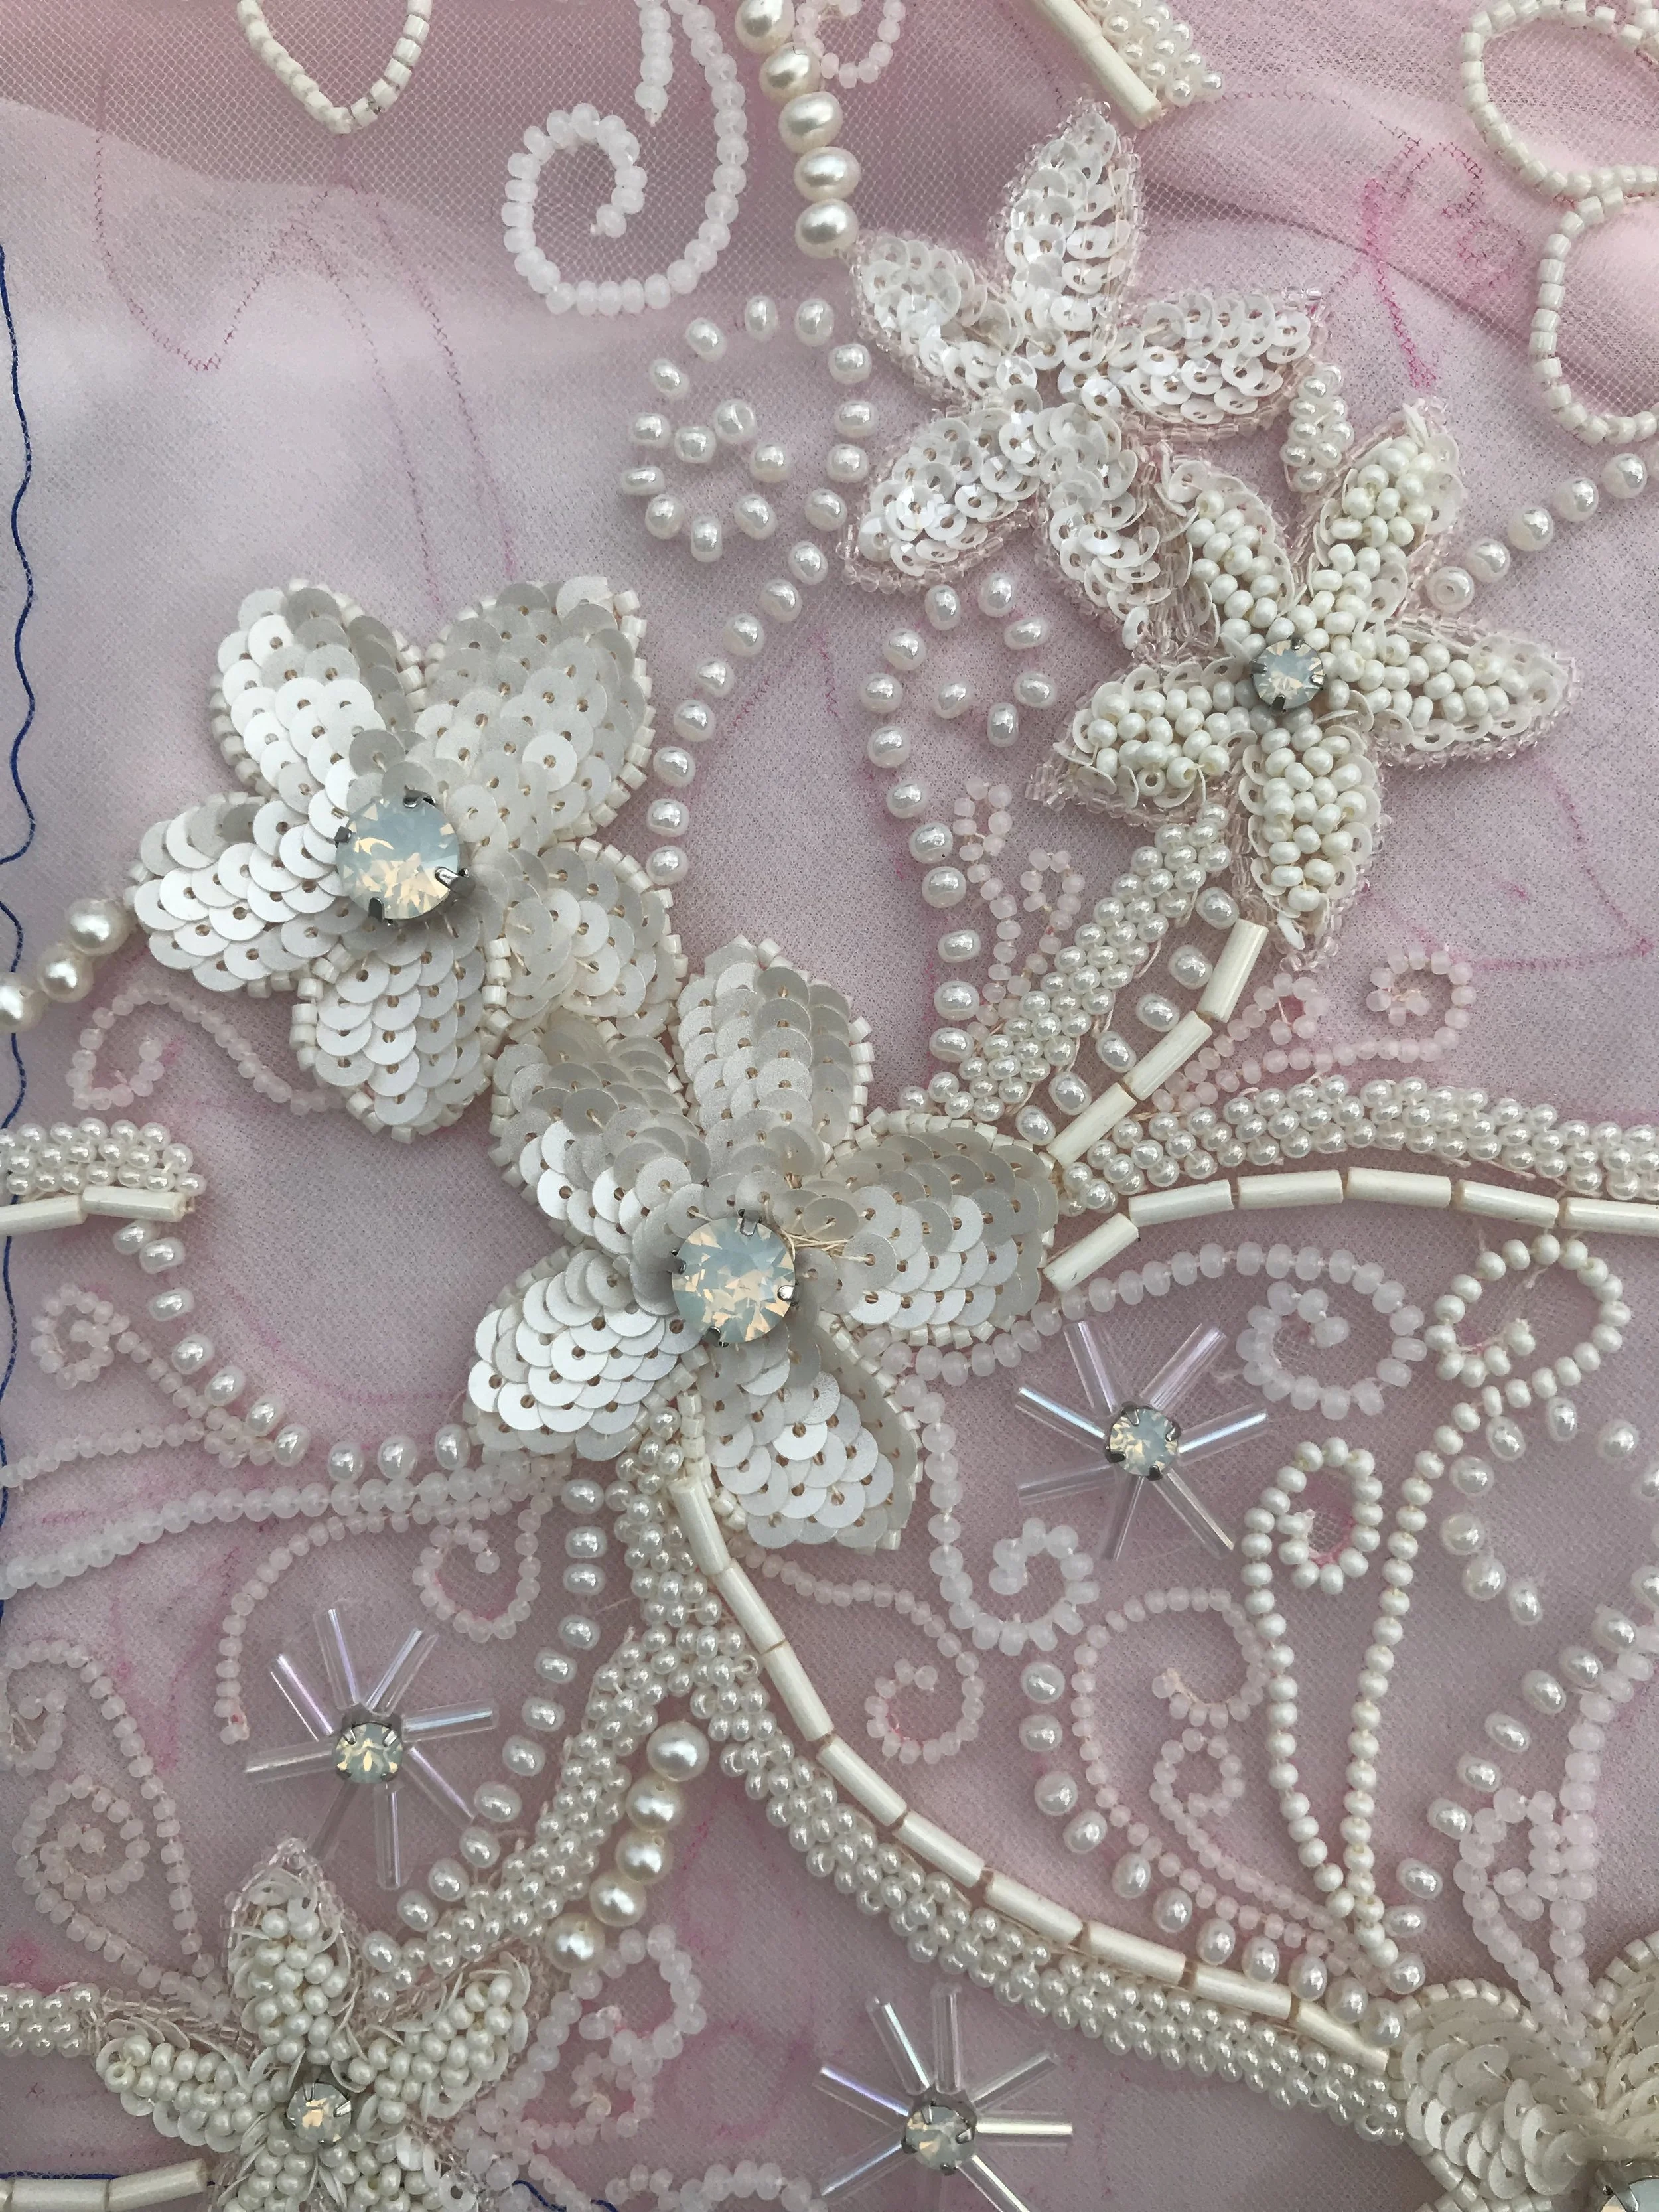
My beads were shipping from the US so I had to wait a while, but when they came it was like Christmas morning! I’d ordered about 7 new whites and creams in different sizes and shapes for the dress, along with beautiful cream bugle beads, in addition to some roses and purples for the flower crown as well (I’ll tell you about that soon!) I immediately knew that the new textures would solve my problems, and got to work straight away. My favorites, which you can see here, are the two sizes of ‘opalescent’ white beads:

I cannot even begin to explain to you how relieved I was when I’d stitched enough beads to confirm that all the design lacked was texture! With the new beads, every time I turned the frame over was a delicious surprise all over again, and I was so excited to work on it! Hours and hours, and I never got bored. I’m actually really surprised - I’d been assuming that I would get bored about halfway through (once the initial novelty wore off) but I’m nearly finished with it now and I’m a bit upset that it’s so close to done! I’m definitely going to try to work more tambour beading into future projects - I’m so excited to try it in colors other than white!

I happily worked away with the new beads for a while as I waited for the sequins to arrive for a few weeks. Shipping from Latvia was only $6, but the estimate was 5 weeks so I was understandably pretty excited when the ‘You have a parcel!’ note turned up in my mailbox. I went to the post office to collect it, but something terrible had happened: The parcel was empty! Someone had cleanly sliced through the edge of the envelope, and the contents had been stolen. I was pretty upset about the whole thing, but this was early September so at the very least I had time to replace them. Fortunately, the Etsy seller was super helpful and immediately got replacements sent out - I did have to wait for shipping for another 5 weeks but - good news! They arrived intact! By this point, I was anxious and excited to get the sequins on to the dress. With everything else changing so much in the design process, I wanted to be sure they looked the way I wanted them to.
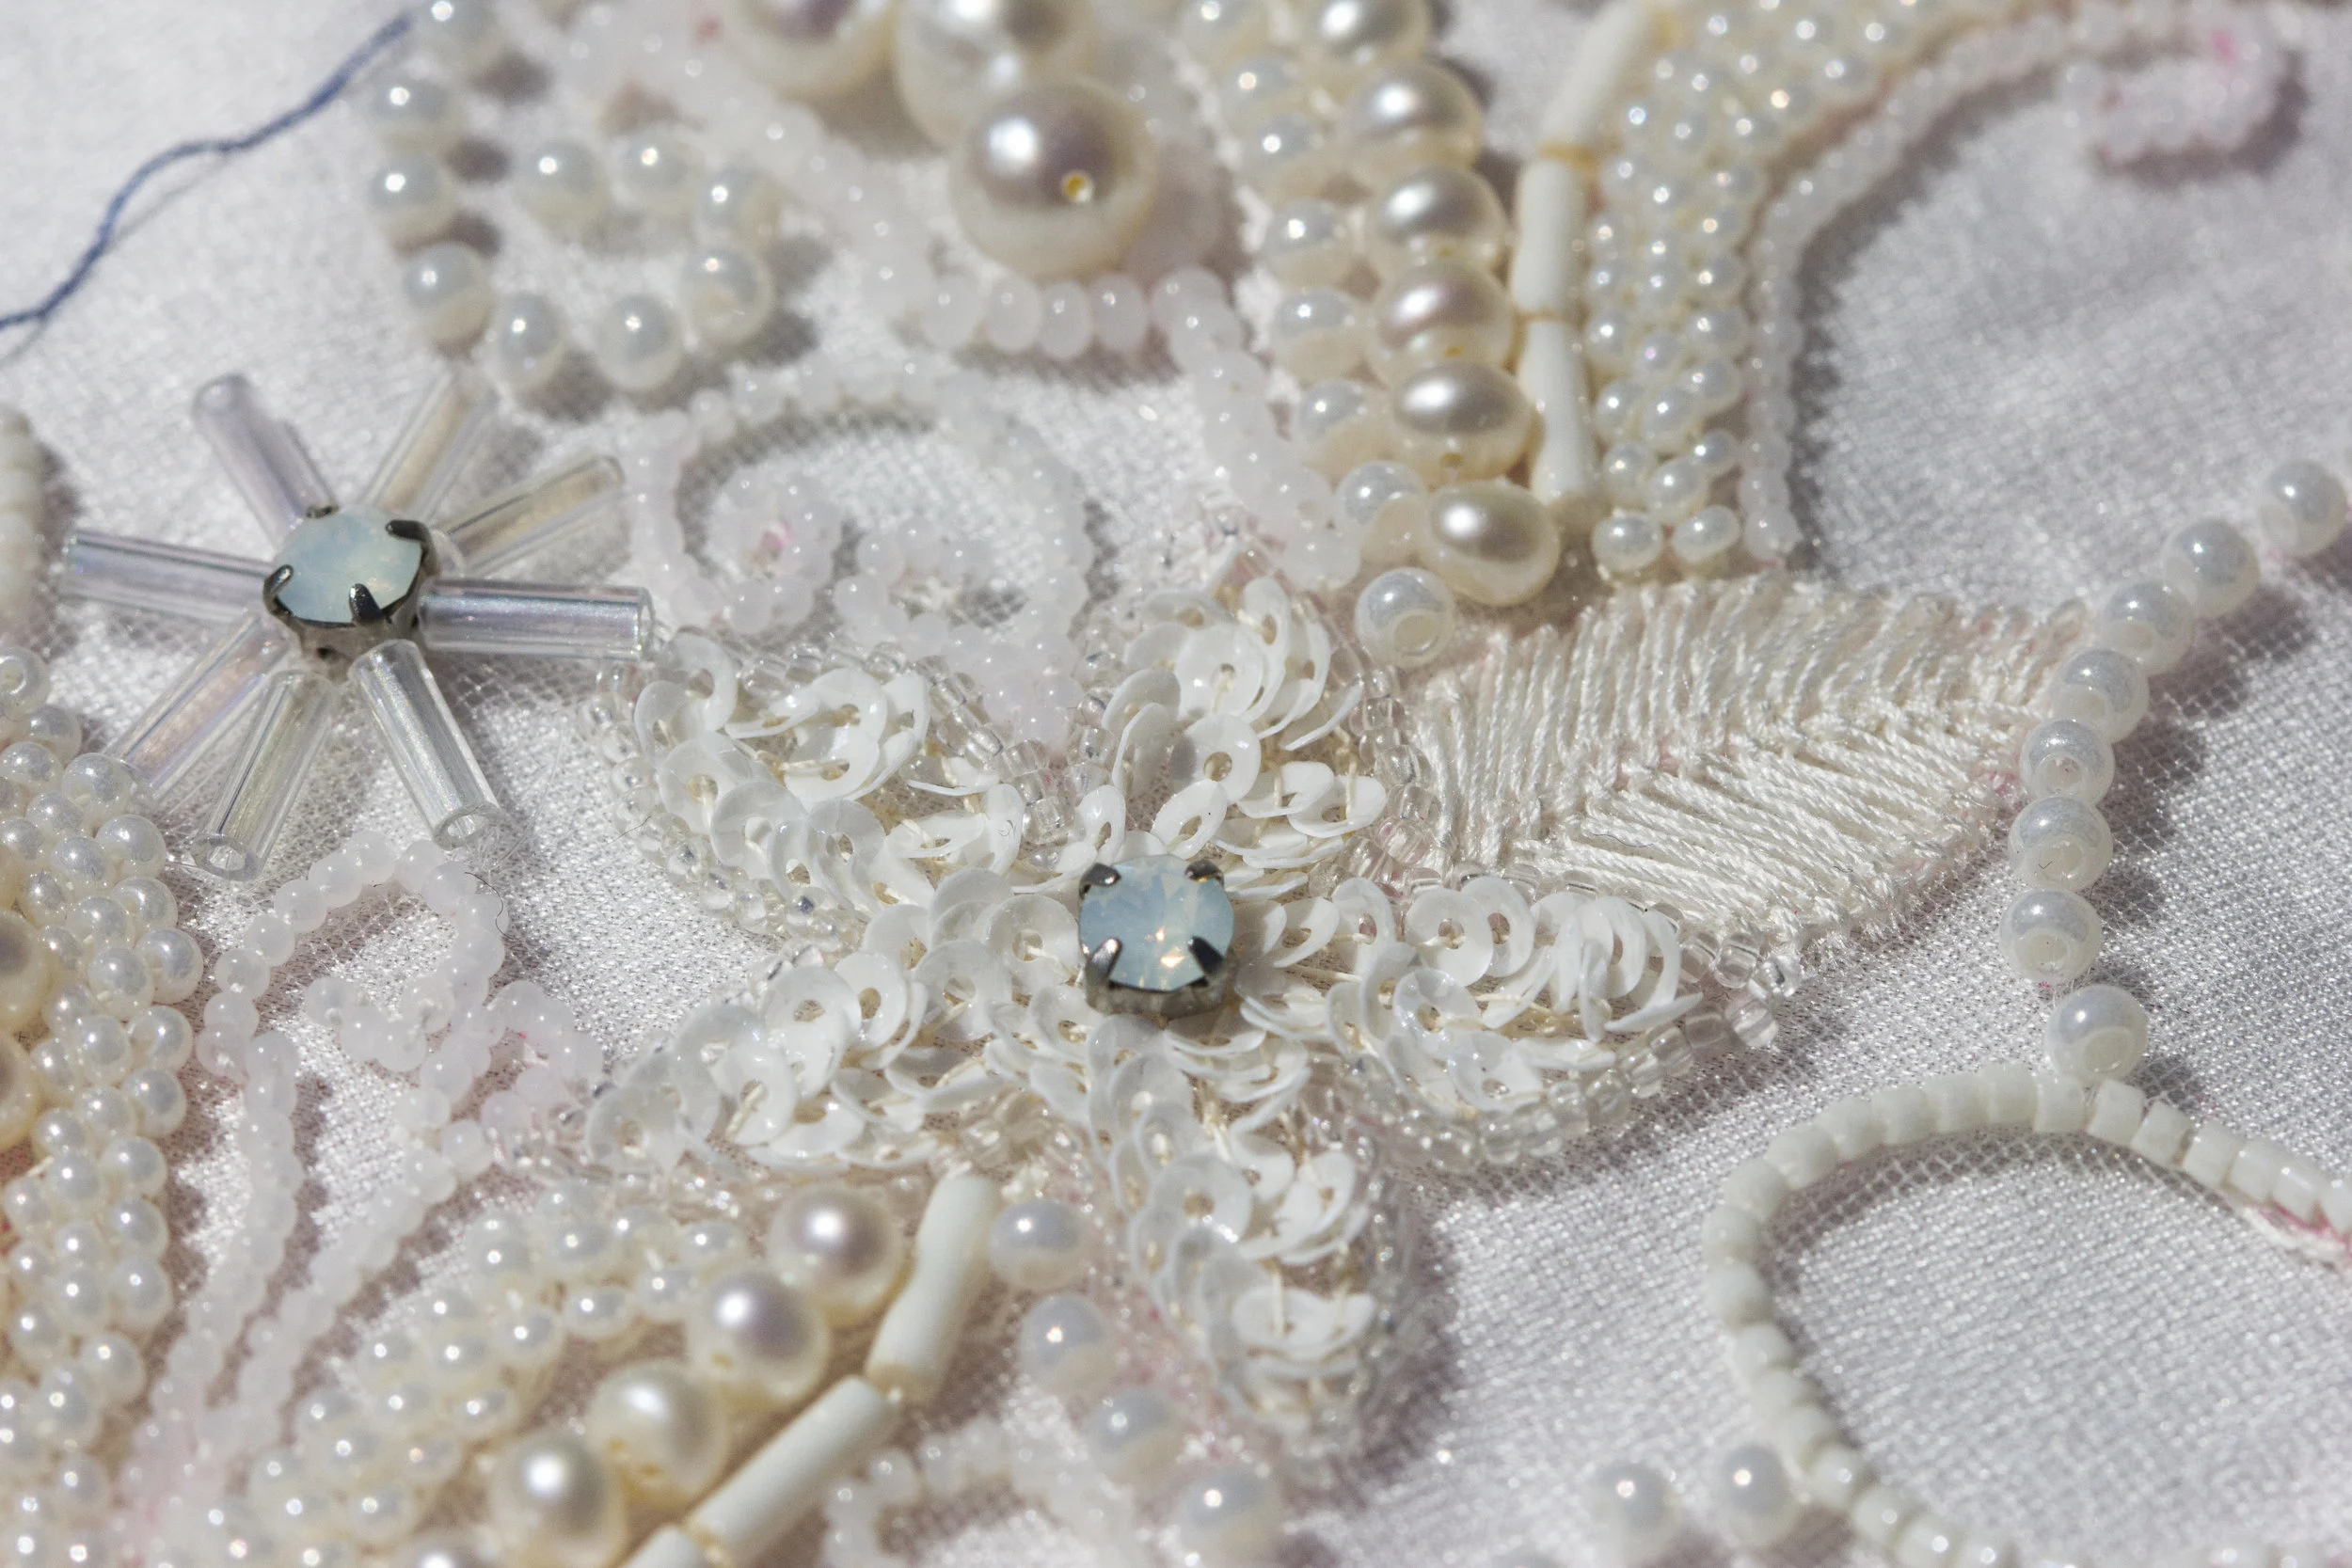
Here, I’ve done two flowers next to each other - one with cup sequins to fill, and the other with an outline of cup sequins followed by a vermicelli seed bead fill.
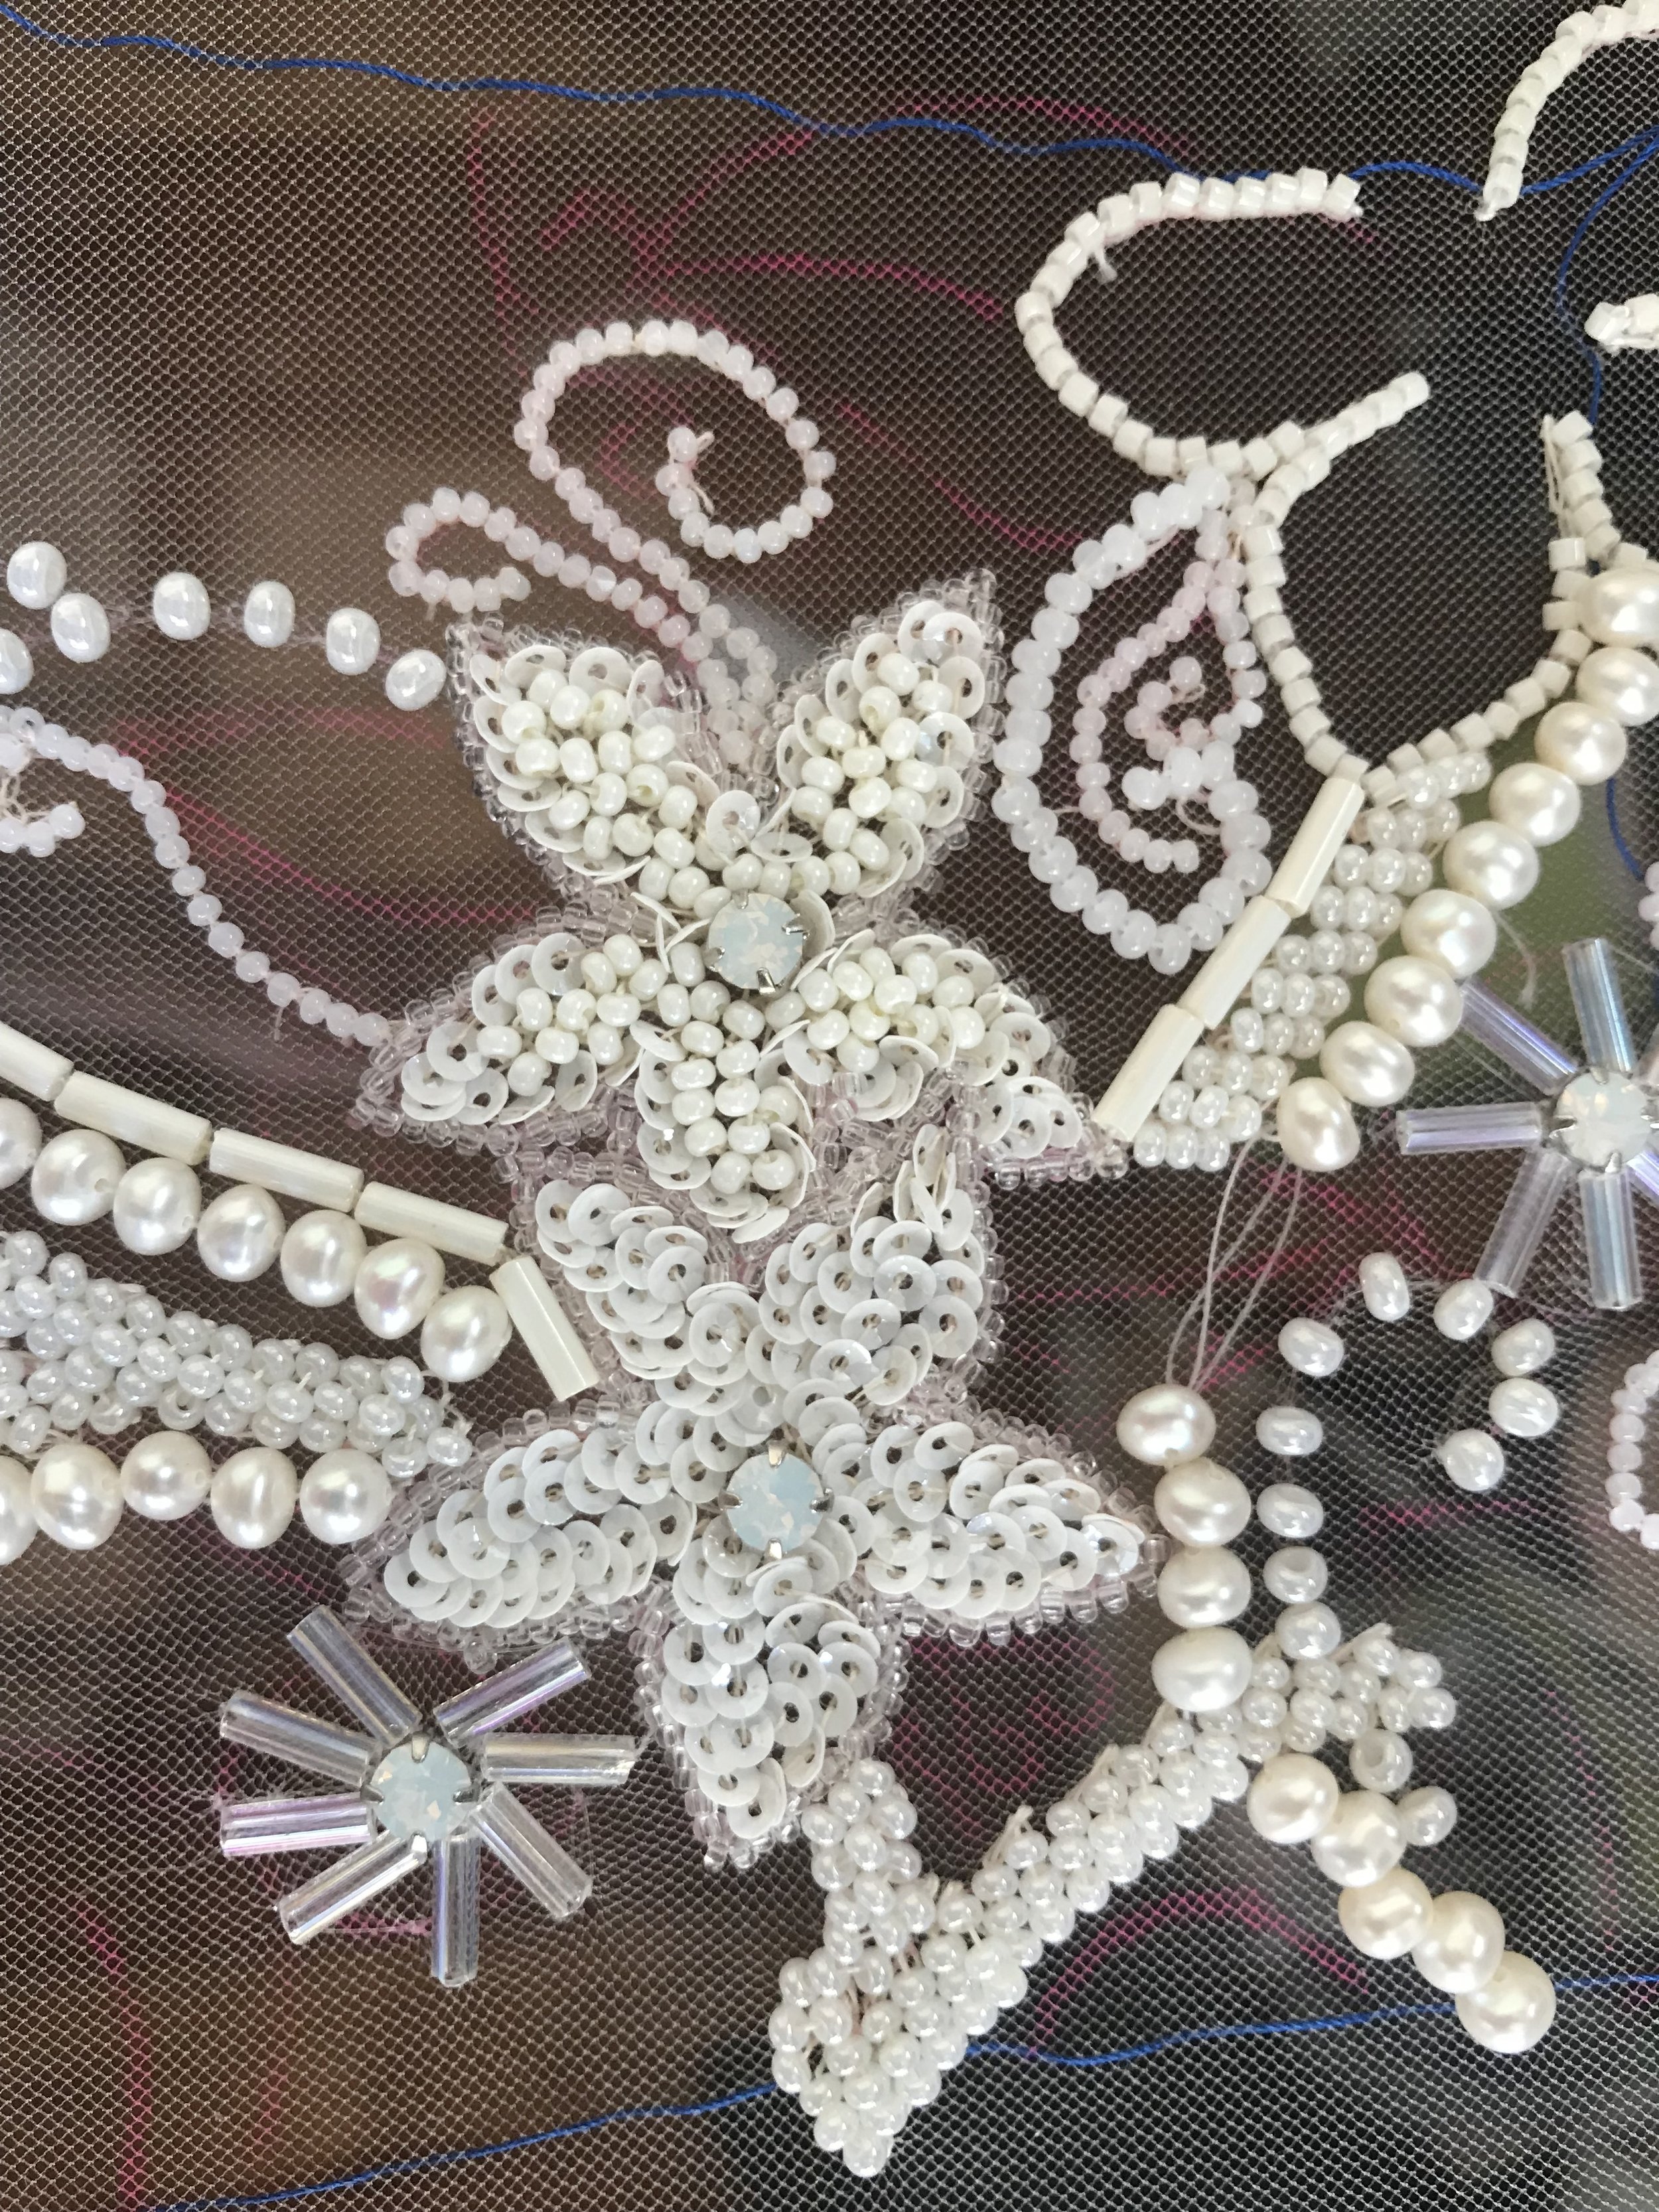
The sequins were a tough nut to crack, work wise. The trick, according to the internet, is to use your thumbnail to separate them from each other, and then push them up the thread like you would a bead - but they stick to each other! They’re very difficult to separate, and there’s this little thumb flick thing that works really well but I had a hard time . By this time, I was pretty familiar with the tambour hook as a tool so that wasn’t the problem, but my left hand took quite a while to figure out how to deal with separating the sequins. The first flower took me about 45 minutes to fill, but I’m happy to say I’m down to a much more reasonable 15-20 at the moment, with just over half of the flowers completed. I’m using a combination of cup sequins (for the little pointy flowers) and flat sequins (for the larger flowers) and I LOVE the textures of each - they’re both sequins and yet look nothing alike!
After the additional beads were incorporated and the sequins safe at hand, there was only one unknown left to figure out: The leaves. I desperately wanted some silky soft satin stitch to feature in my embroidery. I’d seen it in the dress I’d tried on and fallen sort-of in love with (at least, as close as one can to a RTW dress when one plans to make one’s own) and really liked how the soft thread complimented the beads. Are you getting that this project is all about texture? The satin stitch was a bit tricky to figure out. The stitch is formed in such a way that prevents you from just being able to basically stitch a very tight zig zag - everything would just collapse in on itself. Instead, you take a stitch across the width you’re wanting to fill, and then another stitch very closeby to secure it - and then back across, with another stitch to secure. It’s a four stitch pattern, basically, and results in a lovely thick satin stitch fill with a border of little nubs. The leaf in the photo above is a good shot of what it looks like finished. Here’s the trick, though: It’s worked from the other side! This is an Aari technique - Aari is very similar to tambour (it’s still the application of a chain stitch) except that a) it’s worked from the right side of the piece, and b) when used with beads, the beads are picked up onto the hook and deposited one by one onto the ‘chain’ of each stitch.

I’m not using Aari with beads, so I’ve decided to proceed with my tambour hook since I’m used to it. Basically, the only thing I’m doing differently is working from the top and not adding beads! Well… not the only thing. It’s never that easy! My first leaf resulted in a lot of the problems I had with the first bit of embroidery - tension issues like crazy! the tulle was too delicate to support so many stitches so close together, and it didn’t look very nice. I wasn’t sure what to do, and I assumed it was my thread that was the problem since it wasn’t purpose-built for tambour. Fortunately, one of the tambour artists I follow on Instagram (@brodeurbear, if you are prepared to lose the next hour of your life zooming in on immaculate embroidery and beautiful colors, also his cat Mavis is the cutest) was able to offer a few suggestions. He said that in his experience, the thread didn’t matter so much as the fabric. Wide holes like tulle will hold thread less densely than small ones like organza, so it was the fabric that was causing my problems, not the thread! I decided to experiment.

I pinned a small backing of silk habotai to the area underneath the leaf, and then stitched through both the tulle and the silk habotai. It worked beautifully! I was able to densely pack my stitches, and the fabric held up well to the satin stitch as well. Once the leaf was complete, I flipped the frame over and trimmed carefully around the edges with my duckbill scissors. The silk is nearly invisible through the leaf, but gives the piece a substantial rigidity which it was missing before. Success!


As it stands - on the date of this post - I think I’m about 80% finished with the embroidery, with plans to finish it by the end of December. Maybe earlier, we’ll see how we go. The last critical error I encountered occurred over a month ago, and I’ve been working in small increments, steadily over time. I’m waiting on some replacement pearls and a few additional crystals, but nothing game changing. The only big area left to tackle is the back - and they’re small because of the low back!. That, and a few viney fillers over some seams and she’ll be done!

I’m finding it really satisfying to work on a project that takes so much time and planning. Even my pink fur coat with all its hand tailoring only took a few weeks to make, and the progress was always so visible. With the embroidery, sometimes it’s very hard to see the progress that has been made, and yet I know it’s there. It’s oddly comforting in a way I don’t think I quite understand. Additionally, I’ve realized recently just how invested in the process of this project I am - I’m not rushing through anything and always ripping things out if I’m unhappy with them. Time constraints withstanding, I’ve got no desire to finish this thing ahead of its time… and every desire to start a new bead embroidery when it’s done!

I have more progress to catch you up on next week - as always, let me know if you have questions!