
Hello again! Today it’s take two of Project: Wedding Dress catch-up! Last post, I told you about drafting the dress pattern and building the slate frame, and in the interest of all things chronological I’m going to tell you what happened next.
(For grounding purposes: The things I talk about in this post, I was working on in August/September this year. This weekend, I’ve dyed my fabric and the embroidery is almost done, but I have to catch you up first!)
I’d been building up to starting the Tambour beading process with a LOT of research and a little bit of experimentation. I’d absorbed, pinned, and bookmarked as many examples, blog posts, and tutorials as possible but really (as with all things, especially in the world of hand crafting) there’s no substitute for plain old repetitive practice. To be honest, it’s very visible to me how much my technique improved over the course of the embroidery - especially since I spent less than five hours practicing on scrap fabric before jumping into the real deal.. but I’m getting ahead of myself!
Stretching the fabric on the slate frame
There’s a very nifty - if long - video on Robert Haven’s youtube channel of how to dress a slate frame (his channel also has a very in-depth series of beginner videos on tambour beading if you’re so inclined!) which was a helpful starting off point for my process. Basically, you assemble the frame, pin the fabric to the short edges with the twill tape tabs (Imagine the fabric is pinned in the photo below - I forgot to photograph this step in progress!):

Once that’s done, you can adjust the tension if needed by sliding the short edges of the frame along the longer ones and re-securing, and then you use a long length of twill tape to lash the fabric (using pins) to the frame. And then you’re done!

It’s not that simple, of course. I was positively terrified of this step, to be honest. I’d done no significant tambour work so I didn’t have a feel for how tight the fabric needed to be stretched, and to make matters even worse, my fabric (as a reminder, it’s this invisible tulle from Hawes and Freer, and it is the single most expensive per-meter fabric I bought for the dress) had a noticeable amount of crosswise stretch, which was problematic.
When I did my test swatch, I used this same fabric, but I stretched it very tightly in a circular embroidery hoop. When I removed my embroidery from the frame, I realized that the fabric had been too tightly stretched and it had caused the area where I’d embroidered to distort and bubble. PANIC STATIONS. The whole point of doing the embroidery first is so that I can get the bodice shaping exactly right, and furthermore the fabric needs to be smooth over the bodice. I’ve actually seen this same bubbling and wrinkling effect in photos of tambour beading on tulle online, so it must be a fairly prevalent problem. Tambour means ‘drum’ in French - the idea with this technique is that it’s stretched tight like the head of a drum, but that just couldn’t happen for this fabric. Presumably it’s one of the reasons that tulle isn’t recommended on the list of beginner fabrics. Silk organza, which is altogether much more stable, is often used instead.

So. I stretched the fabric over the frame, but in doing so I was careful to not actually stretch the tulle. It’s sitting in the frame under as little tension as is required to keep it from drooping in the middle like a soggy trampoline, but no more than that. This, as it turned out, made it very difficult to embroider (I’ve had more practice now, but it was a rough start) because there’s so much movement in the fabric. I got there in the end! One of the techniques I’ve found helpful is that if I’ve got a particularly tricky area to work on (like a tight spiral, or a sequin that just won’t) I can apply a little bit of extra tension temporarily to the fabric by pressing my pinky finger down onto the fabric while I hold the tambour hook. If I release pressure every time a bead or sequin is applied, the fabric won’t distort from the stitch. But I’m getting ahead of myself again!
Designing the embroidery
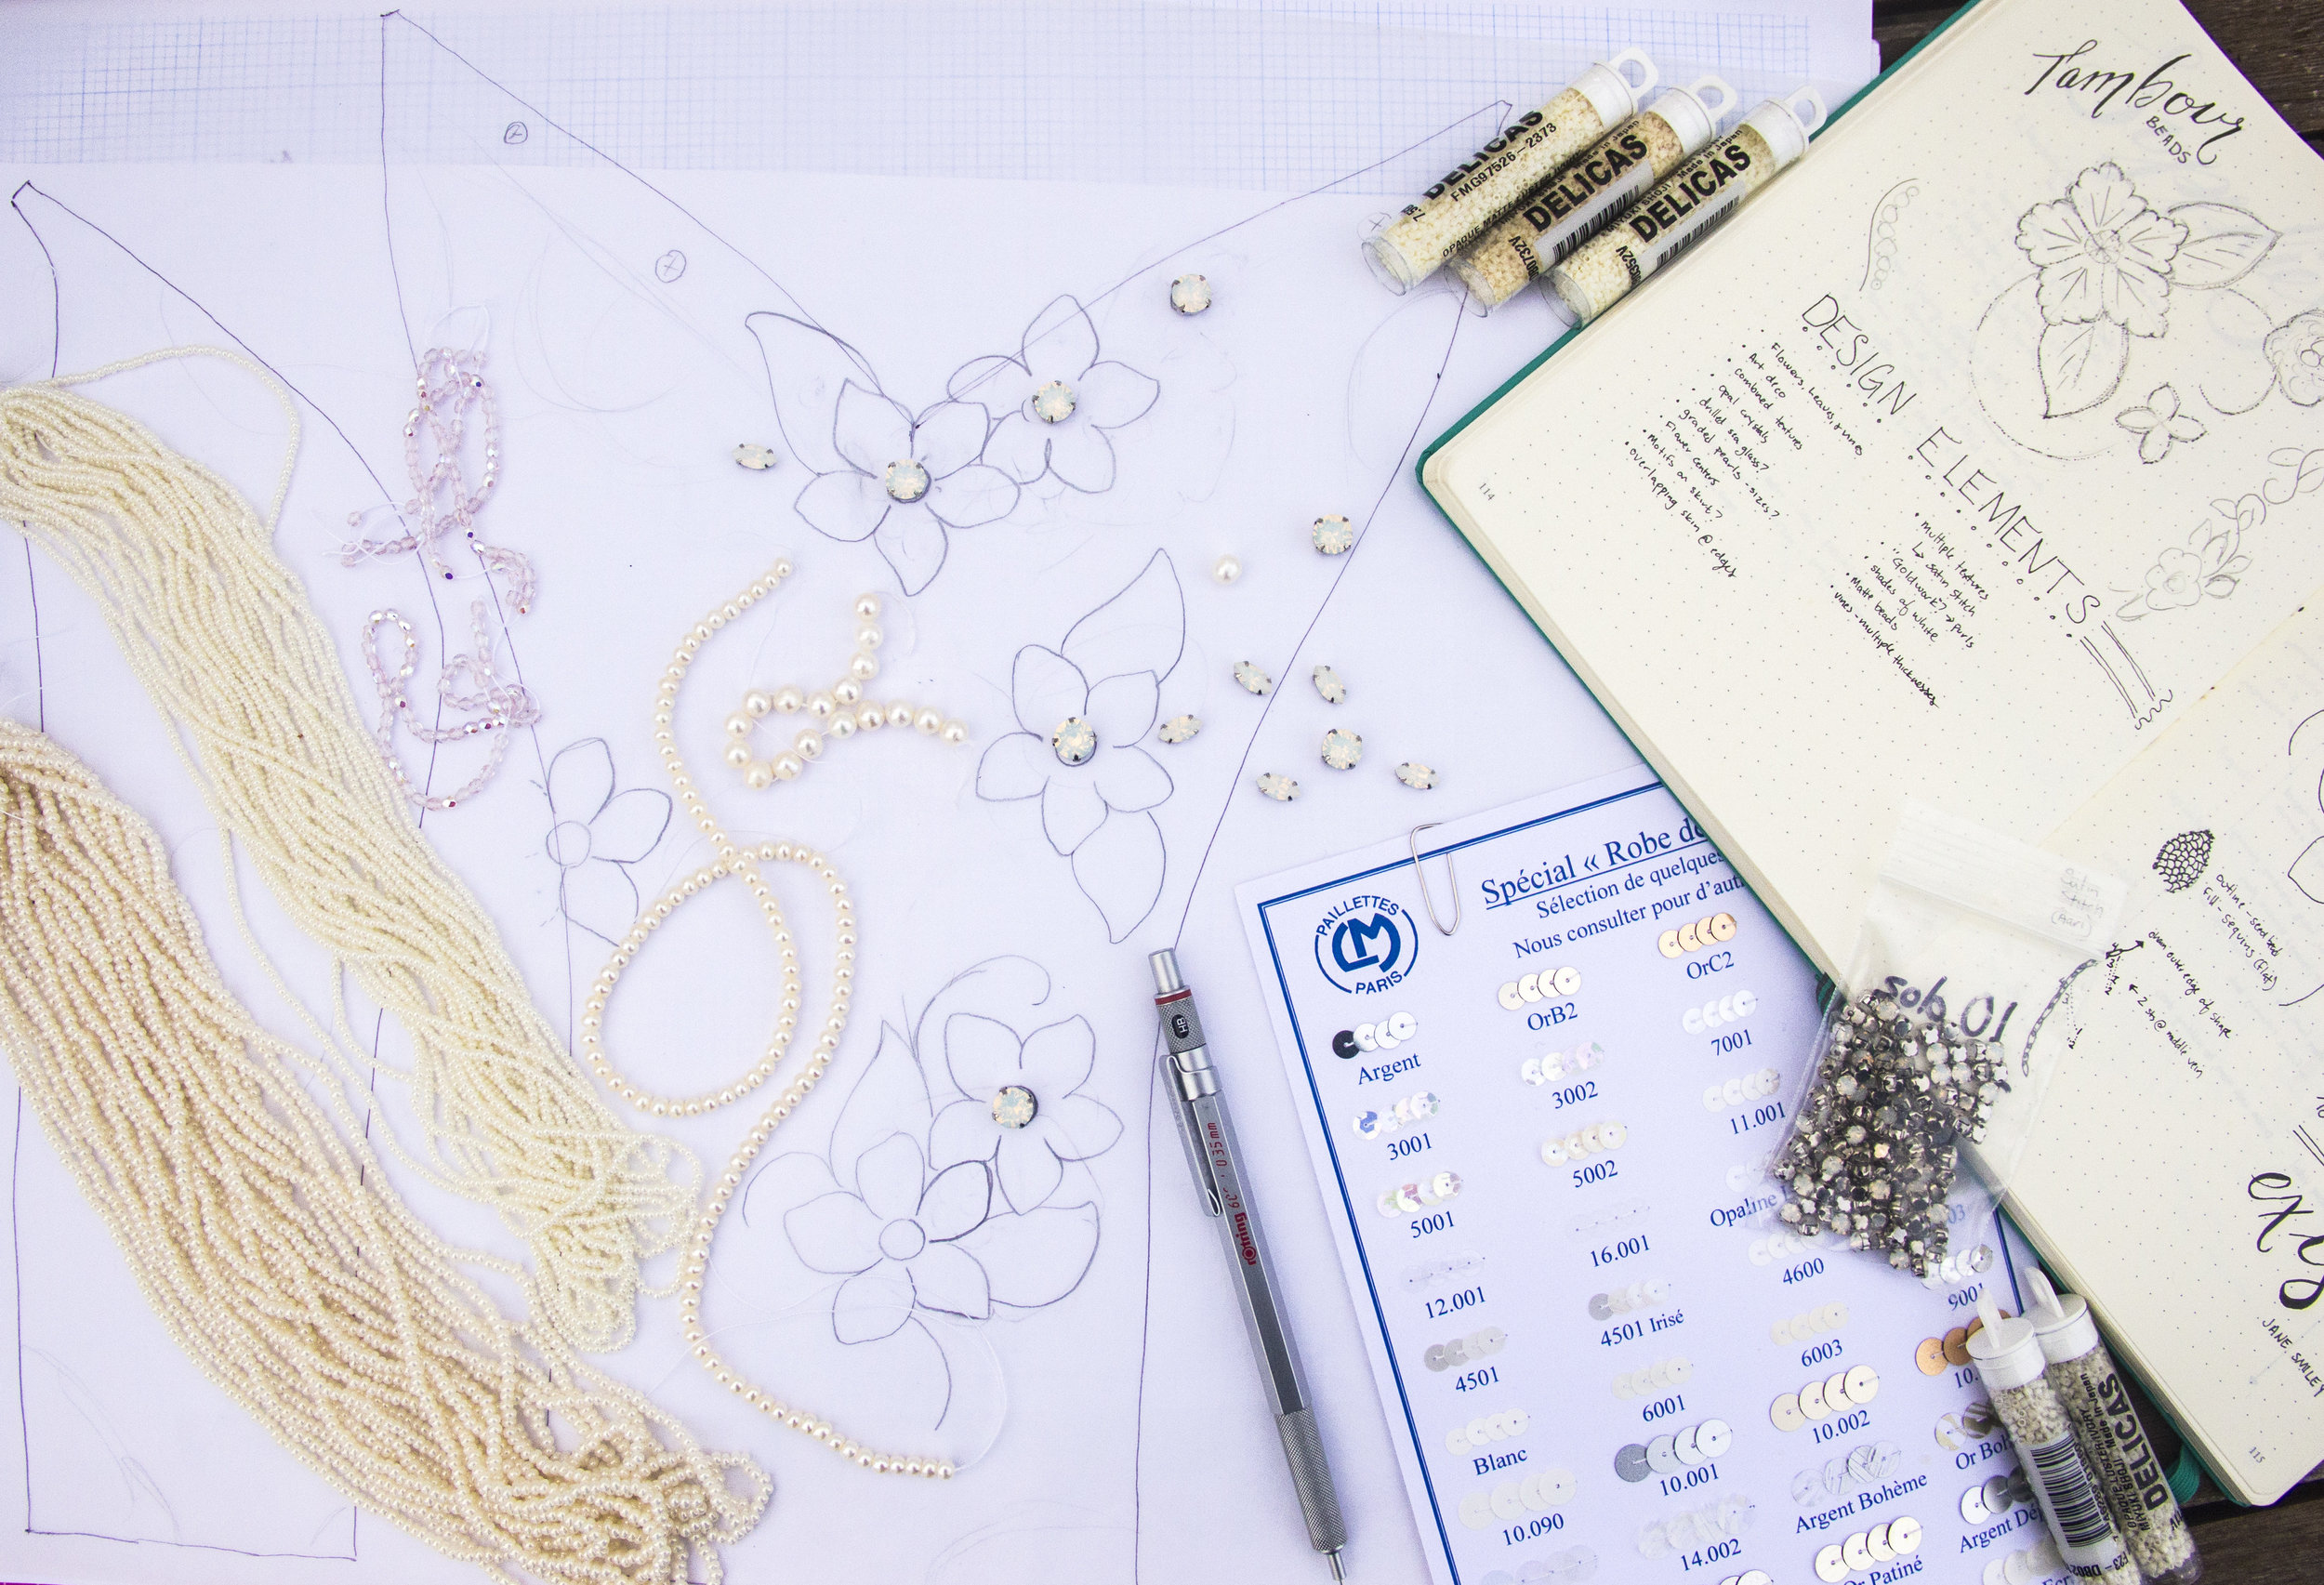
Now. If you asked me at the beginning of all this - during the planning stages - I would’ve told you I was planning on having the embroidery completely and entirely 100% designed before I started. I might have even said that in a video at some point. That didn’t happen. As I got closer and closer to taking my first stitch, I realized there were going to be too many variations to account for, and what I really needed to do was get a rough sketch going of main motif placement and main filler elements, get those down onto the fabric, and see how things went as I filled in the rest. This turned out to be a much better path to take - but that doesn’t mean there wasn’t quite a lot of sketching and planning leading up to that first stitch!

First, I found inspiration photos for the embroidery. I was looking for flowers connected by some kind of vine type swirling elements, with lots of texture to make up for the distinct lack of color. Armed with those, I drew up an outline of what I wanted the main motifs to look like - two different flower styles - a large and a small - to be filled with two types of sequins. I traced off my pattern pieces on tracing paper, and scattered my motif flowers across the bodice, framing the neckline and then fussing until the rest of the flowers looked random but evenly distributed. I was VERY careful not to land anything near any nipple areas thankyouverymuch. I decided some flowers would overlap the seams - even though this will make construction more difficult for me, the idea is that it will make the bodice look closer to seamless: like it was created around a 3D form instead of flat.

Next, I started filling the blank spaces with what I’ve been calling ‘viney bits’ - technical term. On the sketch, they’re just an assortment of curving lines connecting all the flowers, with some tendrils in between. I’ve drawn them in a sort of code for myself to remember which beads to use - a spiral of circles for the pearls, regular lines for plain seed beads, two lines with a zig zag for the thick ‘rope’ stitch, and a line with hashes through it for bugle beads - and it’s all very approximate, since sometimes the beads looked better in a different way on the fabric than they looked to me in pencil. I also added some tertiary starburst elements when I felt things were lacking texture. Those are the clear, rainbow-finished bugle beads with the swarovski crystal centers. I’m getting ahead of myself again!
My tips, if you’re planning an embroidery like this, are to keep in mind from the start that pencil won’t approximate bead or thread, be flexible with changes, and don’t try to do the whole thing before you start. You’re going to change your mind about what looks good, and that’s okay.
Preparing for Tambour Beading
At first stitch, I had all of the flower elements laid out on tracing paper, and a palm sized section on the right side-front pattern piece full of viney bits. The rest was blank, and I’d decided I was okay with that.

Before starting the beading, I needed to transfer both the shape of the pattern pieces as well as the design itself onto the tulle: this turned out to be quite a trick! I decided to tackle them in two different ways, since the purpose of the markings was so different.
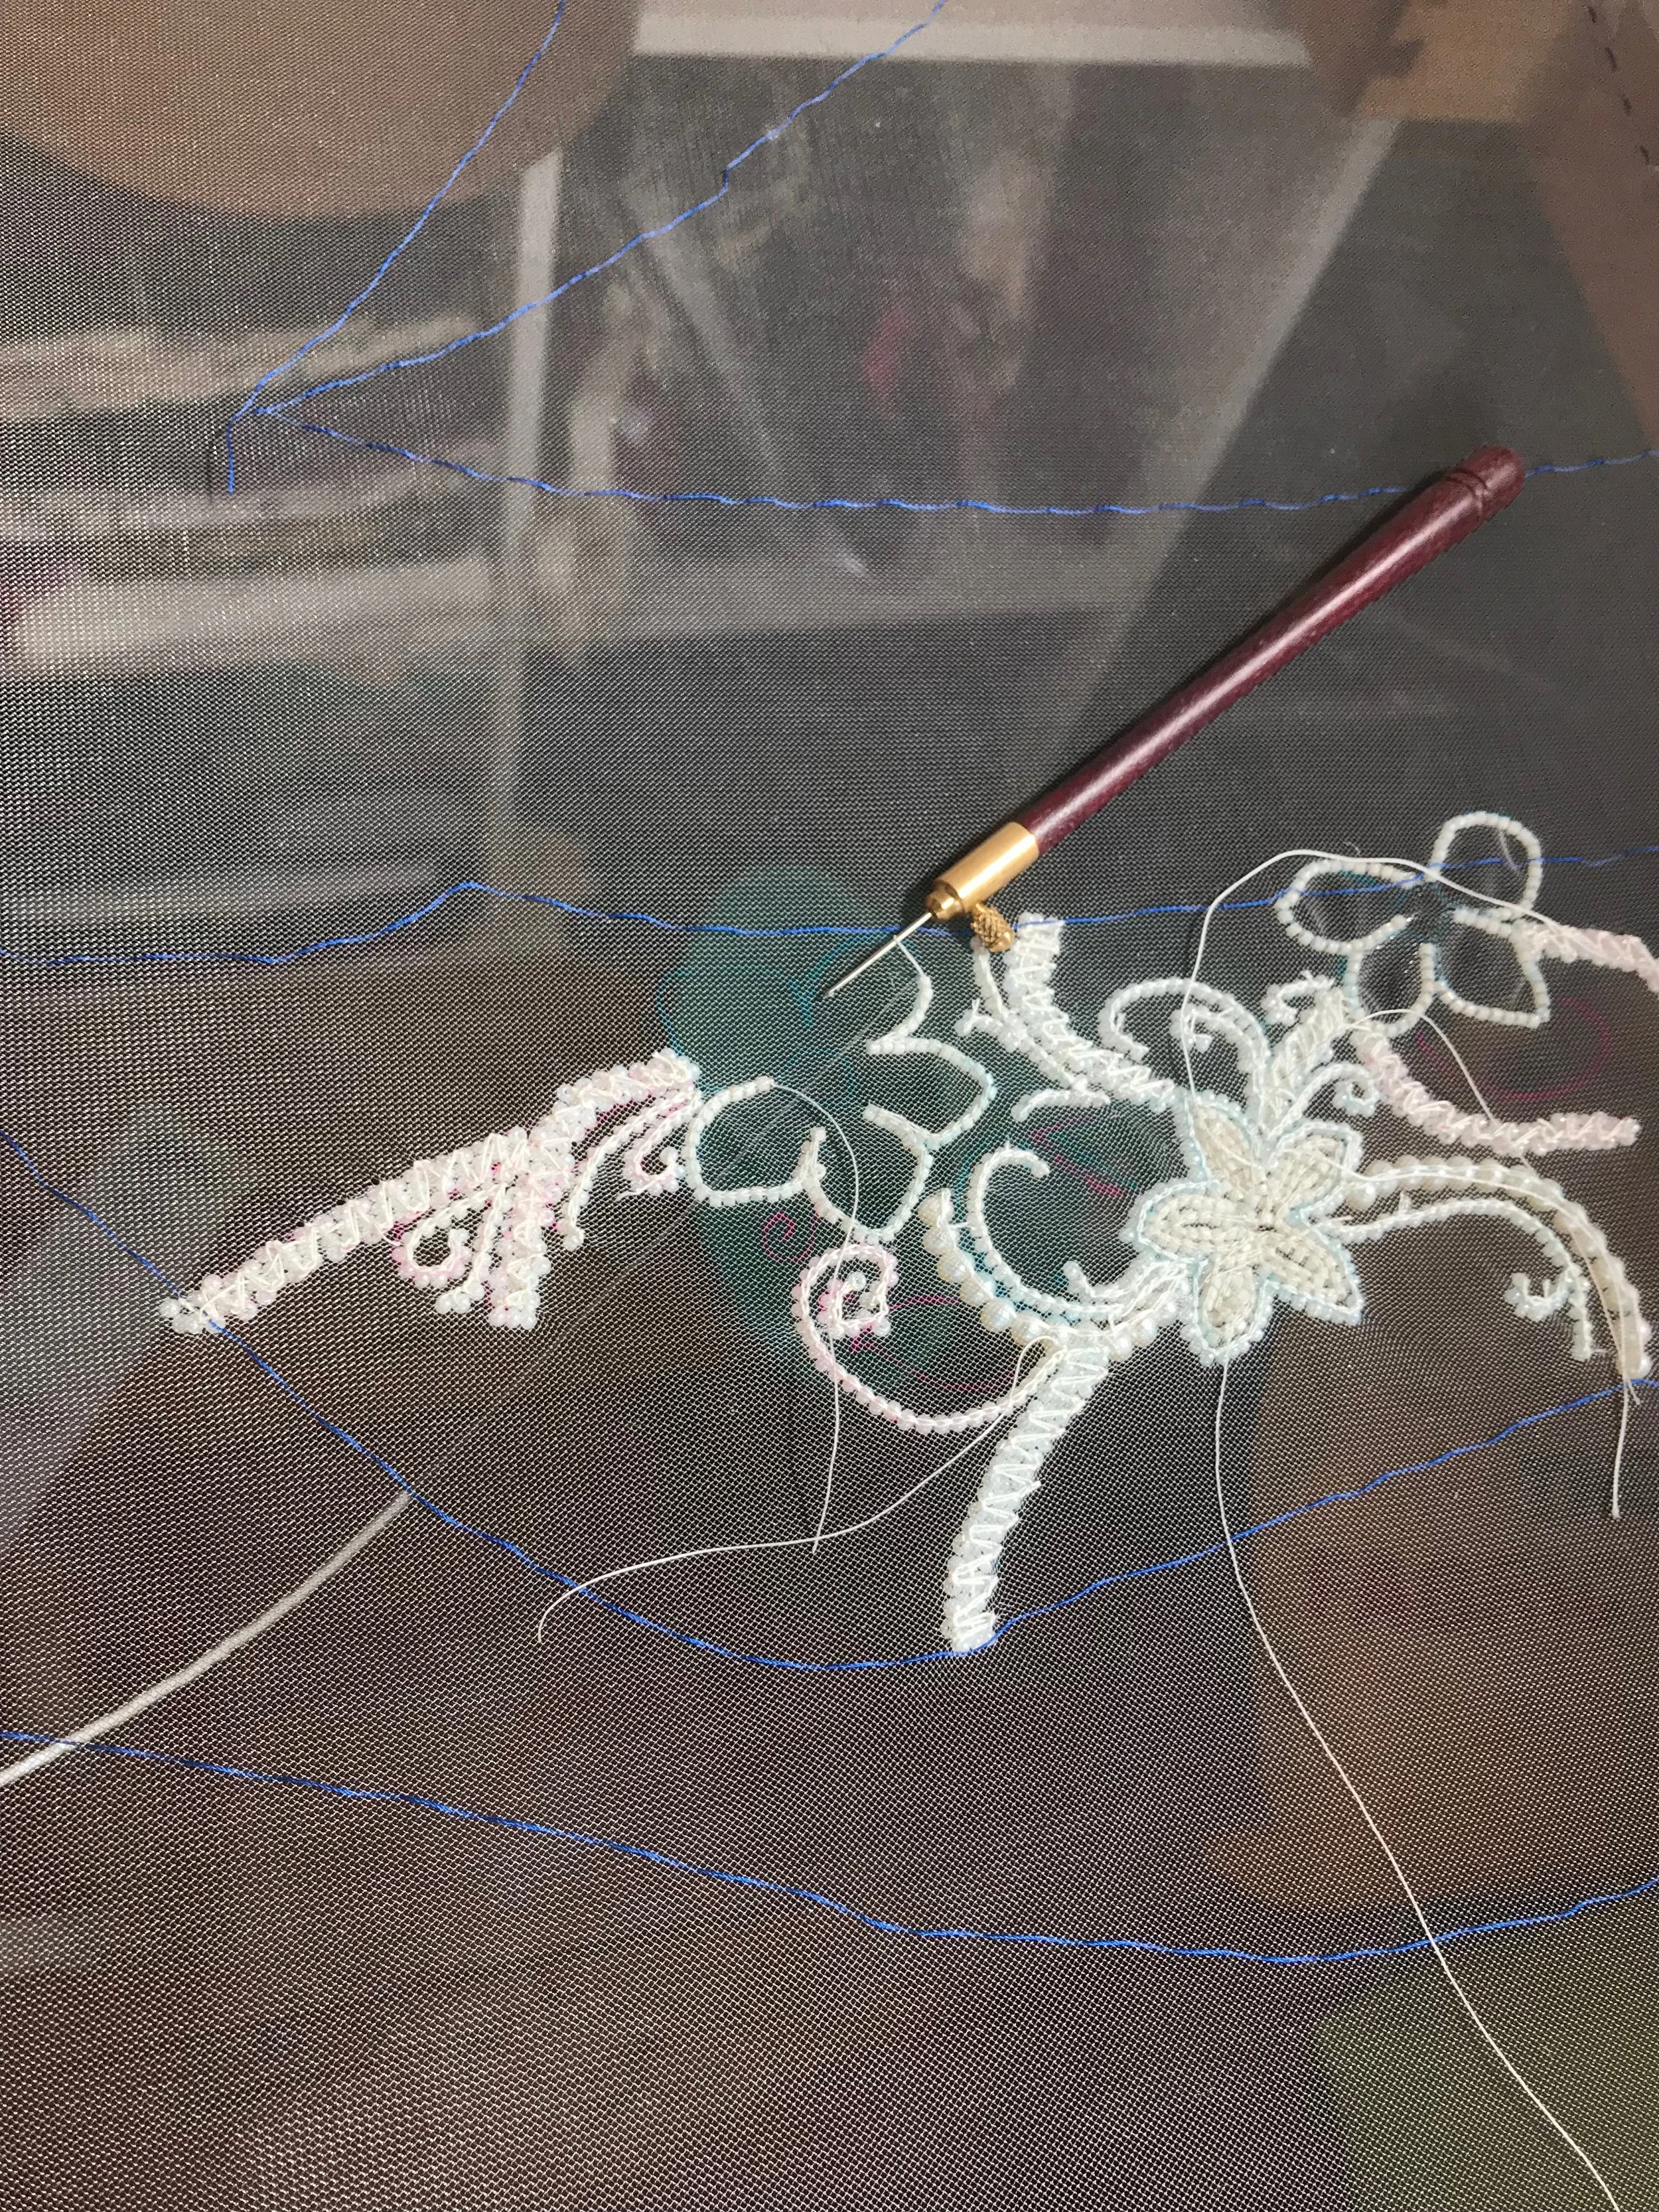
I used bright blue silk thread to trace around each pattern piece on the tulle - laying them out next to each other and carefully following the lines with a running stitch. These boundaries are very visible so it’s obvious to me when I cross them (which is allowed, as long as there’s a corresponding blank space on the neighbouring piece) and I’ll be able to carefully pull them out once the embroidery is finished.

For the design, I decided to use a different transfer method. There are a lot of suggestions online concerning how to get a design onto fabric for embroidery - chalk markers, something called ‘prick and pounce’ where you use powdered chalk through holes in a design to create small dots on the fabric, thread tracing, etc… but I went for the 21st century and decided to use my handy dandy bright pink Pilot FriXion pen. (I bought charcoal and chalk to grind up into pounce - it’s a technique I’d like to try one day but the pen worked better in this case)
I know, I know what you’re thinking - bright pink pen all over a wedding dress? Crazy lady! Tragedy! What if it doesn’t come OUT! - I know, I had the same thoughts. But I also had extra tulle, enough to run some tests and be sure the pen would, in fact, disappear. Pilot FriXion pens disappear when you give them a quick rub (friction’s the name of the game after all) but also when you apply heat (and I bow down to the sewist who first figured that one out, what a lifesaver!) - so all I had to do to remove the pen was get close to it with a hot iron and off it went. It’s quite sensitive - in my tests, with the iron on the wool setting, I could stay half an inch away from the fabric and it was still enough heat to erase, so I don’t actually touch bead nor sequin with the hot plate of the iron. But then - it’s not technically gone, is it? Some people report the ink comes back if you stick it in the freezer. I doubted I’d ever be putting my wedding dress in a freezer, but just in case I stuck it in there for a test. Nothing came back. Whoo! That’s success as far as I’m concerned. I’ve also done a small hand washing test with my beading test piece. My hands, and their oils, have been all over every single bead, sequin, and inch of thread that’s gone into this dress, and I’ve sneezed on it at least three times, so my plan at this stage (please shout things at me in the comments if you disagree) is to give it a quick and gentle hand wash (using delicate soap, just a basic dunk and swish, rinse, no wringing, flat to dry on a towel in the shade) once it’s off the frame and before I attach it to the dress.
All this talk of prep and nothing on the beading! I can’t believe you’re still reading this.
First Stitch
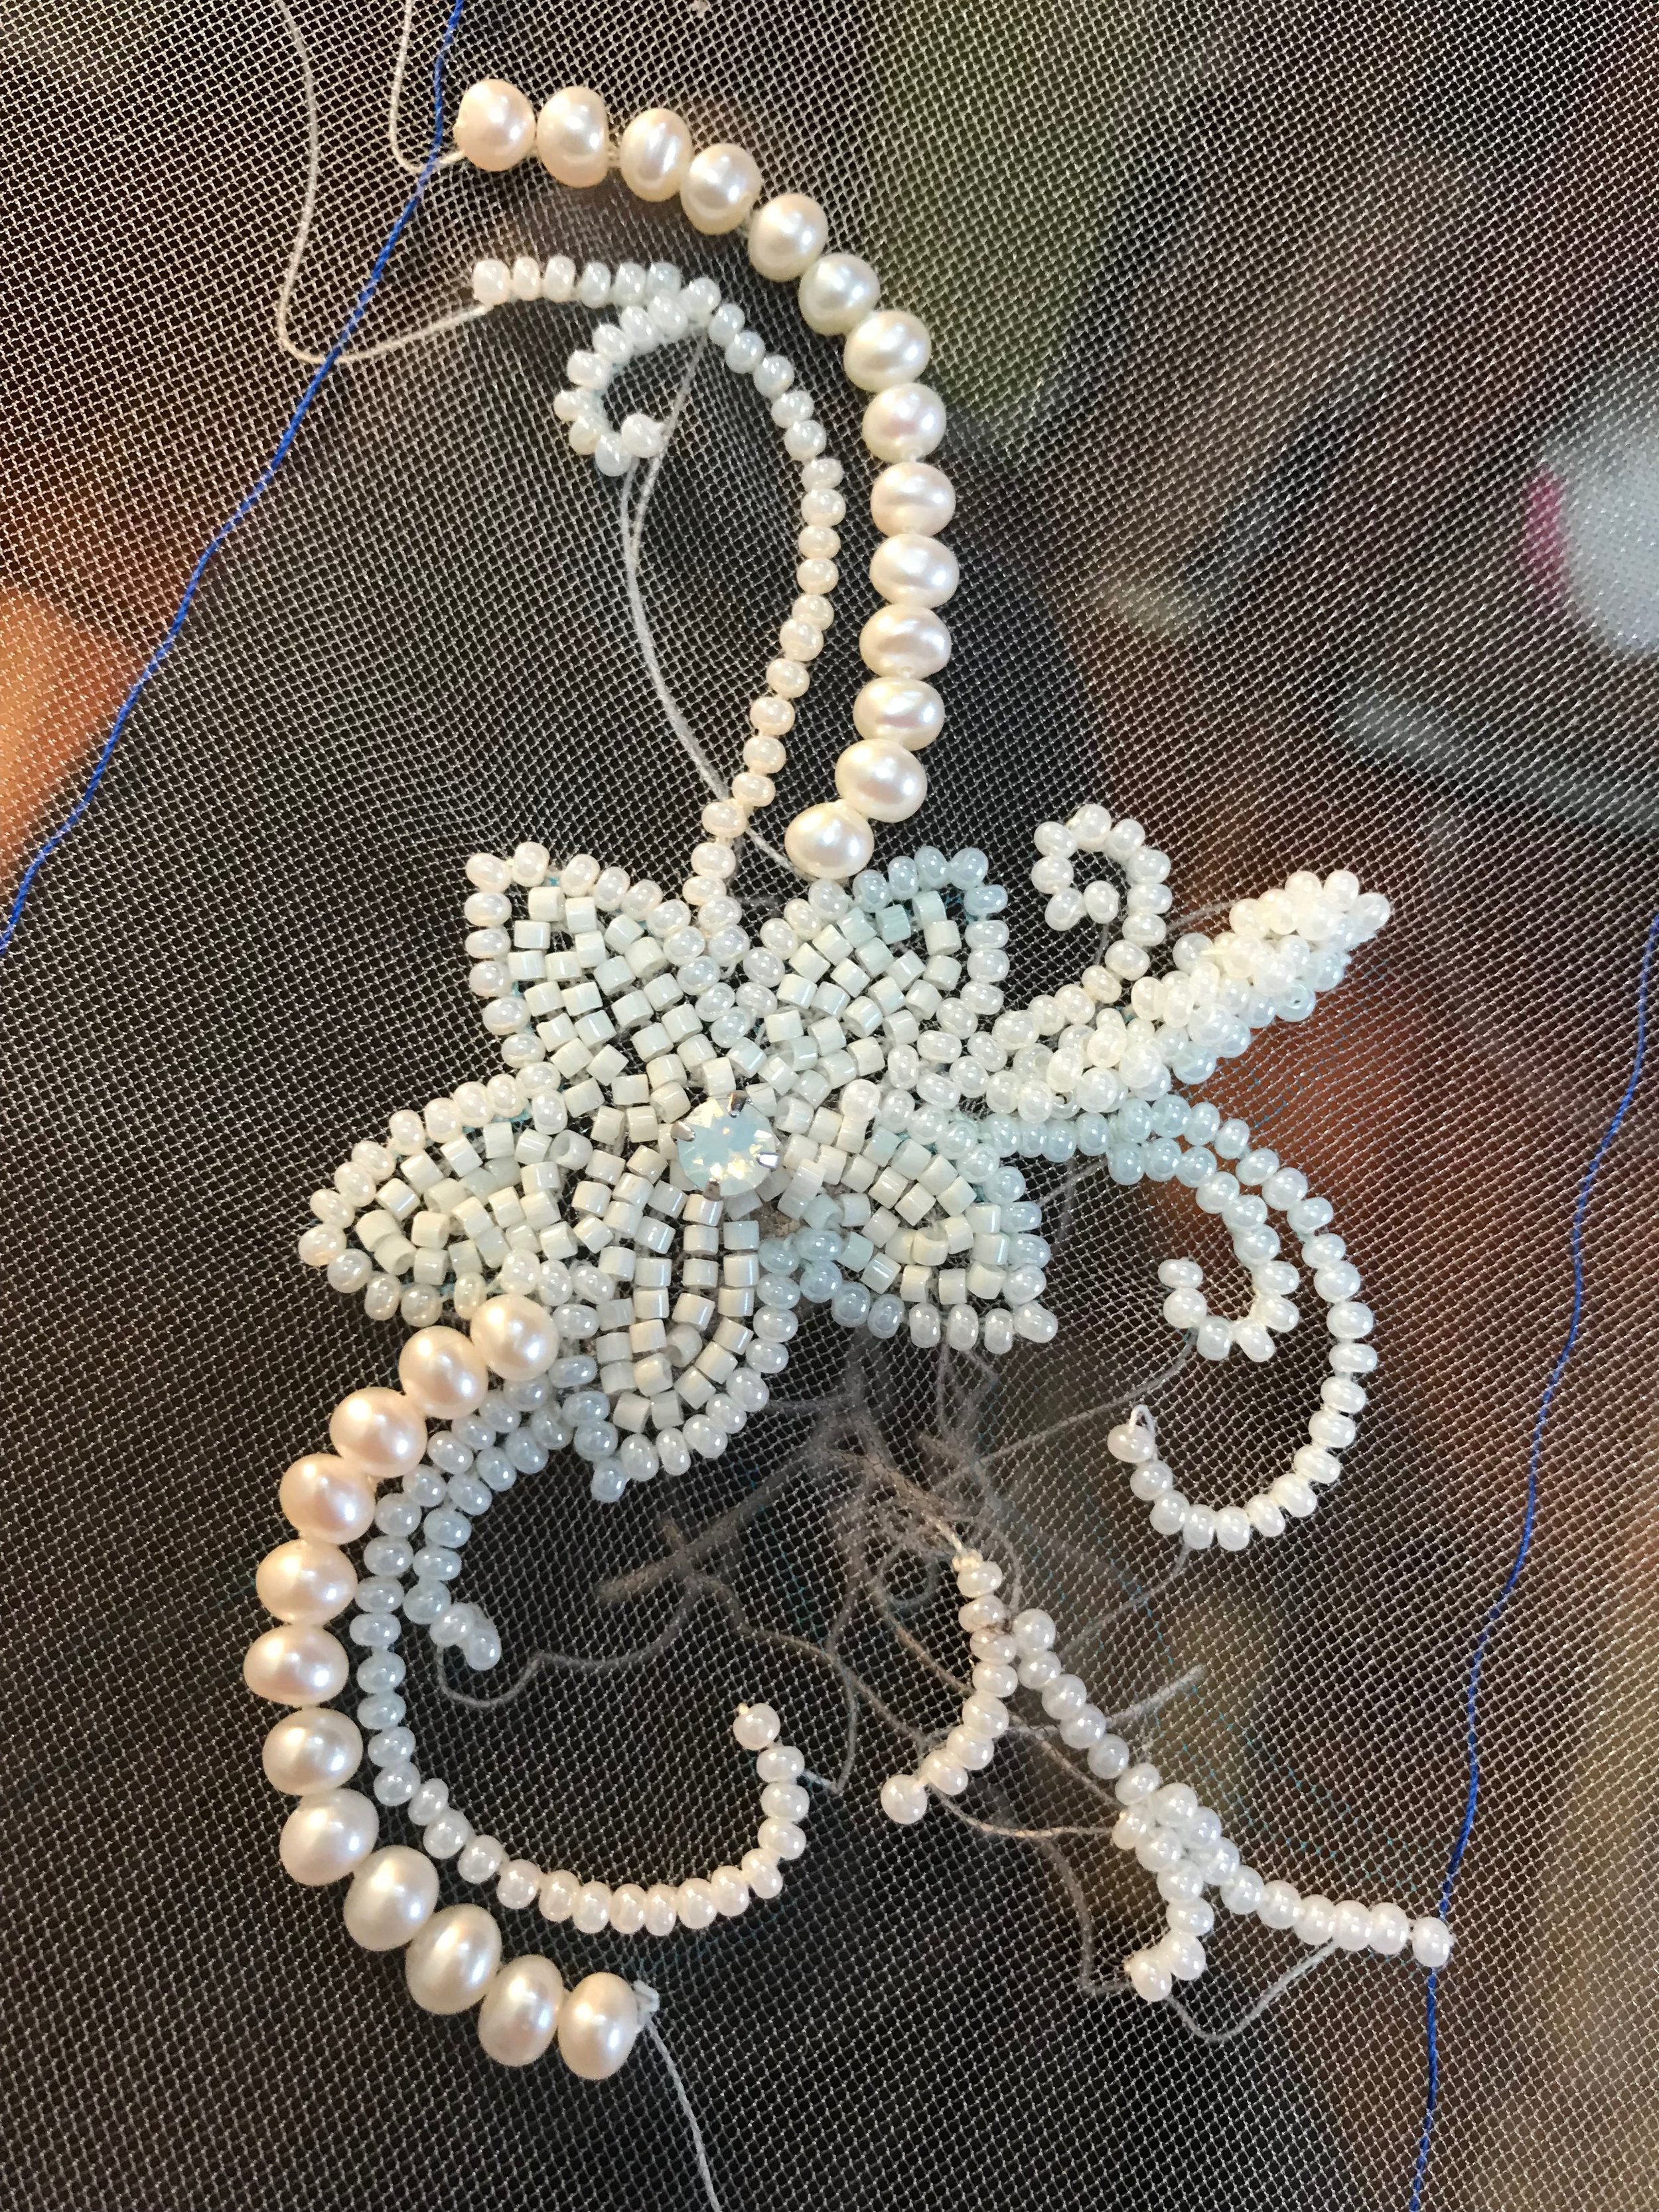
First stitch was taken early on a Saturday morning in August, and I livestreamed the process on Instagram. It was one of the smaller flower motifs, which I outlined first and then filled with beads. The first flower took one and a half hours, and I’m not going to blame the livestream at all for how long it took. It was a slow process. I was slow. The tambour hook, now, after probably hundreds of hours spent is like an extension of my hand, but that first flower was like trying to write a sentence holding on to the eraser-end of a two foot long pencil: Hard. Work. I had practiced, so I knew the technique required to form a stitch, but the real thing is always harder, isn’t it?

My problems were three-fold: First, my embroidery frame is quite large, and a different shape from the circular one I’d practiced on. Getting my arms in comfortable positions without resting my wrists on anything except the edges of the frame was hard and unnatural. I kept wanting to reach my hand under or over but you can’t do that! One hand has to stay above the work to hold the hook, and the other below to hold the beads and thread. Second, the thread was SPLITTY. I kept snagging it with the hook and ending up with tangles. Someone in the livestream suggested waxing the thread with beeswax but I was afraid that would gunk up the beads.
I was using guuterman silk thread which, as wonderful as it is for hand sewing, turned out to be very much not fit for purpose. I tried regular sewing thread but that was a big mistake, so then I went out and bought hand quilting thread - much denser - and this turned out to be an improvement. It wasn’t perfect, so I resolved to do some research as well. The thread issues were made worse by the third problem, which is that the tulle (since it was so loose in the frame) would move down when I put my hook in and follow me up when I drew the hook out. This I suppose I knew was going to happen but there was quite a learning curve, especially since my practice piece had been so tightly stretched.
It’s the only flower with a beaded centre. It doesn’t stand out, looking at the whole piece, but I decided after I’d finished it I didn’t like the look of bead-filled flowers, so the rest of the small flower motifs are sequin filled instead. I chose not to take it out and start over, though, because it was my first flower. It’s sentimental, and it’s going to be hidden under my arm for the most part. I’ll know it’s there, and I’ll remember First Stitch.
By the time I decided to stop on the first day of beading (four hours in, including the livestream) I’d finished that flower plus a fair bit of the surrounding viney bits, and pieces of further flower outlines:
But there was a problem.
The pattern piece was being pulled in by the tension of the stitches. Because my tulle was so loose in the frame, the fabric was scrunching up under the beading, and when I held the pattern piece under the beading, the thread tracing rather rudely informed me that it had been pulled in by over half an inch!

Friends, I put it down. I put it down and ran away from it like a hot potato and I didn’t touch it again for a couple of weeks. I had time - it was August - and it was in this time that I sewed my Rarotonga capsule wardrobe and then went to Rarotonga for a week, and THEN I finished and mailed my wedding invitations - all before I picked it up again. I did some googling in there somewhere for tips, but basically came up with nothing as far as other people’s experiences were concerned. I did find that something called ‘gloving thread’ is good for tambour beading because it’s not splitty and is very dense and resistant to chafing, so I ordered some of that, but nothing to solve my tension issues. I decided that the most logical solution was just to focus on applying less tension in the threads, and to allow the thread to relax completely between each stitch. You know how when you’re new at something (I’m thinking of things like knitting, or even writing as a kid - anything involving fine motor skills) you tend to hold your tools really tightly? I focused on letting go of that tension, and fortunately that was enough! To solve the damage that had already been done, I removed the thread traced lines and re-traced them in the correct position, adding more beads and filling in areas as required.
I worked on it for a few hours at a time whenever I could, but then I encountered another problem. As I practiced, I was able to work on the project for longer periods of time without mentally feeling like I needed a break (it takes a lot of focus to learn a new skill! You can almost feel those synapses making connections) but eventually I got to the point where that wasn’t such an issue anymore. Instead - my body started disagreeing with the project. I’d stand up after beading with a numb right foot, and the familiar sciatic nerve pain I used to get when I screen printed at tables that were too short. Tall people problems. I would have trouble walking if I beaded for too long, and ended up having to set a timer to remind myself to stand up every 15 minutes to stretch and do a lap around the house. This worked, but I felt it was a little ridiculous on the whole. I know I have some special concerns and joint issues, but come on. People do tambour beading - haute couture dresses covered shoulder to ankle in thousands of beads - for a living. Not many people, but those people do exist. This technique has been around for thousands of years, surely there was a solution to this problem that didn’t land me unable to get out of bed in the morning?

One night, when I definitely should have been sleeping, I had a realization. I’ve had this type of pain (at least on a severe scale) two other times in my life, and both were related to the height of my work table. I couldn’t change the height of the tambour frame (it’s propped up between my kitchen table and fabric storage cubes, and nothing short of setting up sawhorses in the middle of the kitchen was going to change that) but I could change the height of my chair, which in this case was effectively the same thing.
I absconded with the adjustable computer chair from the bedroom, had a bit of a play with the heights, and magically, as if a light switch had flipped on, all of my nerve pain was gone. I felt like an idiot. A happy, pain-free one, but an idiot all the same. I still make a point of getting up to stretch every so often, but I feel much happier about things, and so do the nerves in my hips and back.

With this, the last of my initial problems were solved -or so I thought. I hate to leave you on a cliffhanger, dear reader, but this was not the end of my problems. I have, however, already written enough as it is for today, so you’ll have to wait and see what happens next! Here’s a little sneak peek of the direction we’re heading in:
