
Note: I’ve dug deep into the blog draft archive to bring you this gem that I apparently never posted from 2018 - because I have some exciting news, (and I also really want to clear out my drafts folder). I’ve launched my very own Patreon page, and I’d love for you to come check it out! Patreon allows creators like me to provide exclusive access to supporters in exchange for a bit of cash, which then in turn helps me create better content to share with you by funding things like cameras and lights so I can film more video tutorials! It’s a cool system. My Patreon crew will get deep-dive behind the scenes detail on my projects (more regular than the blog posts!) as well as voting power over what I’ll work on next, free downloads, the occasional gift, and coupon codes for things like that pattern release I keep talking about, have an opportunity to get help with projects they’re working on, access to livestreams as I work on projects, as well as 1:1 chats for project help. Of course, no stress at all if you’d rather stick to the blog - I love that you’re here and you support as a reader is awesome, and that’ll never change!
Without further ado - here’s one very old blog post from the world before the pandemic!
______________
I'm so excited about today's project! The weather is warming up, and I’m starting to be able to get out on my paddleboard more frequently - which means I get to wear this outfit all the time! Jon and I did manage a couple of solid SUP days even through the off season, which is when most of these photos were taken. It was the perfect opportunity for me to take my rashguard top out for a couple of trials, and enough for me to realize I needed to make one small change before I'd have the perfect SUP Outfit - which you can see in some of the more recent photos too!

If you haven't already, go check out my SUP Leggings post - I've used the same fabrics for my top, and that post goes in-depth on the properties of different swim-activewear fabrics, so it'll be helpful if you're planning a water activity wardrobe. I won't repeat too much of that here, but I do want to tell you a bit more about flatlocked seams because I kind of skipped over that in the last post. First though - the pattern!
I used the Helen's Closet Avery Leggings pattern for my SUP leggings - altogether a really nice pattern if you're in the market, and I've made both an activewear version and a merino layering version which has been in near-constant rotation. For my top, I wanted something that would mimic the color blocking I'd used in the leggings but also maintain a few critical fitting properties I needed specifically for SUP use. I needed a high neck for sun protection, it needed to be closely fitting so that it would resist bagging out when wet, but it still needed to leave me with a good range of motion for paddling, especially in the shoulders. A long, long time ago, I made myself a merino hiking shirt that was designed to fit well under my hiking pack - it had similar properties to the ones I was looking for in the rashguard shirt, so I decided to use that draft as a base. It has shaped raglan sleeves and a side sleeve-and-body insert that keeps things close fitting in the torso and arms but provides the required freedom of movement in the shoulders. I just added some length to the sleeves, raised the neck slightly, and then hacked the whole thing apart for some color blocking!

That's the short version. You want the dirty drafting details though, right? (If you don't, maybe skip this paragraph...) - the two piece raglan sleeve is great for activewear because the shape - specifically at the armpit - allows for a LOT more movement without distortion. It's not a huge issue when the fabric is as stretchy as swimwear fabric is, but a seam up under your armpit is also more likely to chafe, especially if the shirt is wet. As far as raglan vs. set in sleeve pro-con lists are concerned, I'd pick a raglan for activewear every time. I've drafted for about an inch of negative ease through the upper chest, and about 1/2" of negative ease from bicep to wrist, which keeps things snugly skin tight in those areas - important because if I go swimming in this thing, any areas that are a bit loose are much more prone to bagging out, and this can be restricting if you're swimming. If you're adjusting a pattern of your own to have negative ease, just measure the pattern pieces against your own measurements and subtract however much you need to give yourself a tight fitting top. Do keep in mind that regular shirt patterns will probably have positive ease - after all, in most cases you do want a bit of breathing room! In the case of close fitting knit t shirts, you may find yourself with a bit of negative ease already, if the fabric is meant to sit stretched on your body. I mentioned the chest, though - right? Negative ease through the chest, but I actually flared the shirt out from the waist down to the hips to give myself some positive ease in the lower torso, and although I ended up cropping the rashguard, I still think it's important to mention it. You know how sometimes if you're wearing a shirt that's too tight around your hips, and you lift your arms up and the shirt settles up around your waist instead? Yeah. When you're SUPing or swimming (or surfing so I've heard) - your arms spend kind of a lot of time above your head. If I'd gone with negative ease all the way down to the hem, I'd have spent about 50% of my time on the board yanking the shirt back down again. The way I planned it, I lift my arms, the shirt goes up - I put my arms down again, the shirt goes back down.

After our paddling weekend, I did come to one small realization - a full length rashguard shirt wasn't actually necessary for my particular SUP outfit. The Avery leggings are extra-super-incredibly high waisted, so even if I crop the shirt to my natural waist, I still have complete torso coverage if I lift my arms above my head. Second, the third installment of my SUP outfit series is some new swimwear - a top and two bottoms - and I want the whole set to be completely interchangeable. I didn't think my bottoms were going to look as good with a longer length top, and since I can still have full coverage with the leggings, I decided to crop the top. Our trip to Mangawhai Heads was before I'd cropped the top, but the Rarotonga trip was after, so you can see the difference. I’ve been on a couple of paddles since then and definitely don’t regret the decision!
So. We've talked design and aesthetics - you know you want to know about those flatlocked seams though! I'm sorry I didn't talk about them in my last post, so many of you have asked questions about them, so I figured I better document the technique in a little mini-tutorial-troubleshooting-guide for posterity.
First of all, the what's what: A flatlock is a type of seam that any regular ole' run of the mill overlocker/serger will happily accomplish. The only thing you need to do to make it happen is (gasp!) adjust the tension! That said, some special thread really helps, but the actual thing can definitely be accomplished with regular serger thread, so let's start there. The first thing you'll want to do is take out one of the needles if you're currently using a four-thread overlock - you should have one needle threaded, plus your upper and lower looper.
But what does it look like? It's all in the name! You sew your seam along an edge - wrong sides together - and then open and stretch the material, watching wide-eyed as your seam magically flattens itself out against the fabric! Here's the right (above) and wrong (below) side of a flatlock seam:

If you have any RTW activewear in your closet (or in a bag under the bed with the camping gear.... just me?) you'll likely see some flatlock and also a bit of coverstitch - the two are very similar, but flatlock conveniently does not require the purchase of a dedicated coverstitch machine. It is, however, similarly durable/lovely/flat/strong as a coverstitch seam treatment. The same, but different. Here’s a shirt hem I did with my coverstitch recently, for comparison:
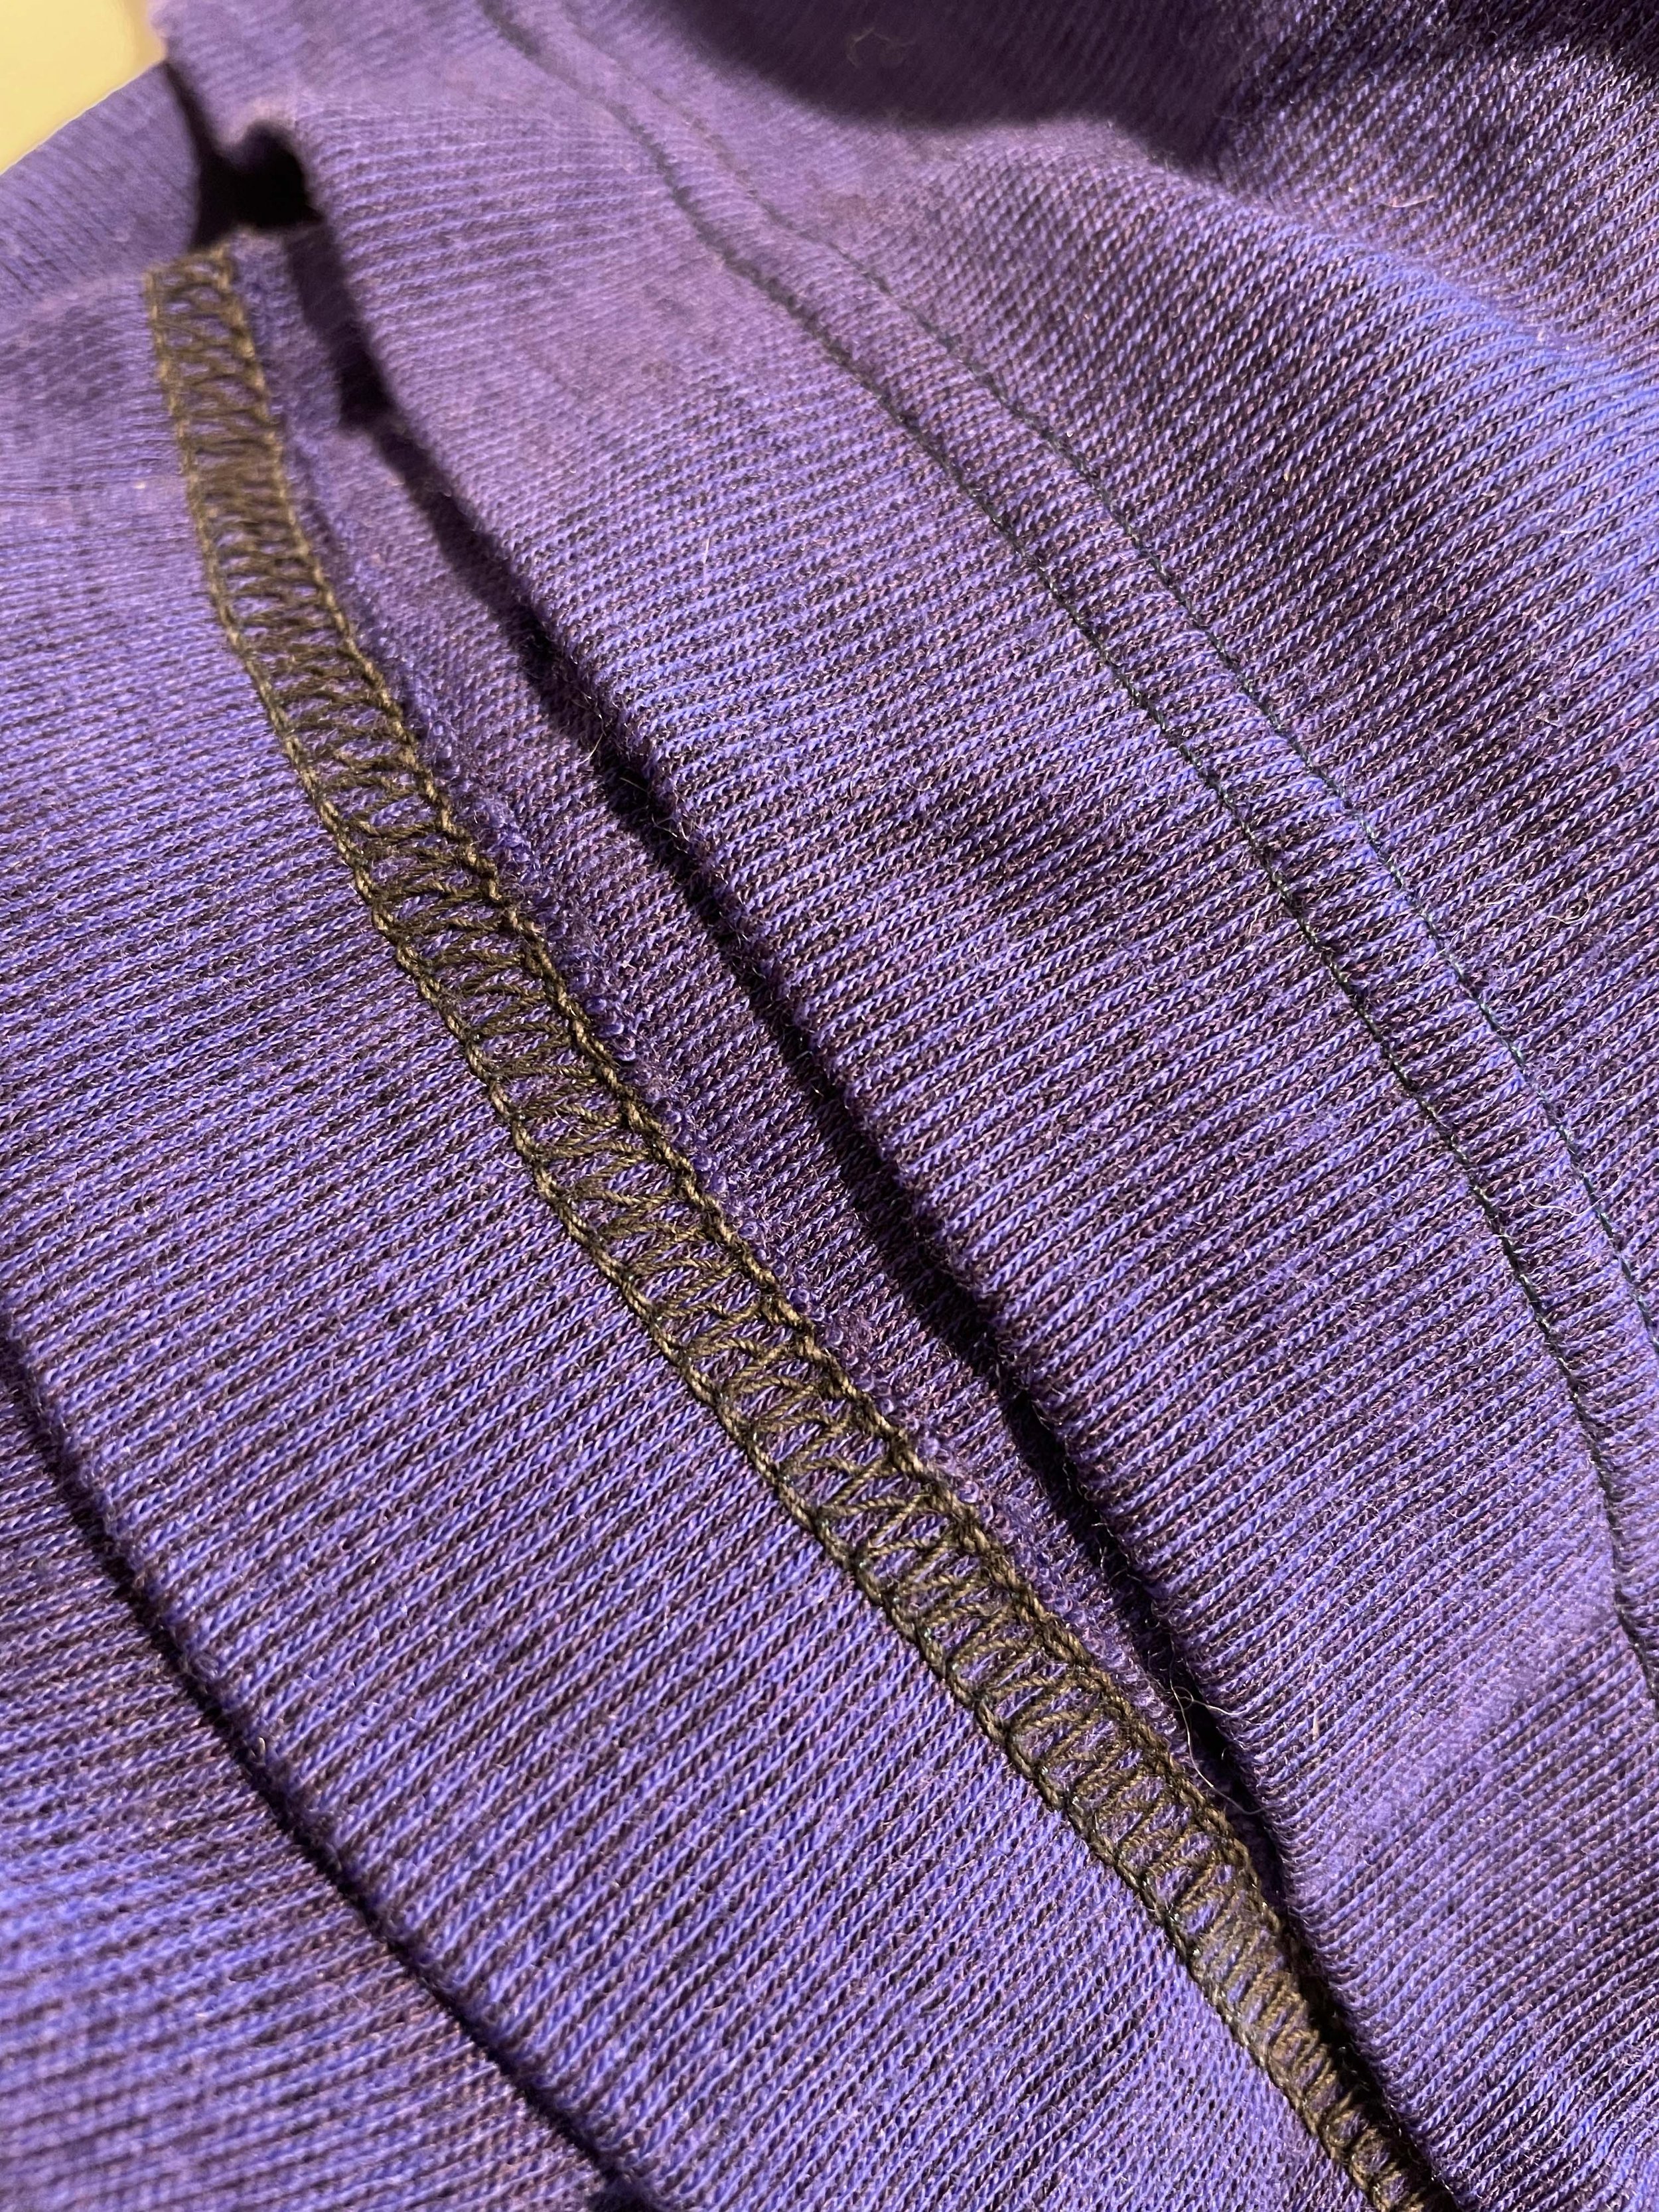
The secret is in the tension. If your serger came with a manual, I'll encourage you to go grab it for some exact and machine-specific tension settings (it should have flatlock listed in the index) - but basically what we're doing is loosening the needle tension, loosening the upper looper tension, and tightening the lower looper tension. You may have to fuss with the exact tension settings here: Too tight on the needle and upper looper and your flatlock won't be flat, but too loose and it won't be sturdy. Likewise, too loose on the lower looper will also create a funky ridge in the seam, but too tight and you'll lose the vertical stretch of the seam. My favorite way to test is to cut out all my pattern pieces first, and then use the scraps from cutting to test my seam treatments. That way, you're using the actual fabric you intend to sew without wasting any precious fabric.
So. What's this about special thread? Wooly Nylon is a multifilament nylon thread that you may find also features prominently in your RTW activewear. It happens to have a lot of benefits - it makes a mighty fine serged rolled hem, it can be used in normal sewing machines to stretch-ify a straight stitch, and lots of cool things like that - but there are two features we're particularly interested in for this use case. First, it is stretchy, so your finished flatlock seam won't have any breakage problems, even if you're, like, the Hercules of water activities (also, have you ever tried to get in or out of a wet pair of leggings? it's like a snake shedding a skin, and it's no wonder those skins rarely come off in one piece! We need strength under pressure here guys!) Second of all, wooly nylon 'at rest' (unstretched) is going to nestle itself into that seam and provide a really dense coverage that will completely disguise the fact that somewhere in there, the edge of your fabric is hiding - very professional looking!

I get it for about $7/cone at Sewing Depot in New Zealand, but there are a variety of sources around the world - it's not too expensive. I bought two cones - you'll want to put wooly nylon in your needle (use a threader, don't try to just stick it in the eye on its own, it’s called wooly for a reason) as well as in the upper looper. You can use it in the lower looper as well - it will actually make things look a little nicer - but if you don't have room in the budget for a third cone, don't stress. I also sometimes wind cone-threads off using the bobbin winder on my sewing machine - you can use an empty spool hot-glued to a bobbin.... but that's a whole separate post on its own.
Flatlock is useful anywhere you need a really stretchy, really low-profile, professional looking exposed seam finish on a garment. I'd take advantage of the contrasting seams look, though, because it's hard to find an exact wooly nylon match for some fabrics. Alternatively, If you use nylon activewear fabric and nylon thread, you could just buy everything in white and then throw it in a dye pot after!

The first outing with the rashguard shirt and leggings together was a weekend trip Jon and I took a month or two ago. Mangawhai Heads is just under 2 hours north of Auckland, and is a smallish beach town with a significantly sized estuary and sand dunes that are a native bird sanctuary. The estuary is filled with sting ray, flounder, and sometimes also sharks, and although there's the usual currents of the tides coming and going, it's still an amazing place to paddle.
We went out into the water, landed on the sand dunes for a little walk around (So many birds! So cheerful and curious!) and then went out again the next day even though it wasn't as sunny and warm. We also saw 20-30 sting rays swimming around below us - I'd never seen sting rays in the wild before so it was an amazing experience! My SUP suit was great for keeping the sun off, and I didn't have to do any thinking about or adjusting during the day.

In Rarotonga (post-cropping), it was entirely too hot to consider wearing the leggings, but the shirt was perfect because it meant I wasn't constantly worried about reapplying sunblock to my whole entire body - just the legs, and it’s easier to reach your legs with sunscreen than your back. The new cropped length worked really well with my high waisted bottoms, and dunking the shirt in the water helped me stay cool in the hot sun.
I just want to mention one more thing: I’m trying to make an effort to be more transparent about how much my pet projects cost to make, and my feelings on that subject, especially since they tend to change from project to project. I did initially second guess my decision to buy 3m of swimwear fabric for the leggings. 2m of merlot and 1m of graphite - but I am So. Glad. That I did. It was a big expense ($103 including shipping) but I've now made leggings, a rashguard top, a swim top and bottom set which I’ll hopefully blog soon, and I still have fabric left for one more top I'm planning, and at least two more bottoms. There's no way I could have found this quality for that price in RTW (in fact, my inspiration leggings alone run $129) and the result, since everything matches, is a completely interchangeable set that I can mix around as the weather and my activity level dictate, and which will serve me in any water-based activity for (hopefully) a solid couple of years.*
(note from the future - it’s been four years and I still wear this kit every time we go to the beach!)