

Today is Wedding Dress Skirt Day! In the interest of full disclosure, I actually made the bodice the day after the skirt (I cut it from the large offcuts that the circle skirt pieces left) but it makes more sense to talk about it this way, so here we are. On today’s agenda, we’re talking about lessons learned. Three layers of silk circle skirt, an investigation into the behavior of silk when washed, and finally, the very exciting union of bodice and skirt!

The scene: My fabric is dyed and dried, and I’ve stuffed it all into shopping bags to take to Gill and Ricky’s house, where I will use their large expanse of wooden living room floor to cut the pieces of my circle skirt. I elected to iron it at their house as well - no point pressing all of it just to bundle it up for the ride and have it get wrinkly again. I’ve cleared the furniture in half the room because two of my fabrics - the silk satin and the top layer of gauze - are 110cm wide, so my full length circle skirts are each composed of two half-circle seams. I love using wide fabrics for circle skirts because it means there are only two seams to contend with, and both of them are on the straight grain.
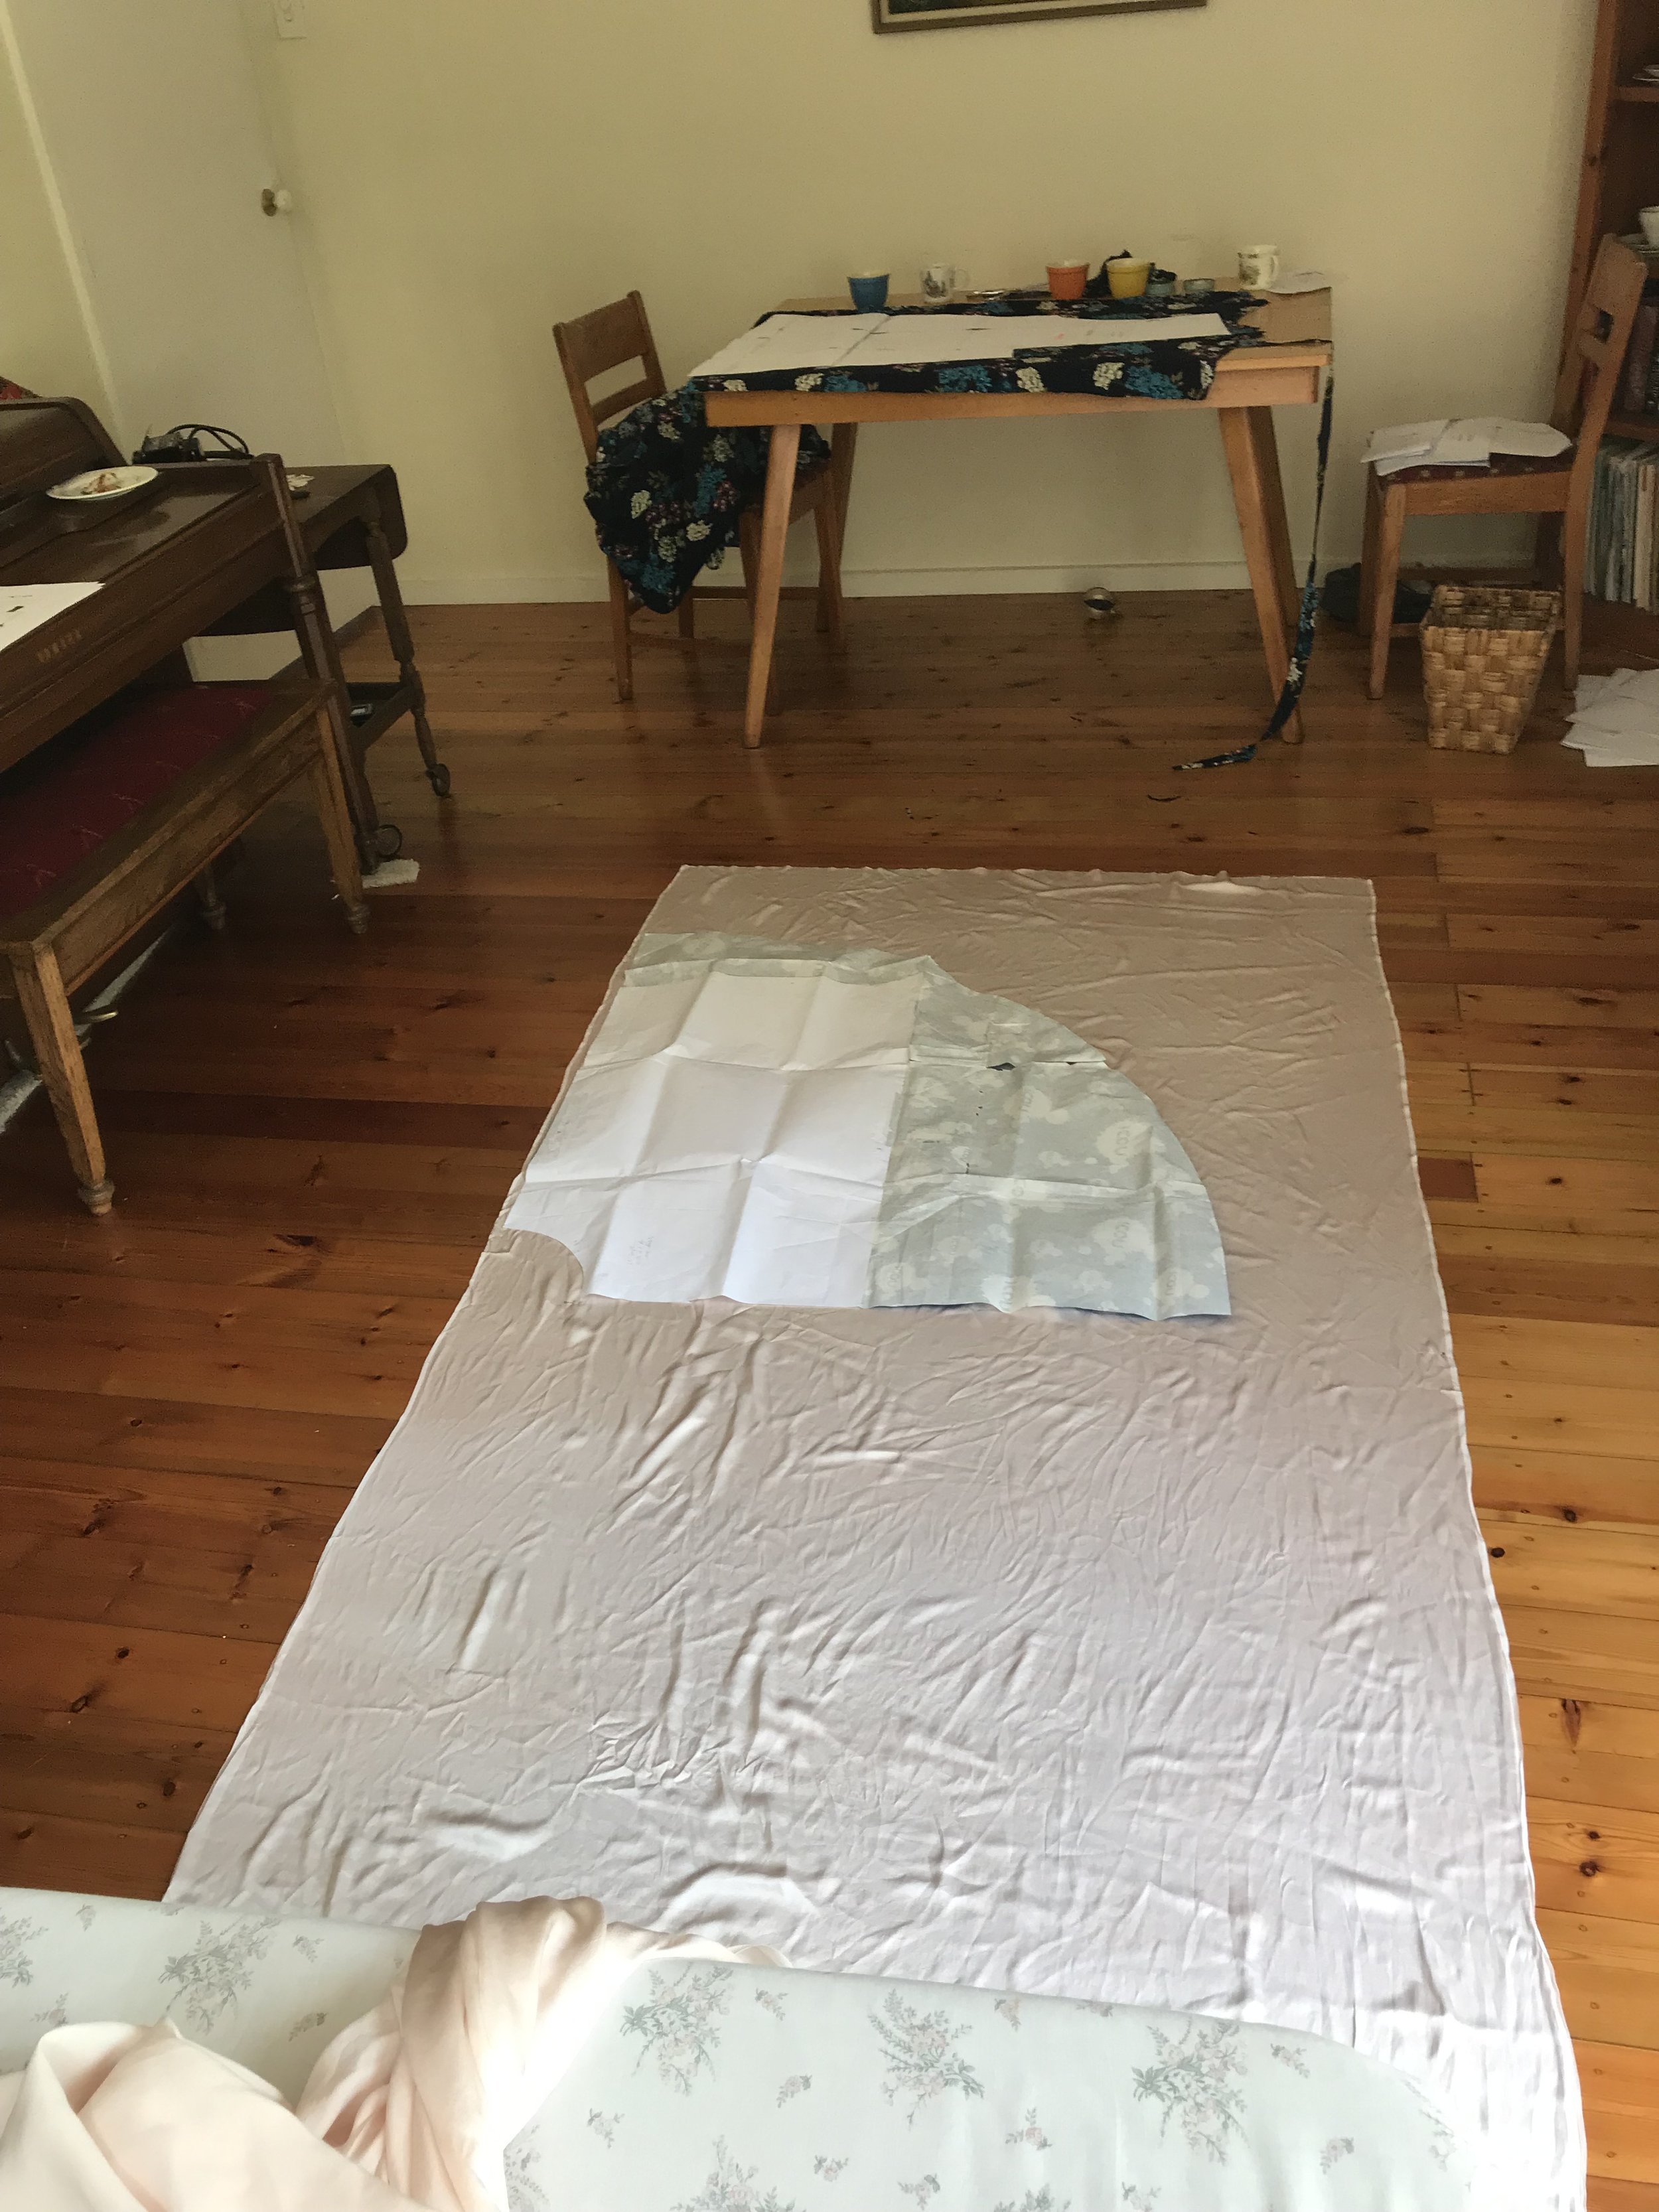
A note: This photo was taken before I pressed my fabric - just as a quick test to be sure everything fit and I had enough floor space! Please ignore the wrinkles :)
I started with the lower layer. I carefully pressed the wrinkles out of my silk satin (pressing with a press cloth on the wrong side, just to be safe!), laid it out on the floor, and cut my pieces. I tried to move them as little as possible before getting them to the machine to sew the side seams, and then pinning the skirt to Pearl - my dress form.

Next, the middle layer. Pressed the silk gauze, laid it out, and since this yardage was narrower (It didn’t come wide enough!), I cut it in eight wedges. At first, I ended up accidentally sewing each bias wedge to a neighbouring straight edge, which was no good - the bias dropped as the skirt hung, and the straight edge, of course, did not. I realized my mistake, fortunately, and pulled the pieces apart. This wasn’t nearly as dramatic as it sounds - I’d sewn my seams with silk thread and I hadn’t backstitched in fear of potential birds nests, so the threads slid right out. I reversed the pieces, sewing biases to biases and straight grains to straight grains, and I was off to the races! That was lesson one.

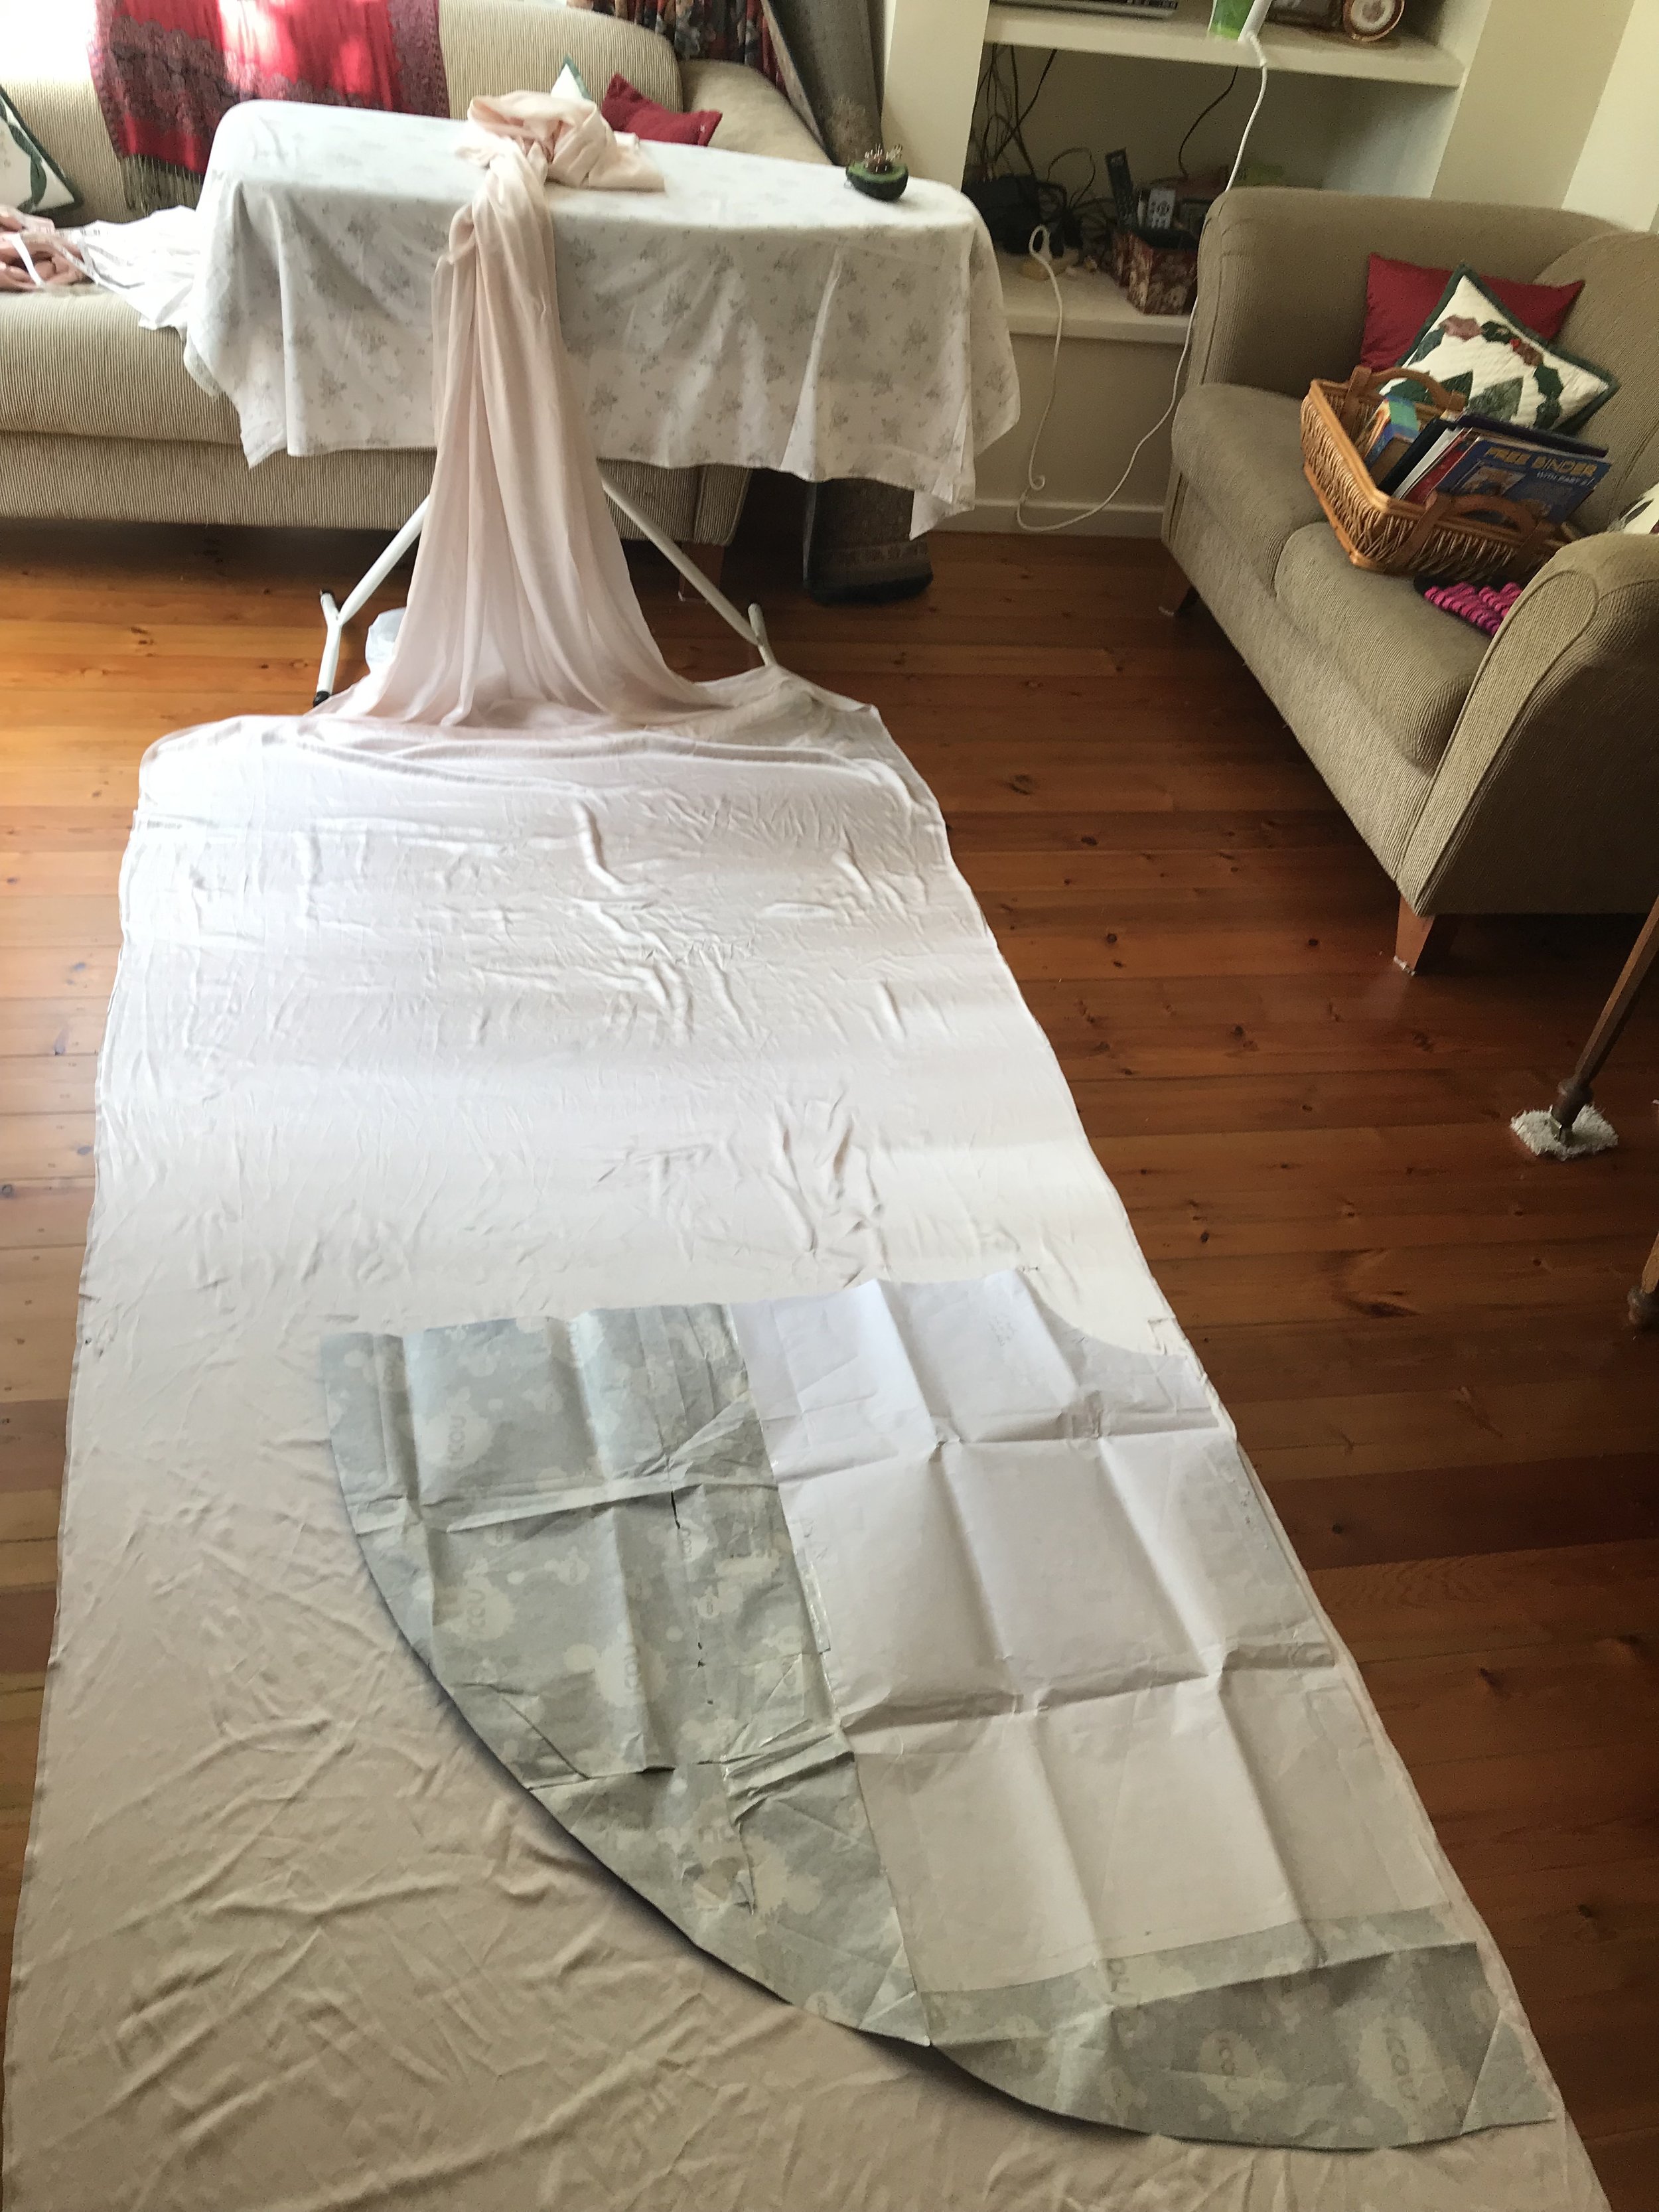
Onwards to the final layer! This was the silk I’d bought that saved the day from The Fabric Shop Otara. I had a photo of its tag - 110cm wide - so I planned to treat it exactly like the satin layer and cut it out in two pieces. I pressed the piece, laid it out on the floor, and…. my pattern piece didn’t fit!

After a solid ten minutes of panic (and trying to figure out if I had enough fabric for a different cutting configuration - I did not) I realized something. The silk gauze, which previous to dyeing had the same texture as the silk gauze I used for my second layer, now had a distinctly crinkled texture. Now. Silk doesn’t shrink in the same way wool does, it just doesn’t - but as it turns out ( after I solved the problem and the panic wore off, I consulted some friends as well as the internet) some silks can “crepe up” during washing. This, incredibly fortunately, can be aggressively steam-pressed out. Think of it like wire coiled in a spring, except when you stretch it out, instead of springing back to shape, it manages to lay flat once again. I re-pressed this piece of silk with steam while holding it taut across the ironing board, and like magic it returned to its original size!
It would most certainly happen again if I were to machine wash my fabric again - I suspect even more likely in warm or hot water like I did for the post-dye wash cycle - but it’s not a particular problem for me since there’s no heckin’ way I’ll be machine washing my wedding dress. It is, however, a reminder that you should always prewash your fabrics! Imagine if I’d sewn this up into a shirt, it would have been SO hard to press it back into shape!
The rest of the skirt went together smoothly - two side seams along the straight grain for the top layer of the skirt, and then on to the mannequin.
Skirt Layer 1: Silk Satin

Skirt Layer 2: Pink Silk Gauze

Skirt Layer 3: Ivory Silk Gauze
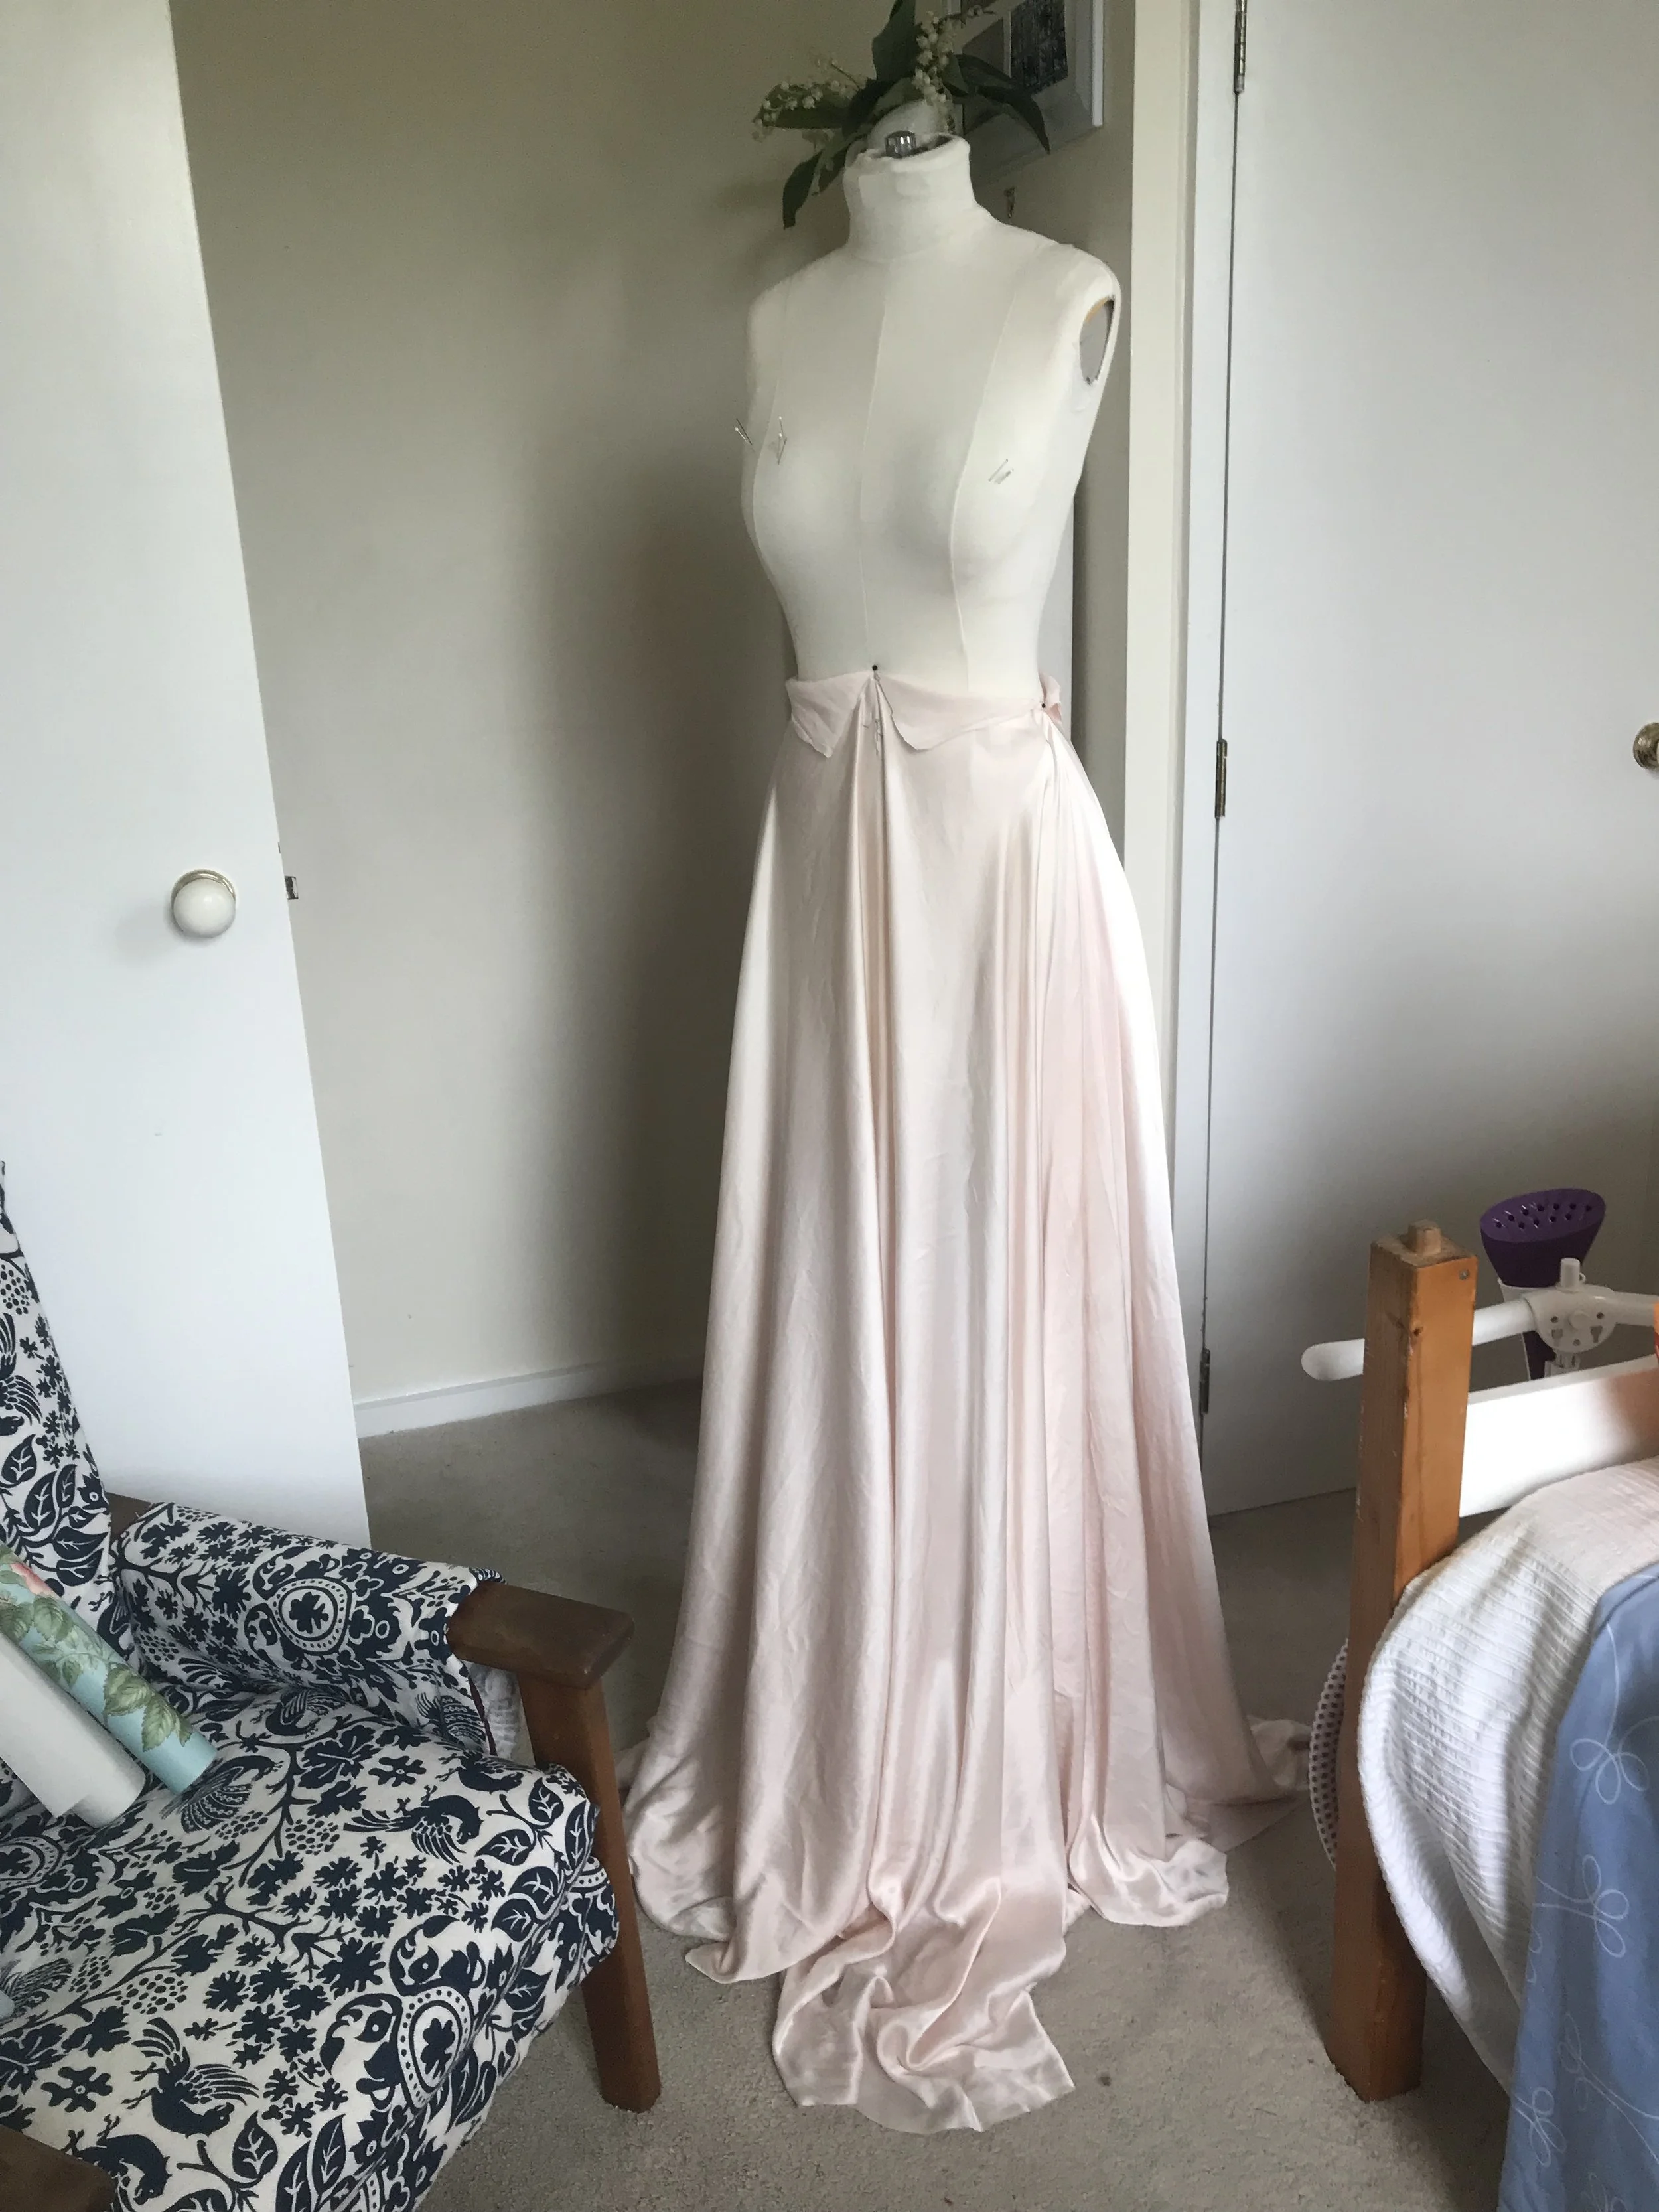
It’s time. It’s time, dear reader, to get the bodice attached to the skirt! The moment of truth, where the dress suddenly looks almost finished, and where I - less than a month before the wedding - zip up that zipper for the first time, and see my dress on my body!

It really isn’t too complex of a process. I’d cut the top of the skirt into a circle whose circumference matched the circumference of the waist of the bodice, so I lined up the outer bodice and corselet against the skirt, pinned liberally, and basted the two together to make sure there wouldn’t be any puckers.

After checking, I machine stitched it, and just like that the skirt and bodice became a dress! After trimming the seam allowances down, I folded the extra allowance from the lining up underneath, and whip stitched it in place to hide my raw edges. Next up, zipper!

Now. I’ll be the first to tell you, the way I inserted this zipper is a cheating cheater’s way and is also a bit risky. I would really advise not doing it this way, but also it turned out fine and rules are, in fact, made for breaking. As long as you understand the reason for the rule.

I used a YKK #5 Conceal zipper for my dress - it’s an industrial strength but still invisible zipper which is specifically designed for bridal wear - that is, to withstand a lot of pressure so that you don’t hulk out of it on the dance floor, basically. My zipper was inserted at the center back, and - I’ll just tell you what rule I broke - instead of creating a center back seam in my skirt, I cut a slash at the CB that was the length of my zipper plus an inch. I inserted the zip as normal (to the bodice, and through all three layers of skirt, and then under the zip I stitched a dart instead of continuing the seam all the way down. I just didn’t want to have to deal with a seam that wasn’t there. This is NOT the way you should do it, you should use a center back seam, but it all fades into the full circle skirt and you can’t tell at all when you’re looking at it so in this instance I decided it was fine.
Now, I didn’t just go cutting into the fabric willy nilly, I did put a lot of thought into it! I basted two parallel lines of stitching down where I intended to slash before I did any cutting - I did this on the dress form so that I could make sure things would lay evenly. This helped all the layers to stay together and meant I didn’t have to risk any bunching. I removed the basting stitches after the zipper was installed, and just finished it with the dart and a very good press.
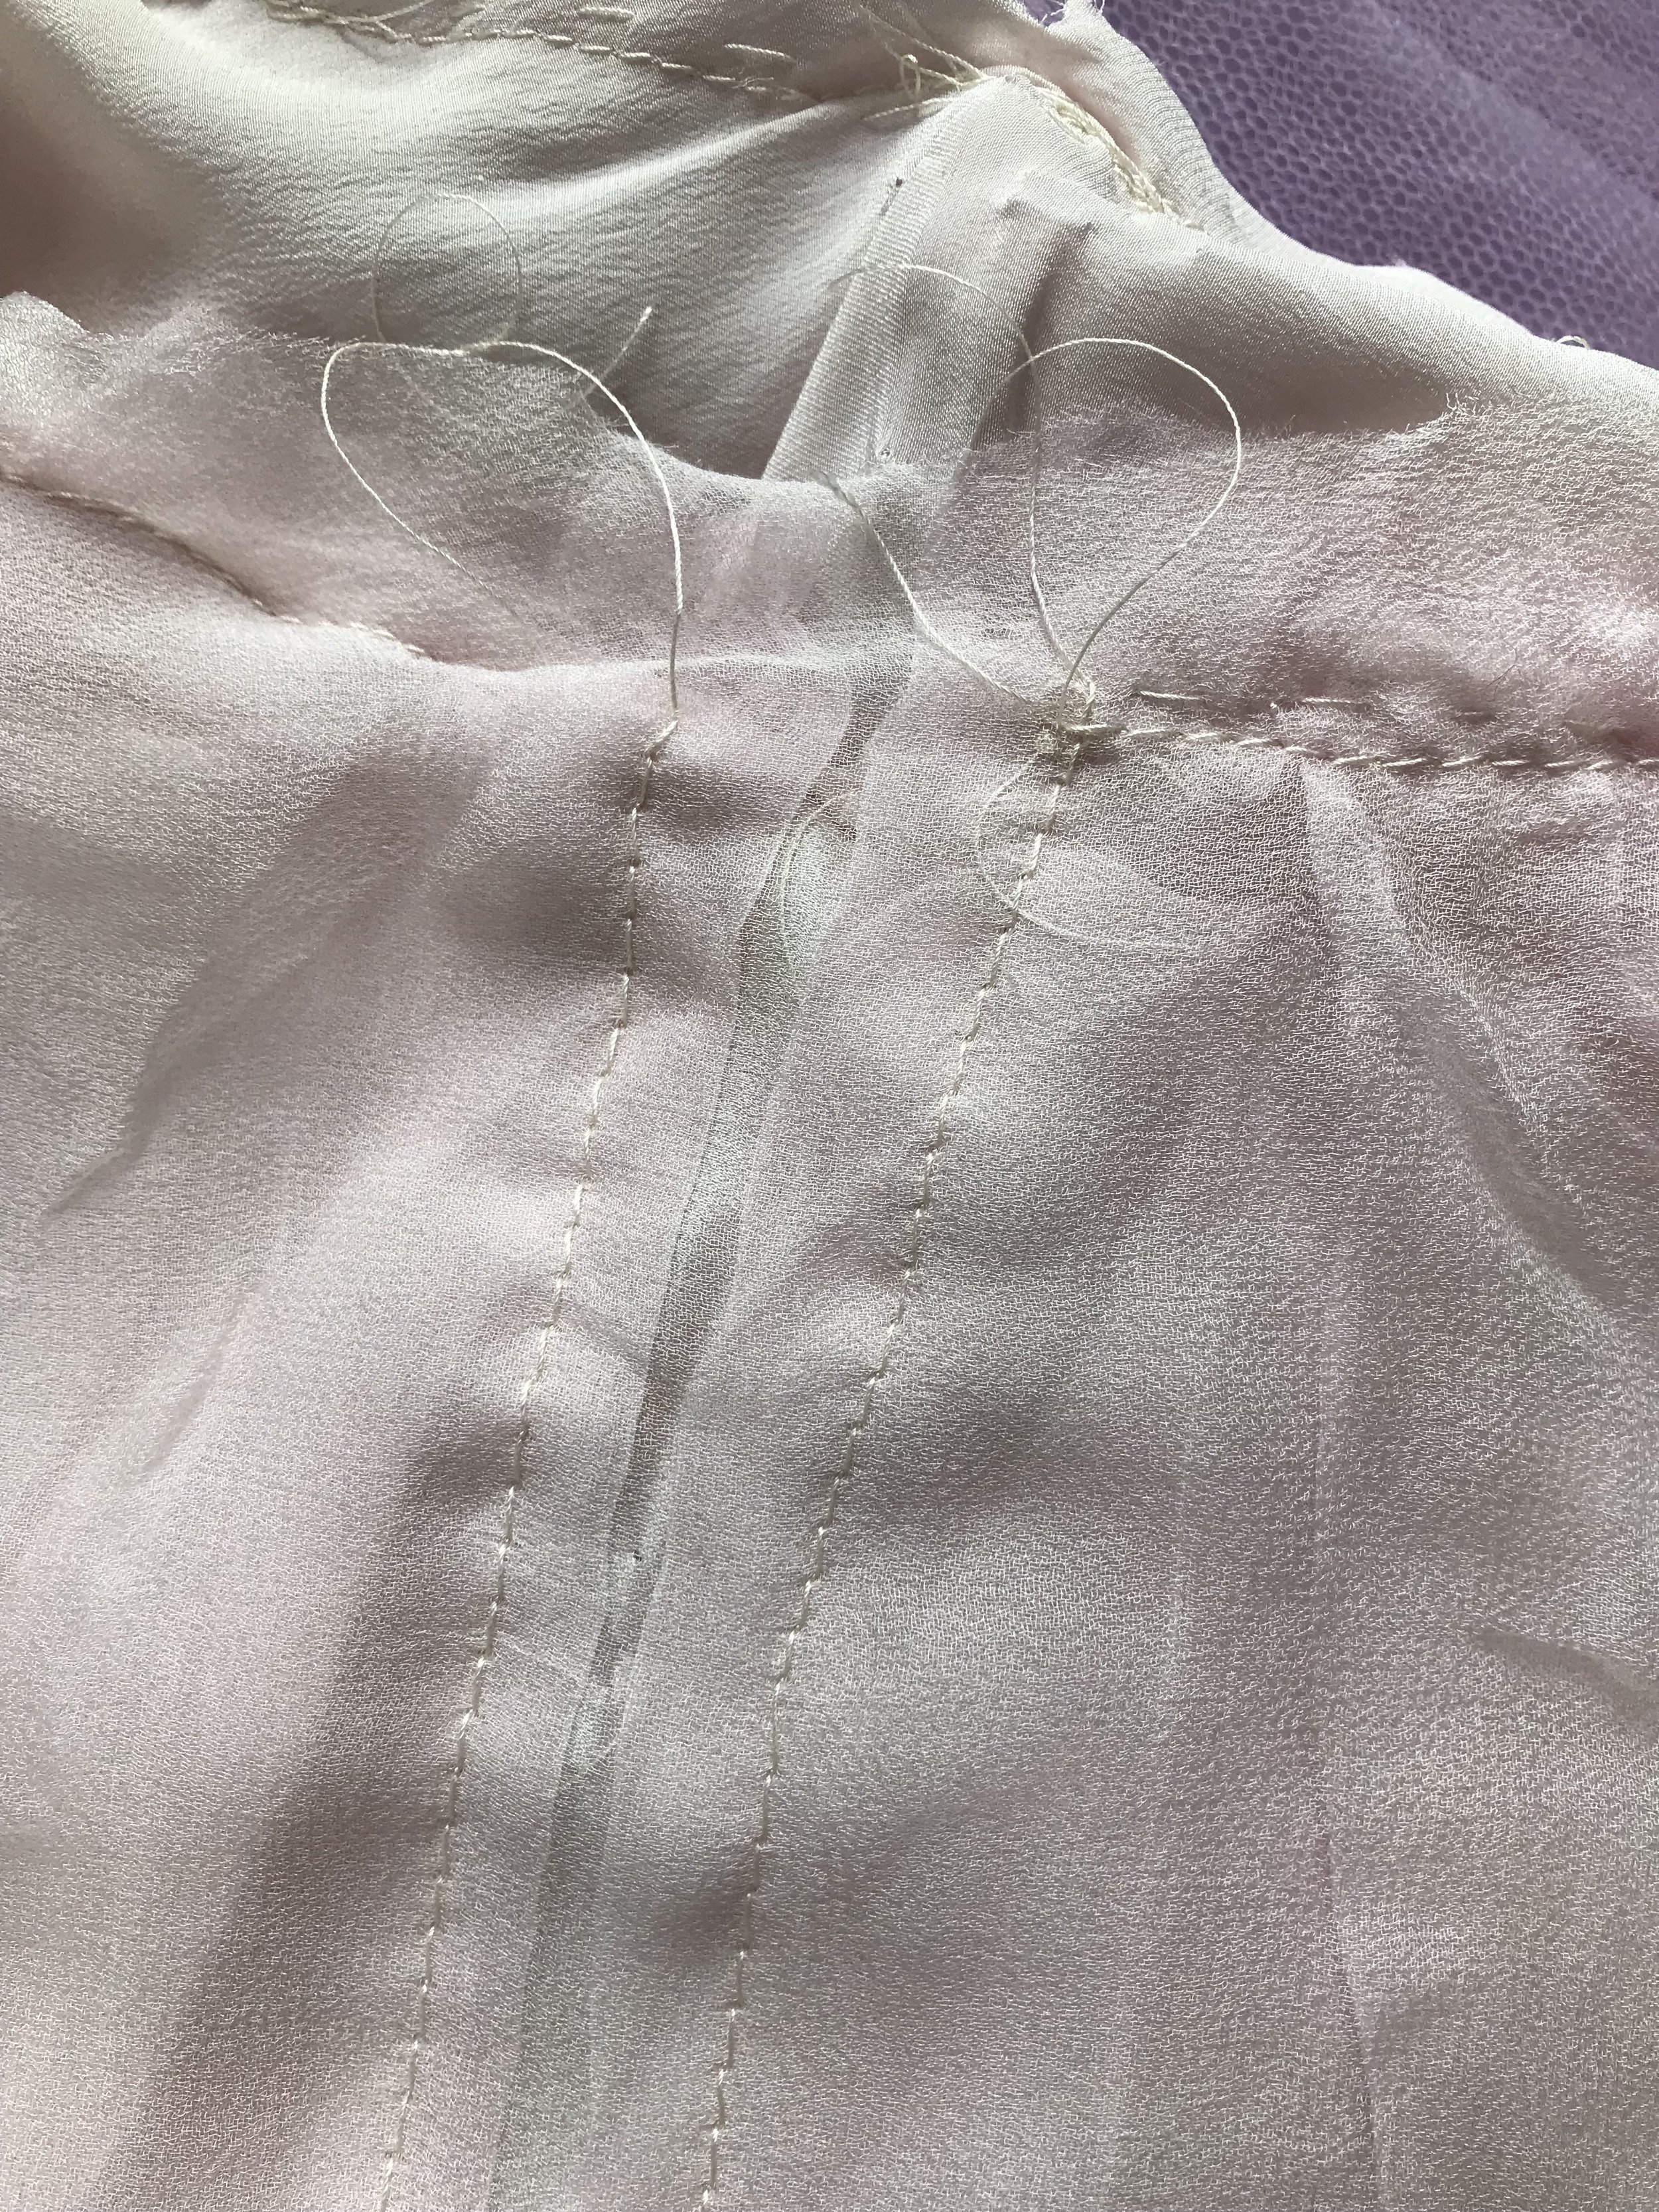
I did encounter one zipper hiccup in the process: I forgot to swap the silk thread I had used for sewing the skirt seams for polyester thread before I attached the zipper. The first time I zipped myself into the dress, I did a little spin and I just heard those stitches POP - panic, of course, because I couldn’t immediately see what had broken and whether there had been any damage - so you can imagine my relief when I realized it was just the thread. Silk thread, though I love it, is not nearly as strong as polyester thread and really shouldn’t be used for load bearing seams of any description - but especially not a boned corselet! I re-stitched the zip with polyester thread, and all was once again well in the world.


So. The dress is together. I put it on, zip it up, it fits, and it looks like a wedding dress! I needed to let the hem drop (and what a drop it was!) I did, however, do a few walking tests and wearing tests - it was really the first time I’d tried on the dress, which was so exciting! I wasn’t in a particular rush to take it off. It really could have been done except the hem at this stage, but for the fact that I still had my embroidery to overlay. The silk is so loosely woven, and the circle skirt so full, that the bias drop was incredibly obvious from the getgo - In the photo below, check out the difference between the hem at the centre front compared to all the pieces dragging on the floor!


I left the dress form to wear it for a week so that the hem could drop completely, and I came back (with a friend!) the following weekend to get the hem leveled out. In between hem leveling, though, I also finished the embroidery and (gasp!) overlaid it on the bodice, and I know that’s the part you REALLY want to see! The next chapter will cover finishing the embroidery, removing it from the frame, preparing it, and attaching it to the dress! It was honestly like nothing I’d ever done before, and it was SO amazing once it was finished! As always, ask your questions in the comments so I can answer them in the next post. We’re almost there!