
Hello again! I once again do not have a completed shoe to show you, but my oh my has there been some progress towards the goal!
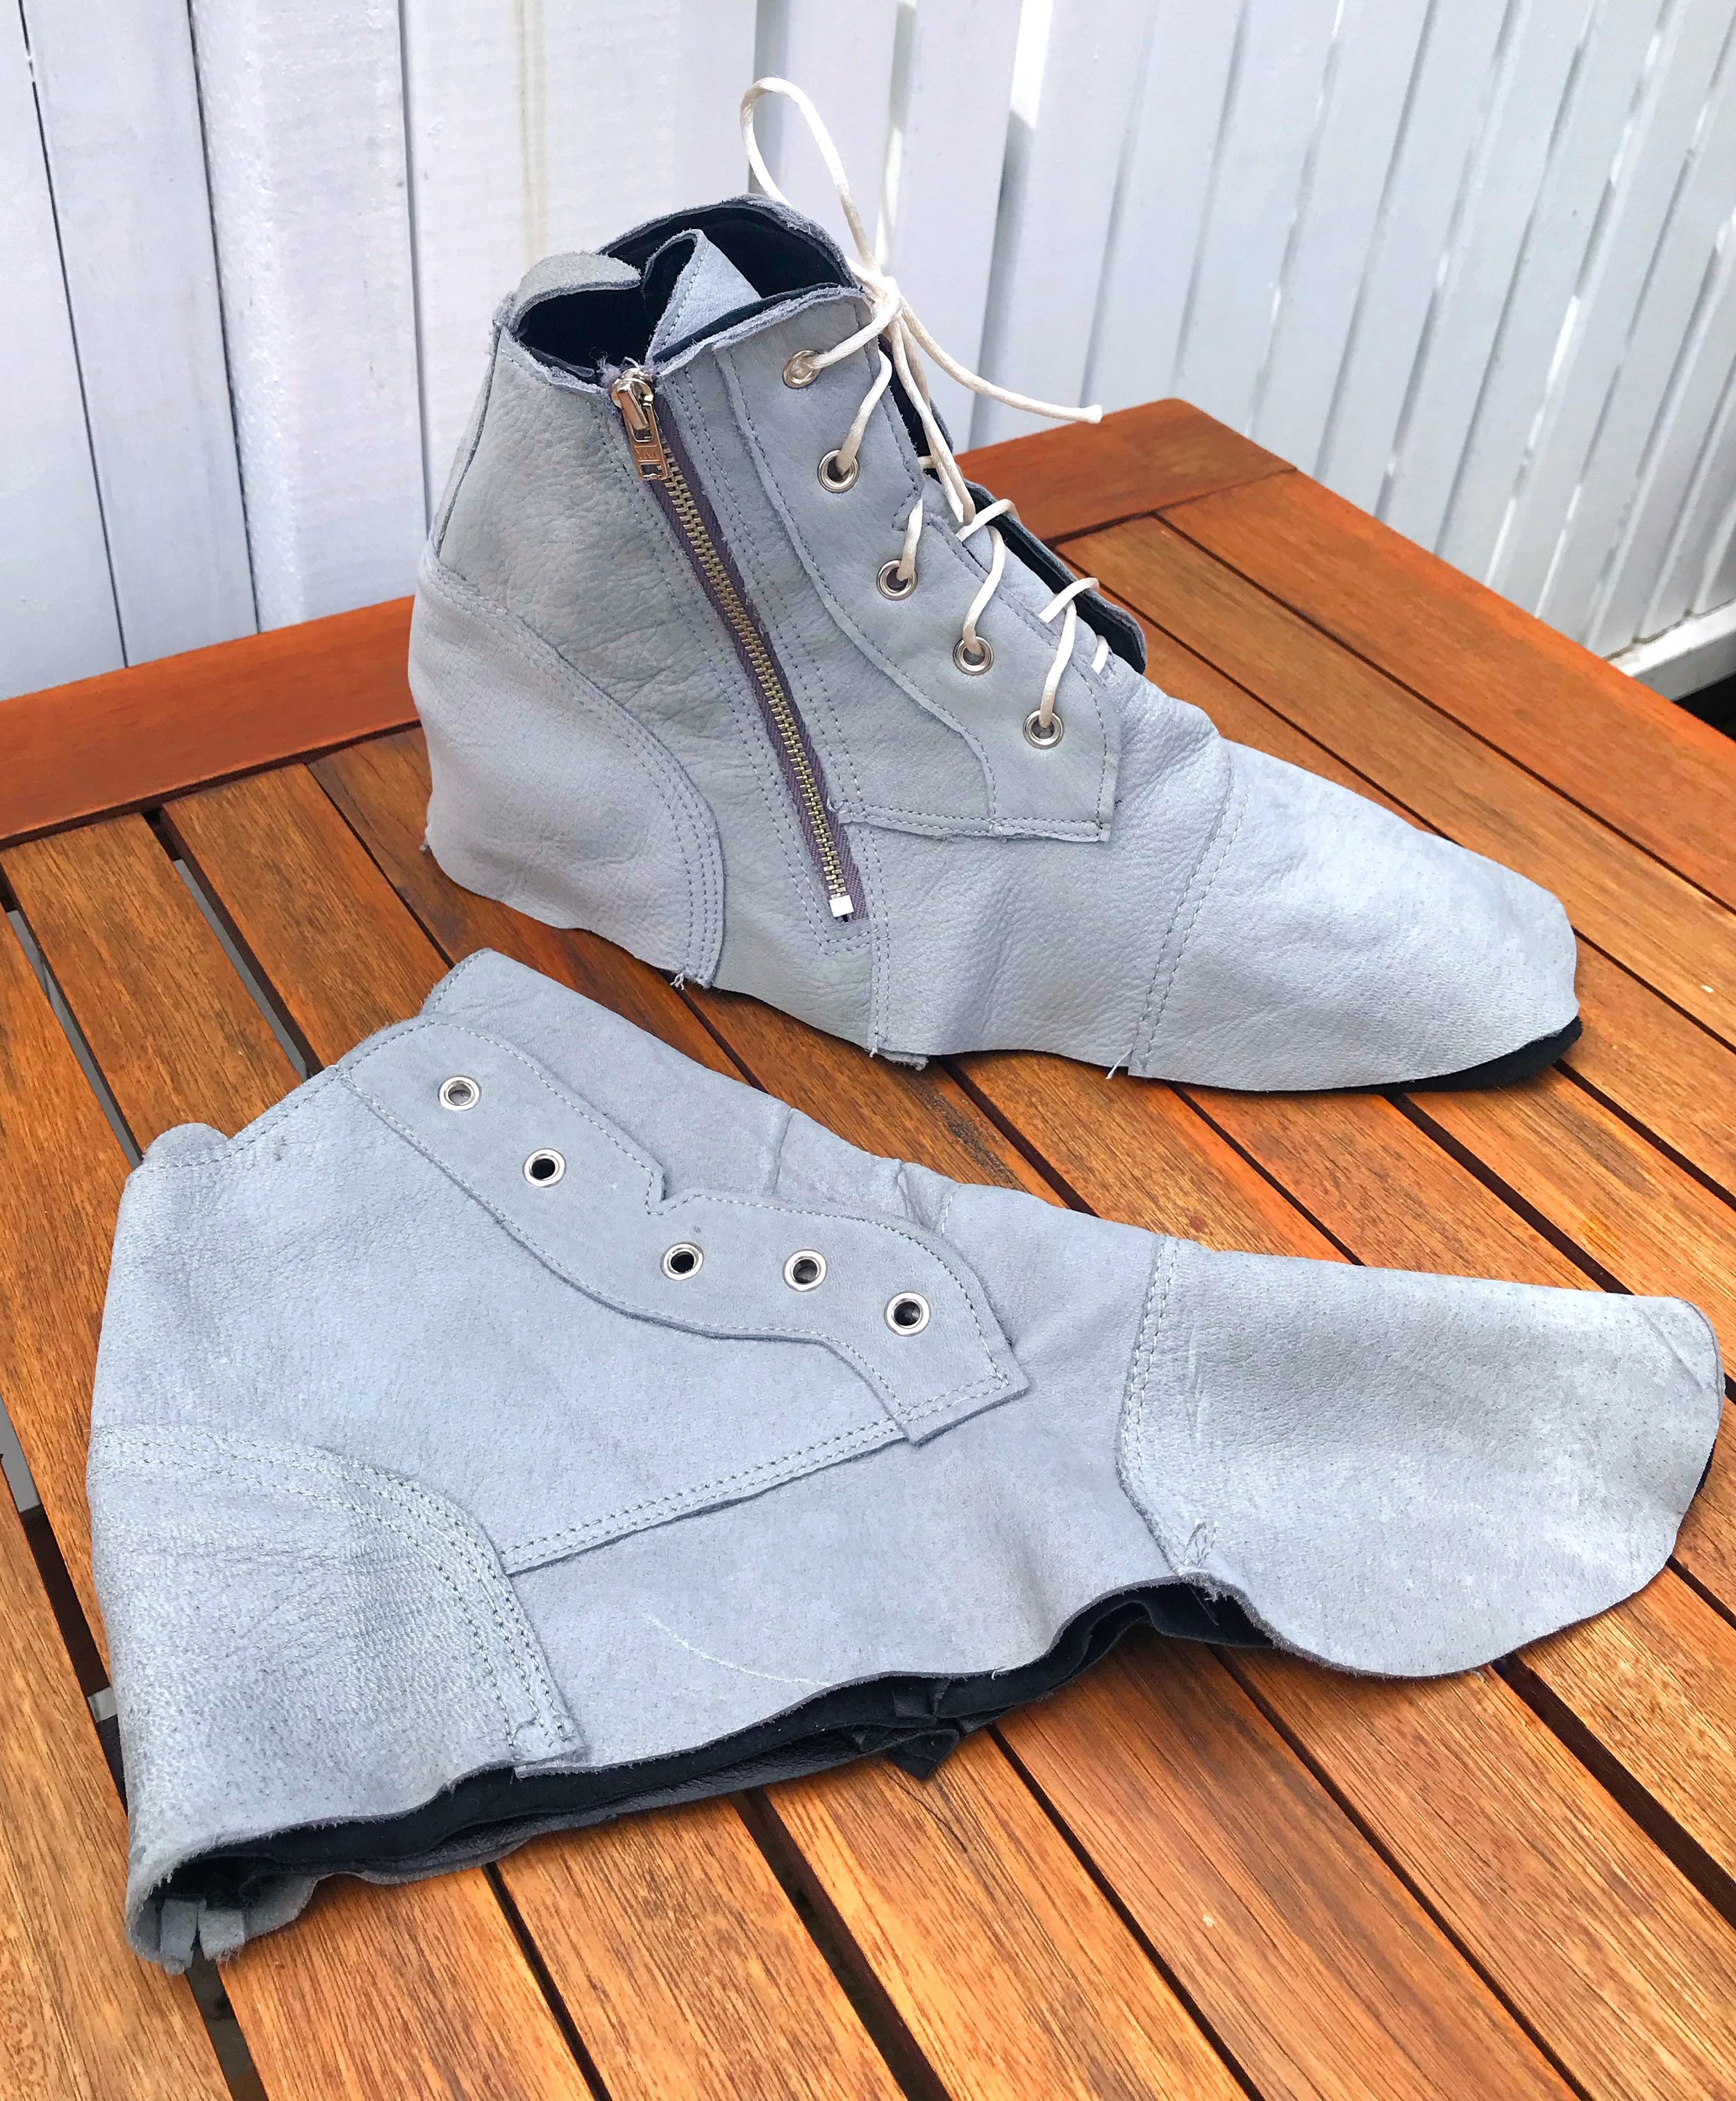
I’ve finished off the shoe uppers, and they are ready to be lasted, but that process involves the nasty glue, so I have to wait now for the weather and my schedule to line up. In the mean time, I have a LOT to catch you up on.
I had a very hard time making the lining pattern for this shoe. The outer pattern is easy - you tape the last, cut the tape off the last and it’s already in the right shapes. However, when I went to make my lining, I had to realign these now-flat pieces with their unfamiliar curvy seams and cut them in a new configuration, since none of the lining seams can overlap any of the outer seams. It’s basically like doing the same work in a slightly different way all over again, except you don’t have the tape to help you along the way. I also made things particularly difficult for myself by choosing to include the side zip. It can’t actually be attached to the lining because the lining and outer have to be separate in order for the shoe to be lasted, so it just kind of hangs there, and gets glued and tacked down after.
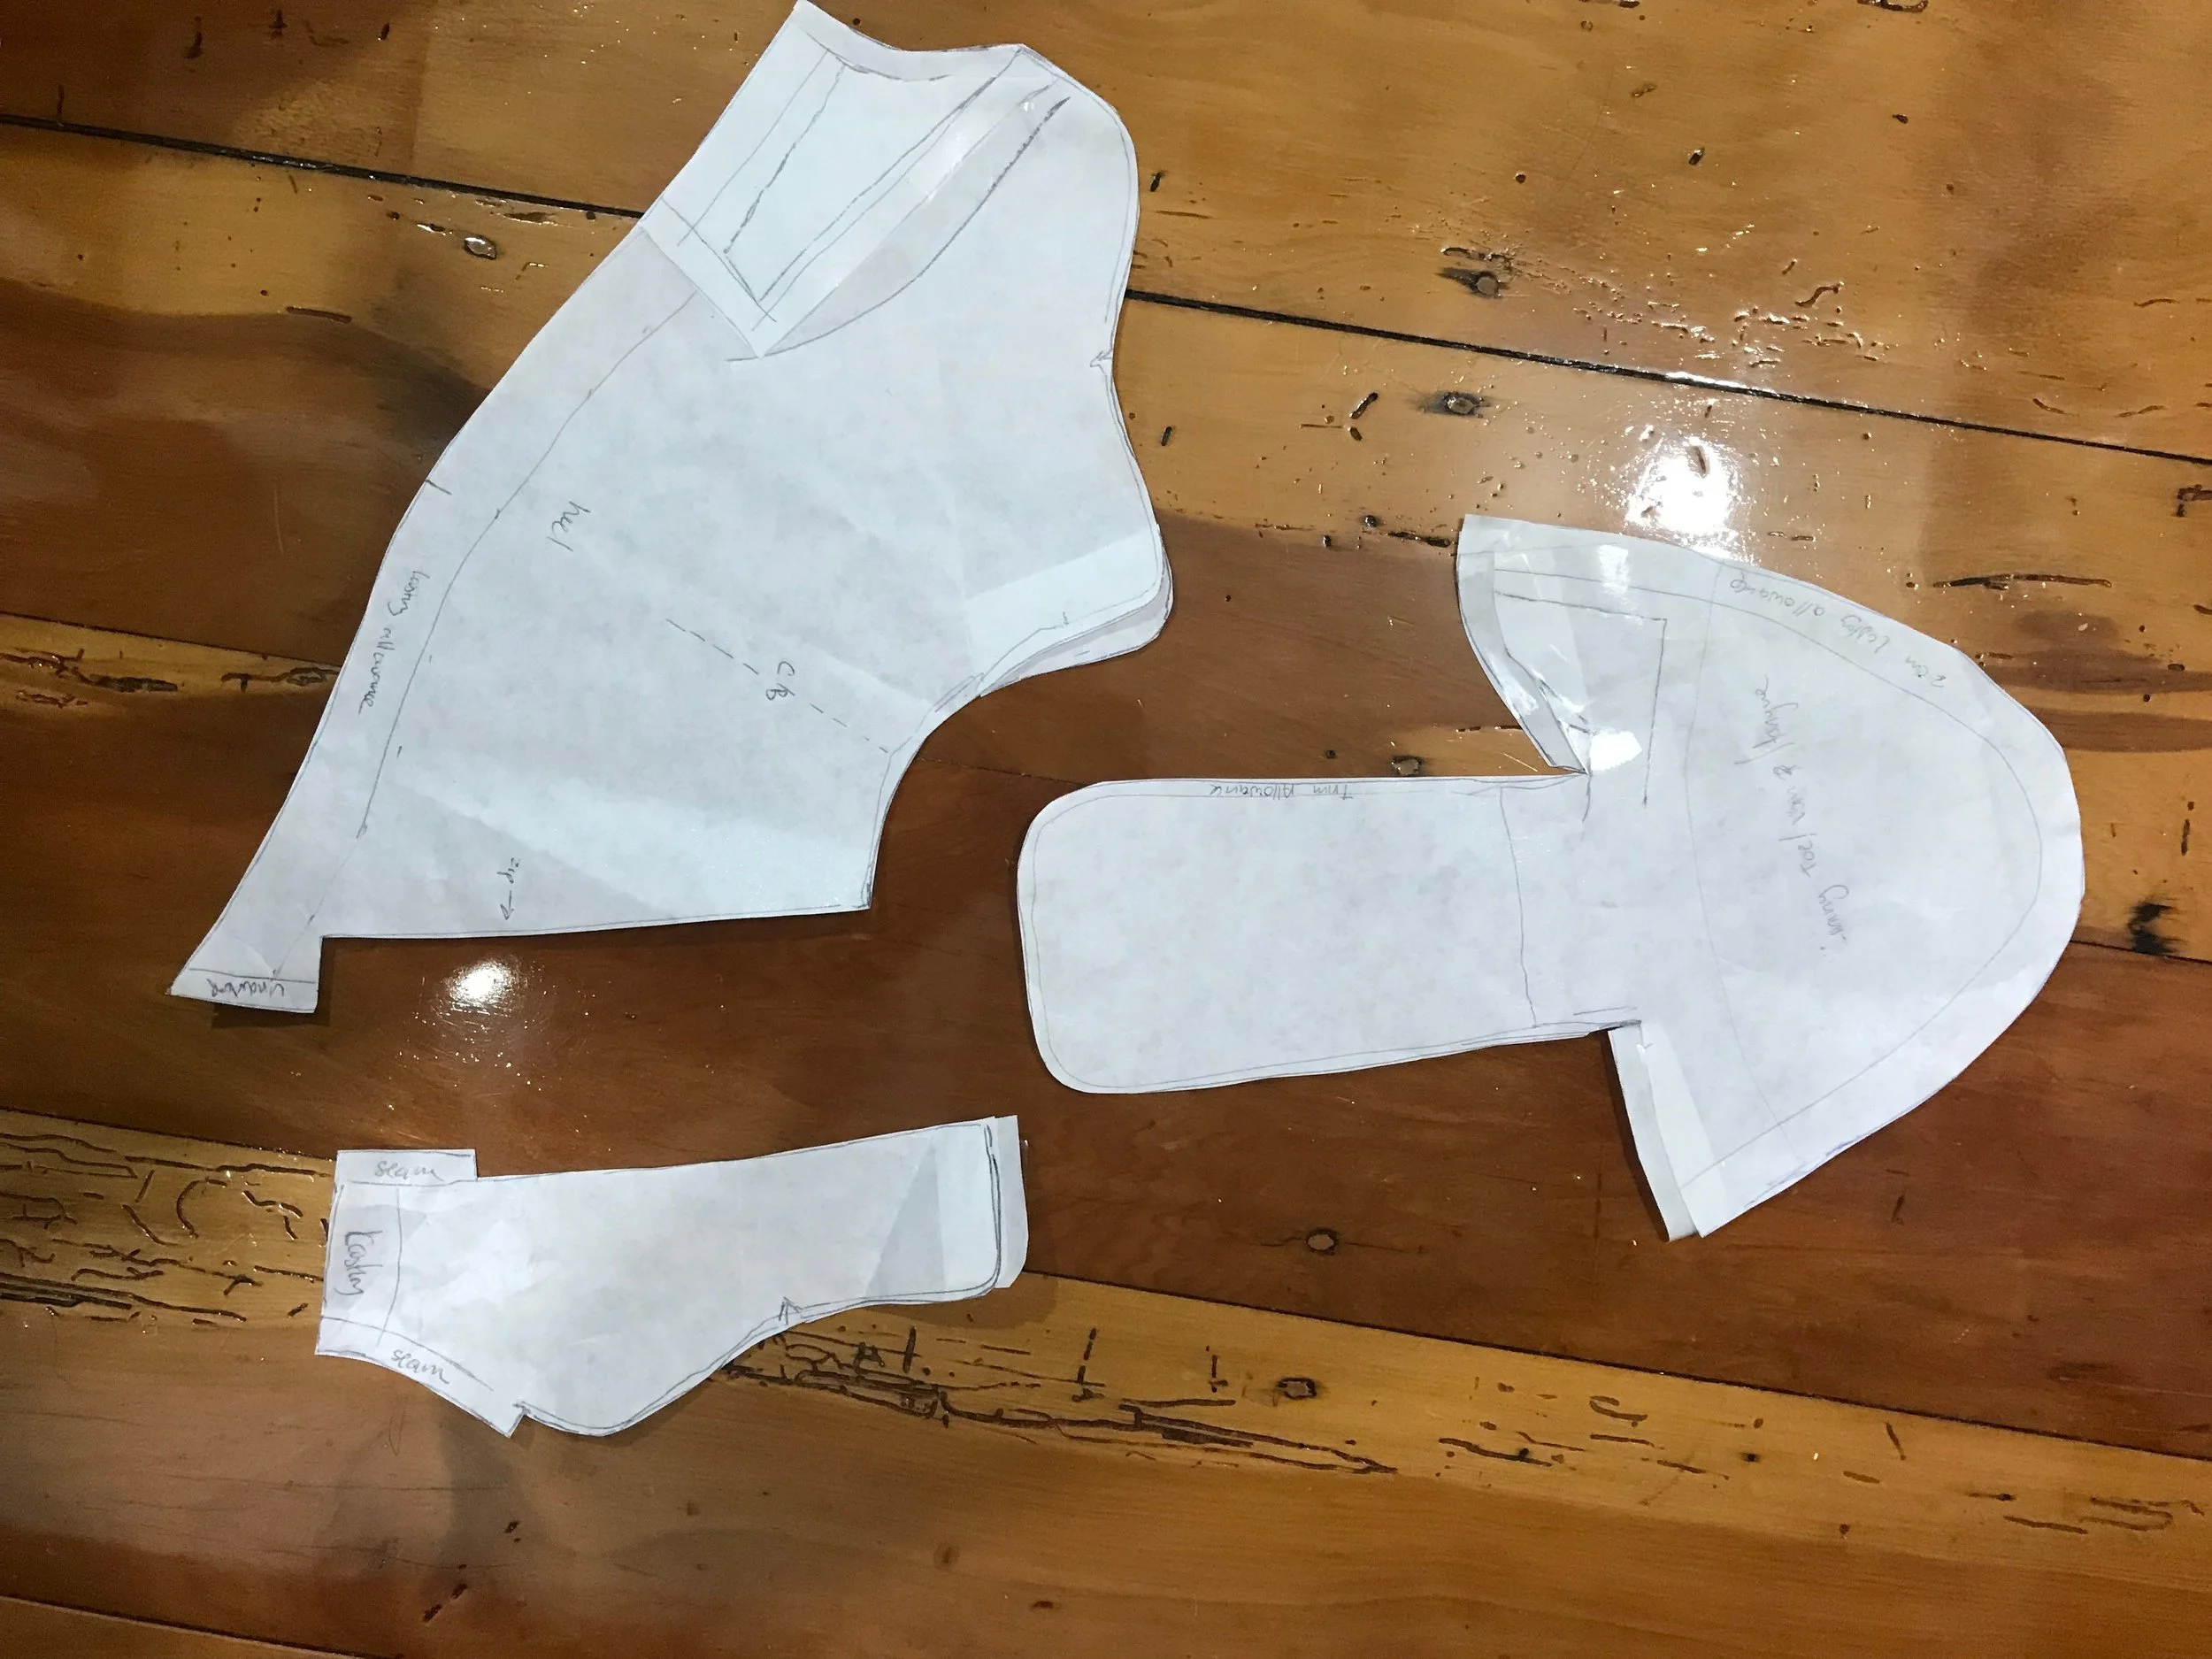
I realised after I’d finished the lining pattern that what I SHOULD have done, is created some kind of master/block of the last instead of hacking it apart right away into the pattern for the outer of this particular shoe. that way, I wouldn’t have had to fight with all the design components when drafting the lining. In sewing, it’d be like drafting two versions of a shirt from a bodice block, rather than drafting two completely separate shirts from scratch… which is pretty much what I did. ( I learned a few days later that the master/block of a shoe last is called a ‘standard’)

After I finished the lining pattern, I made another mock-up (this time also including the lining) - just to check everything would line up correctly. I didn’t last the new mock-up (nor did I sew in the zipper! because I didn’t really have any changes that would have affected those areas, so once I was confident that it was all working, I set to cutting my leather!

I believe most shoemakers cut their leather with a knife, rather than scissors, and this makes sense as you’re less likely to end up with those little scraggly bits that sometimes happen with scissors. However. My leather was Not Having That. It kept shifting under the knife, and it was causing me more stress than I cared to deal with, so I just picked up a pair of scissors and (carefully) went for it. I don’t know if it was my knife, or my technique, or what - but hey. I like scissors. Scissors are good. The right way to do the thing is the way that works.
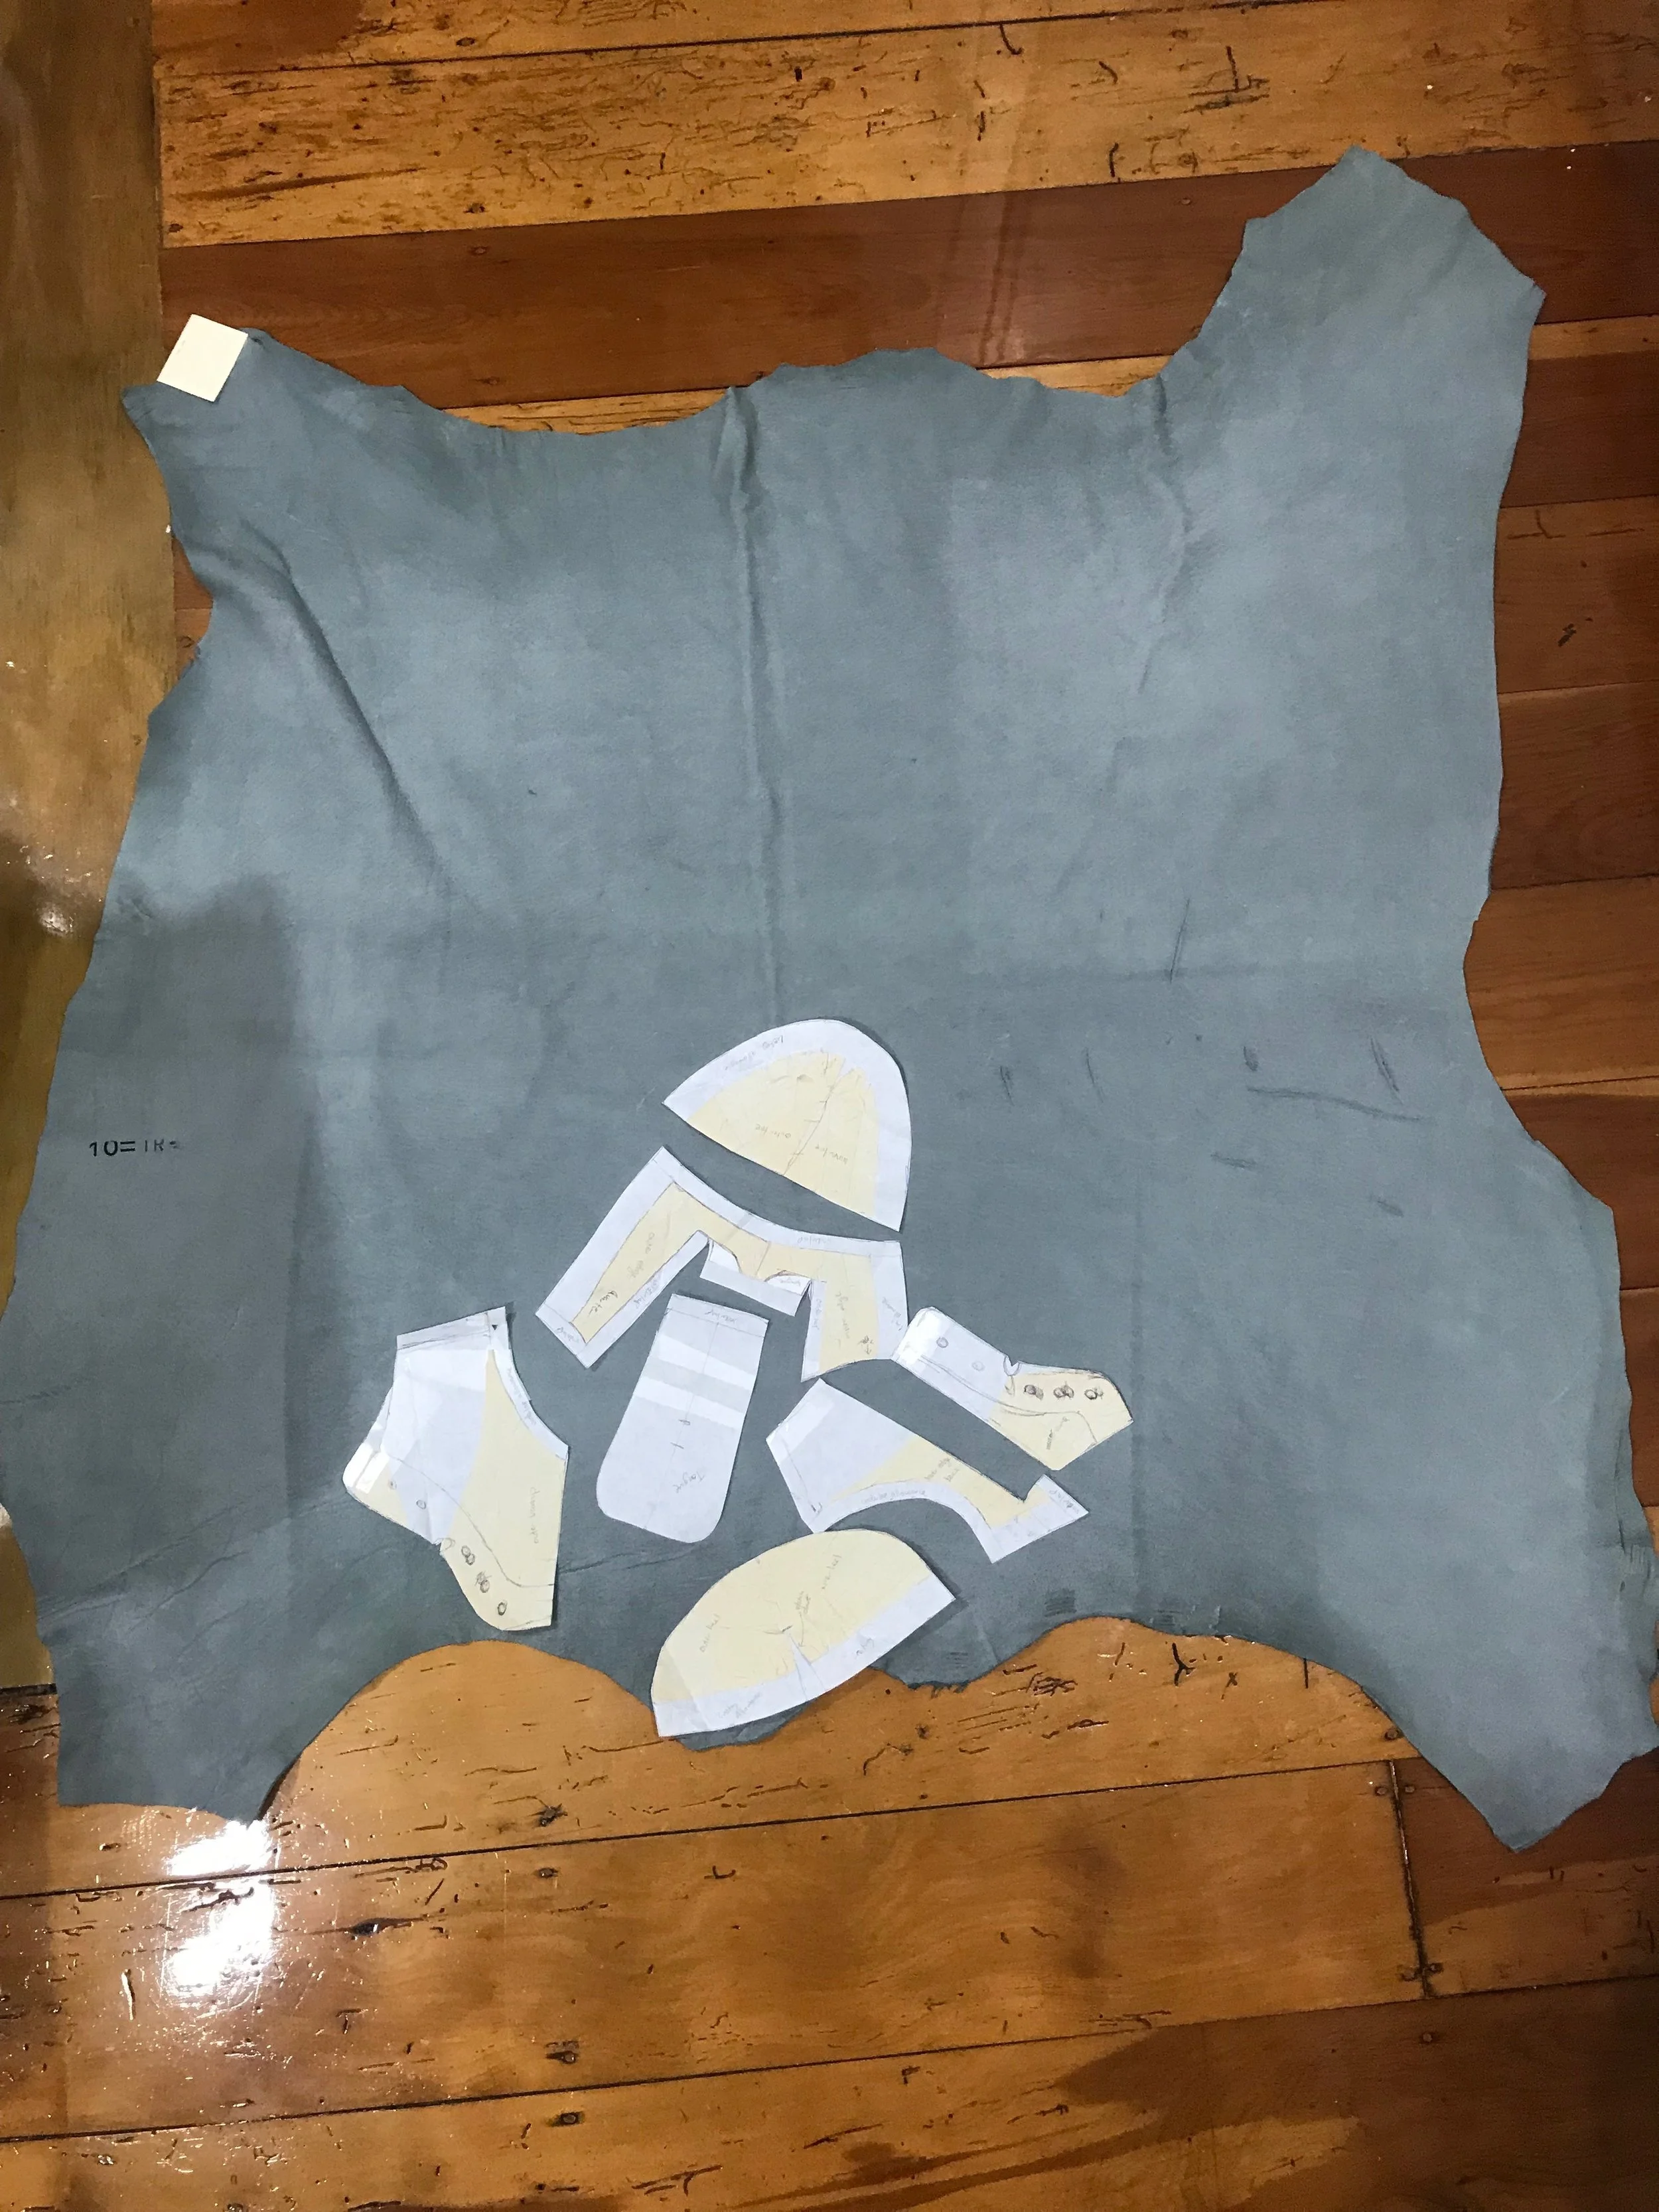
TThese pieces are laid on for scale purposes - this isn’t how I cut them out!
Leather has more stretch perpendicular to the direction of the spine, and generally you want that stretch to go around the foot, with less stretch from heel to toe. I kept that in mind as I cut, but still tried to be as economical as I could - each piece nested in as close as possible to another, which worked out well in the end as I had about 40-50% of each hide left over! Given I’m making boots, I’m pretty pleased with this result - I should be able to get an additional pair of shoes out of each piece. I have read that it’s common to use a silver pen to trace pieces and then cut them out, but I found that a chalk pen on the suede side of my leather worked just fine - and I already had one in my stash!
It wasn’t until after I’d finished cutting out the leather that I tested to see whether I could actually sew it on my machines. A bit risky, I suppose, but I wasn’t willing to just lop a corner off my leather before I’d started cutting (I told you! I was very economical!) so I only used the cutting scraps to test my stitching.

I have two machines - a Bernina 830 and an Elna Supermatic. Of the two machines, the Elna has a much more powerful motor and can sew through things that are a lot thicker (She’s my topstitching machine) but she has some fundamental disagreements with seam allowances under 1/4”, so the Bernina is best for edge stitching and tight corners. The Bernina sewed through two layers of my grey leather - although she did complain a bit, and the Elna did fine with 3 but had to be hand cranked at 4. I’m really pleased that I was able to get the uppers completed using a combination of these two machines - I don’t really see purchasing another sewing machine happening for me in the near future, so it’s pretty imperative that they work for me. Fortunately, I do have a friend with an industrial machine which I know can sew through leather. If I absolutely MUST sew something thicker, at least I have a connection there.

I used Gutermann upholstery thread, with regular poly sewing thread in the bobbin for the entire construction. I think with a leather machine you’d use the thick thread for both top and bottom, but that wasn’t an option for my machines.
These are my machines, and what worked for me, but of course everyone’s situation is different. Professional shoemakers use something called a ‘post bed machine’ to sew shoes - it’s a completely different to a regular sewing machine. If you’re struggling to sew through leather, here are a few tips I found on my search: Use a walking foot, try lengthening your stitch, put a piece of tissue paper over the leather, but under the foot, to keep it moving smoothly, or hand crank your machine. There’s a leather sewing wheel attachment for the bernina which I have, but it turns out to not actually work that well at all in combination with my 830’s inability to get through more than two layers. One day, I’ll get my hands on a 930 and I suspect the story will be different.
One thing that helps a lot with both machines’ ability to sew through leather is a process called skiving - basically, shaving off the edges of the back of a piece of leather to make them thinner. This is traditionally done using a fixed skiving blade held at a steep angle, but I found a ‘safety skiver’ from the place I bought my grommets - it’s basically a mean-looking safety razor with replaceable blades. It was very easy to learn to use, although my blade barely lasted to the end of the upper construction, and it’s a very hard process to do with a dull blade! I would still recommend the safety skiver if you’re starting out, or not making shoes very regularly but it definitely doesn’t have the longevity that a fixed blade would. It was $23, and the cheapest fixed skiving blade I could find was $100+ - though these can be sharpened indefinitely. This option not only meant I didn’t have to buy the knife, it also saved me from buying all the associated knife-sharpening tools.

So. I really should have skived all of my pieces before I started sewing them together, but I skived as I went. This wasn’t the end of the world, it’s just that I ended up making a few things more difficult for myself than they strictly needed to be - if you’re not careful, the skiver will shave stitches right off the top of the leather! Ask me how I know.
Construction was pretty straightforward - although I can’t imagine trying to do this for the first time without a mockup. The linings are sewn right-sides-together with a 1cm seam allowance, and then each seam is hammered down flat and glued open. The majority of the seams on the upper are overlapped and stitched that way - it means there is less bulk, and also creates a stronger seam. I glued the overlapped seams together (with a VERY small amount of PVA glue) and allowed this to dry before sewing them together. The glue doesn’t really do much in the way of structure, but it does hold the two pieces of leather together long enough to get the seam sewn, and it keeps it from shifting as you sew. The glue basically serves as pins for leather, which of course is un-pinnable in the usual way. Rubber cement is often used instead of PVA glue because it’s easier to get off the surface of leather if you accidentally get some outside your seam allowances, but given the choice between buying rubber cement, or using the PVA I already had… well. I’d rather spend the extra money on leather.

Skiving each seam, then gluing it, and allowing to glue to dry ended up making the process take quite a few hours - I think all up it took about five hours to cut and sew the uppers plus linings - and probably another hour to set the 20 grommets (along with setup, marking, and grommet testing). For the most part, I was able to sew one while the glue on the other was drying, but it was definitely still quite a process!
Assembly basically went as follows: I attached the toe and tongue to the vamp, thus basically assembling the front of the shoe, and then the two inner-quarters went together with the zipper, and on to the vamp, and then the back seam, the outer quarter, and lastly the heel. This is not the way the internet tells you how to do this! It was my zipper making things complicated again. Ideally, that area should have been constructed last, and the heel first, but this was impossible because of the way the zipper had to go in. I wanted to give myself as high a chance of success in that area as possible, which meant sewing the zipper in while I could still lay everything flat. It worked out really well in the end though!

Once the uppers and the linings were constructed, the last sewing step is to sew them together along the tongue and the top edge of the shoe (topline) - the rest is left to hang separately, because during the lasting process you have to be able to separate the lining from the upper in order to add the structural components inside.

The lining is designed to include a 3mm trim allowance - this makes things WAY easier to line up (we’re still gluing here) and also means the feed dogs of the machine have a bit more to grab on to while sewing right along the edge. Once all the stitching is done, the edges are trimmed off. Once again, they tell you to do this with a knife, but that didn’t work for me. Scissors worked just fine!

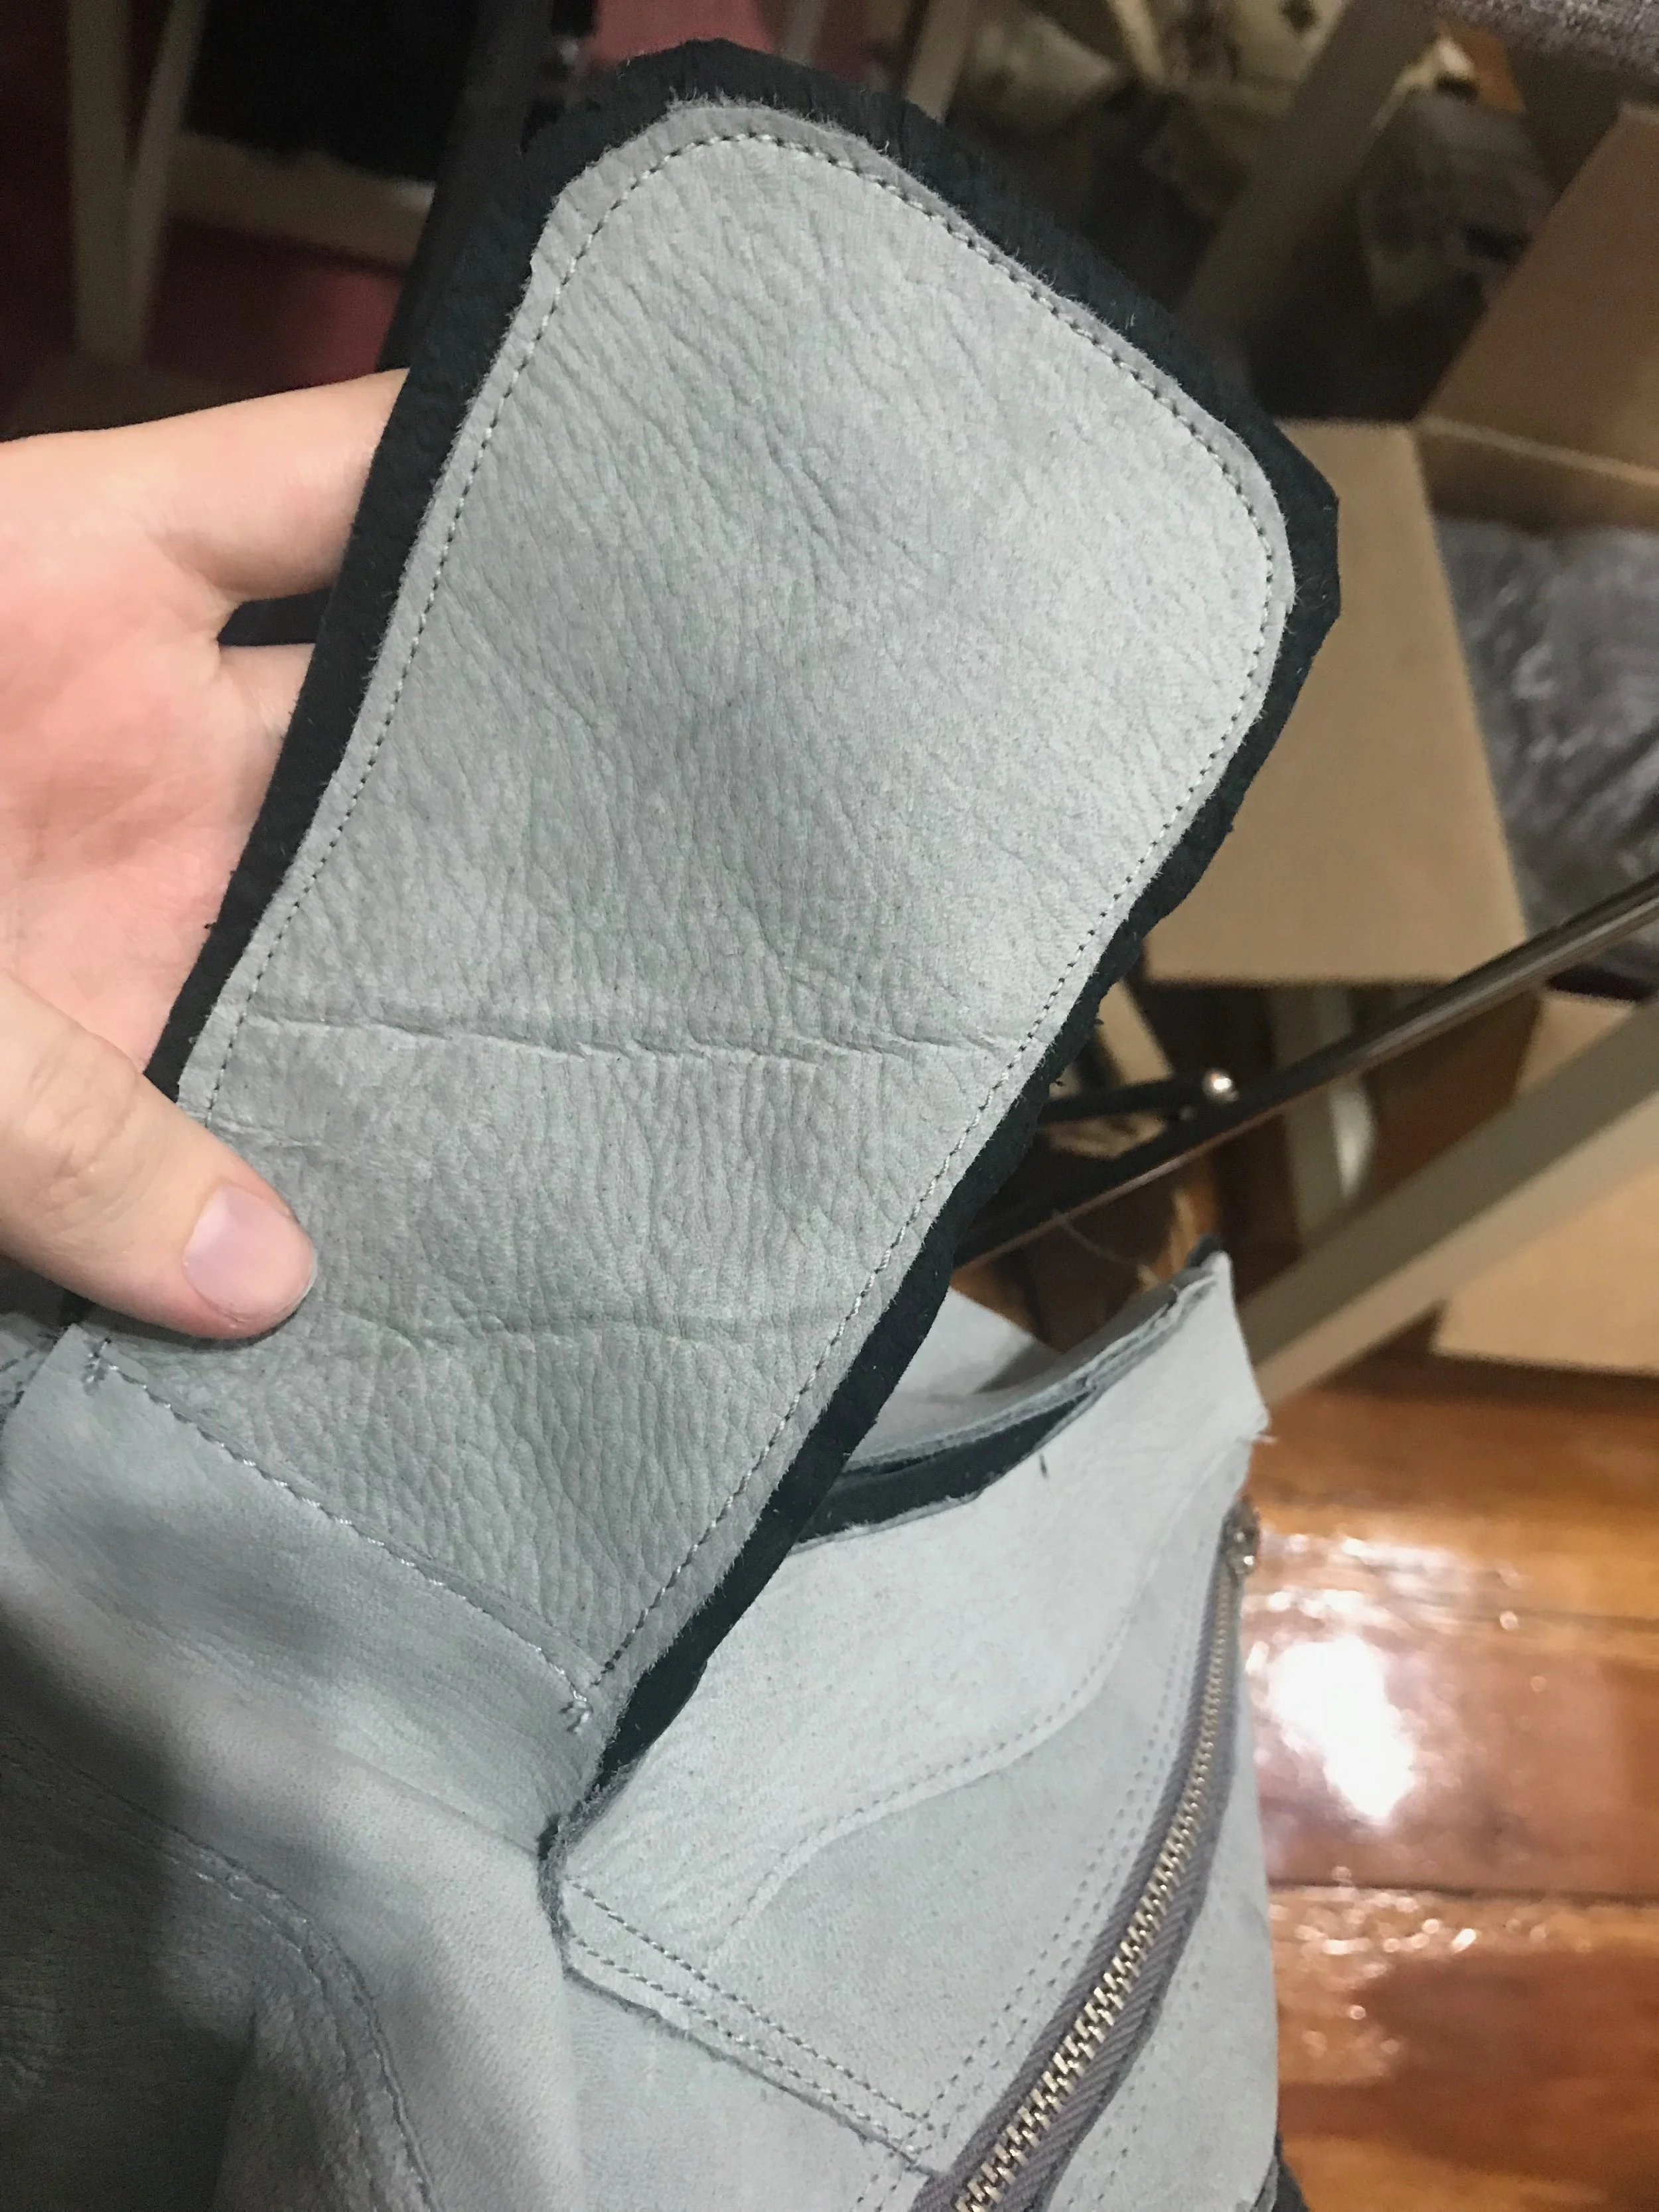
My Bernina did really struggle with the facing at the front of the shoe. There is an extra layer there for the eyelets, and there was a fair amount of hand cranking involved to get it through all three layers of leather, but the Elna wasn’t handling sewing that close to the edge. I made it work in the end, and you can’t tell from the stitching that I had any trouble which is good - that close to the end of the construction, and in a really obvious spot, I’d have hated for something to happen!

Once all the sewing is done, the hardware can be installed. This was another point where I deviated from my inspiration shoe - the two pieces at the top of my original shoe are boot hooks, rather than eyelets, presumably to help the lacing happen faster, but I always used the zipper, and every time I un-zipped the shoe the laces would fall off of the boot hooks. My version has eyelets all the way up, and I have exactly no intention of tying these shoes more than once. I might even put a little dab of glue on the knot once the final laces are in there. I didn’t spend all that time and energy sourcing, drafting and sewing a zipper just to ignore it!

The eyelets are from GDL Trading, and have a main eyelet piece along with a little washer that goes on the back to provide something sturdy for the back of the eyelet to set into. Hopefully, between these fairly heavy duty washers and the extra layer of leather in the lacing sections, we won’t have any issues with the eyelets pulling as the boots are worn! Here, I’ve laced up the shoe with some trim from my box - I’ll replace this with the final shoelace once the shoe is complete.

Next steps are lasting the shoe (that is, stretching it over the last to give it shoe shape and structure, and then adding the sole and heel! I’m in the home stretch now!

(nothing like a closeup shot to make you go back and trim those edges smoother!)